Table of Contents
Advertisement
EXPRESSIONS REVIVE and
EXPRESSIONS REVIVE-PLUS
SMARTFIT 2 ELECTRIC SHOWERS
Installation and User Guide
IMPORTANT:
This booklet should be left with the user after
installation and demonstration.
Advertisement
Table of Contents

Subscribe to Our Youtube Channel
Related Manuals for Redring EXPRESSIONS REVIVE


Summary of Contents for Redring EXPRESSIONS REVIVE
- Page 1 EXPRESSIONS REVIVE and EXPRESSIONS REVIVE-PLUS SMARTFIT 2 ELECTRIC SHOWERS Installation and User Guide IMPORTANT: This booklet should be left with the user after installation and demonstration.
-
Page 2: Important Safety Information
IMPORTANT SAFETY INFORMATION THIS APPLIANCE CAN BE USED BY CHILDREN AGED FROM 8 YEARS AND ABOVE AND PERSONS WITH REDUCED PHYSICAL, SENSORY OR MENTAL CAPABILITIES, OR LACK OF EXPERIENCE AND KNOWLEDGE IF THEY HAVE BEEN GIVEN SUPERVISION OR INSTRUCTION CONCERNING USE OF THE APPLIANCE IN A SAFE WAY AND UNDERSTAND THE HAZARDS INVOLVED. - Page 3 ADVICE TO USERS The following points will help you have a greater understanding of how your shower works: The heating elements operate at a constant rate, dependent on your chosen power setting. The water temperature is achieved by adjusting the rate of water flow. The higher the water flow the lower the temperature and vice versa.
- Page 4 We recommend that the installation is done in the following sequence. a. Fixing the shower to the wall (see note below) b. Plumbing c. Electrical connections However, we recommend you determine the best configuration for your water inlet options before fixing the shower to the wall, as it may be easier to adjust/fit connections whilst unit is still ‘in-hand’.
- Page 5 7. Your shower is provided with 6 x wall-fixing positions in the backplate (fig.19) These have been especially designed to match a number of previous ‘Redring Showers’, as well as providing flexibility for new installations. The 3 x top-fixing holes are a ‘key-hole’ slot design (‘k’ or ‘l’ fig.19), and the single most convenient should be marked and drilled first.
- Page 6 Showing Right Side Entry Left Side Entry is available for all options by exchanging the fitted end cap (fig.7)
- Page 7 Also refer to page.8 for further water inlet entry information...
- Page 8 WATER INLET ENTRY OPTIONS (also see fig.5) The pipe work can enter the shower unit from 8 x different positions. Bottom Left, Bottom Right, Top Left, Top Right, Rear Left, Rear Right, Side Left or Side Right. The shower unit has come fitted with a compression elbow (fig.5a). This can be removed to provide an alternative Ø15mm straight shank connection point (fig.7).
- Page 9 5. The shower is designed to have an open outlet and should only be used with the manufacturers recommended fittings. Do not connect the handset until the shower front cover and detachable lower section are fitted. WARNING: DO NOT FIT A TAP ON THE SHOWER OUTLET. TAKE CARE TO AVOID RESTRICTING THE OUTLET OF THE PRESSURE RELIEF DEVICE.
- Page 10 WARNING: KNOB ALIGNMENT IS VERY IMPORTANT DURING THE INSTALLATION OF YOUR SHOWER AND MUST BE CORRECT FOR CORRECT OPERATION. Ensure power select Knob is aligned to the ‘COLD’ (9 o‘clock position), whilst the ‘D-Shaft’ in the product is aligned as shown (fig.10). Ensure temperature Knob is aligned to the end of the blue arc as shown, whilst the ‘spindle’...
- Page 11 PARTS SUPPLIED ITEM DESCRIPTION wall bracket top bracket cover sliding rail soap-dish hose-retainer shower holder bottom bracket cover TOOLS REQUIRED power drill drill bit cross head screw driver pencil BEFORE YOU START Identify all components and check pack contents. The screws and wall plugs supplied are only suitable for use in solid walls. Ensure there are no hidden service pipe or cables where you intend to drill.
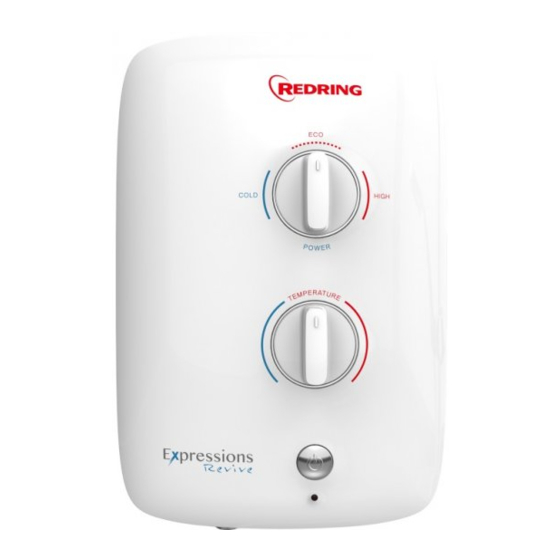
- Page 12 HOW TO USE YOUR SHOWER Ensure the electricity and water are turned on to the unit. Your shower has 2 control knobs and a push-button (fig.13). Knob ‘A’ controls the 3 x power selection ‘HIGH’ ‘ECO’ ‘COLD’ Knob ‘B’ controls the water temperature. Button ‘C’...
-
Page 13: Pressure Relief Valve
Press Button ‘C’ to Stop the shower (fig.17). Water will cease to flow and ‘Power’ light will go out. Expressions Revive-Plus Models Please note that the water will continue to flow for around six seconds to cool the shower for the next user. - Page 14 HOW TO MAINTAIN YOUR SHOWER It is recommended that the shower unit and accessories be cleaned using a soft cloth and that the use of abrasive or solvent based cleaning fluid be avoided, especially on any plated finishes. We recommend that before any cleaning, the isolating switch be turned off, thus avoiding accidentally switching on the shower.
- Page 15 HOW YOUR SHOWER WORKS 1. Water is heated instantaneously as it flows over the heating elements in the heat exchanger (fig.19). 2. The heaters are only switched on when sufficient water is flowing. This is done automatically with a switch which works on water pressure. 3.
- Page 16 Clean the inlet filter. Poor Spray Clean the shower handset. Expressions Revive-Plus Models. Water continues This is normal on the to flow when The shower includes a shutdown feature that means water will continue to button ‘C’...
- Page 17 Water too Check each element circuit. COLD Check tightness of electrical connections. Expressions Revive-Plus model only: Check circuit through relay Undo headworks of stabiliser valve No water flow control Check stabiliser is in place and remove any debris in valve.
- Page 18 Heat Exchanger k) Wall Fixing Key-Hole Slot c) Flow Valve l) Alternative key-Hole slot d) Pressure Relief Device m) Wall Fixing Slot (Expressions Revive-Plus only) e) On/Off Solenoid Valve n) Relay (Expressions Revive-Plus only) f) Pressure Switch o) Timer PCB...
-
Page 19: Circuit Diagrams
Cat No. 93672108 Ø25mm Riser Rail Brackets Cat No. 93672160 Detachable Lower Section Cat No. 93672177 Ø25mm Clear Soap-Dish Cat No. 93672162 Phased Shut-Down Relay Cat No. 93597878 Phased Shut-Down PCB Cat No. 93550835 CIRCUIT DIAGRAMS Expressions Revive Showers Expressions Revive-Plus Showers... - Page 20 We DO NOT recommend these products be used in heavy or unsupervised commercial applications. f) For the service work to be undertaken free of charge, the work must only be undertaken by Redring Xpelair Group Limited, or our approved agents. g) Service under guarantee has no effect on the expiry date.
Need help?
Do you have a question about the EXPRESSIONS REVIVE and is the answer not in the manual?
Questions and answers