
Related Manuals for Bush Heritage 2


Summary of Contents for Bush Heritage 2
- Page 1 USER MANUAL Digital Radio CONNECTED DAB+ / FM Spotify Connect Radio Enabled Bluetooth / WiFi Network Multi-Room Smartphone NFC Connect Enabled Audio Streaming App Control...
-
Page 2: Important Safety Instructions
Important Safety Instructions 1. Read these instructions. 2. Keep these Instructions. 3. Heed all Warnings. 4. Follow all instructions. 5. Do not use the speaker near water. 6. Clean only with dry cloth. WARNING: TO REDUCE THE RISK OF FIRE OR ELECTRIC SHOCK, DO NOT EXPOSE THIS SPEAKER TO RAIN OR MOISTURE. -
Page 3: Table Of Contents
Contents Important Safety Instructions ......................2 Contents ............................3 Getting Started ..........................5 Unit Front View ......................... 7 Unit Top View ........................... 8 Unit Back View ......................... 8 Setup Wizard ........................... 9 Internet Radio Mode ........................11 Local “Country”... - Page 4 Selecting FM Mode ........................ 26 Scan settings .......................... 26 Audio Settings ........................26 Storing Preset Stations ......................27 Recalling a Preset Station ...................... 27 Bluetooth Mode ..........................28 NFC (Near Field Communication) ....................28 Aux in Mode ...........................
-
Page 5: Getting Started
Getting Started Carefully remove your radio from the box. You may wish to store the packaging for future use. What you can find inside of your package Main unit Power adapter Instruction manual Positioning your Radio Place your radio on a flat / stable surface that is not subject to vibrations. Avoid the following locations: Where the radio will be exposed to direct sunlight. - Page 6 Using Headphones You will require headphones fitted with a 3.5 mm diameter stereo plug. The Headphones socket is located on the back of this unit. Headphones are not supplied with this radio. Turn down the volume before connecting headphones. Slowly raise the volume with the headphones on until you reach your desired level.
-
Page 7: Unit Front View
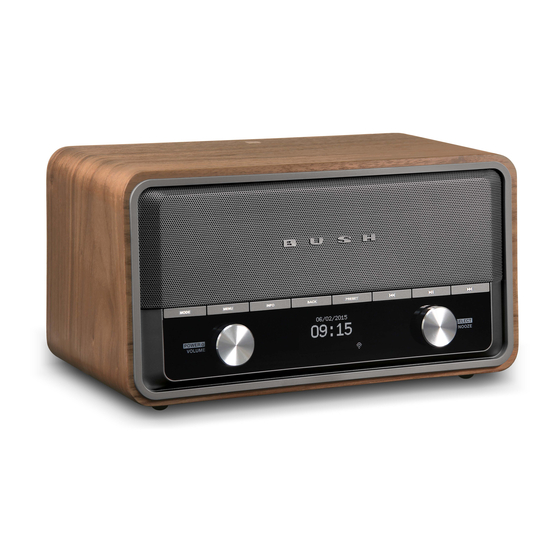
Unit Front View MODE button button Press to switch among Internet, Spotify, Press to pause or play current playing Music player, DAB, FM, Bluetooth and track in Spotify, Music player and Aux in mode. Bluetooth modes. /VOLUME knob 10. SELECT/SNOOZE knob POWER Press to switch radio on or standby. -
Page 8: Unit Top View
Unit Top View NFC sensor Unit Back View DAB/FM antenna Headphones socket AUX IN socket DC IN socket Update port For service professional only! -
Page 9: Setup Wizard
Setup Wizard For initial use, the display will show ‘Setup wizard’ screen. Press SELECT/SNOOZE knob to confirm ‘YES' to start setup. Options in the setup wizard include the following: Date/Time Set 12 or 24 hour format Auto update Synchronously update clock from the playing program you selected or set by yourself. Update from DAB Update from FM Update from Network... - Page 10 Note: If a password (WEP/WPA) isn’t required by your network, radio will connect to the network automatically. Turn SELECT/SNOOZE knob to cycle through the alphanumeric character list, press SELECT/SNOOZE knob to select an appointed character. Note: WEP/WPA pass codes are case-sensitive. If a wrong operation is being conducted, select to delete designated character.
-
Page 11: Internet Radio Mode
Internet Radio Mode The display will show 'Main menu' after 'Setup wizard' completed. Press SELECT/SNOOZE knob to select Internet radio mode. While 'Station list' is highlighted, press SELECT/SNOOZE knob to confirm. → Then refer following section to choice stations. Or if failed to connect to network, please follow: a. -
Page 12: Selecting A Station Through 'Stations
Selecting a station through ‘Stations’ Stations enables you to select a station from categories: Location, Genre, Popular stations or New stations, or search stations. Press MENU button > Station list > Stations, press SELECT/SNOOZE knob to confirm. → In 'Stations' menu: ‘Location’... -
Page 13: Selecting A Program Through 'Podcasts
Selecting a program through ‘Podcasts’ Podcasts enables you to select a podcast from categories: Location or Genre, or search podcasts. Press MENU button > Station list > Podcasts, press SELECT/SNOOZE knob to confirm. → In 'Podcasts' menu: ‘Location’ enables you to choose from the podcasts provided by any country which you choose from a list. -
Page 14: Getting Access Code And Faq From 'Help
Getting Access Code and FAQ from ‘Help’ Press MENU button > Station list > Help, press SELECT/SNOOZE knob to confirm. Turn SELECT/SNOOZE knob to select Get access code or FAQ, and then press SELECT/SNOOZE knob to confirm It uses for creating an account when registering your radio on portal Get access code www.wifiradio-frontier. -
Page 15: Adding Station To 'My Added Stations
After you added the stations, in order to have your radio access your new settings, get your radio power off for several minutes is necessary. The added stations are accessible by pressing MENU button > Station list > My favourites. Note: doing a ‘factory reset’... -
Page 16: Viewing Station Information
After you added the stations, in order to have your radio access your new settings, get your radio power off for several minutes is necessary. The added stations are accessible by pressing MENU button > Station list > My added stations. -
Page 17: Spotify
Spotify Spotify gives you millions of songs at your fingertips. The artists you love, the readymade playlists for every mood and genre, the latest hits and new discoveries just for you. With Spotify Connect feature, you can play and control all this music wirelessly. Choose music on your smartphone or tablet, and listen on your radio. -
Page 18: Controlling Spotify Connect
The Connect icon will turn green to signify that your radio is now selected and being used for audio playback. Your Spotify app will only recognize your radio when the radio is connected to the internet (i.e. in Internet Radio, Spotify Connect or Music player mode). To use Spotify when your radio is in non-internet modes (i.e. -
Page 19: Music Player Mode
Music player Mode In order for your radio to play music files from a computer, the computer must be set up to share files or media. The built-in Music player allows devices like this radio to play unprotected audio files (AAC, MP3, WMA) from a shared media library, navigating through tag menus such as Artist, Album or Genre. -
Page 20: Playing Shared Media
OK to close the dialogue boxes. The PC is now ready to stream the music to the radio. The WMP UPnP service runs in the background; there is no need to start WMP explicitly. Playing Shared Media Press MODE button repeatedly to select Music player mode. While 'Shared media' is highlighted, press SELECT/SNOOZE knob to confirm. -
Page 21: My Playlist
My Playlist The My Playlist feature enables you to create a playlist of your favourite tracks from your music libraries. Once you have your playlist ready you can choose to play through the playlist on your radio and can also set shuffle and repeat play functions while your playlist is playing. To save a track to ‘My Playlist’, browse the track you want to add to the playlist, press and hold SELECT/SNOOZE knob, and then the track is added to the playlist. -
Page 22: Dab Mode
DAB Mode Selecting DAB Mode Press MODE button repeatedly to select DAB mode. For initial use, radio will carry out a full scan and store stations list in memory Once the scanning is completed, the DAB/DAB+ stations will be displayed in alphanumeric order. -
Page 23: Scanning Stations
Scanning Stations Press MENU button on the unit, turn SELECT/SNOOZE knob to select Scan, and then press SELECT/SNOOZE knob to full scan. Manual Tune This can help you when adjusting your antenna or when adding stations that were missed while auto tuning. -
Page 24: Changing Station Order
Changing Station Order You may want to display the stations in different order. Press MENU button, turn SELECT/SNOOZE knob to select Station order, and then press SELECT/SNOOZE knob to confirm. Turn SELECT/SNOOZE knob to select 'Alphanumeric', 'Ensemble' or 'Valid', and then press SELECT/SNOOZE knob to confirm your selecting option. -
Page 25: Recalling A Preset Station
Recalling a Preset Station Press PRESET button to show the saved preset stations. Turn SELECT/SNOOZE knob to select the preset station you want to play and then press the SELECT/SNOOZE knob to confirm. -
Page 26: Fm Mode
FM Mode Selecting FM Mode 1. Press MODE button repeatedly to select FM mode. 2. For initial use, it will start at the beginning of the FM frequency range (87.50MHz). Otherwise, the last listened FM station will be selected. 3. To manually change the FM frequency, while FM frequency shows up, turn SELECT/SNOOZE knob clockwise or anticlockwise to change the frequency by 0.05MHz per step. -
Page 27: Storing Preset Stations
Storing Preset Stations Your radio can store up to 10 of your favourite FM stations. This will enable you to access your favourite stations quickly and easily. 1. While playing your favourite station, press and hold PRESET button on the main unit until diaplay shows as below: 2. -
Page 28: Bluetooth Mode
Bluetooth Mode Pair the unit with a Bluetooth device to listen to music: Press the MODE button to select Bluetooth mode. The display will flash in repeatedly. Activate your Bluetooth device and select the search mode. ‘Heritage II’ will appear on your Bluetooth device. Select ‘Heritage II’... -
Page 29: Aux In Mode
Aux in Mode AUX IN allows for quick and easy connection to an MP3 player or other external audio sources. Before connecting to the mains socket, use a 3.5mm audio cable (not supplied) to connect to your external audio device through the AUX IN socket on the back of unit. Connect power adapter to mains socket, press POWER /VOLUME knob to switch unit on. -
Page 30: General Operation
General Operation Setting Sleep This feature enables your radio to switch to standby mode by itself after a set sleep time. Press MENU button on the unit > Main menu > Sleep, and then press SELECT/SNOOZE knob to confirm. Turn SELECT/SNOOZE knob to view options Sleep OFF, 15, 30, 45 or 60 MINS, press SELECT/SNOOZE knob to confirm. -
Page 31: Setting Equaliser
Setting Equaliser This feature enables you to choose a sound equalization profile. Each of the equalization setting will change the tone of the sound from your radio when selected. Press MENU button on the unit > Main menu > System settings > Equaliser, and then press SELECT/SNOOZE knob to confirm. -
Page 32: Setting Time/Date
Setting Time/Date Press MENU button on the unit > Main menu > System settings > Time/Date, press SELECT/SNOOZE knob to confirm. Turn SELECT/SNOOZE knob to select options, and then press SELECT/SNOOZE knob to confirm the setting. Manually set-up both Time and Date Set Time/date: ‘Update from DAB, ‘Update from FM’, ‘Update from Auto update:... -
Page 33: Setup Wizard
1. Press MENU button on the unit > Main menu > System settings > Software update, press SELECT/SNOOZE knob to confirm. 2. Turn SELECT/SNOOZE knob to select 'Auto-check setting', your radio will check periodically for new version software. 3. Turn SELECT/SNOOZE knob to select 'Check now', your radio will now to check new version software and automatically upgrade the detected new version software. -
Page 34: Multi-Room
Multi-room Multi-room is a feature that enables you control your radio (one or group) via UNDOK App for playback. You can enjoy music by using your smartphone which has UNDOK App to control the radios (multi-room capable devices) in the kitchen, bedroom or living room. Of course you also can control the radios playing together. - Page 35 If your radio is a client in the group, the radio display will show “Waiting for synchronisation” and then the radio will play the same program as master device playing. Tap ‘Close’ at top-right corner on editing screen to leave editing. (Refer to Figure 5.) The devices in the group will be listed below group name.
- Page 36 Figure 5 Figure 6 Figure 7 Figure 8 Figure 9 Figure 10...
- Page 37 Alternatively, you can edit group through your radio. Press MENU button > Main menu > System settings > Multi-room, and then press SELECT/SNOOZE knob to confirm. Turn SELECT/SNOOZE knob to select options, and then press SELECT/SNOOZE knob to confirm. View your radio state (Ungrouped, Server or Client) and the View details group which it belong to.
-
Page 38: Menu Map
Menu Map... -
Page 40: Troubleshooting
Troubleshooting If a problem occurs, it may often be due to something very minor. The following table contains various tips. Problem Solution No Power. Ensure the mains cable is properly connected. Make sure that the unit is turned on. The unit does not respond The unit may freeze up during use. - Page 41 For Customer Service and to register your Warranty visit: www.bushaustralia.com.au Our goods come with guarantees that cannot be excluded under the Australian Consumer Law. You are entitled to a replacement or refund for a major failure and for compensation for any other reasonably foreseeable loss or damage. You are also entitled to have the goods repaired or replaced if the goods fail to be of acceptable quality and the failure does not amount to a major failure.
Need help?
Do you have a question about the Heritage 2 and is the answer not in the manual?
Questions and answers