HOKLARTHERM Riga S Mounting Instruction
Hide thumbs
Also See for Riga S:
- Assembly instruction manual (25 pages) ,
- Assembly instructions manual (40 pages)

Related Manuals for HOKLARTHERM Riga S


Summary of Contents for HOKLARTHERM Riga S
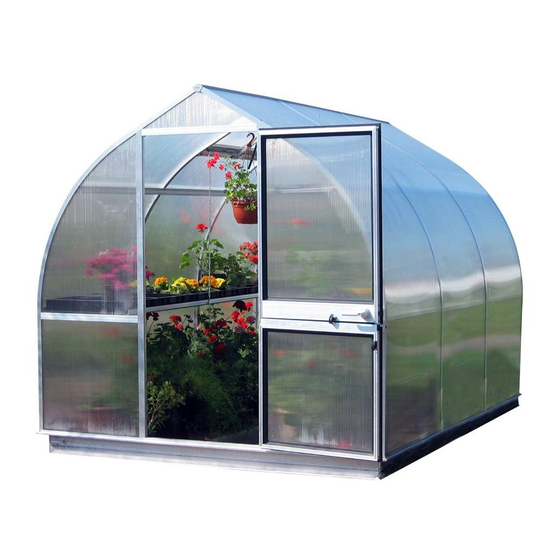
- Page 1 ALUMINIUM Greenhouse Riga S / Riga Technical changes reserved. Mounting instruction Basic kit As at 02/2005 Riga S System breadth 2,32 m Riga System breadth 2,96 m...
- Page 2 Dear garden friend, Congratulations for the purchase of an aluminum greenhouse from Hoklartherm. The erection is simple. First read the mounting instruction and follow this step by step. Parts and piece list Start with the basic kit (please do not open all the boxes at the same time) and do not confuse about the numerous single parts.
- Page 3 (see also description from p.14 on) (View from the outside) Step 2 Step 1 *Riga S *Riga 730 x 728 1048 x 728 Angle bracket pos.1 Floor profiles Pos.1.1 Tallow-drop screw 4,2x13 Pos.12 (screw down only after installation of door = alignment possibility)
- Page 4 Assembly course eaves and roof Step 8 Step 9 for ex. back Screw down ridge at gable with wall gable end plate Pos.4 (raised counter- sunk head screw 4,2x13) Front gable to assemble the same way later! support ends or left hold up Step 11 Step 10...
- Page 5 Step 14 Step 15 mounting skylight false !!! right Place door gable in front and screw Build in doors and windows Screw angle bracket Pos.6 down Instruction see page 8-11 in with screw 4,2x13 Step 16 for a better detail the panes are shown being cut.
-
Page 6: Table Of Contents
Please check according to tables if the components are complete Contents of main box - basic construction- Profiles for both gables Amount/Length mm Detail Pos. Designation Riga S Riga Floor profiles -gable- 2238 2238 2874 2874 Edge stay bar left 1.5.4... -
Page 7: Designation
Frame of doors Amount wedge sealings 3-5 6-8 mm length 1030 Screw M6 Type + nut Riga S/II (Pos.14) Riga S/III We recommend to use hexagon head cap wood Riga III screws and pegs inclu- Riga IV ded for pegging. These... - Page 8 Profiles for skylight Detail Pos. Designation Amount/Length Window profile roof Window profile roof Contents accessories bag skylight Designation Amount/Length Detail Pos. T-sealing 1052 Assembly angle with setscrew Allan key Hexagon bolt M6x12 + nut Angle bracket / skylight Annotation: sealing is bunched in one hank for all the doors and windows, cut to size please.
- Page 9 Profiles for divided revolving door -at the bottom- Detail Amount / Length Pos. Designation 5.3.1 Door profile at the bottom Door profile left with borings for Sash lock oor profile right with hinge borings Door profile with cross holes Rectangular tube with cross holes Accessories bag divided door at the bottom- Detail Amount / Length...
- Page 10 Profiles for Geteilte Drehtür -top- Detail Amount / Length Pos. Designation Door profile left 1 x 1102 Rose / 1 x 1285 Orch. Door profile with hinge right 1 x 1102 Rose / 1 x 1285 Orch. borings Door profile Door profile with boring at the bottom 5.4.1 for lockable door handle...
- Page 11 Profiles for back wall window Detail Amount / Length Pos. Designation Door profile with borings left 1 x 1102 Rose / 1 x 1285 Orch. 5.1.2 for sash lock Door profile right 1 x 1102 Rose / 1 x 1285 Orch. 5.2.2 with hinge borings 5.3.1...
-
Page 13: Amount/Length Mm Riga Iii
Foundation frame (extra accessories) Profiles for foundation frame Amount/Length mm Detail Pos. Designation Riga -S- Riga Foundation frame profile 2199 2199 2835 2835 Foundation frame profile 2033 3091 3091 4149 Angle bracket/foundation frame 40/40 x 135 Fixing plate (stay bar - foundation frame) Assembly of foundation frame Each foundation frame is to turn into the floor profiles. - Page 14 Good advice for a quick and perfect assembly of the greenhouse from Hoklartherm Most of the assembly can be done by you alone. The assembly for gable and lateral walls takes 2 – 4 hours according to your skills. It is best if you have further two persons being able to hold it for approx.
- Page 15 On the square head of the angle bracket you detach the edge stay bars pos. 1.2 + pos. 1.3 (length 1447 mm). Take care that the groove is on the top! Do not position any triangular glazing onto the frame of doors. The verge flashing profiles in pos.
- Page 16 Now the second gable in the foot is to connect with the floor lengthwise profile in the same way already known. Push the grooved profile and ridge profile into the nuts / slots of the gable profiles. Screw down as well with the grooved and ridge end plates. Now a small angle 30/30/20 x 2 can be screwed in by means of sheet metal screws 4,2 x 16 to secure the floor profiles (see step 15).
- Page 17 Clean the greenhouse with much water only (for ex.: with a car wash-brush or a HP-cleaning apparatus. You can additionally use any purifiers. We wish all the buyers and users of this Hoklartherm-greenhouse much fun with their hobby of gardening and have much success with growth!
Need help?
Do you have a question about the Riga S and is the answer not in the manual?
Questions and answers