
Related Manuals for Necta Korinto UL


Summary of Contents for Necta Korinto UL
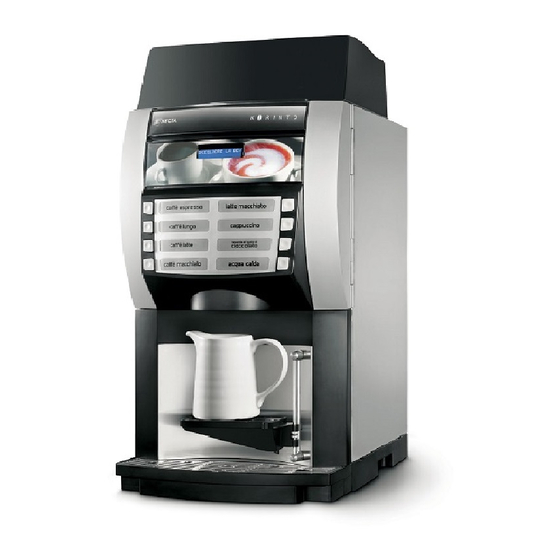
- Page 1 INSTALLATION, USE AND MAINTENANCE MANUAL MANUEL D'UTILISATION, INSTALLATION ET ENTRETIEN Korinto Espresso UL 120V Pag. 1 English Pag. 44 Français DOC. NO. H 274V 00 EDITION 1 07 - 2006...
- Page 3 DICHIARAZIONE DI CONFORMITA’ DECLARATION OF CONFORMITY DÉCLARATION DE CONFORMITÉ KONFORMITÄTSERKLÄRUNG DECLARACIÓN DE CONFORMIDAD DECLARAÇÃO DE CONFORMIDADE VERKLARING VAN OVEREENSTEMMING INTYG OM ÖVERENSSTÄMMELSE OVERENSSTEMMELSESERKLÆRING YHDENMUKAISUUSTODISTUS Valbrembo, 01/04/2005 Dichiara che la macchina descritta nella targhetta di identificazione, è conforme alle disposizioni legislative delle direttive: 98/37/CE, 89/336, 73/23 CEE e successive modifiche ed integrazioni.
-
Page 5: Table Of Contents
English TABLE OF CONTENTS NOTES ON PROGRAMMING PAGE 16 INTRODUCTION PAGE 2 POWER ON PAGE 16 IDENTIFICATION OF THE VENDING MACHINE PAGE 2 IN CASE OF FAILURE PAGE 2 OPERATING MODES PAGE 16 TRANSPORT AND STORAGE PAGE 2 NORMAL OPERATING MODE PAGE 16 POSITIONING THE VENDING MACHINE PAGE 3... -
Page 6: Introduction
IN CASE OF FAILURE INTRODUCTION In most cases, any technical problems are corrected by small repair operations; however, before contacting the manufacturer we recommend that this manual be read This technical documentation is part and parcel of the carefully. vending machine and must always follow the machine Should there be serious failures or malfunctions, contact in case it is moved or transfer of ownership, so as to the following:... -
Page 7: Positioning The Vending Machine
POSITIONING THE VENDING MACHINE WARNING FOR SCRAPPING The vending machine is not suitable for outdoor installation. It must be positioned in a dry room where the temperature remains between 2° C and 32° C, and not where water jets The symbol indicates that the machine may not be are used for cleaning (e.g. -
Page 8: Power Consumption
PAYMENT SYSTEM CAPACITY OF CONTAINERS Using special kits, the machine can be fitted with payment systems with Executive, MDB or BDV protocol. The payment systems must be housed in the special side module (optional). k l i SALE PRICES A different programmable price can be set for each single a l l selection;... -
Page 9: Loading And Cleaning
All operations requiring the machine to be energized Chapter 1 should be carried out EXCLUSIVELY by qualified per- LOADING AND CLEANING sonnel, informed about the specific risks of such situation. POWER SUPPLY SWITCHES HYGIENE AND MAINTENANCE According to current safety and health rules and regula- Main tions, the operator of an automatic vending machine is A main switch is fitted outside the machine, disconnecting... -
Page 10: Using The Vending Machine
In order to access the programming menus, press the USING THE VENDING MACHINES FOR HOT programming button located on the push-button card. DRINKS IN OPEN CONTAINERS At this point the machine goes into Filler menu mode. (Ex.: plastic cups, ceramic cups, jugs) The selection buttons are now used for surfing through the different menus. -
Page 11: Service Functions
SERVICE FUNCTIONS CLEANING THE WASTE TRAYS Some operations, if enabled from the programming menu, The waste trays can be easily removed even with the door can be carried out directly with the door closed entering a closed (see Fig. 8) permitting quick emptying and clean- password (pressing 5 buttons in a sequence) after press- ing. -
Page 12: Disassembling And Cleaning The Mixers
- in order to remove the water funnel, rotate the green DISASSEMBLING AND ring nut anti-clockwise; CLEANING THE MIXERS pay special attention to closing it fully during When installing the machine, and then at least once a reassembly; week or even more frequently according to the use of the - in order to remove the impellers, block the disk fitted machine and the quality of the inlet water, the mixers and on the mixer shaft with a finger (see Fig. -
Page 13: Installation
Top panel Chapter 2 Also when opening the machine top panel, a switch INSTALLATION disconnects the power, allowing loading operations in a safe condition. Installation and the following maintenance operations The switch on key MUST NOT be left inside the ma- should be carried out with the machine switched on and chine, it must be kept by the qualified personnel therefore by qualified personnel only, who are trained in... -
Page 14: Connection To The Water Mains
With some modules it may be necessary to fit a gasket to CONNECTING THE MACHINE TO THE seal the space between machine and support counter. POWER SUPPLY The gasket is supplied separately from the module. For installation, lay the machine on its back and fit the The machine is designed to operate under a single-phase gasket (see figure 12) following the installation instructions 120 V~ voltage and is protected by 15 A fuses. -
Page 15: Installing The Payment System
INSTALLING THE PAYMENT SYSTEM POWER ON Before switching the machine on, ensure that the grounds trays and the container lids are into place. The machine is sold without payment system, there- Each time the machine is switched on, the display shows fore the installer of such a system is responsible for the following message: any damage to the machine or to things and persons... -
Page 16: Initialising
INITIALISING FILLING THE WATER SYSTEM When the “Initialise” function is displayed the vending If the machine is connected to the water mains, when it is machine can be initialised restoring all default data. switched on the conditions of air-break (full or empty), This function should be used the first time the machine is pump and boiler priming (pressure) are checked. -
Page 17: Operation
The dispensing valve opens, allowing the pump to push VARIABLE CHAMBER the boiler water onto the coffee for the brewing cycle. COFFEE UNIT At the end of the dispensing cycle, the purge valve opens and the coffee dose is lightly pressed, permitting the discharge of residual water through the third way of the COFFEE DISPENSING CYCLE dispensing solenoid valve. -
Page 18: Decaffeinated Dispensing Cycle
DECAFFEINATED DISPENSING CYCLE PRE-SELECTIONS The machine is supplied with a door, for manually inserting According to the layout set for the vending machine, it is ground coffee, locked by default. possible to have different pre-selections; the available pre- According to the location needs, it is possible to selections for each layout are indicated in the selection dose table supplied with the machine. -
Page 19: Water Temperature Control
WATER TEMPERATURE CONTROL ADJUSTING THE COFFEE DOSE The grinder is fitted with a sensor that can count the The boiler temperature is controlled by the software and can be adjusted directly from the menu. number of rotations of the grinding wheels. This allows the control software of the machine to deter- ADJUSTING THE GRADE OF GRINDING mine the number of rotations, and therefore grams of... -
Page 20: Notes On Programming
After a few seconds the display shows the message: Notes on programming Ready for use The machine electronic control allows or not the use of SELECT THE DRINK many functions: All of the available functions are described in the machine program, including the ones that are not used for the After making the first selection the machine performs a specific configuration of the model (layout). -
Page 21: Surfing Mode
In the event of a malfunction detected by the control FILLER MENU system, an error message will be displayed indicating the type of problem. When pressing once the programming button located on the coin mechanism compartment, the machine goes into “Filler menu”... -
Page 22: Statistics
STATISTICS CHANGE TUBES CONTROL All data concerning sales and the machine operations is By accessing the “Tube control” function the change tubes stored in both total counters and relative counters, which can be filled or released manually. can be reset without losing total data. Confirm refilling, and the display will indicate “Credit: ——”... -
Page 23: Test Dispensing
TEST DISPENSING GSM PRE-ALARMS For complete or partial dispensing tests (water, powder, The control software can send, via GSM modem, a signal only and without accessories) each button (or combination indicating an “ending product” signal, when there is only a of buttons according to the model) is assigned a selection certain (programmable) number of pieces or grams of (see the dose selection table). -
Page 24: Technician Menu
TECHNICIAN MENU CAN-BUS board Failed dialogue between C.P.U. board and can-bus board Below is listed a summary explanation of the main func- (FB unit control). tions useful for managing the operation of the machine, Coin mechanism grouped by use logic and not necessarily in the order in The machine is locked if it receives a pulse longer than 2 which they are displayed in the menu. -
Page 25: Programming Parameters
READING PRESENT FAILURES Time bands When the “Failure” function is displayed, press the confirm Four programmable time bands are provided for selling button “ ” to display the present failures. products at different prices. If no failures are currently present, after pressing the The time periods are programmable for beginning and end confirm button “... - Page 26 FUNCTIONS COMMON TO ALL SYSTEMS Powder dose The powder dose expressed in grams can be set for each Immediate change selection button, for each product that composes such Normally, the amount of a selection is cashed after the selection. machine sends the message “Selection successful”. For correct conversion of product dose values, the flow rate When this function is enabled, disabled by default, the cash of the single doser units, expressed in g/s, can be set to...
- Page 27 Setting the regeneration counter No coffee It is possible to display the message If the function it is possible to enable/disable the indication “Replace water filter” after a programmable number of on the display “Insert coffee” if the grinder detects the selections.
- Page 28 MISCELLANEOUS Free Vend password This function is used for setting the password that must be This menu contains some of the functions that are used entered while in normal operating mode (door closed) for less frequently concerning the machine parameters. activating the Free Vend function.
-
Page 29: Statistics
STATISTICS Printing Connect an RS232 serial printer having a Baud rate of 9600, Data on the machine operations is stored in both general 8 data bit, no parity, 1 stop bit to the serial port located on counters and relative counters, which can be reset without the push button board to print all the statistics described in losing total data. -
Page 30: Miscellaneous
“Language” MISCELLANEOUS When the machine is switched on for the first time or in any case after initialising, as well as the list of controls This menu contains some sub-menus, used less fre- to be performed, also the language used for the quently, which permit control of the functions described messages on the display is proposed. -
Page 31: Maintenance
Chapter 3 MAINTENANCE Important notice!! Access to the machine interior for maintenance and/or repairs is via the back panel and from the side panels. Therefore the machine is designed to be rotated, thus allowing removal of the back panel and of the side panels. The integrity of the machine and compliance with the standards of the relevant systems must be checked at least once a year by qualified personnel. -
Page 32: Sanitising The Mixers And Foodstuff Circuits
- in order to remove the impellers, block the disk fitted on SANITISING THE MIXERS the mixer shaft with a finger (see Fig. 24), then rotate the AND FOODSTUFF CIRCUITS impeller to undo it. When installing the machine, and then at least once a week or even more frequently according to the use of the machine and the quality of the inlet water, the mixers and the dispensing conduits must be thoroughly sanitised... -
Page 33: Periodical Cleaning
PERIODICAL CLEANING Before restarting the machine, the same sanitising procedure described in section “Sanitising the mixers At least once a year, or more frequently according to the and the foodstuff circuits” should be repeated. use of the machine and the quality of the inlet water, the CLEANING THE PRODUCT CONTAINERS entire foodstuff circuit system must be cleaned and sani- tized as described below. -
Page 34: Printed Board Functions And Indicator Lamps
PRINTED BOARD FUNCTIONS AND INDICATOR LAMPS ACTUATION BOARD This board, placed at the back of the machine, (see Fig. 26) processes the information from the push-button card and from the payment system; it also controls the actuations, the input signals and the boiler board. The 15 V AC voltage required for board operation is supplied by a transformer which is protected by a 160 mAT fuse on the primary and by a 1.25 AT fuse on the secondary... -
Page 35: Push-Button Board
PUSH-BUTTON BOARD BOILER CONTROL BOARD This board controls the alphanumeric display, the selec- This board (see Fig. 30) controls the boiler heating ele- tion buttons and the programming and wash buttons (see ment. Fig 28). It supports the validator connectors as well as the printer port. -
Page 36: Hydraulic System
HYDRAULIC SYSTEM FOR ESPRESSO 1 - Spout support 9 - Coffee pump 2 - Flow diverter spout 10- Bypass 3 - Instant prod. mixer 11 - Volumetric counter 4 - Brewing chamber 12 - Air-break 5 - Upper piston 13 - Water inlet solenoid valve 6 - Dispensing solenoid valves 14 - Mechanical filter 7 - Purge solenoid valve... -
Page 37: Programming Menu Summary
Programming menu summary The machine can function in 3 different operating modes. - Normal vending mode - Filler menu - Technician menu In order to access the programming menus, press the programming button located on the push-button card: At this point the machine goes into Filler menu mode. The buttons shown in the figure are used for surfing through the different menus: Scrolling buttons UP ( ) and DOWN ( ) The UP and DOWN scrolling buttons are used for moving from one programming menu item to the next one, located... - Page 38 "Filler Menu" Summary 1 - STATISTICS 1.1 - STATIS. PRINTING 1.1.1 - PARTIAL PRINTING 1.1.1.1 - SEL. CNT. PRINT. 1.1.1.2 - PRINT BAND CNT 1.1.1.3 - DISC. CNT.PRINT. 1.1.1.4 - FAIL. CNT.PRINT. 1.1.1.5 - COIN MECH. PRINT 1.1.2 - TOTAL PRINTING 1.2 - PRINT REL.
- Page 39 "Filler Menu" Summary 1.4 - DISP. REL. STAT. 1.4.1 - SEL. CNT. DISP. 1.4.1.1 - CNT DIS. X S.SEL 1.4.1.2 - TOT CNT DISPLAY 1.4.1.3 - SEL.NO.CNT. DIS. 1.4.2 - DISPLAY BAND CNT 1.4.3 - DISC. CNT. DISP. 1.4.4 - FAIL. CNT. DISP. 1.4.5 - COIN MECH.
- Page 40 "Filler Menu" Summary 5 - TEST 5.1 - COMP. DISPENSING 5.2 - WATER ONLY 5.3 - POWDER ONLY 6 - EVADTS 6.1 - CONNECTION NEXT FUNCTION/ PREVIOUS FUNCTION / DECREASE DATA UNIT (-1) INCREASE DATA UNIT (+1) CONFIRM DATA / DELETE DATA / CONFIRM FUNCTION EXIT FUNCTION...
- Page 41 "Technician Menu" Summary 1 - FAILURES 1.1 - FAILURE READING 1.2 - FAILURE RESET 2 - SET PARAMETERS 2.1 - CASH 2.1.1 - PRICES 2.1.1.1 - SET INDIV. PRICE 2.1.1.1.1 - PRICE BAND 0 2.1.1.1.2 - PRICE BAND 1 2.1.1.1.3 - PRICE BAND 2 2.1.1.1.4 - PRICE BAND 3 2.1.1.1.5 - PRICE BAND 4 2.1.1.2 - SET GLOB.
- Page 42 "Technician Menu" Summary 2.2 - SELECTIONS 2.2.1 - SET WATER 2.2.1.1 - WATER DOSES 2.2.1.2 - SET WHIP DOSES 2.2.1.2.1 - SET WHIP DOSES 2.2.1.2.2 - SET MODALITY 2.2.1.3 - EL.VALVE SETTING 2.2.2 - SET POWDER 2.2.2.1 - POWDER DOSES 2.2.2.2 - DOSER SETTING 2.2.3 - SELECTION STATUS 2.2.4 - SEL.
- Page 43 "Technician Menu" Summary 2.5 - PRE-SELECTIONS 2.5.1 - WATER + 2.5.1.1 - SELECTION ENABL. 2.5.1.2 - DOSE VARIATION 2.5.1.3 - PRICE VARIATION 2.5.2 - WATER - 2.5.2.1 - SELECTION ENABL. 2.5.2.2 - DOSE VARIATION 2.5.2.3 - PRICE VARIATION 2.5.3 - STRONG 2.5.3.1 - SELECTION ENABL.
- Page 44 "Technician Menu" Summary 2.6 - MISCELLANEOUS 2.6.1 - FB DATA 2.6.2 - JUG FACILITIES 2.6.3 - PASSWORD 2.6.3.1 - SET PASSWORD 2.6.3.2 - ENABLE PASSWORD 2.6.3.3 - PWD AZZ. CONTAT. 2.6.3.4 - PWD JUG FACILITY 2.6.3.5 - PWD FREE VENDING 2.6.3.6 - PWD BLOCCO TAST.
- Page 45 "Technician Menu" Summary 3.3 - STATISTICS RESET 3.3.1 - PARTIAL RESET 3.3.1.1 - SEL. CNT. RESET 3.3.1.2 - DISC. CNT. RESET 3.3.1.3 - FAIL. CNT. RESET 3.3.1.4 - COIN MECH. RESET 3.3.2 - TOTAL RESET 3.4 - DISP. REL. STAT. 3.4.1 - SEL.
- Page 46 "Technician Menu" Summary 3.6 - EN. CNT AT START 3.7 - STATIS. PRINTING 3.7.1 - PARTIAL PRINTING 3.7.1.1 - SEL. CNT. PRINT. 3.7.1.2 - PRINT BAND CNT 3.7.1.3 - DISC. CNT.PRINT. 3.7.1.4 - FAIL. CNT.PRINT. 3.7.1.5 - COIN MECH. PRINT 3.7.2 - TOTAL PRINTING 3.8 - PRINT REL.
- Page 47 "Technician Menu" Summary 5 - MISCELLANEOUS 5.1 - D.A. REGISTRY 5.1.1 - INSTALL. DATE 5.1.2 - PROG. M/C CODE 5.1.3 - OPER. CODE ENTRY 5.2 - INITIALISING DB 5.3 - EVADTS 5.3.1 - CONNECTION 5.4 - UPKEY 5.4.1 - SETUP MANAGEMENT 5.4.1.1 - UPKEY ->...
-
Page 48: Wiring Diagram
WIRING DIAGRAM LEGEND INITIALS DESCRIPTION INITIALS DESCRIPTION GENERAL COUNTER COFFEE UNIT MOTOR COFFEE UNIT MOTOR CAM GRINDER VOLUMETRIC COUNTER MD1-.. INGREDIENT MOTOR - INSTANT WATER INLET SOLENOID VALVE MDFB INGREDIENT MOTOR - FRESH BREW COFFEE DISPENSER SOLENOID VALVE MF1-.. WHIPPER MOTORS ESP1-. - Page 49 © by N&W GLOBAL VENDING SpA NOTE...
- Page 52 © by N&W GLOBAL VENDING SpA NOTE...
- Page 53 © by N&W GLOBAL VENDING SpA NOTE...
- Page 54 © by N&W GLOBAL VENDING SpA NOTE...
- Page 55 The Manufacturer reserves the right to modify, without prior notice, the characteristics of the equipment described in this publication; and further declines to accept any responsibility for any inaccuracies contained in this publication which can be ascribed to printing and/or transcription errors. All instructions, drawings, tables and information contained in this publication are confidential and can neither be repro- duced completely or in part, nor be transmitted to third parties without the written permit of the Manufacturer, who has the sole ownership.
Need help?
Do you have a question about the Korinto UL and is the answer not in the manual?
Questions and answers