
Related Manuals for Miele CM7300


Summary of Contents for Miele CM7300
-
Page 1: Operating Instructions
Operating instructions Coffee machine To avoid the risk of accidents or damage to the appliance it is essential to read these instructions before it is installed and used for the first time. en – GB M.-Nr. 10 315 190... -
Page 2: Packaging Material / Disposal Of Old Machine
Please kept in case the machine ever needs to do not therefore dispose of it with your be returned to Miele for servicing. household waste. Please dispose of it at your local community waste collection / recycling centre or contact your Dealer for advice. -
Page 3: Table Of Contents
Contents Packaging material / Disposal of old machine ........... 2 Warning and Safety instructions ................6 Guide to the machine ..................16 Accessories ......................17 Operation ......................18 Touch display ......................18 Operation ....................... 18 Symbols in the display ................... 20 Using for the first time.................. - Page 4 Contents Grinder setting ..................... 39 Drinks parameters ....................40 Amount of coffee ....................40 Brewing temperature....................41 Pre-brewing the coffee................... 41 Portion size ......................42 Resetting drinks ....................43 Profiles ........................44 Opening a profile....................44 Creating a profile....................44 Selecting a profile ....................
- Page 5 Contents Cleaning and care ....................57 Quick guide......................57 Cleaning by hand or in the dishwasher..............58 Drip tray and waste container ................60 Drip tray cover......................61 Water container...................... 61 Central spout with integrated cappuccinatore............62 Cup sensor......................64 Stainless steel milk flask ..................
-
Page 6: Warning And Safety Instructions
They contain important notes on setting it up, as well as on its safety, operation and maintenance. Miele cannot be held liable for damage caused by non- compliance with these Warning and Safety instructions. Keep the instructions in a safe place and pass them on to any... - Page 7 Warning and Safety instructions Correct application This coffee machine is intended for use in domestic households and similar working and residential environments. Examples of a working or residential environment include – shops, offices and other working environments, – small businesses, showrooms etc., –...
- Page 8 Warning and Safety instructions Safety with children Caution! Danger of burning and scalding on the dispensing spouts. Children's skin is far more sensitive to high temperatures than that of adults. Ensure children do not touch hot surfaces of the coffee machine or place parts of their body under the dispensing spouts.
-
Page 9: Technical Safety
Warning and Safety instructions Technical safety A damaged coffee machine is dangerous. Check it for any visible damage before setting it up. Never attempt to use a damaged coffee machine. To avoid the risk of damage to the machine, make sure the connection data (voltage and frequency) on the data plate corresponds to the household supply, before connecting the machine to the mains supply. - Page 10 Miele authorised service technician. While the machine is under guarantee, repairs should only be undertaken by a Miele authorised service technician. Otherwise the guarantee is invalidated. Faulty components must only be replaced by genuine Miele Original spare parts.
- Page 11 Warning and Safety instructions Only use genuine original Miele accessories with this machine. Using spare parts or accessories from other manufacturers will invalidate the guarantee, and Miele cannot accept liability.
-
Page 12: Correct Use
Warning and Safety instructions Correct use The spouts present a danger of burning or scalding. The liquids and steam dispensed are very hot. Please note: – Keep well away from the area underneath the spouts when hot liquids and steam are being dispensed. –... - Page 13 Sugar will damage the coffee machine. Only add ground coffee or the Miele cleaning tablets for degreasing the brew unit to the ground coffee chute. Do not use any caramelised ready ground coffee. The sugar in the coffee will stick to and block the brew unit of the coffee machine.
-
Page 14: Cleaning And Care
Descale the coffee machine regularly depending on the water hardness level in your area. Descale the machine more frequently in areas with very hard water. Miele cannot be held liable for damage arising from insufficient descaling, the use of incorrect descaling agent or the use of descaling agent which is not of the appropriate concentration. - Page 15 Warning and Safety instructions For machines with stainless steel surfaces: Do not use sticky notes, transparent adhesive tape, masking tape or other types of adhesive on stainless steel surfaces. These damage the surface, causing it to lose its dirt repellent protective coating.
-
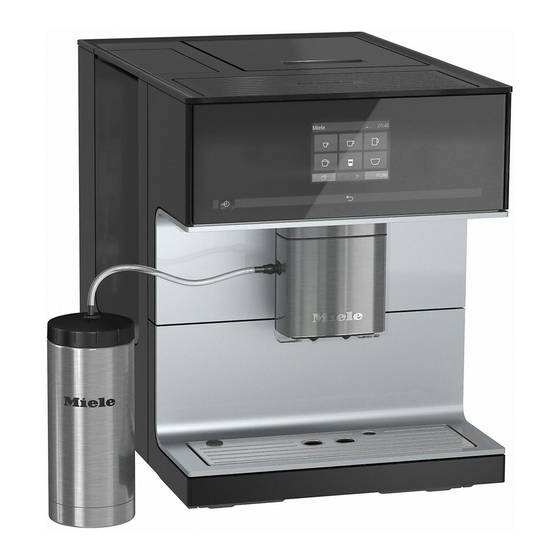
Page 16: Guide To The Machine
Guide to the machine a On/Off sensor i Ground coffee drawer with integrated coffee scoop b "Back" sensor j Brew unit c Touch display k Height-adjustable central spout with d Cup heating lighting and integrated hot water spout e Water container l Master switch f Coffee bean container... -
Page 17: Accessories
These products and other useful Optional accessories accessories can be ordered via the Miele accessories and cleaning and internet, from Miele (see back cover for conditioning products are available for contact details) or from your Miele your coffee machine. dealer. -
Page 18: Operation
Operation Touch display You can scroll to the right or left using the and arrows at the bottom. The display can be scratched by Context-dependent functions or menus pointed or sharp objects, e.g. pens. can be found to the left and right of the arrow sensors. - Page 19 Operation Entering numbers Entering letters Use the numerical keypad to enter Profile names or the names for your numbers, e.g. if you want to set a timer own drinks are entered using a duration. The numerical keypad will keyboard. appear automatically in the relevant It is best to select short names (max.
-
Page 20: Symbols In The Display
Operation Symbols in the display The following symbols can appear in addition to the text and the drinks symbols: Symbol Explanation Settings, e.g. the brightness of the display or the volume of the buzzer and keypad tones, are selected via a bar chart. This indicates information and instructions about operating ... -
Page 21: Using For The First Time
When you switch the machine on for of 5:00 and 23:00. the first time the following message will appear in the display: " Miele - Select the time of day display and ". Willkommen touch OK. -
Page 22: Water Hardness
Using for the first time Water hardness After setting the machine up you can make your first drinks. Coffee beans The water hardness level indicates how can be ground up to five times, as the much calcium is dissolved in the water. coffee machine checks whether there The higher the calcium content, the is sufficient ground coffee to make an... - Page 23 Using for the first time Measuring the water hardness level You can determine the water hardness yourself using the enclosed test strip. Alternatively, your local water authority will be able to tell you the hardness of water in your area. ...
-
Page 24: Filling The Water Container
Filling the water container Change the water every day to prevent a build-up of bacteria. Only use cold, fresh tap water to fill the water container. Hot or warm water or other liquids can damage the coffee machine. Do not use mineral water. Mineral water will cause serious limescale deposits to build up in your machine ... -
Page 25: Filling The Coffee Bean Container
Filling the coffee bean container Fill the coffee bean container with Tip: You can use a nut or seed grinder roasted coffee or espresso beans if you to grind green coffee beans. These want to use freshly ground coffee types of grinder generally have a beans for each cup of espresso or rotating stainless steel blade. -
Page 26: Switching On And Off
Switching on and off Switching on Switching off Switch the master switch on the right Touch the On/Off sensor . hand side of the machine to the "I" If coffee has been dispensed, the position. coffee machine will rinse the coffee ... -
Page 27: Spout Adjustment
Spout adjustment Switching the spout The central spout cannot be manually adjustment on and off adjusted. Start in the menu. Drinks Before making the drink, the central spout moves to the optimum height for Touch . the cups or glasses used. ... -
Page 28: Cup Heating
Cup heating Cups should always be pre-heated to Pre-heating cups allow the flavour of the coffee to develop and be retained. The smaller the volume of the coffee/ espresso and the thicker the cup, the more important it is to pre-heat the cup. You can pre-heat cups or glasses on the cup heating surface on the top of the coffee machine. -
Page 29: Making Coffee
Making coffee The following drinks can be made: The spouts present a danger of burning or scalding. – Ristretto . This is a concentrated, The liquids and steam dispensed are strong espresso. It is made with the very hot. same quantity of ground coffee as for an espresso, but with very little Keep well away from the area... -
Page 30: Cancelling Preparation
Making coffee Cancelling preparation Two portions Touch You can also dispense two portions of a Stop Cancel drink at once into one cup or into two DoubleShot cups at the same time. Select the function if you DoubleShot To fill two cups at the same time: would like a particularly strong and aromatic coffee. -
Page 31: Dispensing Several Cups Of Coffee One After The Other - Coffee Pot
Making coffee Dispensing several cups of Making coffee with ground coffee one after the other - coffee Coffee pot To make coffee using ready ground coffee, add a portion of ground coffee You can make several cups of coffee to the ground coffee chute. This gives one after the other automatically with you the option of making a cup of function (max. - Page 32 Making coffee Making coffee with ground coffee If you want to make a drink with ground coffee: Touch You can now select which type of drink you would like to make with ground coffee. Place a cup under the central spout. ...
-
Page 33: Making Coffee With Milk
Making coffee with milk The following drinks with milk can be Caution. Danger of burning and made: scalding from the central spout. Liquids and steam dispensed from – Cappuccino consisting of approx. the spouts will be very hot. 2/3 milk froth and 1/3 espresso. -
Page 34: Milk Flask
Making coffee with milk Milk flask The stainless steel flask keeps milk cool for longer. Good milk froth can only be made with cold milk (< 10 °C). Place the milk flask beside the coffee machine. Connect the other end of the milk tube to the central spout. -
Page 35: You Can Use Bottled Milk Or Cartons
Making coffee with milk You can use bottled milk or Making drinks with milk cartons. The milk pipework must be connected to the central spout and submerged in sufficient cold milk. Start in the menu. Drinks Place a suitable container underneath the central spout. -
Page 36: Making Tea
The type of tea determines the preset temperature. The respective dispensing temperatures are recommended by Miele for making black tea, green tea, herbal or fruit tea. The taste of the tea will be affected by the type of water used. Water should be as soft as possible to allow the aroma to develop. -
Page 37: Making Tea
Making tea Making tea Tea pot: making several cups of tea, one after the other The hot water spout is located to the right of the central spout. You can make several cups of tea one after the other automatically with the Use the arrow sensor ... -
Page 38: Dispensing Hot Water
Dispensing hot water To cancel preparation: Danger of burning and scalding on the hot water spout. The water Touch Stop Cancel dispensed is very hot. Start in the menu. Drinks Place a suitable container underneath the hot water spout. ... -
Page 39: Grinder Setting
Grinder setting When the beans are ground correctly, Open the machine. the coffee or espresso will flow evenly into the cup with a good crema. The crema should have an even nut- brown colour. The grinder setting you select will be used for all coffee drinks. -
Page 40: Drinks Parameters
Drinks parameters You can set the grind amount and the Amount of coffee brewing temperature separately for The coffee machine can grind and brew each type of drink. First select the drink 6-14 g of coffee beans per cup. The and then adjust the parameters. -
Page 41: Brewing Temperature
Drinks parameters Brewing temperature Pre-brewing the coffee The ideal brewing temperature will When the pre-brewing function is depend on switched on, the freshly ground coffee is first moistened with a little hot water. – the type of coffee being used, Then the remaining water is forced –... -
Page 42: Portion Size
Portion size You can adjust the amount of water for The drink will be made and will Save all coffee drinks, hot water and types of appear in the display, as soon as the tea to suit the size of your cups. minimum dispensing amount is reached. -
Page 43: Resetting Drinks
Resetting drinks You can reset portion sizes and Resetting all drinks parameters individually or for all drinks Touch Reset all drinks back to their factory default setting. will Reset all drinks to default settings? Start in the menu. Drinks appear in the display. -
Page 44: Profiles
Profiles In addition to the Miele profile, you can Processing profiles enter up to 8 individual profiles to cater When you have created at least one for different tastes and preferences. profile you can choose from the The portion quantities and parameters... - Page 45 Deleting a profile You can programme the coffee machine Touch Delete profile so that it changes back to the Miele Touch the profile you want and then standard profile automatically after touch each drink is dispensed or so that it retains the most recently selected The profile will be deleted.
-
Page 46: Profiles: Creating And Processing Drinks
Profiles: creating and processing drinks You can save frequently made drinks in Changing a drink: changing a profile with your own individual the portion size(s), drinks settings (see "Profiles"). parameters and names You can also change the names of the The desired profile with the newly drinks and delete any unwanted drinks created drinks will appear in the... -
Page 47: Profiles: Making Drinks
Profiles: making drinks Start in the menu. Drinks Touch Profiles Select the profile you want. The name of the profile selected will be shown in the top left of the display. Now you can make the drink you want. ... -
Page 48: Expert Mode
Expert mode In Expert mode you can change the amount of coffee and portion size while the drink is being made. The setting will not be saved and will only apply for the Grinding current drink. Switching Expert mode on and Start in the menu. -
Page 49: Settings
Settings You can use the "Settings" menu to Changing and saving settings customise the coffee machine to suit Start in the menu. Settings your requirements. Select the option you want to Opening the Settings menu change. Start in the menu. -
Page 50: Possible Setting Options
Settings Possible setting options The factory default for each option has a * next to it. Option Available settings , English and other languages Language deutsch Country Time Show – Night dimming Clock format – 12 h (am/pm) 24 h Date Timer Timer 1... - Page 51 Settings Option Available settings Lighting Machine switched on – Set the brightness Machine switched off – Brightness Switch off after Info Number of drinks – Total no. of drinks Total no. of coffee drinks Total no. of / ... tea drinks: Ristretto Espresso No.
-
Page 52: Language
Settings Language Clock format The options are: You can select the language (and country variant of that language) for all – 24 hour display ( 24 h display text. – 12 hour display ( 12 h (am/pm) Tip: If you select the wrong language by mistake, you can find the Setting the time "Language"... -
Page 53: Timer
Settings Timer Switch on at There are two timers with the following The coffee machine will not switch on functions: at the required time if you have activated the system lock. The coffee machine The timer settings are deactivated. – switches on at a particular time, e.g. If the coffee machine has switched in the morning for breakfast ( Switch on... -
Page 54: Expert Mode
Settings Switch off after Expert mode See "Expert mode" for more timer function is Switch off after information about Expert mode. only available in Timer 1. Lighting If none of the sensors have been touched or a drink has not been made, You have the following options: the coffee machine will switch itself off –... -
Page 55: Info (Display Information)
Settings Info (display information) Water hardness In the option, the number of Please see "Using for the first time" for Info portions made for each drink can be information about water hardness. displayed. Display brightness You can also see how many portions You can set the display brightness can be dispensed before the machine using the bar chart. -
Page 56: Service
Settings Service Factory default setting You can reset the coffee machine to its Evaporating the coffee machine factory default settings. The coffee machine should be The number of drinks and the machine evaporated before it is stored for a long status (No. -
Page 57: Cleaning And Care
Cleaning and care Clean the coffee machine regularly to avoid a build-up of bacteria. Quick guide Recommended frequency What do I have to clean / maintain? Every day Water container (at the end of the day) Waste container Drip tray and grille Stainless steel milk flask Cup sensor Once a week... -
Page 58: Cleaning By Hand Or In The Dishwasher
Cleaning and care Cleaning by hand or in the Danger of burning and scalding dishwasher on hot components or by hot liquids. Always allow the coffee machine to The following must be cleaned by hand cool down before cleaning it. only: Caution: Water in the drip tray can –... - Page 59 Cleaning and care All surfaces are susceptible to scratching. Scratches on glass surfaces could even cause a breakage. Contact with unsuitable cleaning agents can discolour the surfaces. Wipe up any spillages or splashes of descaling agent immediately. To avoid damaging the surfaces of your coffee machine, do not use: –...
-
Page 60: Drip Tray And Waste Container
Cleaning and care Drip tray and waste container Clean the lower panel by hand only using hot water and a little washing- Danger of burning. up liquid. If the pipework has just been rinsed, All other parts are dishwasher safe. wait a while before removing the drip tray as the water used for rinsing will ... -
Page 61: Drip Tray Cover
Cleaning and care Drip tray cover Water container Remove the drip tray cover. Change the water every day to prevent a build-up of bacteria. The drip tray cover can be cleaned in the dishwasher, or by hand using hot Make sure that the valve, the water and a little washing-up liquid. -
Page 62: Central Spout With Integrated Cappuccinatore
Cleaning and care Central spout with integrated cappuccinatore With the exception of the stainless steel cover, all parts of the central spout should be cleaned in the dishwasher at least once a week. This will remove coffee and milk deposits effectively. Clean the stainless steel spout cover by hand only using hot water and a little washing-up liquid. - Page 63 Cleaning and care Clean all parts thoroughly. Replace the components of the central spout: Reassemble the dispensing unit. Push the spout nozzles firmly back onto the dispensing unit. Make sure that all parts are tightly connected to one another. ...
-
Page 64: Cup Sensor
Cleaning and care Cup sensor Stainless steel milk flask The cup sensor is located underneath The milk flask should be taken apart the central spout. and cleaned every day. Clean the cup sensor daily by hand Clean all parts by hand only using with warm water and a little washing-up hot water and a little washing-up liquid. -
Page 65: Milk Pipework
Cleaning and care Milk pipework Coffee bean container All parts of the milk system need to Danger of injury from the grinder. be cleaned thoroughly and regularly. Disconnect the coffee machine from Milk contains bacteria which the power supply before cleaning. proliferate rapidly with inadequate cleaning. -
Page 66: Ground Coffee Drawer
Cleaning and care Ground coffee drawer Clean the brew unit by hand only using hot water. Do not use Clean the ground coffee drawer and washing-up liquid or any other chute for ground coffee regularly, e.g. cleaning agent. The moving parts of when you degrease the brew unit. - Page 67 Cleaning and care Press the button under the handle of Wipe any remaining coffee off the the brew unit and, whilst doing so, two filters (see arrows). One filter is turn the handle anti-clockwise . located in the funnel and the other to the left of the funnel.
-
Page 68: Casing
Select sponge. Then dry all parts with a soft Maintenance cloth. You can now select a maintenance programme. Tip: You can also clean the appliance front with the Original Miele all purpose microfibre cloth. -
Page 69: Rinsing The Machine
Cleaning and care Rinsing the machine Rinsing the milk pipework After a coffee has been dispensed, the Milk residue can clog up the milk machine is rinsed before it switches off. pipework. If you have made a drink with This removes any residual coffee. milk, the coffee machine will rinse the milk pipework automatically after a few You can also rinse the milk pipework... -
Page 70: Cleaning The Milk Pipework
Miele coffee machines and prevents subsequent damage. The milk pipework cleaning agent is available to order from Miele or via the internet at www.miele-shop.com. maintenance Clean the milk pipework Place the container next to the programme lasts for approx. -
Page 71: Degreasing The Brew Unit
We recommend using Miele cleaning necessary. tablets to clean the brew unit. These have been specially developed for use with Miele coffee machines and prevent subsequent damage. Miele cleaning tablets can be ordered from Miele or www.miele-shop.com. The maintenance programme for degreasing the brew unit lasts for approx. -
Page 72: Descaling The Machine
Descaling the machine The coffee machine prompts you when Warning. When descaling the it needs to be descaled. Number of drinks machine, cover delicate surfaces until the machine must be descaled: 50 and natural flooring to prevent appears in the display. Each time a damage from splashes of descaling drink is made, the coffee machine solution. - Page 73 Carefully rinse the water container with clean water. Ensure that no Miele descaling tablets are available to descaling solution residue remains in order from Miele or via the internet at the water container. Fill the water www.miele-shop.com. container to the symbol with fresh, clean tap water.
- Page 74 Descaling the machine Descaling when not prompted by a message Start in the menu. Drinks Touch . The descaling process cannot be cancelled once it has started. The process has to be completed through to the end. Select and then Maintenance Descale...
-
Page 75: Problem Solving Guide
Follow the instructions which appear in the display to remedy the problem. If after this, the fault message appears in the display again, contact Miele. Message Cause and remedy F1, F2, There is an internal fault. - Page 76 Problem solving guide Message Cause and remedy F73 or The brew unit cannot be positioned correctly. Check the brew unit Switch the coffee machine off with the On/Off sensor . Remove and clean the brew unit (see "Cleaning and care –...
- Page 77 Problem solving guide Message Cause and remedy There is too much ready ground coffee in the ground Too much ground coffee coffee chute. If more than two level scoops of ground coffee is added to the coffee chute, the brew unit cannot process the coffee.
-
Page 78: Unusual Performance Of The Coffee Machine
Switch the coffee machine off at the wall socket and unplug it. Contact a qualified electrician or Miele. The coffee machine The switch-off time programmed using the timer has switches off suddenly. - Page 79 Problem solving guide Problem Cause and remedy The coffee machine The system lock has been activated. does not switch itself You need to deactivate the system lock (see on, although the Switch "Settings - System lock"). setting has been on at A day of the week has not been selected.
- Page 80 Problem solving guide Problem Cause and remedy The waste container is This is not a fault. full, although the drip The drip tray has probably been removed without the tray and waste waste container being emptied. container have been Removing the drip tray resets the internal counter for emptied following each emptying the waste container.
-
Page 81: Unsatisfactory Results
The coffee bean container has become empty during makes a louder noise the grinding process. than usual. Fill the container with fresh beans. There may be stones in amongst the coffee beans. Switch the coffee machine off immediately. Call Miele. - Page 82 Problem solving guide Problem Cause and remedy The crema on the The grinder setting is not correct. coffee or espresso is Set the grinder to a finer or coarser setting (see not as it should be. "Setting the coffee grinder"). The brewing temperature is too high for this type of coffee.
-
Page 83: Transporting The Machine
Transporting the machine If you are not going to use the coffee Clean the drip tray and waste machine for an extended period of time, container. e.g. whilst on holiday, or if it needs to The coffee machine is now ready to be be moved, a number of procedures will packed. -
Page 84: Packing The Machine
Transporting the machine Packing the machine The coffee machine should only be packed when it is clean and dry. Residues of coffee grounds can cause scratches on surfaces. Coffee and milk residues or water can cause a build-up of bacteria. Use the original packaging including polystyrene blocks to pack the coffee machine. -
Page 85: After Sales / Guarantee
– Miele. purchase. However, you must activate your cover by calling 0330 160 6640 or Contact details for Miele are given at registering online at www.miele.co.uk. the end of this booklet. N.B. A call-out fee will be charged for service visits... -
Page 86: Saving Energy
Saving energy If the settings of the following functions Switch the machine off with are altered from the factory default, the master switch and at the energy consumption will increase: wall socket. – Eco mode If the coffee machine is not going to be used for a longer period of time, e.g. -
Page 87: Electrical Connection
Electrical connection All electrical work should be carried out Do not connect the machine to an by a suitably qualified and competent inverter such as those used with an person only, in strict accordance with autonomous energy source e.g. solar current national and local safety power. -
Page 88: Installation
Installation If the machine is installed in a niche, the Danger of overheating niche must provide the following Please ensure that there is adequate minimum dimensions: ventilation around the machine. Do not cover the machine with tea Height 550 mm towels or similar objects whilst it is in Width 510 mm... -
Page 89: Dimensions
Dimensions... -
Page 90: Technical Data
Technical data Current draw in standby mode < 0.5 Watt (default setting) Pump pressure: max. 15 bar Through-flow heater: 1 stainless steel thermo block Dimensions (W x H x D): 311 x 397 x 445 mm Net weight 13 kg Connection cable length: 120 cm Water container... - Page 91 Citywest Business Campus, Dublin 24 Dubai Tel: (01) 461 07 10, Fax: (01) 461 07 97 Tel: +971-4-341 84 44 E-Mail: info@miele.ie, Internet: www.miele.ie Fax: +971-4-341 88 52 Manufacturer: Miele & Cie. KG E-Mail: info@miele.ae Internet: www.miele.ae Carl-Miele-Straße 29, 33332 Gütersloh, Germany...
- Page 92 CM7300 en – GB M.-Nr. 10 315 190 / 01...
Need help?
Do you have a question about the CM7300 and is the answer not in the manual?
Questions and answers