
Subscribe to Our Youtube Channel
Related Manuals for ATV IPEMB2FI


Summary of Contents for ATV IPEMB2FI
-
Page 1: Network Camera
INSTRUCTION MANUAL Full HD IR Network Camera Please read this manual thoroughly before use, and keep it handy for future reference. - Page 2 WARNING TO REDUCE THE RISK OF FIRE OR ELECTRIC SHOCK, DO NOT EXPOSE THIS PROCUCT TO RAIN OR MOISTURE. DO NOT INSERT ANY METALLIC OBJECT THROUGH THE VENTILATION GRILLS OR OTHER OPENNINGS ON THE EQUIPMENT. Apparatus shall not be exposed to dripping or splashing and that no objects filled with liquids, such as vases, shall be placed on the apparatus.
-
Page 3: Fcc Compliance Statement
1.1.1.1 FCC COMPLIANCE STATEMENT INFORMATION TO THE USER : THIS EQUIPMENT HAS BEEN TESTED AND FOUND TO COMPLY WITH THE LIMITS FOR A CLASS A DIGITAL DEVICE, PURSUANT TO PART 15 OF THE FCC RULES. THESE LIMITS ARE DESIGNED TO PROVIDE REASONABLE PROTECTION AGAINST HARMFUL INTERFERENCE WHEN THE EQUIPMENT IS OPERATED IN A COMMERCIAL ENVIRONMENT. -
Page 4: Important Safety Instructions
IMPORTANT SAFETY INSTRUCTIONS 1. Read these instructions. 2. Keep these instructions. 3. Heed all warnings. 4. Follow all instructions. 5. Do not use this apparatus near water. 6. Clean only with dry cloth. 7. Do not block any ventilation openings. Install in accordance with the manufacturer’s instructions. -
Page 5: Table Of Contents
Contents 1. Description ......................1 1.1 Components ................1 1.2 Key Features ................1 2. System Connection ....................2 2.1 Connection .................. 2 2.2 Network Connection and IP assignment ........5 3. Operation ....................... 6 3.1 Download and Install ActiveX ............ 6 3.2 User Login ................... - Page 6 3.5.5.1 User Management ............... 25 3.5.5.2 IEEE 802.1xs ................ 25 3.5.5.3 HTTPS Configure ..............26 3.5.5.4 RTSP Authentication ............26 3.5.5 System ..................27 3.5.5.1 Time Parameters ..............27 3.5.5.2 Device Information .............. 28 3.5.5.3 Maintenance ................ 28 3.5.5.4 Upgrade Device ..............29 3.5.5.5 Connection ................
-
Page 7: Description
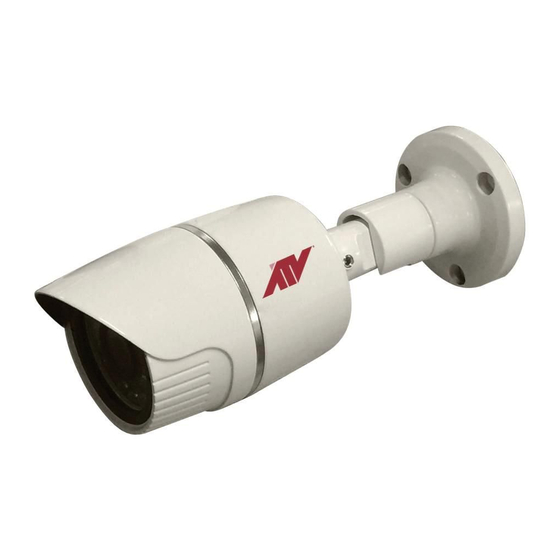
1. Description The Network Camera supports the network service for an image sensor with progressive scan, which can be monitored on a real-time screen regardless of distances and locations. By using its dedicated program, many users are able to have an access to the Network Camera at once or a single user can monitor various network cameras at the same time. -
Page 8: System Connection
Multi-language: Chinese, English, Japanese, Portuguese, Russian, Spanish 2. System Connection 2.1 Connection Connection Cable Name Description Power Cable Cable for Power source (DC 12V) Ethernet Cable Cable for Ethernet (POE) Name Description Lens Allows wide area to be monitored Power Cable Cable for Power source (DC 12V) Ethernet Cable... - Page 9 Camera Dimension Dimensions Unit: mm Base Installation Secure the camera to the wall or ceiling by the camera stand (individual purchase). Ceiling Mount Wall Mount...
- Page 10 Carefully remove the contents from the box, and verity that nothing was damaged in shipment. 1) Mark the screw hole positions on the ceiling or wall surface using the Template Sheet. 2) Disassemble the camera by removing the dome cover. 3) Mount the camera assembly using the Anchors (x2) and Screws (x2) to the surface of the ceiling or wall.
-
Page 11: Network Connection And Ip Assignment
2.2 Network Connection and IP assignment The Network Camera supports the operation through the network. When a camera is first connected to the network it has no assigned IP address. So, it is necessary to allocate an IP address to the device with the “Smart Manager”... -
Page 12: Operation
3. Operation The Network Camera can be used with Windows operating system and browsers. The recommended browsers are Internet Explorer, Safari, Firefox, Opera and Google Chrome with Windows. Note: To view streaming video in Microsoft Internet Explorer, set your browser to allow ActiveX controls. -
Page 13: User Login
3.2 User Login Reopen IE web browser after the ActiveX installation completes, input the IP address of IP Camera (192.168.1.10 by default) to enter into login page. Select the system language, input user name and password, then click [Login] button to enter the main interface. Note: The default user name is “admin”, the default password is blank. -
Page 14: Video Control
3.3.1 Video Control [Main / Sub Stream]: Select the stream according to the network environment: main stream is HD channel and sub stream is SD channel. [16:9 / 4:3]: Adjust the display scale. [Play]: Click button to open the current video. [Stop]: Click button to close the current video. -
Page 15: Configure
3.4 Configure Click [Configure] button in the menu bar to configure parameters. 3.4.1 Quick Setup Step 1: Time Parameters Set up the IP Camera’s date, time and current time zone, or click [Sync PC time] to sync system time with PC. Enable NTP Service and set its IP and port number, IP Camera will sync system time with NTP server. - Page 16 Set up appropriate stream parameters. Parameter Description Stream ID Main stream: HD channel. Sub stream: SD channel. Stream type Include Only Video and Video & Audio. Encode type Support the standard H.264 and M-JPEG video encoding. Frame rate Set the encoding frame numbers per second. The smaller frame interval, the higher image bitrate and the better Frame interval image quality you get.
- Page 17 Step 4: Network Parameters Set up the IP Camera’s port number. Set up its IP address, net mask and gateway. Please avoid conflict with the IP addresses of other devices or PC. If DHCP function of router and IP Camera is enabled, it will automatically obtain IP address from the router.
-
Page 18: Image
3.4.2 Image 3.4.2.1 ISP Configure [Brightness / Contrast / Hue / Saturation / Sharpness]: Drag the slider to adjust the brightness, contrast, hue, saturation and sharpness of video, range from 1 to 255. [DWDR]: Open this function to balance the contrast between light and dark areas within an image. User can see highlight areas (under strong light) and low-light areas (shadows, backlighting, etc) simultaneously, otherwise highlight areas display white and dark areas display black. -
Page 19: Privacy Regional
3.4.2.2 Privacy Regional [Enable]: Enable or disable privacy function. [Color]: Select the color overlay of privacy area. Enable privacy function, click and drag cursor to set the privacy area of video image. An image can be entirely or partially masked, it supports 4 areas at maximum. Click Clear all button to clear all privacy areas. -
Page 20: Day/Night Configure
Time [Enable]: Enable this function to display system time. [Color]: Select different colors for time display. The background color of time area which has a transparency of 30% will automatically adjust according to the character color. Text [Enable]: Enable this function to display text content. [Color]: Select different colors for text display. - Page 21 [Day/Night Switch Schedule]: Enable this function, user can set a daily schedule of switch. The start time should be earlier than the end time. You can copy and apply time settings to the other date or every day. Click OK button to save your settings, click Refresh button to update the schedule.
-
Page 22: Network
3.5.1 Network 3.5.1.1 Network Configure [Device Port]: Default value is 5000 (users are recommended not to change it). [Media Port]: Default value is 5005. [Web Port]: Default value is 80 (users are recommended not to change it). [RTSP Port]: Default value is 554 (users are recommended not to change it). [ONVIF Port]: Default value is 12001 (users are recommended not to change it). -
Page 23: Pppoe Configure
3.5.1.2 PPPoE Configure [Enable]: Enable or disable PPPoE dial-up function. [Dynamic IP]: Display the public IP Address after the success of dial-up. [Account/Password]: The account / password of ADSL dial-up, obtained from the internet service provider. [Dial]: Support PPPoE dialing with wired and wireless. Click OK button to save the setting. -
Page 24: E-Mail Configure
3.5.1.4 E-mail Configure [Enable]: Enable or disable E-mail notification function. [SSL]: Enable or disable mail encryption function. [SMTP server]: Outgoing Mail Server Address. Mail server addresses are different for different Email service providers, e.g. the SMTP server of 163.com is smtp.163.com, and the SMTP server of Gmail mailbox is smtp.gmail.com. -
Page 25: Ftp Configure
3.5.1.5 FTP Configure When an alarm is triggered, IP Camera will upload text messages and images to FTP server. [Enable]: Enable or disable FTP function. [Server address]: FTP server’s IP address or domain name, such as 192.168.1.119. [Port]: FTP server’s port number, the default value is 21. [User name/Password]: FTP server’s user name and password. -
Page 26: Alarm
3.5.2 Alarm 3.5.2.1 Motion Detection [Enable]: Enable or disable motion detection function. [Set Motion Area]: Click and drag cursor to set the area of motion detection in the video window. An image can be entirely or partially set, it supports 1 area for detection. [Sensitivity]: Set the sensitivity of motion detection: low, normal, high;... -
Page 27: I/O
5/10/30/60/120/300/600/900/1200/1800s. [Capture]: Linkage capture and store in the SD card when alarm is triggered. [E-mail]: Enable this function, the alarm information of motion detection will be sent to mailbox (refer to E-mail Configure). The notification email can contain text messages and images. [FTP]: Enable this function, the alarm information of motion detection will be saved in FTP Server. -
Page 28: Audio & Video
[FTP]: Enable this function, the information of I/O alarm will be saved in FTP Server. It can upload text messages and images. Click OK button to save the setting. When the setting is not saved, click Refresh button to return to the previously saved parameters;... -
Page 29: Roi Setting
3.5.3.2 ROI Setting Select a region needs to be processed, that is ROI (region of interest). User can set the main concern and the most interesting region on the video, and IP Camera will improve the corresponding region’s image quality while encoding. -
Page 30: Capture Configure
important information before alarm activation. This function can save pre-recording (usually is 6~7s) and improve monitoring system reliability, otherwise it only writes the current video data to SD card. [Stream ID]: The smaller record stream you set, the more video files are stored in SD card. Select a stream type for recording: main stream is HD channel, and sub stream is SD channel. -
Page 31: Security
3.5.5 Security 3.5.5.1 User Management Enter the new user's name and password, set the appropriate user right, then click [Add] button to add this user into the user list. Select a user in the user list, modify user information or right, and then click [Modify] button to confirm the changes. Select a user in the user list, click [Delete] button to delete this user. -
Page 32: Https Configure
Its work processes in the network video system are as follows: Step 1: IP Camera sends the network access request to switch or AP (Access Point); Step 2: Switch or AP sends this request to authentication server, such as RADIUS server (Remote Authentication Dial In User Service) - Microsoft Internet Authentication Service. -
Page 33: System
3.5.5 System 3.5.5.1 Time Parameters [Time Setting]: Manually set the date and time of IP Camera. [Sync PC time]: Click this button to sync system time with PC. [Time zone]: Set the current time zone. [Daylight Saving Time]: User can enable DST function, and set start & end time and shift time. [NTP Service]: Enable this function, IP Camera will sync system time with NTP server according to the time zone;... -
Page 34: Device Information
3.5.5.2 Device Information [Device information]: Self-define device name and channel name displayed in the search list while searching for devices. They support 24 characters (only contain Chinese characters, letters, numbers and underline). [Running State]: View CPU and memory utilization, running time and hard disk space. [Version]: View the version number, WEB version number, ONVIF version number, build date and core version number. -
Page 35: Upgrade Device
[Auto Maintenance]: User can enable the timing reboot function of IP Camera, and set reboot date and time. [Device Restart]: Click [Device Restart] button to pop up a dialog box, then click OK button to restart IP Camera. [Restore]: Click [Factory Default] button to pop up a warning window, then click OK button to restore factory settings and restart the device automatically. -
Page 36: Connection
3.5.5.5 Connection In this interface, user can view all user information. Click “Refresh” button to refresh the online user list. User can preview and configure device remotely through IE web browser, ISS, ISS Mobile and other client. Clicking “Disconnected” button can take the client offline. 3.5.6 Local Configure [Protocol]: Support TCP, UDP and multicast network protocol. -
Page 37: Log
[Display mode]: Select the video display mode. Two options: full of window and original proportion. [Length of recording file time]: Select the recording time for each local recording file. Click OK button to save the setting. When the setting is not saved, click Refresh button to return to the previously saved parameters;... - Page 38 Production Specifications Main Item Specification 1/2.7” Progressive scan CMOS Image sensor Active Array 1920(H) x 1080(V) Lens Fixed 3.6mm Lens, F1.8 Angle of View 90.0°(H) x 50.0(V) IR Distance 20m (with built-in 24 IR LEDs) Min. illumination Color: 0.2Lux, B/W: 0.0Lux (F1.8, 50IRE with IR On) Shutter Speed 1/20,000 ~ 1/30 (Slow shutter 1/15, 1/8 and 1/4) D-WDR, 3D-DNR &...
Need help?
Do you have a question about the IPEMB2FI and is the answer not in the manual?
Questions and answers