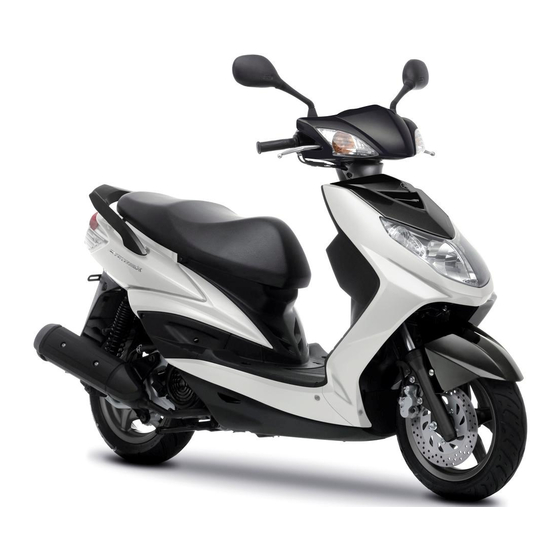
Yamaha Cygnus-X XC125 Owner's Manual
Hide thumbs
Also See for Cygnus-X XC125:
- Owner's manual (76 pages) ,
- Owner's manual (76 pages) ,
- Service manual (175 pages)

Related Manuals for Yamaha Cygnus-X XC125


Summary of Contents for Yamaha Cygnus-X XC125
- Page 1 Read this manual carefully before operating this vehicle. OWNER’S MANUAL XC125 4P9-F8199-E5...
- Page 2 EAU46090 Q Read this manual carefully before operating this vehicle. This manual should stay with this vehicle if it is sold.
- Page 3 Welcome to the Yamaha world of motorcycling! As the owner of the XC125, you are benefi ting from Yamaha’s vast experience and newest technology regarding the de- sign and manufacture of high-quality products, which have earned Yamaha a reputation for dependability.
- Page 4 IMPORTANT MANUAL INFORMATION EAU10133 Particularly important information is distinguished in this manual by the following notations: This is the safety alert symbol. It is used to alert you to potential personal injury hazards. Obey all safety messages that follow this symbol to avoid possible injury or death.
- Page 5 IMPORTANT MANUAL INFORMATION EAUT1390 XC125 OWNER’S MANUAL ©2011 by Yamaha Motor Taiwan Co., Ltd. 1st edition, October 2011 All rights reserved. Any reprinting or unauthorized use without the written permission of Yamaha Motor Taiwan Co., Ltd. is expressly prohibited. Printed in Taiwan.
-
Page 6: Table Of Contents
TABLE OF CONTENTS SAFETY INFORMATION ....1-1 OPERATION AND IMPORTANT RIDING Adjusting the rear brake lever free Further safe-riding points ....1-5 POINTS ..........5-1 play ..........6-18 Starting the engine ......5-1 Checking the front brake pads and DESCRIPTION ........2-1 Starting off ........ - Page 7 TABLE OF CONTENTS Storage ..........7-4 SPECIFICATIONS ......8-1 CONSUMER INFORMATION ..... 9-1 Identifi cation numbers ...... 9-1...
-
Page 8: Safety Information
SAFETY INFORMATION SAFETY INFORMATION EAU10269 sure it is in safe operating condition. • Ride where other motorists can Be a Responsible Owner Failure to inspect or maintain the ve- see you. Avoid riding in another As the vehicle’s owner, you are re- hicle properly increases the possibility motorist’s blind spot. - Page 9 SAFETY INFORMATION • Always obey the speed limit off-road use. ● A passenger should also observe and never travel faster than the above precautions. warranted by road and traffic Protective Apparel conditions. The majority of fatalities from scooter Avoid Carbon Monoxide Poisoning •...
- Page 10 Yamaha accessories, which are avail- as possible on both sides of the and handling if the weight distribution able only from a Yamaha dealer, have scooter to minimize imbalance or of the scooter is changed. To avoid been designed, tested, and approved instability.
- Page 11 If electrical ac- ucts similar in design and quality to dlebar or the front fork area can cessories exceed the capacity of genuine Yamaha accessories, recog- create instability due to improp- the scooter’s electrical system, an nize that some aftermarket accesso-...
-
Page 12: Further Safe-Riding Points
SAFETY INFORMATION EAU10373 bed, and choke it in a rail to pre- ● Slow down as you approach Further safe-riding points vent movement. a corner or turn. Once you have ● Be sure to signal clearly when ● Secure the scooter with tie-downs completed a turn, accelerate making turns. - Page 13 SAFETY INFORMATION load will affect the stability of the scooter and could divert your at- tention from the road. (See page 1-1.)
-
Page 14: Description
EAU10401 EAU10401 DESCRIPTION DESCRIPTION EAU10410 Left view 1. Fuel tank cap (page 3-7) 2. Rear storage compartment (page 3-10) 3. Rear turn signal light (page 6-28) 4. Tail/brake light (page 6-28) 5. Kickstarter (page 3-9) 6. Air fi lter (page 6-13) -
Page 15: Right View
EAU10401 DESCRIPTION EAU10420 Right view 1. Battery (page 6-24) 2. Front turn signal light (page 6-28) 3. Auxiliary light bulb (page 6-29) 4. Headlight (page 6-27) 5. Centerstand (page 6-22) -
Page 16: Controls And Instruments
EAU10401 DESCRIPTION EAU10430 Controls and instruments 1. Rear brake lever (page 3-6) 2. Left handlebar switches (page 3-5) 3. Speedometer (page 3-3) 4. Multi-function display (page 3-3) 5. Front brake lever (page 3-6) 6. Right handlebar switch (page 3-5) 7. Main switch/steering lock (page 3-1) -
Page 17: Instrument And Control Functions
EAU1044E EAU1044E INSTRUMENT AND CONTROL FUNCTIONS INSTRUMENT AND CONTROL FUNCTIONS EAU45440 EAU10683 Main switch/steering lock LOCK The headlight comes on automatically The steering is locked, and all electri- when the engine is started and stays cal systems are off. The key can be on until the key is turned to “OFF”... -
Page 18: Keyhole Cover
EAU1044E INSTRUMENT AND CONTROL FUNCTIONS EAUT2111 EAU11006 To unlock the steering Keyhole cover Indicator and warning lights RESET SELECT ZAUM00** 1. Turn. ZAUM00** ZAUM00** 2. Release. 1. Keyhole cover lever 1. High beam indicator light “&” 2. Turn signal indicator light “5” Push the key in, and then turn it to To open the keyhole cover 3. -
Page 19: Speedometer
If the warning light does not come of an accident. on initially when the key is turned to “ON”, or if the warning light remains ZAUM00** on, have a Yamaha dealer check the 1. Speedometer electrical circuit. The speedometer shows the riding RESET speed. -
Page 20: Instrument And Control Functions
If the odometer indicates “-----”, have ● a fuel meter km (1800 mi) thereafter to indicate a Yamaha dealer check the multi- that the engine oil should be changed. function display, as it may be faulty. After changing the engine oil, reset the oil change tripmeter. -
Page 21: Handlebar Switches
Left ● If the oil change tripmeter in- of fuel in the fuel tank. The display dicates “-----”, have a Yamaha segments of the fuel meter disappear dealer check the multi-function towards “E” (Empty) as the fuel level display, as it may be faulty. -
Page 22: Front Brake Lever
EAU1044E INSTRUMENT AND CONTROL FUNCTIONS EAU12400 EAU12900 EAU12950 Dimmer switch “&/%” Front brake lever Rear brake lever Set this switch to “&” for the high beam and to “%” for the low beam. EAU12460 Turn signal switch “4/6” To signal a right-hand turn, push this switch to “6”. -
Page 23: Fuel Tank Cap
EAU1044E INSTRUMENT AND CONTROL FUNCTIONS EAU13074 EAU13221 Fuel tank cap Fuel The fuel tank cap cannot be closed unless the key is in the lock. In addi- To open the fuel tank cap tion, the key cannot be removed if the Open the fuel tank cap lock cover, cap is not properly closed and locked. - Page 24 4. Be sure to securely close the fuel system. tank cap. EWA15151 Your Yamaha engine has been de- WARNING signed to use regular unleaded gaso- Gasoline is poisonous and can line with a research octane number of cause injury or death.
-
Page 25: Catalytic Converters
EAU1044E INSTRUMENT AND CONTROL FUNCTIONS EAU13445 ECA10701 EAU13680 Catalytic converters Kickstarter NOTICE This vehicle is equipped with catalytic Use only unleaded gasoline. The converters in the exhaust system. use of leaded gasoline will cause EWA10862 unrepairable damage to the cata- WARNING lytic converter. -
Page 26: Seat
EAU1044E INSTRUMENT AND CONTROL FUNCTIONS EAUT1503 EAUT1713 3. Fold the seat up. Seat Storage compartments To close the seat To open the seat Front storage compartment 1. Fold the seat down, and then 1. Place the scooter on the center- push it down to lock it in place. -
Page 27: Sidestand
EAU1044E INSTRUMENT AND CONTROL FUNCTIONS EAU15305 Rear storage compartment ● To avoid humidity from spread- Sidestand ing through the rear storage compartment, wrap wet articles in a plastic bag before storing them in the compartment. ● Since the rear storage com- partment may get wet while the scooter is being washed, wrap any articles stored in the rear... -
Page 28: Ignition Circuit Cut-Off System
The engine will tand before starting off. Therefore, start. check this system regularly and have a Yamaha dealer repair it if it does not function properly. Put the sidestand down. If the engine stalls: The sidestand switch is OK. -
Page 29: For Your Safety - Pre-Operation Checks
Failure to inspect or maintain the vehicle properly increases the possibility of an accident or equipment dam- age. Do not operate the vehicle if you fi nd any problem. If a problem cannot be corrected by the procedures pro- vided in this manual, have the vehicle inspected by a Yamaha dealer. - Page 30 • Make sure that operation is smooth. • Check throttle grip free play. Throttle grip 6-15, 6-21 • If necessary, have Yamaha dealer adjust throttle grip free play and lubricate cable and grip housing. • Check for damage. • Check tire condition and tread depth.
- Page 31 • Tighten if necessary. Instruments, lights, signals • Check operation. 3-2~3-5 and switches • Correct if necessary. • Check operation of ignition circuit cut-off system. Sidestand switch 3-11 • If system is not working correctly, have Yamaha dealer check vehicle.
-
Page 32: Operation And Important Riding Points
For maximum engine life, never ac- If there is a control or function you NOTICE celerate hard when the engine is do not understand, ask your Yamaha See page 5-3 for engine break-in cold! dealer. instructions prior to operating the EWA10271 vehicle for the fi... -
Page 33: Starting Off
EAU15943 OPERATION AND IMPORTANT RIDING POINTS EAU16761 EAU16780 EAU16793 Starting off Acceleration and decelera- Braking tion EWA10300 WARNING ● Avoid braking hard or sud- Before starting off, allow the engine to denly (especially when leaning warm up. over to one side), otherwise the scooter may skid or overturn. -
Page 34: Tips For Reducing Fuel Consumption
If any engine trouble should occur After every hour of operation, stop the during the engine break-in period, immediately have a Yamaha dealer engine, and then let it cool for fi ve to check the vehicle. ten minutes. Vary the engine speed from time to time. -
Page 35: Parking
EAU15943 OPERATION AND IMPORTANT RIDING POINTS EAU17213 Parking When parking, stop the engine, and then remove the key from the main switch. EWA10311 WARNING ● Since the engine and exhaust system can become very hot, park in a place where pedestri- ans or children are not likely to touch them and be burned. -
Page 36: Periodic Maintenance And Adjustment
(if applica- your risk of injury or death during muddy or wet conditions, the air ble). Yamaha dealers are trained and service or while using the vehicle. fi lter element should be cleaned or... -
Page 37: Owner's Tool Kit
EAU1722A PERIODIC MAINTENANCE AND ADJUSTMENT EAU17521 have a Yamaha dealer perform it for Owner’s tool kit you. ZAUM00** 1. Owner’s tool kit The owner’s tool kit is located inside the storage compartment under the seat. (See page 3-10.) The service information included in this manual and the tools provided in the owner’s tool kit are intended to as-... -
Page 38: Periodic Maintenance Chart For The Emission Control System
● From 30000 km (17500 mi), repeat the maintenance intervals starting from 6000 km (3500 mi). ● Items marked with an asterisk should be performed by a Yamaha dealer as they require special tools, data and technical skills. EAU46920 Periodic maintenance chart for the emission control system... -
Page 39: General Maintenance And Lubrication Chart
EAU1722A PERIODIC MAINTENANCE AND ADJUSTMENT EAU17717 General maintenance and lubrication chart ODOMETER READING ANNUAL ITEM CHECK OR MAINTENANCE JOB 1000 km 6000 km 12000 km 18000 km 24000 km CHECK (600 mi) (3500 mi) (7000 mi) (10500 mi) (14000 mi) √... -
Page 40: Periodic Maintenance And Adjustment
EAU1722A PERIODIC MAINTENANCE AND ADJUSTMENT ODOMETER READING ANNUAL ITEM CHECK OR MAINTENANCE JOB 1000 km 6000 km 12000 km 18000 km 24000 km CHECK (600 mi) (3500 mi) (7000 mi) (10500 mi) (14000 mi) Rear brake lever pivot √ √ √... - Page 41 EAU1722A PERIODIC MAINTENANCE AND ADJUSTMENT EAUT2710 ● Air fi lter and V-belt fi lter • This model’s air fi lter is equipped with a disposable oil-coated paper element, which must not be cleaned with compressed air to avoid damaging it. •...
-
Page 42: Removing And Installing Panels
EAU1722A PERIODIC MAINTENANCE AND ADJUSTMENT EAU18771 EAUT1882 Panel B Removing and installing pan- Panel A To remove the panel To remove the panel Remove the screws, and then take Remove the screws, and then take The panels shown need to be re- the panel off. -
Page 43: Checking The Spark Plug
EAU1722A PERIODIC MAINTENANCE AND ADJUSTMENT EAUT1835 Panel C Panel D Checking the spark plug To remove the panel To remove the panel The spark plug is an important engine Remove the screws, and then take 1. Open the seat. (See page 3-10.) component, which is easy to check. - Page 44 Do not attempt to diagnose such problems yourself. Spark plug gap: Instead, have a Yamaha dealer check 0.7 ~ 0.8 mm (0.028 ~ 0.031 in) the vehicle. 2. Clean the surface of the spark plug gasket and its mating sur- 2.
-
Page 45: Engine Oil And Oil Strainer
EAU1722A PERIODIC MAINTENANCE AND ADJUSTMENT EAUT1352 off. Engine oil and oil strainer 2. Place an oil pan under the engine The engine oil should be between the T h e e n g i n e o i l l e v e l s h o u l d b e to collect the used oil. - Page 46 EAU1722A PERIODIC MAINTENANCE AND ADJUSTMENT and then tighten the drain bolts to beled “ENERGY CONSERVING the specifi ed torque. II” or higher. ● Be sure no foreign material en- Tightening torque: ters the crankcase. Engine oil drain bolt A: 20 Nm (2.0 m·kgf, 14.5 ft·lbf) 8.
-
Page 47: Final Transmission Oil
The final transmission case must be checked for oil leakage before each ride. If any leakage is found, have a Yamaha dealer check and repair the scooter. In addition, the fi nal transmis- sion oil must be changed as follows at... -
Page 48: Air Fi Lter And V-Belt Case Air Fi Lter Elements
EAU1722A PERIODIC MAINTENANCE AND ADJUSTMENT EAUT3120 2. Remove the air filter case cover Air filter and V-belt case air Recommended final transmission by removing the screws. fi lter elements oil: 2(✕6) See page 8-1. The air filter and V-belt case air filter Oil quantity: elements should be cleaned at the in- 0.11 L (0.12 US qt, 0.10 Imp.qt) - Page 49 EAU1722A PERIODIC MAINTENANCE AND ADJUSTMENT Cleaning the air fi lter check hoses Cleaning the V-belt case air filter 3. Pull the air fi lter element out, and 1. Check the hoses on the front and element then clean it with solvent. After rear side of the air filter case for 1.
-
Page 50: Checking The Throttle Grip Free Play
Periodi- Recommended oil: ance must be adjusted by a Yamaha cally check the throttle grip free play Yamaha foam air filter oil or other dealer at the intervals specifi ed in the and, if necessary, have a Yamaha quality foam air fi... -
Page 51: Tires
EAU1722A PERIODIC MAINTENANCE AND ADJUSTMENT EAUT2142 proved for this model. Tire inspection Tires To maximize the performance, dura- bility, and safe operation of your ve- Tire air pressure (measured on cold hicle, note the following points regard- tires): Up to 90 kg (198 lb): ing the specifi... -
Page 52: Cast Wheels
Yamaha Motor Co., Ltd. ● T h e w h e e l r i m s s h o u l d b e... -
Page 53: Checking The Brake Lever Free Play
Checking the brake lever free Adjusting the rear brake lever play free play There should be no free play at the brake lever end. If there is free play, have a Yamaha dealer inspect the brake system. EWA14211 ZAUM00** WARNING 1. Adjusting nut... -
Page 54: Checking The Front Brake Pads And Rear Brake Shoes
EAU1722A PERIODIC MAINTENANCE AND ADJUSTMENT EAU22380 EAU32345 disappeared, have a Yamaha dealer Checking the front brake Checking the brake fl uid level replace the brake pads as a set. pads and rear brake shoes EAU22540 The front brake pads and the rear... -
Page 55: Changing The Brake Fl Uid
fl uid level goes down suddenly, have the oil seals of the brake master cyl- fluid; otherwise, the rubber a Yamaha dealer check the cause be- inder and caliper as well as the brake seals may deteriorate, causing fore further riding. -
Page 56: Checking And Lubricating The Cables
In addition, the cable should be lubri- the cables and cable ends should be cated by a Yamaha dealer at the inter- lubricated if necessary. If a cable is vals specified in the periodic mainte- damaged or does not move smoothly, nance chart. -
Page 57: Checking And Lubricating The Centerstand And Sidestand
If the centerstand or sidestand d o e s n o t m o v e u p a n d d o w n smoothly, have a Yamaha dealer check or repair it. Otherwise, the centerstand or sidestand could... -
Page 58: Checking The Front Fork
[EWA10751] face and hold it in an upright 2. Hold the lower ends of the front have a Yamaha dealer check or re- position. WARNING! To avoid pair it. fork legs and try to move them injury, securely support the ve- forward and backward. -
Page 59: Checking The Wheel Bearings
If there is play in the wheel hub or if the wheel does not turn smoothly, have a Yamaha dealer check the wheel bearings. ZAUM00** ZAUM00** 1. - Page 60 To charge the battery more than two months, check it sulfuric acid, which causes se- Have a Yamaha dealer charge the at least once a month and fully vere burns. Avoid any contact battery as soon as possible if it seems charge it if necessary.
-
Page 61: Replacing The Fuses
4. If the fuse immediately blows age rating than recommended again, have a Yamaha dealer to avoid causing extensive check the electrical system. damage to the electrical sys- tem and possibly a fire. -
Page 62: Replacing The Headlight Bulb
4. Unhook the headlight bulb holder, 7. Install the panel. off any dirt and fi ngerprints on the and then remove the burnt-out 8. Have a Yamaha dealer adjust the headlight bulb using a cloth moist- bulb. headlight beam if necessary. -
Page 63: Replacing A Front Turn Signal Light Bulb
ECA10670 6. Install the socket (together with NOTICE the bulb) by turning it clockwise. It is advisable to have a Yamaha 7. Install the panel. dealer perform this job. 1. Place the scooter on the center- stand. 2. Remove panel A. (See page 6-7.) 3. -
Page 64: Replacing An Auxiliary Light Bulb
2. Remove the auxiliary light socket ment parts. Imitation parts may look (together with the bulb) by turning like Yamaha parts, but they are often it counterclockwise. inferior, have a shorter service life and 3. Remove the burnt out bulb by can lead to expensive repair bills. - Page 65 EAU1722A PERIODIC MAINTENANCE AND ADJUSTMENT the area, including pilot lights from water heaters or furnaces. Gasoline or gasoline vapors can ignite or explode, causing severe injury or property damage. 6-30...
-
Page 66: Troubleshooting Chart
Remove the spark plug and check the electrodes. The engine does not start. Have a Yamaha dealer check the vehicle. Check the battery. 4. Battery The engine turns over The battery is good. -
Page 67: Scooter Care And Storage
Be able. Rust and corrosion can develop Cleaning sure to consult a Yamaha dealer for even if high-quality components are ECA10783 advice on what products to use be- NOTICE used. - Page 68 EAU25991 SCOOTER CARE AND STORAGE with water, diluted mild deter- c l e a n e r s o r h a r d s p o n g e s rosive in combination with water, carry gent with water may be used. as they will cause dulling or out the following steps after each ride Be sure to rinse off any deter-...
- Page 69 WARNING Contaminants on the brakes or tires can cause loss of control. ● Consult a Yamaha dealer for ad- ● Make sure that there is no oil vice on what products to use. or wax on the brakes or tires.
-
Page 70: Storage
EAU25991 SCOOTER CARE AND STORAGE EAU36563 2. Fill up the fuel tank and add fuel gine over. [EWA10951] Storage stabilizer (if available) to prevent 4. Lubricate all control cables and Short-term the fuel tank from rusting and the the pivoting points of all levers Always store your scooter in a cool, fuel from deteriorating. - Page 71 EAU25991 SCOOTER CARE AND STORAGE Make any necessary repairs before storing the scooter.
-
Page 72: Specifications
SPECIFICATIONS SPECIFICATIONS Engine oil Fuel tank capacity EAU50915 Recommended brand 7.4 L (1.96 US gal, 1.63 Imp.gal) Dimensions YAMALUBE Throttle body Overall length Type 1855 mm (73.0 in) ID mark SAE 10W-30, 10W-40, 10W-50, 15W-40, Overall width 4P91 20W-40 or 20W-50 685 mm (27.0 in) Manufacturer 10 30 50 70 90 110... - Page 73 SPECIFICATIONS Size Rear wheel Charging system 110/70-12 AC magneto Wheel type Manufacturer/model Battery Cast wheel CHENG SHIN / C-992N Rim size Model Rear tire J12 X MT3.00 MF (YT7B-BS) Type Front brake Voltage, capacity Tubeless 12 V, 6.5 Ah Type Size Headlight Single disc brake...
- Page 74 SPECIFICATIONS Signaling system fuse 15.0 A Ignition fuse 7.5 A Backup fuse 7.5 A Spare fuse 20.0 A x 1 Spare fuse 7.5 A x 1 Spare fuse 15.0 A x 1...
-
Page 75: Consumer Information
Record the vehicle identifi cation num- ber and model label information in the spaces provided below for assis- tance when ordering spare parts from a Yamaha dealer or for reference in case the vehicle is stolen. VEHICLE IDENTIFICATION NUM- BER:... - Page 76 INDEX Starting the engine ........5-1 Start switch ..........3-6 Acceleration and deceleration ....5-2 Handlebar switches ........3-5 Steering, checking ........6-23 Air fi lter and V-belt case air fi lter Headlight bulb, replacing ......6-27 Storage ............. 7-4 elements ..........
- Page 77 INDEX...
- Page 78 INDEX...
- Page 79 INDEX...
- Page 80 PRINTED IN TAIWAN 2011.10-0.8 × 1 !