Table of Contents
Advertisement
Advertisement
Table of Contents

Subscribe to Our Youtube Channel
Related Manuals for AEG 47102V-MN


Summary of Contents for AEG 47102V-MN
- Page 1 User Manual 47102V-MN Cooker...
-
Page 2: Table Of Contents
14. ENERGY EFFICIENCY....................26 FOR PERFECT RESULTS Thank you for choosing this AEG product. We have created it to give you impeccable performance for many years, with innovative technologies that help make life simpler features you might not find on ordinary appliances. Please spend a few minutes reading to get the very best from it. -
Page 3: Safety Information
ENGLISH SAFETY INFORMATION Before the installation and use of the appliance, carefully read the supplied instructions. The manufacturer is not responsible if an incorrect installation and use causes injuries and damages. Always keep the instructions with the appliance for future reference. -
Page 4: Safety Instructions
Do not use a steam cleaner to clean the appliance. • Metallic objects such as knives, forks, spoons and lids • should not be placed on the hob surface since they can get hot. If the glass ceramic surface / glass surface is cracked, •... -
Page 5: Electrical Connection
ENGLISH • Parts of the appliance carry current. fuses removed from the holder), earth Close the appliance with furniture to leakage trips and contactors. prevent touching the dangerous • The electrical installation must have parts. an isolation device which lets you •... -
Page 6: Care And Cleaning
• Open the appliance door carefully. Disconnect the mains plug from the The use of ingredients with alcohol mains socket. can cause a mixture of alcohol and air. • Make sure the appliance is cold. There is the risk that the glass panels WARNING! can break. -
Page 7: Product Description
ENGLISH 2.7 Service • Disconnect the appliance from the mains supply. • To repair the appliance contact an • Cut off the mains cable and discard it. Authorised Service Centre. • Remove the door catch to prevent • Use original spare parts only. children and pets to get closed in the appliance. -
Page 8: Before First Use
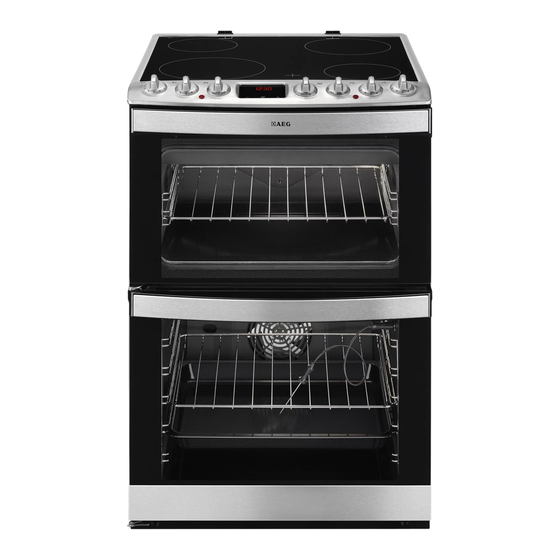
3.3 Cooker control panel Knobs for the hob Knob for the top oven functions Electronic programmer Knob for the main oven functions Knob for the main oven temperature Temperature lamp / symbol / indicator for the main oven Temperature lamp / symbol / indicator for the top oven 3.4 Accessories... -
Page 9: Hob - Daily Use
ENGLISH 4. Let the appliance operate for 15 Preheat the two ovens. Heat minutes. up one oven at a time. 5. Set the function and the Set the functions listed maximum temperature. below, if applicable. 6. Let the appliance operate for 15 minutes. -
Page 10: Hob - Care And Cleaning
6.2 Examples of cooking applications The data in the table is for guidance only. Heat setting Use to: Time Hints (min) Keep cooked food warm. as nec- Put a lid on the cookware. essary 1 - 2 Hollandaise sauce, melt: but- 5 - 25 Mix from time to time. -
Page 11: Oven - Daily Use
ENGLISH • Remove when the hob is sufficiently some detergent. After cleaning, rub cool: limescale rings, water rings, fat the hob dry with a soft cloth. stains, shiny metallic discoloration. Clean the hob with a moist cloth and 8. OVEN - DAILY USE 1. -
Page 12: Cooling Fan
8.3 Main oven functions Symbol Oven function Application Off position The appliance is off. Oven Lamp To activate the lamp without a cooking function. Full Grill To grill flat food and to toast bread. Conventional Cooking To bake and roast food on 1 shelf position. -
Page 13: Oven - Clock Functions
ENGLISH 1. Put the trivet into the deep pan so that the supports of the wire shelf point up. • All accessories have small indentations at the top of 2. Put the deep pan into the oven on the right and left side to the necessary shelf position. - Page 14 9.2 Buttons Button Function Description MINUS To set the time. CLOCK To set a clock function. PLUS To set the time. 9.3 Clock functions table Clock function Application Time of day To set, change or check the time of day.
-
Page 15: Oven - Hints And Tips
ENGLISH 10. OVEN - HINTS AND TIPS before. Adapt your usual settings WARNING! (temperature, cooking times) and Refer to Safety chapters. shelf positions to the values in the tables. The temperature and baking • The manufacturer recommends that times in the tables are you use the lower temperature the guidelines only. - Page 16 Baking results Possible cause Remedy The cake is too dry. The baking time is too long. The next time you bake, set a shorter baking time. The cake browns unevenly. The oven temperature is too Set a lower oven tempera-...
-
Page 17: Main Oven
ENGLISH Food Temperature (°C) Time (min) Shelf posi- tion Milk Puddings 150 - 170 90 - 120 Pasta Lasagne etc. 170 - 180 40 - 50 Pastry: Choux 180 - 190 30 - 40 Pastry: Eclairs, Profiteroles 180 - 190 30 - 40 Pastry: Flaky / Puff Pies 210 - 220... - Page 18 Food Temperature Time (min) Shelf posi- (°C) tion Fruit Pies, Crumbles 180 - 200 30 - 50 Milk Puddings 150 - 170 60 - 90 Pastry: Choux 180 - 190 30 - 40 Pastry: Shortcrust 190 - 200 25 - 35...
- Page 19 ENGLISH Food Temperature (°C) Time (min) Shelf posi- tion Fish 160 - 180 30 - 40 Fruit Pies, Crumbles 170 - 180 30 - 50 Milk Puddings 140 - 160 60 - 90 Pastry: Choux 180 - 190 30 - 40 Pastry: Shortcrust 180 - 190 25 - 35...
- Page 20 10.10 Thermaflow® or Conventional Cooking - Main Oven Roasting Food Temperature (°C) Time (min) Beef / Beef boned 170 - 190 20 - 35 minutes per 0.5 kb (1 lb) and 20 - 30 mi-...
-
Page 21: Oven - Care And Cleaning
ENGLISH Food Time (min) Shelf position Chops - Lamb 15 - 25 2 - 3 Chops - Pork 20 - 25 2 - 3 Fish - Whole / Trout / Makarel 10 - 12 Fillets - Plaice / Cod 4 - 6 Kebabs 12 - 18 2 - 3... - Page 22 2. Pull the rear end of the shelf support Spots or discolouration of away from the side wall and remove the catalytic surface have no effect on catalytic properties. WARNING! Keep children away when you clean the oven at a high temperature.
-
Page 23: Troubleshooting
ENGLISH 11.7 Replacing the lamp To install the panels, do the same steps in reverse. Put a cloth on the bottom of the interior of the appliance. It prevents damage to 11.6 Removing and cleaning the lamp glass cover and the cavity. the door glasses - main oven WARNING! The door glass in your... - Page 24 12.1 What to do if... Problem Possible cause Remedy You cannot activate the ap- The appliance is not connec- Check if the appliance is cor- pliance. ted to an electrical supply or rectly connected to the elec- it is connected incorrectly.
-
Page 25: Installation
ENGLISH 13. INSTALLATION Use small feet on the bottom of WARNING! appliance to set the appliance top Refer to Safety chapters. surface level with other surfaces. 13.1 Technical data 13.4 Anti-tilt protection Adjust the appliance to the correct Dimensions height and put it in the correct area before you attach the anti-tilt protection. -
Page 26: Energy Efficiency
This appliance is supplied without a main plug or a main cable. 13.6 Covering terminal board 14. ENERGY EFFICIENCY 14.1 Product information for hob according to EU 66/2014 Model identification 47102V-MN Type of hob Hob inside Freestanding Cooker Number of cooking zones Heating technology Radiant Heater... - Page 27 • If it is possible, always put the lids on the cookware. 14.3 Product Fiche and information for ovens according to EU 65-66/2014 Supplier's name Model identification 47102V-MN Top oven: 105.6 Energy Efficiency Index Main oven: 105.9 Top oven: A Energy efficiency class...
-
Page 28: Environment Concerns
EN 60350-1 - Household electric cooking – When the cooking duration is appliances - Part 1: Ranges, ovens, steam longer than 30 minutes, reduce ovens and grills - Methods for measuring the oven temperature to performance. minimum, 3 - 10 minutes before the end of the cooking time, 14.4 Oven - Energy saving... - Page 29 ENGLISH...
- Page 30 www.aeg.com...
- Page 31 ENGLISH...
- Page 32 www.aeg.com/shop...
Need help?
Do you have a question about the 47102V-MN and is the answer not in the manual?
Questions and answers