Motorola AP7131 Installation Manual
Ap7131 series
Hide thumbs
Also See for AP7131:
- Product reference manual (694 pages) ,
- Installation manual (58 pages) ,
- Brochure (12 pages)
Table of Contents
Advertisement
Advertisement
Table of Contents

Related Manuals for Motorola AP7131


Summary of Contents for Motorola AP7131
- Page 1 AP7131 Series Access Point INSTALLATION GUIDE...
- Page 2 AP7131 Series Access Point Zebra and the Zebra head graphic are registered trademarks of ZIH Corp. The Symbol logo is a registered trademark of Symbol Technologies, Inc., a Zebra Technologies company. © 2015 Symbol Technologies, Inc.
-
Page 3: Table Of Contents
4.3 Electrical Specifications ........38 4.4 AP7131 Radio Specifications ....... 38 4.5 AP7131N Radio Specifications . - Page 4 6.0 Support ........... 48 7.0 Symbol Technologies End-User Software License Agreement . . 49 8.0 AP7131 Series Access Point China ROHS Compliance ..56...
-
Page 5: Introduction
Installation Guide Introduction As a standalone Access Point, an AP7131 series Access Point provides small and medium-sized businesses with a consolidated wired and wireless networking infrastructure, all in a single device. The integrated router, gateway, firewall, DHCP and Power-over-Ethernet (PoE) simplify and reduce the costs associated with networking by eliminating the need to purchase and manage multiple pieces of equipment. -
Page 6: Warnings
AP7131 Series Access Point 1.2 Warnings • Read all installation instructions and site survey reports, and verify correct equipment installation before connecting the Access Point to its power source. • Remove jewelry and watches before installing this equipment. • Verify the unit is grounded before connecting it to the power source. -
Page 7: Hardware Installation
Installation Guide Hardware Installation An AP7131 or AP7131N Access Point installation includes mounting the Access Point, connecting the Access Point to the network, connecting antennae and applying power. Installation procedures vary for different environments. Both AP7131 and AP7131N Access Points have the following port designations: •... -
Page 8: Access Point Placement
AP7131 Series Access Point 2.3 Access Point Placement For optimal performance, install the Access Point away from transformers, heavy-duty motors, fluorescent lights, microwave ovens, refrigerators and other industrial equipment. Signal loss can occur when metal, concrete, walls or floors block transmission. Install the Access Point in an open area or add Access Points as needed to improve coverage. -
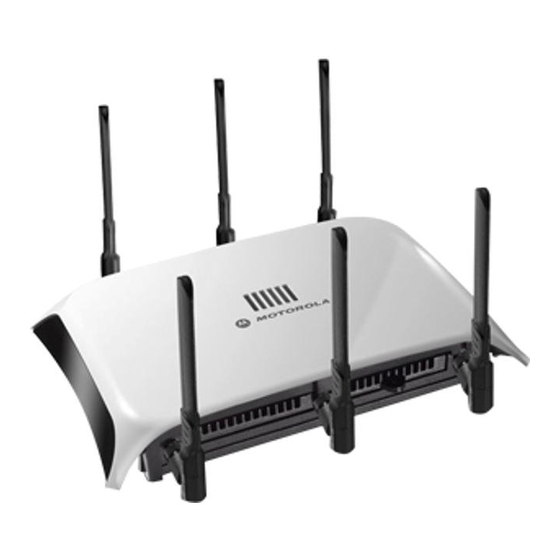
Page 9: Antenna Options
Installation Guide 2.3.1 Antenna Options Two antenna suites are supported. One antenna suite supporting the 2.4 GHz band and another antenna suite supporting the 5 GHz band. Select an antenna best suited to the intended operational environment of your Access Point. - Page 10 AP7131 Series Access Point The 2.4 GHz antenna suite includes: Part Number Antenna Type Approximate Gain (dBi) ML-2499-11PNA2-01R Wide Angle Directional ML-2499-HPA3-01R Omni-Directional Antenna ML-2499-BYGA2-01R Yagi Antenna 13.9 ML-2452-APA2-01 Dual-Band ML-2452-PTA2M3X3-1 Facade with 6 Element 4.75/5.5 Antenna Module ML-2452-PTA3M3-036 3 Port MIMO Antenna...
-
Page 11: Power Injector System
Injector is separately ordered and not shipped with an existing AP SKU. An AP7131 and AP7131N can also be used with the 3af power injector (AP-PSBIAS-1P2-AFR). However, AP functionality is limited when powered by an AP-PSBIAS-1P2-AFR, since the AP has Ethernet connectivity limited to only the GE1 port. - Page 12 AP7131 Series Access Point A separate Power Injector is required for each Access Point comprising the network. The Power Injector can be installed free standing, on an even horizontal surface or wall mounted using the power injector’s wall mounting key holes. The following guidelines should be adhered to before cabling the Power Injector to an Ethernet source and an Access Point: •...
-
Page 13: Mounting The Access Point
2.4 Mounting the Access Point Both the AP7131 and AP7131N can attach to a wall, mount under a suspended T-Bar or above a ceiling (plenum or attic) following the same installation instructions. Choose one of the following mounting options based on the physical environment of the coverage area. - Page 14 AP7131 Series Access Point...
- Page 15 Installation Guide To mount the Access Point on a wall using the provided template: 1. Copy the template (on the previous page) to a blank piece of paper. Do not reduce or enlarge the scale of the template. If printing the mounting template (on the previous page) from an CAUTION electronic PDF, dimensionally confirm the template by measuring each value for accuracy.
- Page 16 AP7131 Series Access Point a. Connect a RJ-45 CAT5e (or CAT6) Ethernet cable between the network data supply (host) and the Power Injector Data In connector. b. Connect a RJ-45 CAT5e (or CAT6) Ethernet cable between the Power Injector Data & Power Out connector and the Access Point GE1/POE port.
-
Page 17: Suspended Ceiling T-Bar Installations
Installation Guide 2.4.2 Suspended Ceiling T-Bar Installations A suspended ceiling mount requires holding the Access Point up against the T-bar of a suspended ceiling grid and twisting the Access Point chassis onto the T-bar. The mounting tools (customer provided) and hardware required to install the Access Point on a ceiling T-bar consists of: •... - Page 18 AP7131 Series Access Point e. Attach the power supply line cord to a power supply. Do not actually connect to the power source until the cabling portion CAUTION of the installation is complete. Three Radio AP7131N LEDs 5. Verify the behavior of the Access Point’s LEDs. For more information, see 6.
-
Page 19: Above Ceiling (Plenum) Installations
.625 to .75 inches thick. Both the AP7131 and AP7131N are Plenum rated to UL2043 and NEC1999 NOTE to support above the ceiling installations. To ensure UL compliance and... - Page 20 AP7131 Series Access Point 5. Create a light pipe path hole in the target position on the ceiling tile. 6. Use a drill to make a hole in the tile the approximate size of the Access Point LED light pipe.
- Page 21 Installation Guide For Power Injector installations: a. Connect a RJ-45 CAT5e (or CAT6) Ethernet cable between the network data supply (host) and the Power Injector Data In connector. b. Connect a RJ-45 CAT5e (or CAT6) Ethernet cable between the Power Injector Data & Power Out connector and the Access Point’s GE1/POE port.
-
Page 22: Led Indicators
2.5 LED Indicators Both AP7131 and AP7131N Access Points have six LEDs on the top of the Access Point housing, and one optional LED light pipe at the bottom of the unit. However, an AP7131Access Point does not use LED 6, as no third radio is available. -
Page 23: Three Radio Ap7131N Leds
Installation Guide 2.5.1 Three Radio AP7131N LEDs A three radio AP7131N Access Point has the following unique LED behavior: LED 1 LED 2 (LAN) LED 3 (WAN) LED 4 - 5 GHz LED 5 - 2.4 GHz LED 6 Blinking Red Blinking Green Blinking Green Amber is on when... -
Page 24: Single Radio 2.4 Ghz Leds
When no Server is connected, the Yellow LED is always on. 2.5.4 Single Radio 5 GHz AP7131 LEDs A single 5 GHz radio Access Point has the following unique LED behavior: LED 1 LED 2 LED 3 LED 4 - 5 GHz LED 5 - 2.4 GHz... -
Page 25: Rear 7131 Led
Installation Guide 2.5.5 Rear AP7131 LED The LED on the rear (bottom) of the Access Point is optionally viewed using a single (customer installed) extended light pipe, adjusted as required to suit above the ceiling installations. The LED light pipe has the following color... -
Page 26: Basic Access Point Configuration
AP7131 Series Access Point Basic Access Point Configuration Once the Access Point is installed and powered on, complete the following steps to get the device up and running and access management functions: 1. Attach an Ethernet cable from the Access Point to a controller with an 802.3af compatible power source or use the PWRS-14000-148R power supply to supply power to the Access Point (once fully cabled). - Page 27 Installation Guide 3. Enter the default username admin in the Username field. 4. Enter the default password admin123 in the Password field. 5. Click the Login button to load the management interface. When logging in for the first time, you’re prompted to change the NOTE password to enhance device security in subsequent logins.
- Page 28 AP7131 Series Access Point The Introduction screen displays the various actions that can be performed using the wizard under the Function Highlight field. Use the Choose One type to Setup the Access Point field options to select the type of wizard to run.
- Page 29 Installation Guide For the purposes of this guide, use the Typical Setup (Recommended) option to simplify the process of getting the Access Point up and running quickly with a minimum number of changes to the Access Point’s default configuration. For information on using the Access Point’s Advanced Setup option, refer to the WiNG Access Point System Reference Guide to familiarize yourself with the feature set supported by the WiNG operating system.
- Page 30 AP7131 Series Access Point • Standalone AP - Select this option to deploy this Access Point as an autonomous fat Access Point. A Standalone AP isn't managed by a Virtual Controller AP, or adopted by a controller If wanting to adopt the Access Point to a controller or service platform, NOTE use the controller or service platform’s resident UI to connect to the...
- Page 31 Installation Guide 12. The Typical Setup Wizard displays the Network Topology screen to define how the Access Point handles network traffic. 13. Select an Access Point Mode from the available options. • Router Mode -In Router Mode, the Access Point routes traffic between the local network (LAN) and the Internet or external network (WAN).
- Page 32 AP7131 Series Access Point 14. Select Next. The Typical Setup Wizard displays the LAN Configuration screen to set the Access Point's LAN interface configuration. 15. Set the following DHCP and Static IP Address/Subnet information for the LAN interface: • Use DHCP - Select the checkbox to enable an automatic network address configuration using the Access Point’s DHCP server.
- Page 33 Installation Guide • DNS Forwarding - Select this option to allow a DNS server to translate domain names into IP addresses. If this option is not selected, a primary and secondary DNS resource must be specified. DNS forwarding is useful when a request for a domain name is made but the DNS server, responsible for converting the name into its corresponding IP address, cannot locate the matching IP address.
- Page 34 AP7131 Series Access Point 18. Select Next. The Typical Setup Wizard displays the RADIUS Server Configuration screen if required. Otherwise, the Typical Setup Wizard displays the Summary and Commit screen. 19. Use the Radius Server Configuration screen to configure the users for the onboard RADIUS server. Use...
- Page 35 Installation Guide 20. Select Add User to display the dialog to enter user information to add to the RADIUS server user database. 21. Enter the following user information: • Username - Provide a user name used to authenticate the user. •...
- Page 36 AP7131 Series Access Point 27. Select Next. The Typical Setup Wizard displays the Summary and Commit screen to summarize the screens (pages) and settings updated using the Typical Setup Wizard. No user intervention or additional settings are required. Its an additional means of validating the Access Point’s updated configuration before it’s deployed.
-
Page 37: Specifications
Installation Guide Specifications 4.1 AP7131 Physical Specifications An AP7131 Access Point has the following physical specifications: Dimensions 5.50 in. Depth x 7.88 in. Width x 1.10 in. Height 14 cm Depth x 20.32 cm Width x 2.79 cm Height Housing... -
Page 38: Electrical Specifications
AP7131 Series Access Point 4.3 Electrical Specifications The AP7131 and AP7131N Access Points have the following electrical characteristics: Operating Voltage 48VDC (compatible with POE .3af/.3at Draft) Operating Current Not to exceed 750mA @ 48VDC Power 48VDC, 0.75A 4.4 AP7131 Radio Specifications... -
Page 39: Ap7131N Radio Specifications
Installation Guide 4.5 AP7131N Radio Specifications An AP7131 has the following radio characteristics: Operating Channels All channels from 4920 MHz to 5825 MHz except channel 52 -64 Channels 1-13 (EU), Channels 1-11 (US/Canada) Channel 14 (2484 MHz) Japan only Actual operating frequencies depend on regulatory Data Rates Supported 802.11g: 1,2,5.5,11,6,9,12,18,24,36,48, and 54Mbps... -
Page 40: Regulatory Information
AP7131 Series Access Point Regulatory Information This guide applies to the following Model Numbers: AP7131, AP-7131N. Zebra devices are designed to be compliant with rules and regulations in locations they are sold and will be labeled as required. Local language translations are available at the following website: www.zebra.com/support... -
Page 41: Health And Safety Recommendations
Installation Guide 5.2 Health and Safety Recommendations Warnings for the use of Wireless Devices Please observe all warning notices with regard to the usage of wireless devices. Potentially Hazardous Atmospheres You are reminded of the need to observe restrictions on the use of radio devices in fuel depots, chemical plants etc. and areas where the air contains chemicals or particles (such as grain, dust, or metal powders). -
Page 42: Radio Frequency Interference Requirements - Fcc
AP7131 Series Access Point Operation in the US The use on UNII (Unlicensed National Information Infrastructure) Band 1 5150-5250 MHz is restricted to indoor use only, any other use will make the operation of this device illegal. The available channels for 802.11 b/g operation in the US are Channels 1 to 11. The range of channels is limited by firmware. -
Page 43: Ce Marking And European Economic Area (Eea)
Installation Guide To reduce potential radio interference to other users, the antenna type and its gain should be so chosen that the equivalent isotropically radiated power (EIRP) is not more than that permitted for successful communication. This device has been designed to operate with the antennas listed in section 2.3.1 of this guide, and having a maximum gain of 13.9 dBi (2.4 GHz) and 13 dBi (5 GHz) for radios one and two. - Page 44 AP7131 Series Access Point Korea Warning Statement for Class B ther Countries Australia Use of 5GHz RLAN’s in Australia is restricted in the following band 5.50 – 5.65GHz. Brazil Regulatory declarations for AP7131N - BRAZIL Note: The certification mark applied to the AP7131N is for Restrict Radiation Equipment. This equipment operates on a secondary basis and does not have the right for protection against harmful interference from other users including same equipment types.
- Page 45 Installation Guide Article 12 Without permission granted by the DGT, any company, enterprise, or user is not allowed to change frequency, enhance transmitting power or alter original characteristic as well as performance to a approved low power radio-frequency devices. Article 14 The low power radio-frequency devices shall not influence aircraft security and interfere legal communications;...
-
Page 46: Waste Electrical And Electronic Equipment (Weee)
AP7131 Series Access Point 5.8 Waste Electrical and Electronic Equipment (WEEE) English: For EU Customers: All products at the end of their life must be returned to Zebra for recycling. For information on how to return product, please go to: www.zebra.com/weee. -
Page 47: Turkish Weee Statement Of Compliance
Installation Guide Malti: Għal klijenti fl-UE: il-prodotti kollha li jkunu waslu fl-aħħar tal-ħajja ta' l-użu tagħhom, iridu jiġu rritornati għand Zebra għar-riċiklaġġ. Għal aktar tagħrif dwar kif għandek tirritorna l-prodott, jekk jogħġbok żur: www.zebra.com/weee. Românesc: Pentru clienţii din UE: Toate produsele, la sfârşitul duratei lor de funcţionare, trebuie returnate la Zebra pentru reciclare. -
Page 48: Support
AP7131 Series Access Point Support If you have a problem with your equipment, contact support for your region. Contact information is available at: www.zebra.com/support When contacting support, please provide the following information: • Serial number of the unit • Model number or product name •... -
Page 49: Symbol Technologies End-User Software License Agreement
Installation Guide Symbol Technologies End-User Software License Agreement This End-User Software License Agreement ("End-User License Agreement") is between Symbol Technologies Inc. (herein "Symbol Technologies") and End-User Customer to whom Symbol Technologies' proprietary software or Symbol Technologies Products containing embedded, pre-loaded, or installed software ("Products") is made available. - Page 50 AP7131 Series Access Point If the Software licensed under this End-User License Agreement contains or is derived from Open Source Software, the terms and conditions governing the use of such Open Source Software are in the Open Source Software Licenses of the copyright owner and not this End-User License Agreement. If there is a conflict between the terms and conditions of this End-User License Agreement and the terms and conditions of the Open Source Software Licenses governing End-User Customer’s use of the Open Source...
- Page 51 Installation Guide operated. End-User Customer may make as many copies of the Documentation as it may reasonably require for the internal use of the Software. Unless otherwise authorized by Symbol Technologies in writing, End-User Customer will not, and will not enable or allow any third party to: (i) install a licensed copy of the Software on more than one unit of a Product;...
- Page 52 AP7131 Series Access Point 6. CONFIDENTIALITY End-User Customer acknowledges that the Software contains valuable proprietary information and trade secrets and that unauthorized dissemination, distribution, modification, reverse engineering, disassembly or other improper use of the Software will result in irreparable harm to Symbol Technologies for which monetary damages would be inadequate.
- Page 53 Installation Guide BE DISCLAIMED BY LAW, EVEN IF ADVISED OF THE POSSIBILITY OF SUCH DAMAGES. THE LIMITATIONS IN THIS PARAGRAPH WILL APPLY NOTWITHSTANDING ANY FAILURE OF ESSENTIAL PURPOSE OF ANY LIMITED REMEDY. 9. TERM AND TERMINATION Any use of the Software, including but not limited to use on the Products, will constitute End-User Customer’s agreement to this End-User License Agreement.
- Page 54 AP7131 Series Access Point consistent with the rights provided to the End-User Customer under the provisions of the FAR and DFARS mentioned above, as applicable to the particular procuring agency and procurement transaction. 11. GENERAL 11.1 Copyright Notices. The existence of a copyright notice on the Software will not be construed as an admission or presumption that public disclosure of the Software or any trade secrets associated with the Software has occurred.
- Page 55 Installation Guide 11.8 Governing Law. This End-User License Agreement is governed by the laws of the the State of Delaware in the United States to the extent that they apply and otherwise by the internal substantive laws of the country to which the Software is shipped if End-User Customer is a sovereign governmental entity. The terms of the U.N.
-
Page 56: Ap7131 Series Access Point China Rohs Compliance
AP7131 Series Access Point AP7131 Series Access Point China ROHS Compliance 有害物质 铅 汞 镉 六价铬 多溴联 多溴二苯 (Pb) (Hg) (Cd) (Cr(VI)) 部件名称 苯 醚 (Parts) (PBB) (PBDE) 金属部件 (Metal Parts) 电路模块 (Circuit Modules) 电缆及电缆组件 (Cables and Cable Assemblies) 塑料和聚合物部件... - Page 57 Installation Guide...
- Page 58 Zebra Technologies Corporation. Lincolnshire, IL 60069 USA Zebra and the Zebra head graphic are registered trademarks of ZIH Corp. The Symbol logo is a registered trademark of Symbol Technologies, Inc., a Zebra Technologies company. © 2015 Symbol Technologies, Inc. MN001372A01 Revision B April 2015...
Need help?
Do you have a question about the AP7131 and is the answer not in the manual?
Questions and answers