Table of Contents
Advertisement
Advertisement
Table of Contents

Subscribe to Our Youtube Channel
Related Manuals for John Lewis JLAFFS2008


Summary of Contents for John Lewis JLAFFS2008
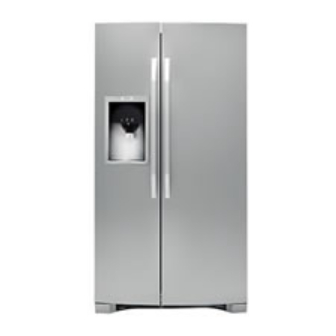
- Page 1 JLAFFS2008 Fridge freezer Instruction manual...
-
Page 2: Important Safety Information
These warnings have been provided in the interest of safety. You MUST read them carefully before installing or using the appliance. If you are unsure of the meanings of these warnings contact the John Lewis branch from which you purchased the appliance. -
Page 3: Maintenance And Cleaning
• Do not damage the refrigerant circuit. persons may cause injury or serious malfunction. Safety Precautions for • Service Force are the authorised repair agents for John Lewis branded domestic Isobutane appliances. • Warning! The refrigerant of the appliance is isobutane (R600a) that is inflammable and explosive to a greater extent. - Page 4 Ecological hints Health Office to see if there are facilities in your area for recycling this appliance. To save water and energy and help protect • When the appliance is to be scrapped, cut the environment, we recommend that you off the power supply cable and remove the follow these hints: door, to prevent young children from being...
-
Page 5: Table Of Contents
Contents Important safety information Installation Electrical connection Permanent connection Removing the doors Installing door handles Connecting the water supply Controls Guide to use the Storage features instruction manual Automatic ice and water maker/ The following symbols will be found in the text dispenser to guide you throughout the instructions: Locating and replacing the... -
Page 6: Installation
Installation This Use and care guide provides general Climate class Ambient operating instructions for your model. Use temperature the refrigerator only as instructed in this Use and care guide. Before starting the +10°C to + 32°C refrigerator, follow these important +16°C to + 32°C first steps. - Page 7 Product dimensions Rising time 20 h Guidelines for final positioning of your refrigerator: • All four corners of the cabinet must rest firmly on the floor. • The cabinet should be level at the front and rear. • The sides should tilt 6.4 mm from front to back (to ensure that doors close and seal properly).
-
Page 8: Electrical Connection
Electrical connection Any electrical work required to install this Green and yellow - Earth appliance should be carried out by a qualified electrician or competent person. Blue - Neutral Brown - Live Warning! THIS APPLIANCE MUST BE EARTHED. If you fit your own plug, the colours of the Should the appliance power supply wires in the mains lead of your appliance may cable need to be replaced, this must be... -
Page 9: Permanent Connection
4. Upon completion there must be no cut, Permanent connection or stray strands of wire present and the In the case of permanent connection it is cord clamp must be secure over the outer necessary that you install a double pole switch sheath. - Page 10 Adjustable hinge (some models) Non-adjustable hinge (some models) 3. Remove the two bottom hinge screws and hinge if necessary. 2. Remove the two screws from the top To reinstall the refrigerator door, reverse the hinge. Lift the door off of the bottom hinge above steps.
- Page 11 To remove the freezer top hinge cover: 1. Remove the two screws from each cover over the top door hinges. 2. Lift hinge cover straight up and off. To remove the freezer door: 1. Detach the multi-wire cable connector located above the top hinge. Grasp both sides of the connector firmly and pull apart.
-
Page 12: Installing Door Handles
Non-adjustable hinge (some 5. Remove the two bottom hinge screws and hinge if necessary. models) 6. Lay the door on its side to avoid damage to the water tube extending from the bottom hinge. To reinstall the freezer door, reverse the above steps. -
Page 13: Connecting The Water Supply
Upper end cap Lower end cap Connecting the water supply About your refrigerator’s responsible for any damage if plastic tubing is used for supply line. water supply • Ensure water supply and installation The automatic ice & water dispenser on your comply with state and local laws and refrigerator requires a permanent water regulations. - Page 14 • A shut-off valve for the connection 9. Open water supply shut-off valve and between your household water line and the tighten any connections that leak. refrigerator supply line. Do not use a self-piercing shut-off valve. • A compression nut and ferrule (sleeve) for the water supply connection at the rear of your refrigerator.
-
Page 15: Controls
Controls Wave-Touch™ (some Level: Awakened models) display mode Your refrigerator is equipped with a Wave- The display is awakened by touching Touch™ Panel user interface display. It is anywhere on the glass where there is an only necessary to touch the glass. There is no indicator. - Page 16 Vacation mode is manually activated when the The temperature display will begin to blink red indicator is lit. with the first touch. After five seconds of water filter - Touch to display filter inactivity, the display will beep to accept the new temperature.
- Page 17 operation. The high temp alarm may IQ-Touch™ (some also be illuminated until a safe models) operating range temperature has been reached. Wave-Touch™/IQ- Touch™ "Sabbath mode" (some models) The Sabbath mode is a feature that disables portions of the refrigerator and its controls for both Wave-Touch™...
- Page 18 Air filter - Touch to display filter status. Press Alarms and hold for three seconds to reset. Temp display - Touch to toggle the freezer and fridge temps display on and off. Touch and hold temp display to toggle display from Fahrenheit to Celsius.
-
Page 19: Storage Features
Storage features Any meat to be kept longer than two days Caution! To avoid injury from should be frozen. If you store fruits or breakage, handle tempered glass vegetables in this drawer, set it to a warmer shelves carefully. temperature to prevent freezing. Features may vary according to model. -
Page 20: Automatic Ice And Water Maker/Dispenser
Automatic ice and water maker/dispenser Priming the water supply Caution! For proper dispenser operation, recommended water system supply pressure should fall between Your refrigerator’s water supply system 210 kPa (2.1 bar) and 690 kPa (6.9 includes several tubing lines, an advanced bar). - Page 21 3. Continue dispensing water for about Turning the ice maker on three minutes to flush the system and and off plumbing connections of any impurities (stopping to empty the glass as necessary). The water dispenser has a built-in device that shuts off the water flow after three minutes of continuous use.
-
Page 22: Cleaning The Ice Maker
– Running water Important! Small ice cubes or ice chips • When dispensing ice, you will hear a jamming in the ice maker may be a sign that snapping or clicking sound when the ice your water filter needs changing. If you have a chute opens and closes. -
Page 23: Locating And Replacing The Filters
• You do not use the ice dispenser Important! frequently. Ice cubes will freeze together in the bin, jamming the dispenser mechanism. Remove the ice storage bin and shake to loosen the cubes or clean as explained above. Caution! NEVER use an ice pick or similar sharp instrument to break up the ice. -
Page 24: Replacing The Water Filter
Order new filters by visiting www.electrolux- filters.com, or seeing the dealer where you bought your refrigerator. John Lewis recommends that you order extra filters when you first install your refrigerator, and that you replace your filters at least once every six... -
Page 25: Care And Cleaning
To replace your snap-in connector). When fully engaged, the front of the filter cartridge PureAdvantage ™ water should be flush with the filter release filter: button. 6. Press a drinking glass against the water It is not necessary to turn the water supply off dispenser while checking for any leaks at to change the filter. - Page 26 Lights are located behind the ice container and baskets in Freezer. Care and cleaning Part Cleaning agents Tips and precautions Interior & Door Liners • Soap and water • Use 2 tablespoons of baking soda in .95 litres of warm •...
- Page 27 Part Cleaning agents Tips and precautions Door Gaskets • Soap and water • Wipe gaskets with a clean soft cloth. Drawers & Bins • Soap and water • Use a soft cloth to clean drawer runners and tracks. • Do not wash any removable items (bins, drawers, etc.) in dishwasher.
- Page 28 Part Cleaning agents Tips and precautions Exterior & Handles (Stainless • Soap and water • Never use CHLORIDE or Steel Models Only) cleaners with bleach to • Stainless steel cleaners clean stainless steel. • Clean stainless steel front and handles with non-abrasive soapy water and a dishcloth.
-
Page 29: Something Not Working
Occasion Tips Long holidays • Remove all food and ice if you will be gone one month or more. • Turn the cooling system off (see “Controls” section for location of On/Off button) and disconnect power cord. • Turn off automatic ice maker and turn water supply valve to closed position. - Page 30 Problem Cause Correction • House fuse blown or tripped • Check/replace fuse with a 15 circuit breaker. amp time-delay fuse. Reset circuit breaker. • Power outage. • Check house lights. Call local electric company. Refrigerator runs too much • Room or outside weather is •...
- Page 31 Problem Cause Correction Refrigerator temperature • Refrigerator control is set too • Set refrigerator control to a cold. warmer setting. Allow 24 too cold. Freezer temperature is satisfactory. hours for temperature to stabilize. Food stored in drawers • Refrigerator control is set too •...
- Page 32 Problem Cause Correction • Door is slightly open. • See PROBLEM column OPENING/CLOSING OF DOORS/DRAWERS . • Door is opened too often or • Open door less often to allow too long. internal temperature to stabilize. • Open containers. • Keep containers covered. Water collects on bottom •...
- Page 33 Problem Cause Correction • Valve on cold water pipe is • Turn off household water line clogged or restricted by valve. Remove valve. Ensure foreign material. If valve is of that valve is not a self-piercing the self-piercing type, it may valve.
- Page 34 Problem Cause Correction Ice dispenser Dispenser will not dispense • Water supply is not • Connect water supply (see ice. connected. CONNECTING THE WATER SUPPLY section). • Ice storage container is empty. • Ensure ice maker is turned on. When the first supply of ice is dropped into the container, the dispenser should operate.
- Page 35 Problem Cause Correction • Ice cubes are hollow or • The ice and water filter smaller than normal. cartridge could be clogged. Replace the filter cartridge. Dispensing system operates best at 210 kPa (2.1 bar) - 690 kPa (6.9 bar) water pressure. Well water pressures should fall within this range.
- Page 36 Problem Cause Correction • Reverse osmosis system is in • It is normal for a reverse regenerative phase. osmosis system to be below 1.38 bar during the regenerative phase. Odors in refrigerator Interior is dirty • Interior needs to be cleaned. •...
-
Page 37: Repairs - After Sales Service
Problem Cause Correction • Control system has disabled • Close and reopen door(s) to lights because one or both enable lights. doors were left open too long. Repairs - after sales service If your oven is not performing satisfactorily; • Mod........consult the fault finding guides within this instruction book (Something not working). - Page 40 John Lewis Partnership 171 Victoria Street London SW1E 5NN www. johnlewis.com 242000200-00-032009...
Need help?
Do you have a question about the JLAFFS2008 and is the answer not in the manual?
Questions and answers