Bosch BGL 8 In'genius Instruction Manual
Hide thumbs
Also See for BGL 8 In'genius:
- Instruction manual (120 pages) ,
- User manual (332 pages) ,
- Information for use (96 pages)
Table of Contents
Advertisement
Moodpic 1
Moodpic 1
63,2 x 50,25mm
63,2 x 50,25mm
CMYK & GREY
CMYK & GREY
Register your new Bosch now:
Register your new Bosch now:
Register your new Bosch now:
www.bosch-home.com/welcome
www.bosch-home.com/welcome
www.bosch-home.com/welcome
Moodpic 2
Moodpic 2
98,6 x 46,7mm
98,6 x 46,7mm
CMYK & GREY
CMYK & GREY
BGL 8...
In'genius
de Gebrauchsanleitung
en Instruction manual
en Instruction manual
fr
Mode d'emploi
it
Istruzioni per l'uso
nl
Gebruiksaanwijzing
da Brugsanvisning
no Bruksanvisning
sv Bruksanvisning
fi
Käyttöohje
es Instrucciones de uso
pt Instruções de serviço
el
Οδηγίες χρήσης
tr
Kullanım kılavuzu
pl
Instrukcja obsługi
hu Használati utasítás
bg Указания за употреба
uk Інструкція з експлуатації
ru Инструкция по
эксплуатации
ro Instrucţiuni de utilizare
ar
1
Advertisement
Table of Contents

Related Manuals for Bosch BGL 8 In'genius


Summary of Contents for Bosch BGL 8 In'genius
- Page 1 Moodpic 1 Moodpic 1 63,2 x 50,25mm 63,2 x 50,25mm CMYK & GREY CMYK & GREY Register your new Bosch now: Register your new Bosch now: Register your new Bosch now: www.bosch-home.com/welcome www.bosch-home.com/welcome www.bosch-home.com/welcome Moodpic 2 Moodpic 2 98,6 x 46,7mm 98,6 x 46,7mm CMYK &...
-
Page 3: Table Of Contents
Table of content Safety information ..............5 Intended use ................5 Safety information ..............6 Proper use .................6 Notes on energy label ..............9 Your vacuum cleaner ..............10 Replacement parts and special accessories ......12 Before using your appliance for the first time .......14 Connecting the flexible hose ..........14 Placing the Bionic filter ............14 Initial use ................15 Putting the handle and the telescopic tube together ....15... - Page 4 Table of content Changing the filter ..............24 Opening the lid ...............24 Changing the dust bag ............24 Cleaning the motor protection filter ........25 Replacing the Bionic filter ............27 Replacing the micro-hygiene exhaust filter ......28 Cleaning the EPA exhaust filter ..........28 Care ..................30 Disposal...................31 Costumer Service ..............32 Conditions of guarantee ............33...
-
Page 5: Safety Information
Safety information Please keep this instruction manual. When passing the vacuum cleaner on to a third party, please also pass on this instruction manual. Intended use This vacuum cleaner is intended for domestic use and not for commercial use. Only use this vacuum cleaner in accordance with the instructions in this instruction manual. -
Page 6: Safety Information
Safety information Safety information This vacuum cleaner complies with the recognised rules of tech- nology and the relevant safety regulations. The appliance may be used by children over the age of 8 years „ and by persons with reduced physical, sensory or mental ca- pacity or by persons with a lack of experience or knowledge if they are supervised or have been instructed on the safe use of the appliance and the have understood the potential dangers of... - Page 7 Safety information When disconnecting the appliance from the mains, pull on the „ plug itself to remove it; do not pull on the power cord. Do not pull the power cord over sharp edges or allow it to be- „ come trapped.
- Page 8 Safety information Please note The mains socket must be protected by at least a 16 amp cir- cuit breaker. If a circuit breaker is tripped when you switch on the vacuum cleaner, this may be because other electrical appliances which have a high current draw are connected to the same power circuit.
-
Page 9: Notes On Energy Label
Safety information Accessories „ Your accessories (nozzle, suction pipe, etc.) may look different from but work in the same way as those depicted in the illust- rations in this instruction manual. Notes on energy label „ This vacuum cleaner is a general purpose vacuum cleaner. To achieve the declared energy efficiency and cleaning perfor- mance class on carpet, please use the interchangeable univer- sal nozzle. -
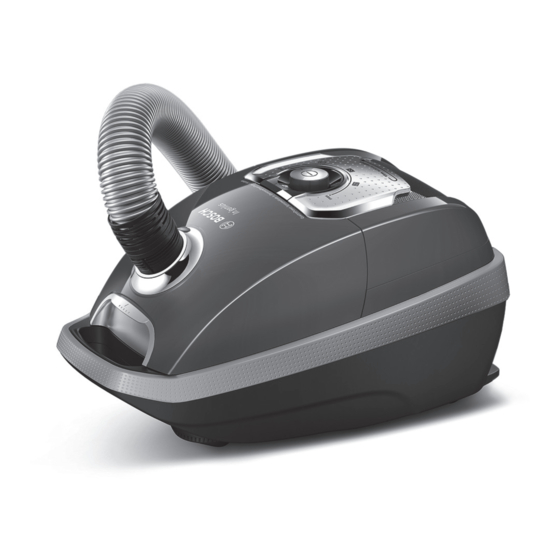
Page 10: Your Vacuum Cleaner
Your vacuum cleaner... - Page 11 Your vacuum cleaner 1 Adjustable floor nozzle 10 Hose handle (For the same functions, 11 Dust bag change indicator the appearance of the 12 Power rotary control and nozzle may differ from the on/off switch picture) 13 Exhaust filter 2 Hard-floor nozzle 14 Parking aid 3 “Animal”...
-
Page 12: Replacement Parts And Special Accessories
Only if high-quality dust bags are used, such as genuine Bosch dust bags, can the figures spe- cified on the EU energy label pertaining to energy efficiency class, suction and dust retention capacity be achieved. - Page 13 Replacement parts and special accessories B Washable microfilter Protects the motor of your vacu- um cleaner, thus increasing its service life. C Hard-floor nozzle BBZ123HD For vacuuming hard floors (parquet, tiles, terracotta, etc.) D Hard-floor nozzle BBZ124HD Innovative "soft & roll" hard-floor nozzle: 2 rotating brush rollers made from natural hair.
-
Page 14: Before Using Your Appliance For The First Time
Before using your appliance for the first time Connecting the flexible hose Fig. • Push the handle onto the flexible hose and lock it in place. Click! Placing the Bionic filter Fig. • Open the dust bag compartment lid. Fig. •... -
Page 15: Initial Use
Initial use Fig. a) Push the flexible hose adapter into the air intake opening in the lid until it locks in place. Click! b) To remove the flexible hose, press the two catches together and pull out the hose. Putting the handle and the telescopic tube together Fig. -
Page 16: Inserting The Telescopic Tube Into The Floor Nozzle
Initial use Inserting the telescopic tube into the floor nozzle Fig. • Push the telescopic tube into the connecting piece of the floor Click! nozzle until it locks in place. • To release the connection, press the locking collar and pull out the telescopic tube. -
Page 17: Attaching The Accessories Holder
Initial use Attaching the accessories holder Fig. a) Place the accessories holder in the required position on the te- lescopic tube. b) Use some pressure to insert the upholstery nozzle with hard fur- nishings brush and the crevice nozzle into the accessories hol- der from above or below. -
Page 18: Switch On /Off
Initial use Switching on and off Fig. • To switch the vacuum cleaner on or off, press the rotary control. Controlling the suction level Fig. Turn the rotary control to infinitely adjust the suction level to the level required. min - For vacuuming curtains and delicate textiles - For vacuuming upholstered furniture and cushions... -
Page 19: Vacuuming
Vacuuming Caution: Floor nozzles are subject to a certain amount of wear, depen- ding on the type of hard floors you have (e.g. rough, rustic tiles). You must therefore check the un- derside of the floor nozzle at re- gular intervals. Worn undersides of floor nozzles may have sharp edges that can damage sensitive hard floors, such as parquet or... -
Page 20: Vacuuming With Accessories
Vacuuming Vacuuming with accessories Fig. Attach the nozzles to the suction pipe or handle as required: a) Crevice nozzle for vacuuming crevices and corners, etc. b) Upholstery nozzle for vacuuming upholstered furniture, curtains, etc. c) Hard-floor nozzle For vacuuming hard floor co- verings (tiles, parquet, etc.) •... -
Page 21: Professional Upholstery Nozzle
Vacuuming Professional upholstery nozzle Fig. • For intensive cleaning of uphols- tered furniture (attach to the handle or suction pipe, depen- ding on requirements). • To clean the professional uphols- tery nozzle, simply vacuum it using the handle. • If it is very dirty, the professio- nal upholstery nozzle can also be opened. -
Page 22: Carrying The Appliance
Vacuuming Carrying the appliance Fig. To overcome obstacles, e.g. steps, the appliance can also be carried by the handle on the appliance body. After using this appliance Disconnecting the appliance Fig. • Pull out the mains plug. • Briefly pull on the power cord and release it (the cable retracts automatically). -
Page 23: Storing And Transporting
After using this appliance Storing and transporting Fig. • To store or transport the appli- ance, you can use the storage aid on the underside of the appliance. • Stand the appliance upright on its end. Slide the hook on the floor nozzle into the recess on the un- derside of the appliance. -
Page 24: Changing The Filter
Changing the filter Opening the lid Fig. • Open the lid by moving the lo- cking lever in the direction of the arrow. Changing the dust bag Fig. a) Close the dust bag by pulling on the locking tab, and remove the bag. -
Page 25: Cleaning The Motor Protection Filter
Changing the filter Motor protection filter Caution: The vacuum must not be operated without the motor protection filter. Cleaning the motor protection fil- The motor protection filter should be cleaned regularly by tapping out the dirt and rinsing. Fig. • Open the dust bag compartment lid. - Page 26 Changing the filter • After cleaning, place the Bionic filter onto the motor protection filter as necessary and push both filters into the appliance. • Close the dust bag compartment lid.
-
Page 27: Replacing The Bionic Filter
Changing the filter Replacing the Bionic filter If your appliance is equipped with a Bionic filter, it should be repla- ced once it begins to lose its effect (after approx. 1 year). Fig. • Open the dust bag compartment lid. Fig. •... -
Page 28: Replacing The Micro-Hygiene Exhaust Filter
Changing the filter Exhaust filter The exhaust filter must be cleaned or replaced at least once a year. Replacing the micro-hygiene ex- haust filter Fig. • Open the rear flap. • Unlock the filter holder by moving the locking tab in the direction of the arrow. - Page 29 Changing the filter Fig. • Open the rear flap. • Unlock the EPA filter by moving the locking tab in the direction of the arrow, and remove it from the appliance. • Tap out the filter unit and rinse it under running water.
-
Page 30: Care
Care Always switch off the vacuum cleaner and disconnect the power cord from the mains before cleaning the vacuum cleaner. The vacuum cleaner and plastic accessories can be cleaned with an ordinary plastic cleaner. Do not use abrasive materials, glass-cleaning agents or all- purpose cleaning products. -
Page 31: Disposal
Disposal "This appliance is labelled in accordance with European Directive 2012/19/EU con- Ez a készülék az elhasznált villamossági és elektronikai cerning used electrical and electronic ap- készülékekről szóló 2012/19/EU irányelvnek megfelelő jelölést kapott. pliances (waste electrical and electronic Ez az irányelv a már nem használt készülékek visszavé- telének és hasznosításának EU-szerte érvényes kereteit equipment - WEEE). -
Page 32: Costumer Service
Milton Keynes MK12 5PT To arrange an engineer visit, to order spare parts and accesso- ries or for product advice please visit: www.bosch-home.co.uk or call Tel.: 0844 892 8979* *Calls from a BT landline will be charged at up to 3 pence per minute. A call... -
Page 33: Conditions Of Guarantee
Conditions of guanrantee For this appliance the guarantee conditions as set out by our representatives in the country of sale apply. Details regarding same may be obtained from the dealer from whom the appli- ance was purchased. For claims under guarantee the sales receipt must be produced. - Page 36 ✆ Beratung und Reparaturauftrag bei Störungen 0911 70 440 040 0810 550 511 CH 0848 840 040 Die Kontaktdaten aller Länder finden Sie im beiliegenden Kundendienst-Verzeichnis. Bosch Home Appliance Group P.O. Box 83 01 01 D-81701 Munich Germany www.bosch-home.com *9000971632*...
Need help?
Do you have a question about the BGL 8 In'genius and is the answer not in the manual?
Questions and answers