Table of Contents
Advertisement
Quick Links
Installation/Operator Manual
WARNING: For your safety the
information in this manual must be
followed to minimize the risk of fire or
explosion and to prevent property
damage, personal injury or death.
— Do not store or use gasoline or other
flammable vapors and liquids in the
vicinity of this or any other appliance.
— WHAT TO DO IF YOU SMELL GAS:
Do not try to light any appliance.
G
Do not touch any electrical switch;
G
do not use any phone in your
building.
Clear the room, building or area of
G
all occupants.
Immediately call your gas supplier
G
from a neighbor's phone. Follow
the gas supplier's instructions.
If you cannot reach your gas
G
supplier, call the fire department.
— Installation and service must be
performed by a qualified installer,
service agency or the gas supplier.
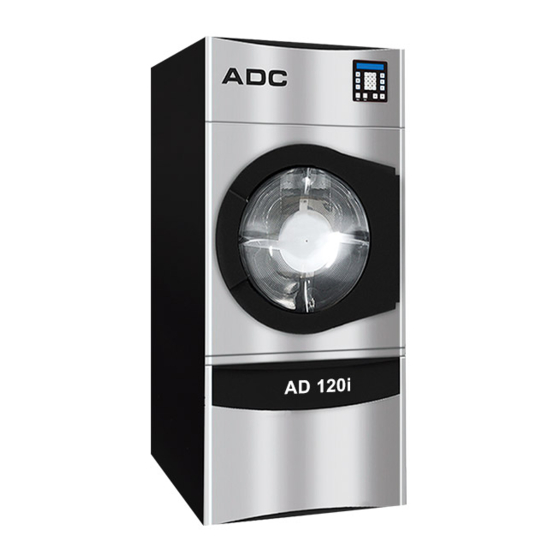
AD120i
AVERTISSEMENT: Assurez-vous de
bien suivre les instructions données dans
cette notice pour réduire au minimum le
risque d'incendie ou d'explosion ou pour
éviter tout dommage matériel, toute
blessure ou la mort.
—Ne pas entreposer ni utiliser d'essence
ni d'autres vapeurs ou liquides
inflammables à proximité de cet
appareil ou de tout autre appareil.
—QUE FAIRE SI VOUS SENTEZ UNE
ODEUR DE GAZ:
Ne pas tenter d'allumer d'appareils.
G
Ne touchez à aucun interrupteur. Ne
G
pas vous servir des téléphones se
trouvant dans le bâtiment.
Évacuez la pièce, le bâtiment ou la
G
zone.
Appelez immédiatement votre
G
fournisseur de gaz depuis un voisin.
Suivez les instructions du fournisseur.
Si vous ne pouvez rejoindre le
G
fournisseur de gaz, appelez le service
des incendies.
—L'installation et l'entretien doivent être
assurés par un installateur ou un
service d'entretien qualifié ou par le
fournisseur de gaz.
American Dryer Corporation
Telephone: +1 (508) 678-9000 / Fax: +1 (508) 678-9447
88 Currant Road
Fall River MA 02720-4781 USA
e-mail: techsupport@amdry.com
www.adclaundry.com
ADC Part No. 113546 - 2
Advertisement
Table of Contents

Subscribe to Our Youtube Channel
Related Manuals for ADC AD120i


Summary of Contents for ADC AD120i
- Page 1 American Dryer Corporation 88 Currant Road Fall River MA 02720-4781 USA Telephone: +1 (508) 678-9000 / Fax: +1 (508) 678-9447 e-mail: techsupport@amdry.com www.adclaundry.com ADC Part No. 113546 - 2...
- Page 2 Replacement parts can be obtained from your reseller or the ADC factory. When ordering replacement parts from the factory, you can FAX your order to ADC at +1 (508) 678-9447 or telephone your order directly to the ADC Parts Department at +1 (508) 678-9000. Please specify the dryer model number and serial number in addition to the description and part number, so that your order is processed accurately and promptly.
-
Page 3: Table Of Contents
WARNING WARNING Children should not be allowed to play on or near the dryer(s). Children should be supervised if Proposition 65 near dryer(s) in operation. Use of this product could expose you to substances Under no circumstances should the dryer door from fuel combustion that contain chemicals switch(es), lint door/drawer switch(es), or heat known to the State of California to cause cancer,... -
Page 4: Safety Precautions
Safety Precautions ____________________ A program should be established for the inspection and cleaning of lint in the burner area, exhaust ductwork, and area Warning around the back of the dryer. The frequency of inspection and cleaning can best be determined from experience at each For your safety, the information in this manual must location. - Page 5 Warning To reduce the risk of personal injury, install lockable doors to prevent public access to the rear NOTES _______________________________________________________ of the dryers. ______________________________________________________________ Exhaust duct outlet should be checked periodically for blockages, and if any found, removed. ______________________________________________________________ IMPORTANT: A means of restraint must be used to prevent ______________________________________________________________ straining of the gas line when the appliance is moved and to keep the appliance upright when a load great enough to...
-
Page 6: Specifications
Specifications _____________________________________________________________________ MAXIMUM CAPACITY (DRY WEIGHT) 120 lb 54.43 kg 106.68 cm TUMBLER DIAMETER 42” 112.39 cm TUMBLER DEPTH 44-1/4” TUMBLER VOLUME 35.5 cu ft 1005.25 L 1.49 kW TUMBLER / DRIVE MOTOR 2 hp BLOWER / FAN MOTOR 1 hp 0.75 kW 113.98 cm CABINET WIDTH... - Page 7 Specifications _____________________________________________________________________ NOTE: The manufacturer reserves the right to make changes in specifications at any time without notice or obligation. 113546 - 2 www.adclaundry.com...
-
Page 8: Component Identification
Installation Procedures _______________ Component Identification ____________ Dryer Front View Installation should be performed by competent professional in accordance with local, state, and country codes. In the absence of these codes, the installation must conform to applicable American National Standards: ANSI Z223.1- LATEST EDITION (National Fuel Gas Code) or ANSI/NFPA NO. -
Page 9: Unpacking / Setting Up
Unpacking / Setting Up ________________ Remove protective shipping material (i.e., plastic wrap and optional shipping box) from the dryer. IMPORTANT: Dryer must be transported and handled in an upright position at all times. The dryer can be moved to its final location while still attached to the skid or with the skid removed. -
Page 10: Dryer Enclosure Requirements
Dryer Enclosure Requirements _______ Reversing the Main Loading Door Hinge Side The dryer is shipped with the main door hinge on the RH side Commercial Type II as standard. The swing of the door is field reversible. If Bulkheads and partitions should be made of noncombustible required, the front panel can reversed so that the door hinges material. -
Page 11: Fresh Air Supply Requirements
Fresh Air Supply Requirements _______ Exhaust Requirements ________________ This appliance may only be installed in a room that meets the Exhaust ductwork should be designed and installed by a appropriate ventilation requirements specified in the national qualified professional. Improperly sized ductwork will create installation regulations. - Page 12 Horizontal Single Dryer Venting NOTE: When the exhaust ductwork passes through a wall, ceiling, or roof made of combustible materials, the opening For a 10-inch (25.40 cm) horizontal run the total length of must be 2-inches (5.08 cm) larger than the duct (all the way ductwork from the dryer outlet must not exceed dimension around).
- Page 13 Vertical Single Dryer Venting Combined Vertical and Horizontal Single Dryer Venting For a 10-inch (24.5 cm) vertical run with three 90° elbows, the ductwork from the dryer to the outside outlet cannot exceed For a 10-inch (25.4 cm) combined vertical and horizontal run, dimension “B”...
- Page 14 MULTIPLE DRYER VENTING (HORIZONTAL) AT COMMON DUCT MULTIPLE DRYER VENTING (VERTICAL) AT COMMON DUCT American Dryer Corp. 113546 - 2...
-
Page 15: Electrical Information
Electrical Information _________________ Electrical Service Specifications Gas Models Only Electrical Requirements All electrical connections must be made by a properly licensed ELECTRICAL SERVICE SPECIFICATIONS (PER POCKET) and competent electrician. This is to ensure that the electrical IMPORTANT: 208 VAC AND 230/240 VAC ARE NOT THE SAME. When ordering, installation is adequate and conforms to local, state, and specify exact voltage. -
Page 16: Electrical Connections
Electrical Connections For 208-240V Applications 1ø 60 Hz A wiring diagram is located behind the control panel for connection data. If local codes permit, power to the dryer can be made by the use of a flexible UL listed power cord/pigtail (wire size must conform to rating of dryer), or the dryer can be hard wired directly to the service breaker panel. - Page 17 CAUTION: The dryer must be grounded. A ground lug has been provided for this purpose. Input connection wiring must be sized properly to handle the dryer’s current draw. This information is printed on the dryer’s rating plate. IMPORTANT: A strain relief must be used where the input wiring enters.
-
Page 18: Gas Information
Gas Information _______________________ IMPORTANT: If connection to this appliance is made with a flexible hose, it must be suitable for the appliance category It is your responsibility to have all plumbing connections, in accordance with national installation regulations of the materials, and workmanship conform to local and state country of destination, and if in doubt the installer must regulations or codes of the country of destination. - Page 19 Heat Input / Gas Consumption / Orifice (Injector) Data (For Non-CE [European] Models Only) GAS SPECIFICATIONS FOR NON-CE APPROVED DRYERS** Nominal Supply Gross Burner Orifice Orifice Size Heating Value Pressure Heat Input Pressure (Injector) Type Quantity Btu/ft in WC Btu/hr in WC Natural 1,000...
- Page 20 If the appliance is converted (gas type changed), a new rating plate must be obtained from ADC (dryer’s serial number is required to purchase a conversion kit). IMPORTANT: Any burner changes or conversions must be made by a qualified professional.
- Page 21 NON-CE DRYERS ONLY 11A. Unregulated Gas Valve Affix L.P. Conversion Label (ADC P/N 112011) to the dryer’s Regulate (govern) gas externally (refer to “Supply rating plate. Pressure” in chart on page 19) to the correct gas pressure Complete L.P. Conversion Confirmation Label (ADC P/N for the gas being used.
-
Page 22: Water Information
Gas Pressure Test Procedure Regulated Gas Valve Refer to “Gas Pressure Adjustment” (this page) to adjust Turn gas cock in gas supply line to “OFF” position. the gas valve to the appropriate burner pressure listed CE Dryers: Back out miniature screw inside pressure tap and on page 19. -
Page 23: Preparation For Operation / Start-Up
Preoperational Test ___________________ It is recommended that a filter or strainer be installed in the water supply line. All dryers are thoroughly tested and inspected before leaving the factory. However, a preoperational test should be IMPORTANT: Flexible supply line/coupling must be used. performed before the dryer is publicly used. -
Page 24: Preoperational Instructions
Preoperational Instructions __________ Service / Parts Information ___________ Service IMPORTANT: For more detailed information regarding the microprocessor controller (computer), refer to the Service must be performed by a qualified trained technician. microprocessor user’s manual included with the dryer. If service is required, contact the reseller from whom the equipment was purchased. -
Page 25: Routine Maintenance
Shipping charges are not the responsibility of ADC. All returns should be “prepaid” to the factory. Any “C.O.D.” or “COLLECT” returns will not be accepted. -
Page 26: Procedure For Functional Check Of Replacement Components
Warning Manual Reset Hi-Limit Instructions To avoid the hazard of electrical shock and contact Warning with moving parts, discontinue electrical supply to Disconnect power before attempting to reset any the dryer before removing the back guard. manual hi-limit! 6 Months This dryer was manufactured with two hi-limit manual reset Inspect and remove lint accumulation in the dryer's air handling thermostats. -
Page 27: Rating Plate Information
______________________________________________________________ ______________________________________________________________ ______________________________________________________________ ______________________________________________________________ When contacting ADC, the information on the rating plate is required to ensure proper service/parts assistance. The rating ______________________________________________________________ plate is located at the upper left side panel of the dryer behind the control door. (Refer to item 8 -Dryer Rear View- page 8.) ______________________________________________________________ 1. -
Page 28: Non-Coin Programming
Non-Coin Programming _______________ SAIL SWITCH OPEN FAULT – Sail switch remained open after the cycle started. Should have closed. To Enter Programming Mode BURNER HIGH LIMIT FAULT – Burner temp. disk has opened. Press Keys Together BURNER IGNITION CONTROL – No signal to gas valve from To Exit Programming Mode Press Multiple Times (DSI) module during trial for ignition time. -
Page 29: Coin Programming
Coin Programming ____________________ Accessing and Clearing Coin Vault Total Enter program mode by switching program switch (up) while Enter Programming Mode By Placing no cycle is in progress. The Programming Switch On The Phase 7 Board Up While No Cycle Is In Progress. Press HI –... - Page 30 ADC Part No. 113546 2 - 08/13/14...
Need help?
Do you have a question about the AD120i and is the answer not in the manual?
Questions and answers