
Related Manuals for Potterton eurocondense four 125 kw


Summary of Contents for Potterton eurocondense four 125 kw
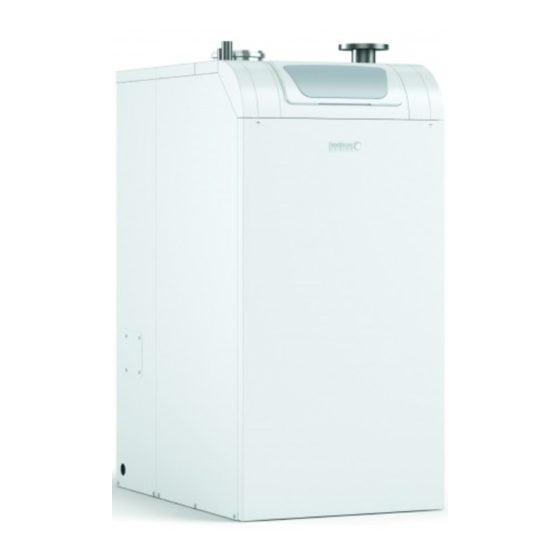
- Page 1 United Kingdom Installation operation and maintenance manual Condensing gas boiler Eurocondense four 125 kW 170 kW 215 kW 260 kW 300 kW...
- Page 2 Dear Customer, Thank you very much for buying this appliance. Please read through the manual carefully before using the product, and keep it in a safe place for later reference. In order to ensure continued safe and efficient operation we recommend that the product is serviced regularly. Our service and customer service organisation can assist with this.
-
Page 3: Table Of Contents
Contents Contents 1 Safety ................6 1.1 General safety instructions . - Page 4 Contents Hydraulic connection ................43 6.2.1 Connecting the heating circuit .
- Page 5 Contents 9.2.7 Domestic water ............... 93 9.2.8 Consumer circuits/Swimming pool circuit .
-
Page 6: Safety
1 Safety 1 Safety 1.1 General safety instructions Danger If you smell gas: 1. Do not use a naked flame, do not smoke, do not operate electrical contacts or switches (doorbell, light, motor, lift, etc.). 2. Shut off the gas supply. 3. - Page 7 1 Safety Danger This appliance can be used by children aged 8 years and above and by persons with reduced physical, sensory or mental capabilities or lack of experience and knowledge when they have been given supervi sion or instruction concerning the safe use of the de vice and understand the resulting risks.
-
Page 8: Intended Use
1 Safety Danger Danger to life due to explosion/fire. Do not store any explosive or easily flammable materi als close to the appliance. Caution Risk of burns! For safety reasons, the discharge pipe from the safety valve must always be open so that water can escape during heating operation. -
Page 9: Installer's Liability
1 Safety 1.4.2 Installer's liability The installer is responsible for the installation and initial com missioning of the appliance. The installer must abide by the following instructions: Read and follow the instructions given in the manuals pro vided with the appliance. Install the appliance in compliance with prevailing legisla... -
Page 10: About This Manual
2 About this manual About this manual General This manual is intended for installers of EC fourboilers. Note The user, installation and service manuals are also available on our internet site. Additional documentation Here is an overview of the further documents belonging to this heating system. - Page 11 2 About this manual Danger Risk of dangerous situations resulting in serious personal injury. Danger of electric shock Risk of electric shock. Warning Risk of dangerous situations resulting in minor personal injury. Caution Risk of material damage. Note Please note: important information. Reference to other manuals or pages in this manual.
-
Page 12: Technical Specifications
3 Technical specifications Technical specifications Homologations 3.1.1 Regulations and standards Beside the general technical rules, the relevant standards, regulations, or dinances and guidelines should be followed: DIN 4109; Noise protection in construction engineering DIN EN 12828; Heating systems in buildings EnEV - Energy saving regulation Federal Immission Control Ordinance 3. -
Page 13: Technical Data
3 Technical specifications Product name EC four EC four EC four EC four EC four 125 kW 170 kW 215 kW 260 kW 300 kW Low-temperature boiler B1 boiler Cogeneration space heater Combination heater Prated Rated heat output Useful heat output at rated heat out 121.6 165.8 210.1... - Page 14 3 Technical specifications Model EC four EC four EC four EC four EC four 125 kW 170 kW 215 kW 260 kW 300 kW Natural gas 80/60°C 19.2-121.6 26.8-165.8 33.5-210.1 40.2-254.5 45.9-294.3 50/30°C 21.3-133.1 29.8-181.3 37.4-229.6 44.9-278.1 52.3-322.1 80/60°C 33.5-121.6 33.5-165.8 46.0-210.1 55.5-254.5...
-
Page 15: Tables Of Sensor Values
3 Technical specifications Model EC four EC four EC four EC four EC four 125 kW 170 kW 215 kW 260 kW 300 kW ∆T = 10 K mbar Sound pressure level 1 m away room air-dependent dB(A) 40-51 40-51 40-52 40-53 40-54... -
Page 16: Pressure Drop Secondary Circuit
3 Technical specifications Temperature [°C] Resistance [Ω] 1256 1070 3.2.4 Pressure drop secondary circuit Fig.1 Pressure drop secondary circuit RA-0000209 WMS [m Pressure drop secondary circuit Water mass flow EC four 125 kW EC four 170 kW EC four 215 kW EC four 260 kW EC four 300 kW 7636047 - 02 - 24082015... -
Page 17: Dimensions And Connections
3 Technical specifications 3.2.5 Dimensions and connections Fig.2 Dimensions and connections RA-0000208 Tab.5 Dimensions Model EC four EC four EC four EC four EC four 125 kW 170 kW 215 kW 260 kW 300 kW Air supply duct Ø 110 Ø... - Page 18 3 Technical specifications Model EC four EC four EC four EC four EC four 125 kW 170 kW 215 kW 260 kW 300 kW Heating return (HR) Flange DN 65 Gas connection R 1" R 1½" R 1½" R 1½" R 1½"...
-
Page 19: Wiring Diagram
3 Technical specifications 3.2.6 Wiring diagram Fig.3 Wiring diagram 7636047 - 02 - 24082015... -
Page 20: Description Of The Product
4 Description of the product Description of the product Main components 4.1.1 Boiler Fig.4 Boiler view EC four 125 kW - 170 kW Flue gas connection Boiler flow (KV) Safety group connection Boiler return (KR) Air supply duct Gas connection Boiler control LMS Ignition transformer (below the control unit) Ionization electrode... -
Page 21: Room Device Rgt
4 Description of the product 4.1.2 Room device RGT Remote setting of all adjustable control functions of the basic appliance is possible using the room device RGT (Figure 1, page 21). Fig.6 Operating interface of the room de 1 Operating mode key, heating mode vice RGT 2 Operating mode key domestic water mode 3 Screen... -
Page 22: Displays
4 Description of the product 4.2.2 Displays Fig.8 Symbols on the display Heating to comfort setpoint Heating to reduced setpoint Heating to frost protection setpoint Current process Holiday function active Reference to heating circuits Burner in operation (boiler only) Cooling active (heat pump only) Compressor in operation (heat pump only) Maintenance message Fault message... -
Page 23: Before Installation
5 Before installation Before installation Regulations governing installation Caution Installation of the appliance must be done by a qualified engineer in accordance with prevailing local and national regulations. Installation requirements 5.2.1 Corrosion protection Caution Risk of damage to the device! The combustion air must be free from corrosive elements - espe... -
Page 24: Heating Water Requirements
(see above). Caution Adherence to the conditions issued by Potterton is vital to safe guard the warranty. Note The water hardness of the heating water has to be checked within the scope of the recommended maintenance of the boiler and the corresponding amount of additive has to be added if necessary. -
Page 25: Diagram Of Water Hardness
The total water volume in the heating system is calculated using the sys tem volume (= fill water volume) plus the top-up water volume. In the Potterton boiler-specific diagrams only the system volume is given to make them easier to read. Over the entire service life of the boiler, a maximum top-up volume of twice the system volume is assumed. - Page 26 -15 °C is usually sufficient. The heat transfer medium must be diluted 2:1 with water to set this operating point. This mixing ratio has been tested by Potterton in relation to its practical suitability for use with gas condensing boilers.
-
Page 27: Water Hardness Tips
5 Before installation Caution Keep the installation room frost-free. If an antifreeze agent is used, pipework, radiators and gas con densing boilers are protected against frost damage. For the gas condensing boiler to be ready for operation at any time, suitable measures must also be taken to keep the installation room frost- free. -
Page 28: Choice Of The Location
5 Before installation Total heating output Total hardness in °dH in kW subject to the specific system volume < 20 l/kW ≥ 20 l/kW and ≥ 50 l/kW < 50l/kW > 600 ≤ 0.11 < 0.11 < 0.11 (1) for system boilers (< 0.3 l/kW) and systems with electric heating elements Choice of the location 5.3.1 Notes for installation location Caution... -
Page 29: Space Requirement
5 Before installation 5.3.2 Space requirement Fig.10 Recommended space requirement EC four EC four EC four EC four EC four 125 kW 170 kW 215 kW 260 kW 300 kW Dimension 60 cm 70 cm 80 cm 90 cm 100 cm Dimension 50 cm Dimension... -
Page 30: Connecting Diagrams
5 Before installation Connecting diagrams 5.5.1 Application examples Fig.12 EC four, one heating circuit and hot water preparation, AguaSave and AguaClean optional (hydraulic diagram) 7636047 - 02 - 24082015... - Page 31 5 Before installation Fig.13 EC four, one heating circuit and hot water preparation, AguaSave and AguaClean optional (hydraulic diagram) 7636047 - 02 - 24082015...
- Page 32 5 Before installation Fig.14 EC four, one mixed heating circuit and hot water preparation, AguaSave and AguaClean optional (hydraulic diagram) 7636047 - 02 - 24082015...
- Page 33 5 Before installation Fig.15 EC four, one mixed heating circuit and hot water preparation, AguaSave and AguaClean optional (hydraulic diagram) 7636047 - 02 - 24082015...
- Page 34 5 Before installation Fig.16 EC four, 3 mixed heating circuits and hot water preparation, AguaSave and AguaClean optional (hydraulic diagram) 7636047 - 02 - 24082015...
- Page 35 5 Before installation Fig.17 EC four, 3 mixed heating circuits and hot water preparation, AguaSave and AguaClean optional (hydraulic diagram) 7636047 - 02 - 24082015...
- Page 36 5 Before installation Fig.18 Boiler cascade with 2 EC four, 3 mixing heating circuits, hydraulic Bypass and hot water preparation, AguaSave and AguaClean optional (hydraulic diagram) 7636047 - 02 - 24082015...
- Page 37 5 Before installation Fig.19 Boiler cascade with 2 EC four, 3 mixing heating circuits, hydraulic Bypass and hot water preparation, AguaSave and AguaClean optional (hydraulic diagram) 7636047 - 02 - 24082015...
- Page 38 5 Before installation Fig.20 Boiler cascade with 2 EC four, 3 mixing heating circuits, hydraulic Bypass and hot water preparation, AguaSave and AguaClean optional (hydraulic diagram) 7636047 - 02 - 24082015...
-
Page 39: Legend
5 Before installation 5.5.2 Legend Fig.21 Legend for application examples; part 1 7636047 - 02 - 24082015... - Page 40 5 Before installation Fig.22 Legend for application examples; part 2 7636047 - 02 - 24082015...
-
Page 41: Installation
6 Installation Installation Mounting 6.1.1 Converting the exhaust connection The conversion of the top passage to the side or rear passage of the flue gas connection is shown below. 1. Remove the lower rear wall. 2. Remove the flue gas connection leading upward and insert an 87° elbow 3. -
Page 42: Installing The Air Supply Duct At The Side
6 Installation 6.1.2 Installing the air supply duct at the side The installation of the air supply duct on the left-hand side of the boiler is shown below. 1. Remove the lower rear wall 2. Remove the side cover plate 3. -
Page 43: Hydraulic Connection
EC four must be inserted through the opening in the rear or side wall. If there is no run-off facility underneath the condensate dis charge, the use of the Potterton neutralisation and lifting system is recom mended. -
Page 44: Check Tightness
Note Connecting the boiler as RLUA-version (RLUA-set and possibly WAS) may give rise to reduced output of the boiler, which is com pensated by Potterton customer service. Approval number The SAS has been approved by the Deutsche Institut für Bautechnik... -
Page 45: Flue Gas System
For more elbows, the following deductions have to be made 1 elbow 87°: 5 m 1 elbow 45°: 2 m 1 elbow 15°: 1 m A calculation by Potterton is required for individual cases of room air-inde pendent operation of the EC four. 7636047 - 02 - 24082015... -
Page 46: General Information About The Exhaust Gas Piping System
A table of permissible flue gas pipe lengths for cascade systems Technical information . A calculation by can be found in the Potterton is required for installations deriving from this. 6.4.3 General information about the exhaust gas piping system Standards and regulations Besides the general technical rules, the following should be partic... -
Page 47: Chimneys Already In Use
6 Installation 6.4.4 Chimneys already in use If a chimney used before for oil or solid fuel-fired boilers is used as a duct for installation of a concentric exhaust gas pipeline, the chimney must be thoroughly cleaned first by a specialist. Note Concentric flue gas routing, also in the duct, also in the shaft, is absolutely necessary The concentric flue gas pipe must run... -
Page 48: Cleaning And Inspection Openings
6 Installation Assembly 1. The pipes and formed pieces have to be fitted together up to the con nector basis. Only the original profile seals of the building kit or the original spare seals may be used between the individual elements. Before assembly, the seals must be treated with the silicone paste which is part of the scope of delivery. -
Page 49: Electrical Connections
6 Installation The ducts for exhaust gas facilities must not have any openings other than the necessary cleaning and inspection ports as well as openings for back ventilation of the exhaust gas pipe. Electrical connections 6.5.1 Electrical connection (general) Danger Danger to life through incorrect work! All electrical work in connection with the installation may only be carried out by a trained electrician. -
Page 50: Circulating Pumps
6.5.7 Replacing cables All connecting cables, except for the mains connection cable, have to be replaced by Potterton special cables in case of replacement. When replac ing the mains connection cable, only cables of the types H05VV-F 3 x 1 or 3 x 1.5 mm... -
Page 51: Commissioning
7 Commissioning Commissioning General Danger Commissioning may only be carried out by an approved installer. The installer checks the tightness of pipes, the correct function of all regulating, control and safety equipment, and measures the combustion values. If this work is not carried out correctly, there is a risk of considerable damage to persons, environment and prop... -
Page 52: Commissioning Procedure
7 Commissioning Only components tested and marked according to the respective standard have been used. Date /signature All system components have been installed according to the instruction of the manufacturers. Company stamp The whole system conforms to the standard........To ensure the heat source operates reliably and economically for a long period, we recom... -
Page 53: Manual Adjustment Of Burner Output (Controller Stop Function)
7 Commissioning EC four EC four EC four 125 kW 170 kW 215 kW Function Prog. no. Setting level Natural Propane Natural Propane Natural Propane Boiler Output basic stage 2331 Burner control Required output prepurging 9504 Required output ignition 9512 59.3 66.3 75.5... -
Page 54: Adjusting Co
7 Commissioning Note The regulator stop function is stopped by pressing the operating mode button Heating Operation for approximately 3 seconds, reaching the maximum boiler temperature or a time limit. If there is demand for heat from a coiled tubing storage tank, this demand will continue to be met during the controller stop function. -
Page 55: Final Instructions
7 Commissioning For more information, see Technical data, page 13 GUID-6D53C28A-DD96-4E9B-915F-A733465011E0, page 0 Final instructions 7.5.1 Instruction of the customer The customer must be given full explanation of the heating system and how the protective installations work. He must be especially instructed about the following: The supply air opening must not be closed or restricted The connection nozzle for the combustion air at the top of the device... -
Page 56: Operation
8 Operation Operation Use of the control panel 8.1.1 Changing parameters Settings which are not directly changed via the operating panel must be carried out on the setting level. The basic programming process is depicted in the following using the ex ample of the setting of Set time and date. -
Page 57: Start-Up
8 Operation 1. Press OK. End user display is shown. 2. Press the Info button for approx. 3 s. The setting levels appear. 3. Select the required setting level using the control knob. Setting levels - End user (Eu) - Commissioning (C), incl. -
Page 58: Setting Necessary Parameters
8 Operation 5. Use the operating mode key for heating mode to select the automat ic operating mode on the boiler control unit xxxxxxxxxxxxxx RA-0000163 6. Set the required room temperature using the control of the control unit RA-0000164 8.2.3 Setting necessary parameters Normally, the parameters of the regulator do not need to be modified. -
Page 59: Adjusting Domestic Water Mode
8 Operation 8.2.5 Adjusting domestic water mode Switched on Domestic water is prepared according to the selected switching programme. Switched off Domestic water preparation has been de-activated. Note XXXXXXXXXXXXXX XXXX A setting between 50 and 60°C is recommended for domestic water heating. -
Page 60: Chimney Sweep Function
8 Operation 1. Press the information key. 2. Press OK. 3. Adjust nominal value by using rotating knob 4. Acknowledge setting with OK. 8.2.9 Chimney sweep function The chimney sweep function is activated or deactivated using the Schorn steinfeger-Taste. 1. Press the Schornsteinfeger-Taste The activated special function is displayed by the symbol in the display. -
Page 61: Settings
9 Settings Settings List of parameters Subject to system configuration, not all parameters listed in the parameter list will be shown on the display. To reach the end user (Eu), Commissioning (C) and Engineer (E) setting levels: Press the OK-Taste. Then press the Informationstaste for approx. - Page 62 9 Settings Operator section Prog. no. Level Standard value Software version — (1) This parameter is only visible in the room device. (2) This parameter is only visible if a suitable standard setting is available in the operating unit. (3) This parameter is only visible in the room device, as the operating unit in the boiler is programmed permanently to the operating unit. Wireless Prog.
- Page 63 9 Settings Time program heating circuit 5 Prog. no. Level Standard value Copy? Default values No | Yes Holidays heating circuit Level Standard value Prog. no. Prog. no. Prog. no. Select Period 1 Period 1 | Period 2 | Period 3 | Period 4 | Period 5 | Period 6 | Period 7 | Period 8 Start —.—...
- Page 64 9 Settings Heating circuit Level Standard value Prog. no. Prog. no. Prog. no. Floor curing function 1150 1450 Off | Functional heating | Curing heating | Curing/ functional heating | Functional/curing heating | Manually Floor curing setp manually 1151 1451 25 °C Floor curing setp current 1155...
- Page 65 9 Settings Prog. no. Level Standard value Optg mode changeover 1680 None | Off | On Consumer circuit / swimming pool circuit Consumer Consumer Swimming Level Standard value circuit 1 circuit 2 pool circuit Prog. no. Prog. no. Prog. no. Flow temp setp cons request 1859 1909...
- Page 66 9 Settings Boiler Prog. no. Level Standard value Temp differential max 2316 - - - Temp differential nominal 2317 15 °C Pump modulation 2320 Temp differential None | Demand | Boiler setpoint | Temp differential nominal | Burner output nominal Pump speed min 2322 10 %...
- Page 67 9 Settings Boiler Prog. no. Level Standard value 2452 EC four 125 kW: 20 Controller delay fan output EC four 170 kW: 28 EC four 215 kW: 35 EC four 260 kW: 42 EC four 300 kW: 48 Controller delay duration 2453 60 s Switching diff on CHs...
- Page 68 9 Settings Solar Prog. no. Level Standard value Charging temp min swi pool 3818 - - - °C Charging prio storage tank 3822 Hot water storage None | Hot water storage tank | Buffer storage tank tank Charging time relative prio 3825 - - - min Waiting time relative prio...
- Page 69 9 Settings Domestic water storage tank Prog. no. Level Standard value El immersion heater release 5061 Hot water release 24h/day | Hot water release | Time hot water El immersion heater control 5062 Hot water sensor External thermostat | Hot water sensor Hot water boost 5070 Off | On...
- Page 70 9 Settings Configuration Prog. no. Level Standard value Ctrl boiler pump/HW valve 5774 All requests All requests | Request CH1/HW only Boiler pump at DHW 5775 Off | On Solar controlling element 5840 Diverting valve Charging pump | Diverting valve External solar exchanger 5841 Commonly...
- Page 71 9 Settings Configuration Prog. no. Level Standard value Function value 2 H1 5956 1000 Function input H4 5970 None None | Optg mode change CHs+HW | Optg mode changeover HW | Optg mode changeover CHs | Optg mode changeover CH1 | Optg mode changeover CH2 | Optg mode changeover CH3 | Heat generation lock | Error/alarm message | Consumer request VK1 | Consumer request VK2 | Release swimpool source htg | Excess heat discharge | Release swi pool solar | Operating level HW |...
- Page 72 9 Settings LPB system Prog. no. Level Standard value Device address 6600 Segment address 6601 Bus power supply function 6604 Automatically Off | Automatically Bus power supply state 6605 Off | On Display system messages 6610 No | Yes System message to alarm relay 6611 No | Yes Alarm delay...
- Page 73 9 Settings Fault Prog. no. Level Standard value History 20 6990 Date / Time Fault code 20 SW diagnostic code 20 6995 Burner control phase 20 Maintenance/special operation Prog. no. Level Standard value Burner hours interval 7040 - - - h Burn hrs since maintenance 7041 Burner start interval...
- Page 74 9 Settings Configuration of extension modules Prog. no. Level Standard value Relay output QX22 module 1 7302 None Parameters see Relay output QX21 module 1 (prog. no. 7301)! Relay output QX23 module 1 7303 None Parameters see Relay output QX21 module 1 (prog. no. 7301)! Sensor input BX21 module 1 7307...
- Page 75 9 Settings Configuration of extension modules Prog. no. Level Standard value Funct output UX21 module 1 7348 None None | Boiler pump Q1 | DHW pump Q3 | DHW intermediate circuit pump Q33 | Heat circuit pump HC1 Q2 | Heat circuit pump HC2 Q6 | Heat circuit pump HC3 Q20 | Collector pump Q5 | Solar pump ext.
- Page 76 9 Settings Configuration of extension modules Prog. no. Level Standard value Funct value 2 H2 module 2 7392 1000 Function input H21 module 2 7396 Operating mode change HCs+DHW Parameters see Function input H21 module 1 (prog. no. 7321)! Contact type H21 module 2 7397 NC | NO Input value 1 H21 module 2...
- Page 77 9 Settings Configuration of extension modules Prog. no. Level Standard value Function input H2 module 3 7461 None Parameters see Function input H21 module 1 (prog. no. 7321)! Contact type H2 module 3 7462 NC | NO Voltage value 1 H2 module 3 7464 Funct value 1 H2 module 3 7465...
- Page 78 9 Settings Input/output test Prog. no. Level Standard value Output test UX21 module 3 7788 Output test UX22 module 3 7790 Sensor temp BX1 7820 Sensor temp BX2 7821 Sensor temp BX3 7822 Sensor temp BX21 module 1 7830 Sensor temp BX22 module 1 7831 Sensor temp BX21 module 2 7832...
- Page 79 9 Settings Diagnostics cascade Prog. no. Level Standard value Priority/state source 3 8104 Parameters see Priority/state source 1 (prog. no. 8100)! Priority/state source 16 8130 Parameters see Priority/state source 1 (prog. no. 8100)! Cascade flow temp 8138 Cascade flow temp setp 8139 Cascade return temp 8140...
- Page 80 9 Settings Diagnostics consumers Prog. no. Level Standard value Outside temp max 8702 Outside temp attenuated 8703 Outside temp composite 8704 Central heating pump 1 8730 Off | On Speed CH pump 1 8735 Room temp 1 8740 Room setpoint 1 Flow temp setpoint 1 Room thermostat 1 8749...
- Page 81 9 Settings Burner control Prog. no. Level Standard value 9504 EC four 125 kW: 73 Required output prepurging EC four 170 kW: 94 EC four 215 kW: 96 EC four 260 kW: 120 EC four 300 kW: 129 9512 EC four 125 kW: Required output ignition 59.3 kW EC four 170 kW:...
- Page 82 9 Settings Burner control Prog. no. Level Standard value Fan output/speed Y-section 9627 EC four 125 kW: 501.1 EC four 170 kW: 517.2 EC four 215 kW: 464.4 EC four 260 kW: 488.0 EC four 300 kW: 431.7 (1) The kW settings are approximate values. Exact values can be determined by the gas meter for example. Prog.
-
Page 83: Description Of The Parameters
9 Settings Info option Prog. no. Level Standard value Water pressure (1) The display of the information values depends on the operating status. Description of the parameters 9.2.1 Time and date Time and date (1–3) The regulator has a year clock with setting possibilities for time, day/month and year. -
Page 84: Wireless
9 Settings Caution The control parameters are overwritten. The factory settings are stored in the operating unit. operating unit . Activation of prog. no. 31 at the The regulator is reset to factory setting. room unit : Activation of prog. no. 31 at the The individual programming of the room unit is written into the control. -
Page 85: Time Programs
9 Settings Delete all devices (140) The wireless connections to all units is cancelled here. 9.2.4 Time programs General information about the time programs. Note Time programs 1 and 2 are always assigned to the respective heating circuits (1 - 3) and only displayed if these heating circuits are present and also turned on in the menu Configuration (prog.- no. -
Page 86: Heating Circuits
9 Settings Start of holiday (642 - 662) Entering the holiday start. End of holiday (643 - 663) Entering the holiday end. Operating level (648-668) Selecting the operating level (Reduced or Off) for the holiday program. Note A holiday period always ends on the last day at 12:00 AM (00:00). The holiday programmes are only activated in the operation modeAutomatically . - Page 87 9 Settings Fig.29 Heating curve diagram 2,75 2,25 °C 1,75 1,25 0,76 0,25 °C RA-sRE036B AT Outdoor temperature VT Flow temperature Determination of the heating curve gradient Enter the lowest calculated outside temperature according to climate zone (e.g. -12°C in Frankfurt) into the diagram (see Figure 1, page 87) (e.g. ver tical line at -12°C).
- Page 88 9 Settings Fig.30 Summer/winter heating limit A Off E On SW Summer/winter heating limit °C T Temperature t Time x Outside temp attenuated (prog.no. 8703) The heating circuit switches to summer operation as soon as the average outside temperature over the past 24 hours rises 1°C above the value set here.
- Page 89 9 Settings Note However, if there is a RGT/RGTF or RGB room unit connected, and the setting “room influence” is set between 1 and 99%, the deviation of the actual and set room temperatures is captured and taken into account in the temperature control. In this way any ex ternal heat can be taken into account enabling a constant room temperature to be achieved.
- Page 90 9 Settings enabled. Without room sensor the quick reduction switches the heater off depending on the outside temperature and the building time constant (prog.no. 6110) until the temperature has theoretically dropped to the re duced target value or the frost protection value. Tab.9 Duration of the quick reduction Duration of the quick reduction for reduction by 2°C in hrs:...
- Page 91 9 Settings Fig.34 Reduced setpoint increase TA1 Reduced setpoint increase start TA2 Reduced setpoint increase end TK Comfort setpoint TR Room temperature reduced setpoint TAg Outside temperature mixed When only a small heating output is required to cover demand, the re duced room setpoint can be increased in the case of cold outside temper...
- Page 92 9 Settings Floor curing setp current (855, 1155, 1455) Display of the current floor curing setpoint. Days complete.current (856, 1156, 1456) Display of the current floor curing function day. Excess heat draw (861, 1161, 1461) If the excess temperature draw is activated via input H1 to H5 or a maxi mum temperature is exceeded in the system, this excess heat energy can be dissipated by the central heating drawing off heat.
-
Page 93: Domestic Water
9 Settings No: The temperature request remains unchanged. The calculated cor rection value is not added. Yes: The temperature request includes the flow setpoint correction. Operating level changeover (898, 1198, 1498) Hx selection of the oper When an external timer is used above the inputs ating level to which the heating circuits are to be switched is possible. - Page 94 9 Settings Legionella function (1640) Function to kill legionella germs by heating up to the set legionella function setpoint (see programme number 1645). Off: Legionella function is switched off. Periodically: Legionella function is repeated periodically, depending on the set value (prog. no. 1641). Fixed weekday: Legionella function will be activated on a certain week...
-
Page 95: Consumer Circuits/Swimming Pool Circuit
9 Settings Optg mode changeover (1680) Using external switching above the inputs H1-H5 it is possible to select which operating mode is to be switched into. Off: The function is switched off. 9.2.8 Consumer circuits/Swimming pool circuit Flow temp setp cons request (1859, 1909, 1959) Setting of the flow setpoint is done with this function, which is effective during active request of the consumer circuit. -
Page 96: Boiler
9 Settings Off: The system pump is not locked. On: When the generator lock is active the system pump is also locked. Mixing valve boost (2130) For the admixture the boiler flow temperature actual value must be higher than the requested setpoint of the mixer flow temperature, since this can not be corrected otherwise. - Page 97 9 Settings On: Switching off activated Impact heat generation lock (2305) This parameter is used to set whether the heat generator lock should be effective only for heating requests or also for DHW requests. Heating mode only: Only heating requests are locked. DHW requests are still operated.
- Page 98 9 Settings Output at pump speed min (2334) and Output at pump speed max (2335) If the option burner output is selected under prog. no. 2320, the boiler pump is operated up to the set burner output under prog. no line 2334 to minimum pump speed.
-
Page 99: Cascade
9 Settings HW (2461) and Switching diff off min HW (2462)Switching diff off max HW Fig.38 Switching difference Sd Switching difference off Sd1 Switching diff off max CHs, Switching diff off max HW Sd2 Switching diff off min CHs, Switching diff off min HW Sd3 Switching diff on CHs, Switching diff on HW t Time Ti Actual temperature... - Page 100 9 Settings Early on, late off: Additional boilers are switched on as early as possible (output range min) and switched back off again as late as possible (out put range min). I.e. as many boilers as possible in operation or long run ning times for additional boilers.
-
Page 101: Solar
9 Settings 9.2.13 Solar Temp diff on (3810) and Temp diff off (3811) Fig.39 Charging control /schematic) 1 / 0 On / off collector pump T Temperature T1 Temp diff on T0 Temp diff off TK Collector temperature TL Charging temperature min buffer storage tank / swimming pool TS Storage tank temperature t Time The switching-on and switching-off point of the collector pump is set with... - Page 102 9 Settings Charging temp max Charging temp max Setpoint solar heat (prog. no. 5050) (prog. no. 4750) (prog. no. 2055) Storage tank temp Storage tank temp Swimming pool temp (prog. no. 5051) (prog. no. 4751) (prog. no. 2070) (1) With swimming pool heating set as priority (prog. no. 2065), the swimming pool will be heated before the storage tanks.
-
Page 103: Solid Fuel Boiler
9 Settings Antifreeze (3880) Information of the antifreeze used. Antifreeze concentration (3881) Input of antifreeze concentration for usage measurement of solar energy. Pump capacity (3884) Input of the flow of the installed pump for calculation of the brought in vol ume for usage measurement. - Page 104 9 Settings Auto heat gen lock SD (4721) The heat generator is locked if the the temperature in the buffer storage tank is higher than the boiler setpoint+Auto heat gen lock SD. Temp diff buffer/CH (4722) If the temperature difference between buffer storage tank and heating cir cuit temperature request is large enough, the heat required by the heating circuit will be taken from the buffer storage tank.
-
Page 105: Drinking Water Storage
9 Settings Optg action return diversion (4796) The function can either be used as return temperature increase or as re turn temperature decrease. Temp decrease: If the return temperature of the consumers is higher than the temperature on the selected sensor (prog. no. 4795), the lower part of the storage tank can be preheated with the return flow. - Page 106 9 Settings Full charging: The cylinder is fully charged at every DHW demand. Full charging legio: The cylinder is fully charged if the legionella function is enabled; otherwise it is only recharged. Full charg 1st time day: During the first charging of the day, the cylinder is fully charged, then recharged.
- Page 107 9 Settings Recooling temp (5055) Setting the temperature for recooling the DHW-storage. Recooling collector (5057) Recooling of the overhaeted collector through giving off of the energie to the surrounding of the collector. El imm heater optg mode (5060) Substitute: The DHW is only heated by an immersion heater if the boiler signals a malfunction or a boiler lock exists.
- Page 108 9 Settings Pump speed min (5101) andPump speed max (5102) Setting of the minimum and maximum speed of the storage tank charging pump in percent. Speed Xp (5103) The P-band Xp defines the amplification of the controller. A smaller Xp val ue leads to a higher actuation of the charging pump with equal control dif...
-
Page 109: Configuration
9 Settings setpoint plus the value set here. The setting -5°C results in the intermedi ate circuit pump being switched on as soon as the boiler temperature is 5°C below the boiler setpoint . Excess interm circ temp del (5151) Control of the burner output on the charging temperature is activated if the time set here has elapsed since switching on the intermediate circuit pump. - Page 110 9 Settings Ctrl boiler pump/HW valve (5774) With this parameter it can be defined for special hydraulic systems that the boiler pump Q1 and the diverting valve Q3 only are responsible for DHW and heating circuit 1, however not for heating circuits 2 and 3 or for the ex ternal consumer circuits.
- Page 111 9 Settings Solid fuel boiler pump Q10: Connection of a circulation pump for the boiler circuit for the connection of a solid fuel boiler. Time setting 5 K13: The relay is controlled by the time program 5 ac cording to the settings. Buffer return valve Y15: This valve must be configured for the return temperature increase/reduction or partial charging of the buffer storage tank.
- Page 112 9 Settings Solar flow sensor B63: This sensor is required for the solar usage meas urement. Solar return sensor B64: This sensor is required for the solar usage measurement. Function input H1 (5950) Function input H4 (5970) and Function input H5 (5977) None: No function.
- Page 113 9 Settings Contact type H1 (5951) Contact type H4 (5971) and Contact type H5 (5978) With this function, the contacts can be set as resting contact (contact closed, must be opened for activating the function) or as working contact (contact opened, must be closed for activating the function). Voltage value 1 H1 (5953),Voltage value 2 H1 (5955), Function value 1 H1 (5954) andFunction value 2 H1 (5956) The linear sensor curve is defined over two fixed points.
- Page 114 9 Settings 40 for buildings with thick walls or outer insulation. 20 for buildings of normal building design. 10 for buildings of light building design. Central setp compensation (6117) The central setpoint lead monitors the heat generator setpoint to the re quired central flow temperature.
- Page 115 9 Settings Solar External solar ex changer, Solar A collector field Tank charging Solar diverting Solar charging Solar diverting pump K9 with sensor B6 pump for valve for pump for valve for DHW=DHW stor and collector pump buffer storage tank buffer storage tank swimming pool K18 swimming pool K18...
-
Page 116: Lpb System
9 Settings Heating circuit 3 Heating circuit 2 Heating circuit 1 Heating circuit pump, mixer Heating circuit pump, mixer Heating circuit pump, mixer Software version (6220) Display of the actual software version. 9.2.18 LPB system Device address (6600) andSegment address (6601) The two-part LPB address of the controller consists of the 2-digit segment number and the 2-digit device number. -
Page 117: Fault
9 Settings All CHs in segment: DHW heating applies to all heating circuits in this section. All CHs in system: DHW heating applies to all heating circuits in the sys tem. Note For all settings the controllers which are in holiday status are also taken into account for the DHW preparation. - Page 118 9 Settings Note The burner hours are only counted, when the maintenance mes sage has been activated. Burner start interval (7042) Setting of the interval for burner starts for maintenance. Burn starts since maint (7043) Burner starts since the last maintenance. Note The burner starts are only counted, when the maintenance mes...
-
Page 119: Configuration Of Extension Modules
9 Settings Reading from stick: Starts reading the data from the stick. This operation is only possible with READ sticks. The data of the set data set is copied to the LMS control. First a check is carried out as to whether the data set may be imported. - Page 120 9 Settings 3. Heating circuit mixer CLOSED Primary control mixer OPEN Primary control mixer CLOSED Flow sensor HC1 Collector sensor Return sensor Flow sensor HC2 Flow sensor HC3 Flow sensor primary control Relay output QX21 module 1(7301), Relay output QX22 module 1, (7302), Relay output QX23 module 1, (7303), Relay output QX21 module 2, (7376), Relay output QX22 module 2(7377) und Relay output QX23 module 2 (7378) , Relay output QX21...
- Page 121 9 Settings Swimming pool pump Q19: Connection of a swimming pool pump at the input Q19. Flue gas relay K17: Relay K17 closes if the flue gas temperature ex ceeds the value set in the control line of prog. no. 7053. St tank transfer pump Q11: The DHW storage tank can be charged from the buffer storage tank providing it is hot enough.
- Page 122 9 Settings Note The chimney sweeper function can be applied in spite of the heat generation lock. Error/alarm message: Closing the inputs Hx results in a control unit-in ternal fault message, which will also be signalled via a relay output pro grammed as an alarm output or in the remote management system.
-
Page 123: Input/Output Test
9 Settings Heat generation lock: The boiler is locked if contact at EX21 is closed. Error/alarm message: Closing the input EX21 results in a control unit-in ternal fault message, which will also be signalled via a relay output pro grammed as an alarm output or in the remote management system. Excess heat discharge: An active excess heat discharge enables, for example, an external source to force the consumers (heating circuit, DHW storage tank, heating circuit pump) to draw off the excess heat us... - Page 124 9 Settings End user (Eu) Commissioning, Engineer (menu Status) Restricted, buffer Forced draw Forced draw HW Forced draw source Overrun active On heating mode Opt start ctrl+CH boost Optimum start control Central heating boost On heating mode Reduced heating mode Optimum stop control Reduced heating mode Frost protection active...
- Page 125 9 Settings End user (Eu) Commissioning, Engineer (menu Status) Boost hot water setpoint Charging active Charging, legionella setp Charging, nominal setp Charging, reduced setp Frost protection active Frost protection active Frost prot instant heater Overrun active Overrun active Standby charging Standby charging Charged Charged, max st tank temp...
- Page 126 9 Settings End user (Eu) Commissioning, Engineer (menu Status) In operation for CH In operation for CH In part load op for CH In part load op for CH Released for CH Released for CH Overrun active Overrun active Released Released Frost protection active Frost protection active...
- Page 127 9 Settings End user (Eu) Commissioning, Engineer (menu Status) Return limitation Return limitation, part load In operation for CH In part load op for CH In part load op for CH In operation for HW In operation for HW In part load op for HW In part load op for HW In op for CH, HW In op for CH, HW...
-
Page 128: Diagnostics Cascade/Heat Generation/Consumers
9 Settings End user (Eu) Commissioning, Engineer (menu Status) Partial charging active Recooling active Recooling via collector Recooling via HW/CHs Charged Charged, max st tank temp Charged, max charging temp Charged, forced temp Charged, required temp Part charged, required temp Charged, min charging temp Cold Cold... -
Page 129: Info Option
9 Settings Note If you change this value, please note that prog.no. 2452 (Controller delay fan output) is always higher. Required output HF (9529) Nominal output fan speed under boiler in HF Postpurge time (9540) After-venting time. Caution This parameter must only be changed by a heating specialist! Fan output/speed slope (9626) and Fan output/speed Y- section (9627) The speed of the fan can be adjusted with this. -
Page 130: Maintenance
10 Maintenance 10 Maintenance 10.1 General 10.1.1 General instructions In heating and air conditioning systems, a regular inspection and mainte nance as required by qualified personnel contribute to correct operation according to the product specification, and therefore to ensuring high effi ciency and low environmental pollution in the long term. -
Page 131: Maintenance Code Table
10 Maintenance 1. Informationstaste Press Further information is displayed. Maintenance code table Note The maintenance message has not been activated by the setting in the factory. 10.2.2 Maintenance code table Servicing code Maintenance description Burner operating hours exceeded Burner starts exceeded Maintenance interval exceeded 10.2.3 Operating phases of the Control Centre LMS The operating phases are displayed after the information key has been... -
Page 132: Standard Inspection And Maintenance Operations
10 Maintenance 10.3 Standard inspection and maintenance operations 10.3.1 Checking water hardness The water hardness of the heating water has to be checked within the scope of the recommended maintenance of the boiler and the correspond ing amount of additive has to be added if necessary. 10.3.2 Removing the burner The following steps describe how to remove the burner: 1. -
Page 133: Checking Combustion Room Insulation
10 Maintenance Fig.46 Removing the burner 8. Remove the nuts and washers 9. Pull the entire burner with burner seal forwards and out Note The illustration shows removal of the burner from the EC four 125 kW - 170 kW. Removal of the burner from the EC four 215 kW - 300 kW is carried out in the same way. -
Page 134: Cleaning The Burner Pipe
10 Maintenance Fig.48 Inserting the combustion room insu 3. Insert a retaining clip with the angled tips from behind into the upper lation. insulating panel 4. Insert the insulating panels Insert the upper insulating panel Insert the left insulating panel Insert the right insulating panel Clamp the central insulating panel D in the remaining space 5. -
Page 135: Cleaning The Fan
10 Maintenance 2. Clean the heat exchanger with a brush or rinse with water 3. Remove deposits from the exhaust collection pan RA-0000237 4. Remove the siphon and clean it 5. Reinstall the siphon 6. Replace the cover of the exhaust collection pan Note Use a new seal when installing the cover. -
Page 136: Checking The Ionization Electrode
10 Maintenance Danger of electric shock Danger to life due to electric current! Before service work is started, the boiler has to be de-energised and secured from accidentally being switched back on. The following steps describe how to change the ignition electrodes: 1. -
Page 137: Electrode Spacing And Installation Locations
10 Maintenance Fig.52 Removing the ionization electrode 2. Remove nuts and pull out the ionization electrode with the seal Note The illustration shows removal of the ionization electrode from the EC four 125 kW - 170 kW. Removal of the ionization electrode from the EC four 215 kW - 300 kW is carried out in the same way. -
Page 138: Troubleshooting
11 Troubleshooting 11 Troubleshooting 11.1 Fault code table The following is an extract from the fault code table. If other fault codes are displayed, please inform the installer. Fault Fault description Explanations/causes code No fault Outside temp sensor fault Check connection or outside temp sensor, emergency opera tion Boiler temperature 1 sensor fault Check connection, inform heating specialist... - Page 139 11 Troubleshooting Fault Fault description Explanations/causes code Safety temperature limiter lockout No heat removal, STB interruption, possible short-circuit in the gas valve , internal fuse faulty; allow device to cool down and carry out reset; if the fault occurs several times inform the in staller Temperature monitor switching off No heat supply;...
-
Page 140: Fault Finding
11 Troubleshooting Fault Fault description Explanations/causes code Sensor BX3 no function Sensor BX21 no function (EM1, EM2 or EM3) Sensor BX22 no function (EM1, EM2 or EM3) Collector pump Q5 missing Collector sensor B6 missing Solar DHW sensor B31 missing Solar interconnection missing Solar actuator buffer K8 missing Solar actuator swimming pool K18 missing... -
Page 141: Fault Switch-Off
11 Troubleshooting 1. Press the information key. Further information about the fault is displayed Fault code table For more information, see Fault code table, page 138 11.2.2 Fault switch-off A fault switch-off is a safety-switch off in the case of flame failure during operation. -
Page 142: Disposal/Recycling
Please follow the legal requirements applicable to disposal in your country. 12.2 Appliance disposal The appliance can be returned to Potterton for disposal via a specialist company. The manufacturer undertakes to recycle the appliance correctly. Note The appliance is recycled by a disposal company. If possible, the materials, especially the plastics, are identified. -
Page 143: Appendix
13 Appendix 13 Appendix 13.1 Declaration of conformity 7636047 - 02 - 24082015... -
Page 144: Index
Index Index Accessories ........22 Hardness stabiliser . - Page 145 Index Replacing the safety valve ......137 Standards ........12 Resistance values .
- Page 146 Index 7636047 - 02 - 24082015...
- Page 147 © Copyright All technical and technological information contained in these technical instructions, as well as any drawings and technical de scriptions supplied, remain our property and shall not be multiplied without our prior consent in writing. Subject to alterations.
- Page 148 7636047 - 02 - 24082015...
Need help?
Do you have a question about the eurocondense four 125 kw and is the answer not in the manual?
Questions and answers