
Related Manuals for Potterton Eurocondense five 400 kW


Summary of Contents for Potterton Eurocondense five 400 kW
- Page 1 United Kingdom Installation Manual Gas condensing boiler Eurocondense five 400 kW Eurocondense five 470 kW Eurocondense five 540 kW Eurocondense five 610 kW...
- Page 2 Dear Customer, Thank you very much for buying this appliance. Please read through the manual carefully before using the product, and keep it in a safe place for later reference. In order to ensure continued safe and efficient operation we recommend that the product is serviced regularly. Our service and customer service organisation can assist with this.
-
Page 3: Table Of Contents
Use of antifreeze agents with Potterton heat generators ....... . . - Page 4 Contents 5.10.5 Moving by two pallet trucks ............. . 36 5.10.6 Transport on rollers .
- Page 5 Contents Settings ..................68 List of parameters .
- Page 6 Contents 14 Appendix ..................156 14.1 Declaration of conformity .
-
Page 7: Safety
1 Safety Safety General safety instructions Danger If you smell gas: 1. Do not use a naked flame, do not smoke, do not operate electrical contacts or switches (doorbell, light, motor, lift, etc.). 2. Shut off the gas supply. 3. Open the windows. 4. - Page 8 1 Safety Danger Risk of poisoning. Never use condensate water as drinking water! Condensate is not suitable for consumption by people or animals. Do not let the skin come into contact with condensate. Suitable protective clothing must be worn during maintenance work.
-
Page 9: Intended Use
1 Safety Danger Replacement of damaged parts may only be performed by an installer. Warning Risk of damage! The condensing boiler may only be installed in rooms with clean combustion air. Foreign matter such as pollen must never filter through the inlet apertures to reach the inside of the appliance. -
Page 10: Liabilities
1 Safety Liabilities 1.3.1 Manufacturer's liability Our products are manufactured in compliance with the requirements of the various Directives applicable. They are therefore delivered with the marking and any documents necessary. In the interests of the quality of our products, we strive constantly to improve them. We therefore reserve the right to modify the specifications given in this document. -
Page 11: About This Manual
2 About this manual About this manual General This manual is intended for the installer of a EC five boiler. Additional documentation Here is an overview of the further documents belonging to this heating system. Tab.1 Overview table Documentation Contents Intended for Technical information Planning documents... - Page 12 2 About this manual Important Please note: important information. Reference to other manuals or pages in this manual. 7713465 - 05 - 23102019...
-
Page 13: Technical Specifications
3 Technical specifications Technical specifications Homologations 3.1.1 Regulations and standards Beside the general technical rules, the relevant standards, regulations, ordinances and guidelines should be followed: DIN 4109: Sound insulation in buildings DIN EN 12828: Heating systems in buildings –, planning domestic hot water heating systems Federal Immission Control Ordinance 1. -
Page 14: Technical Data
3 Technical specifications Technical data 3.2.1 Technical data – Boiler space heaters in accordance with ErP guideline Tab.2 Technical data – Boiler space heaters in accordance with ErP guideline Product name EC five 400 kW Condensing boiler Low-temperature boiler B1 boiler Cogeneration space heater Combination heater Prated... -
Page 15: Technical Data For The Auxiliary Contactor For The Pump Phs
3 Technical specifications Model EC five EC five EC five EC five 400 kW 470 kW 540 kW 610 kW Standard utilisation (Hi/Hs) 75/60°C 106.4/95.4 106.1/95.1 106.2/95.2 106.3/95.3 40/30°C 109.4/98.4 109.3/98.3 109.2/98.2 109.1/98.1 Gas and exhaust side values Gasvolume flow Natural gas E (G20) [H 9,45 kWh/m³] 8,7 - 42,5... -
Page 16: Tables Of Sensor Values
3 Technical specifications Permissible cable cross-sections 1 x (0.75 - 4) solid wire 2 x (0.75 -2.5) 1 x (0.75 - 2.5) flexible cable with wire end ferrules 2 x (0.75 -2.5) 3.2.4 Tables of sensor values Tab.4 Resistance values for outside temperature sensor ATF Temperature [°C] Resistance [Ω] 8194... -
Page 17: Pressure Drop Secondary Circuit
3 Technical specifications 3.2.5 Pressure drop secondary circuit RA-0000253 WMS [m Pressure drop secondary circuit WMS Water mass flow EC five 400 kW EC five 470 kW EC five 540 kW EC five 610 kW 7713465 - 05 - 23102019... -
Page 18: Dimensions And Connections
3 Technical specifications 3.2.6 Dimensions and connections Fig.1 Dimensions and connections RA-0000252 7713465 - 05 - 23102019... - Page 19 3 Technical specifications Tab.6 Dimensions Model EC five EC five EC five EC five 400 kW 470 kW 540 kW 610 kW Rear air supply duct (standard) NW 160 Safety group connection AG R¾" Rear flue gas connection (optional) DN 250 Condensate connection(optional right/left) DN 32 Safety valve connection...
-
Page 20: Wiring Diagram
3 Technical specifications 3.2.7 Wiring diagram Fig.2 Wiring diagram RA-0001346 ATF Outdoor temperature sensor QAC 34 GW Gas pressure monitor B1 Ionisation electrode H1,4,5 Multifunctional Input *) BE Operating unit H6 Gas pressure Monitor input Bus BE Bus connection for operating unit HP Heating circuit pump *) Bus EM Bus connection for expansion module KRF Boiler return sensor type 36... - Page 21 3 Technical specifications LDW B Air pressure monitor blanking plate TLP Domestic water charging pump *) M4 Burner fan TWF DHW sensor type 36 Netz Mains Connection 230V/50Hz TZP Domestic water circulation pump *) P1 PWM output WTF Heat exchanger sensor QX1...3 Multifunctional output X11,60 Bus module interface S1 ON/OFF switch...
-
Page 22: Description Of The Product
4 Description of the product Description of the product Operating principle 4.1.1 Description of the function of the air pressure monitor Fig.3 Description of function of the air Air pressure monitor flue gas pressure monitor (schematic Air pressure monitor blanking plate drawing) Blanking plate In boiler operation the flue gas air pressure monitor monitors the... -
Page 23: Main Components
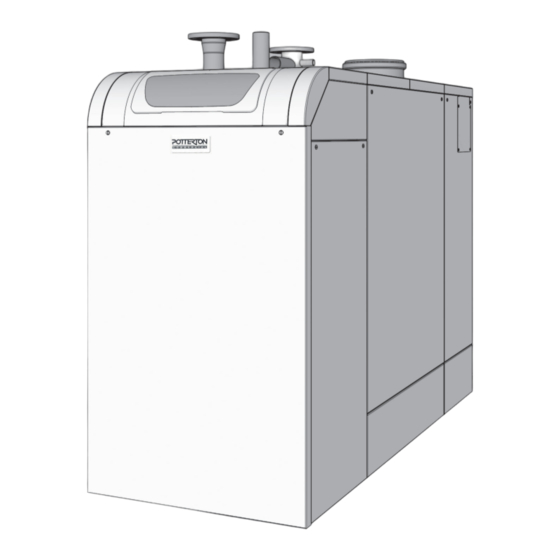
4 Description of the product Main components 4.2.1 Boiler Fig.4 EC five 400 kW-540 kW Boiler flow Flue gas connection Connection for safety group Connection for safety valve Air supply duct Boiler return Gas connection Boiler control LMS Ignition transformer (below the control housing) Control damper Ignition and ionization electrode/flame inspection window Air pressure monitor blanking plate (behind the fan) -
Page 24: Control Panel Description
4 Description of the product Control panel description 4.3.1 Operating elements Fig.6 Operating elements Reset safety temperature limiter (STB) ON/OFF switch Reset button burner control Operating mode key, domestic water mode Operating mode key, heating mode Screen OK key (acknowledgement) Information key Control knob ESC key (cancel) -
Page 25: Installation Of Extension Modules
4 Description of the product Operating elements 1 USB connection for service tool 2 Status bar 3 Work area 4 Control knob 5 Display 6 Navigation bar The control knob is used to operate the room unit. The display is organized into a navigation bar, status bar, and work area. XXXXXXX 14:32 Important... -
Page 26: Before Installation
EC five must be kept free at all times. Treating and preparing the heating water 5.4.1 Introduction This section explains the conditions for heating water when Potterton condensing boilers are used. Important Please note that the boiler EC five has an aluminium silicon heat exchanger. -
Page 27: Heating Water Requirements
Heating systems in which a Potterton condensing boiler is to be installed must be designed as a closed heating system with diaphragm expansion vessel in accordance with DIN EN 12828. -
Page 28: Addition Of A Product To Treat The Heating Water
(dispersion) and form a corrosion protection layer on metallic surfaces. Only products approved by Potterton may be used to treat heating water. Softening/desalination may only be carried out using appliances approved by Potterton, while taking the limit values into consideration. -
Page 29: Full Desalination/Partial Desalination
5 Before installation Important A softening system reduces calcium and magnesium to prevent the formation of scale (VDI directive 2035 Sheet 1). No corrosive water components are reduced or removed (VDI directive 2035 Sheet 2). Tab.7 Table to VDI 2035 Sheet 1 Total heating output in kW Total hardness in °dH depending on the specific system volume <... -
Page 30: Maintenance
(= fill water volume) plus the top-up water volume. In the 1000 Potterton boiler-specific diagrams only the system volume is given to make them easier to read. Over the entire service life of the boiler, a maximum top-up volume of twice the system volume is assumed. - Page 31 Potterton in relation to its practical suitability for use with condensing boilers. Important Up to a mixing ratio of 2:1, the heat transfer fluid WTF B is approved as frost protection down to -15 °C for use with Potterton condensing boilers. Caution Keep the installation room frost-free.
-
Page 32: Choice Of The Location
5 Before installation Choice of the location 5.9.1 Notes for installation location Caution Install the boiler on a solid, stable structure able to bear its weight. Caution Danger of damage from water! The following must be observed when installing the EC five: In order to prevent damage due to water, particularly due to leakages in the DHW storage tank, suitable precautionary measures should be taken regarding installation. -
Page 33: Space Requirement
5 Before installation Room air-independent operation For room air-independent operation an upper and a lower combustion air opening with a cross-section of at least 150 cm is necessary. Danger Risk of life due to escaping flue gas! The combustion air openings must not be covered by any objects placed in front of them. -
Page 34: Transport
5 Before installation 5.10 Transport 5.10.1 General Danger Some components, e.g. the preinstalled components or certain spare parts, exceed the recommended maximum lifting capacity for individual people that is recommended by employment law. Risk of personal injury caused by heavy loads. Do not work alone. -
Page 35: Moving By Crane
5 Before installation 5.10.3 Moving by crane Danger Risk to life due to boiler falling! Crane work may only be carried out by trained specialists. The straps or support cables to be used for lifting must be checked for perfect condition before use. Persons involved in transport must wear protective gloves and safety footwear. -
Page 36: Moving By Two Pallet Trucks
5 Before installation 5.10.5 Moving by two pallet trucks Danger Risk to life due to boiler tipping! When using pallet trucks make sure the weight is distributed evenly on the forks. Persons involved in transport must wear protective gloves and safety footwear. -
Page 37: Moving The Boiler In Tight Spaces
5 Before installation 5.10.7 Moving the boiler in tight spaces When the boiler has to be moved into a tight space it can be helpful to remove the front frame, the fan and the venturi tube with integrated gas valve. This makes the boiler shorter and allows it to be manoeuvred around tight bends more easily. - Page 38 5 Before installation Fig.13 Removing the front frame 8. Loosen the screws on the front frame Support bracket condensate piping Important The support brackets for the condensate piping must be installed when reinstalling the front frame. 9. Remove the front frame RA-0000273 Fig.14 Loosening the screwed connections...
- Page 39 5 Before installation Fig.16 Dimensions without frame, fan and Model EC five EC five EC five EC five venturi tube 400 kW 470 kW 540 kW 610 kW Dimension A 1360 1670 1670 1670 Dimension B 1680 1990 1990 1990 Weight RA-0000276 7713465 - 05 - 23102019...
-
Page 40: Connecting Diagrams
5 Before installation 5.11 Connecting diagrams 5.11.1 Application examples Fig.17 EC five, one mixer heating circuit and hot water preparation, AguaSave and AguaClean optional (hydraulic diagram) RA-08415-B01 Cold water connection in accordance with DIN Do not install any control valves in this area With pipe separation according to DIN 1717 Low-loss header, on-site accessory 7713465 - 05 - 23102019... - Page 41 Important The AguaSave and AguaClean modules are optional accessories for conditioning heating water in accordance with VDI 2035 and the specific requirements of Potterton. Important The generally accepted rules of technology must be observed, with particular reference to the DVGW standard W551 and drinking water regulations.
- Page 42 5 Before installation Fig.18 EC five, one mixer heating circuit and hot water preparation, AguaSave and AguaClean optional (connecting diagram) RA-08415-B02 Pump contactor relay, can be used in EC five/UWG. Control signal ON/OFF Max. pressure limiter 7713465 - 05 - 23102019...
- Page 43 5 Before installation Important Please firstly set all parameters from the "configuration" and Config extension module parameter groups in order to be shown the other parameters. Important The maximum current is 1 ampere per output and 5 amperes per controller. If consumers exceed 1 ampere or 5 amperes, pump contactor relays (PHS) should be used.
-
Page 44: Legend
5 Before installation Important If necessary, the modulation of the boiler pump for the heating circuits under prog. 2322 and 2323 and for drinking water under prog.-no. 5101 and 5102 must be adjusted. If an RGP is used for HC1, the following parameters must be set on the RGP for HC1: Tab.9 Parameters to be set for EC five... - Page 45 5 Before installation Abbreviation Function/explanation Bus EM Bus connection for expansion module Multifunctional input (sensor input) Low-loss header Remote control connection (e.g. RGP) Connection for the gas pressure monitor Heating circuit LDWA Air pressure monitor flue gas NEOP Neutralisation Equipment without pump Netz Mains connection Auxiliary contactor for the pump...
-
Page 46: Installation
6 Installation Installation General Danger Some components, e.g. the preinstalled components or certain spare parts, exceed the recommended maximum lifting capacity for individual people that is recommended by employment law. Risk of personal injury caused by heavy loads. Do not work alone. Use the lifting aids. -
Page 47: Mounting The Cover Panels For Transport Openings
6 Installation Caution Risk of damage to boiler due to unsuitable foundation! The foundation must have sufficient load carrying capacity for the boiler weight. 6.2.2 Mounting the cover panels for transport openings Important The cover panels for closing the transport openings are in the accessories box, which is fastened to the wood cladding of the gas condensing boiler. - Page 48 6 Installation Fig.23 Assembling the pipe fixtures 2. Fasten the condensate piping with pipe fasteners RA-0000281 Fig.24 Assembling the long pipe section 3. Insert the long straight piece of pipe as far as it will go into the front end of the condensate piping RA-0000282 Fig.25 Assembling the siphon adapter...
-
Page 49: Converting The Flue Gas Connection
6 Installation Fig.27 Assembling the remaining pipe 6. Fit the remaining pipe sections together as shown in the illustration sections and install Danger Risk of life due to escaping flue gas! The condensate piping must be checked for leaks! RA-0000285 6.2.4 Converting the flue gas connection For trouble-free operation of the EC five sufficiently dimensioned inlet and... - Page 50 6 Installation Fig.30 4. Loosen the upper fastening screws Important Both outer screws have a lip and are used for fixing the upper cladding. When reinstalling the rear wall they must absolutely be screwed back on the outside. RA-0000287 Fig.31 Loosening the lower fastening 5.
-
Page 51: Flue Gas Connections And Air Supply Ducts
6 Installation Fig.33 Installation of the 87° elbow 7. Remove the flue gas connection leading upward and insert an 87° (accessory) elbow; make sure that the seal is fitted properly 8. Screw the cover plate on the upper cladding in place 9. -
Page 52: Hydraulic Connections
The condensate piping of the EC five must be installed according to the Installing siphon and condensate piping . If there is no run-off section facility underneath the condensate discharge, the use of Potterton neutralisation and syphoning system is recommended. For more information, see... -
Page 53: Gas Connection
6 Installation The neutralisation equipment must be checked at least once annually. Since the condensate volume can be very different depending on the system conditions, checks at a shorter interval are recommended after the heating system has been put into operation initially. The effectiveness of the neutralisation granulate is controlled using pH testers (available at chemists and from chemical supplies retailers), which are sprayed with the draining condensate. -
Page 54: Air Supply/Flue Gas Outlet Connections
6 Installation Danger Danger to life by gas! The entire gas pipe, particularly the joints must be checked for leakages before commissioning. Air supply/flue gas outlet connections 6.5.1 Cleaning and inspection openings Danger Clean flue gas pipes! It should be possible to clean the flue gas pipes and inspect their free cross-section and airtightness. -
Page 55: Cable Lengths
6 Installation Danger of electric shock Danger to life! Risk of injury or a risk to life from electric shock! The use of rigid lines (e.g. NYM) is not allowed because of the risk of cable damages! There are only to use flexible cables, e.g H05VV-F for high voltage power cables, and e.g. -
Page 56: Replacing Cables
6.6.7 Replacing cables All connecting cables, except for the mains connection cable, have to be replaced by Potterton special cables in case of replacement. When replacing the mains connection cable, only cables of the types H05VV-F 3 x 1 mm or 3 x 1,5 mm have to be used. -
Page 57: Filling The System
6 Installation Fig.39 Opening the terminal strip contacts Insert a screwdriver into the terminal strip as shown and lever it open Insert the connection cables into the terminal contacts and remove the screwdriver For more information, see Technical data for the auxiliary contactor for the pump PHS, page RA-0000296 Filling the system 1. -
Page 58: Commissioning
7 Commissioning Commissioning General Danger Commissioning may only be carried out by an approved installer. The installer checks the tightness of pipes, the correct function of all regulating, control and safety equipment, and measures the combustion values. If this work is not carried out correctly, there is a risk of considerable damage to persons, environment and property. -
Page 59: Commissioning Procedure
7 Commissioning Commissioning procedure 7.3.1 Commissioning menu The commissioning menu will be shown once during initial commissioning. 1. Select Language and confirm with OK-Taste. 2. Selcet Year and confirm. 3. Set Time of day and date and confirm. 4. Conclude by pressing the OK-Taste. Important If the commissioning menu entry is terminated by pressing ESC- RA-0000065... -
Page 60: Adjusting Co Content
7 Commissioning 3. Press the Info button The message Controller stop setpoint appears on the display. The actual modulation degree will be displayed on the display. 4. Press OK. The setpoint can now be changed. 5. Press OK. The setpoint displayed is then adopted by the controller. Important The regulator stop function is stopped by pressing the operating mode button Heating Operation for approximately 3 seconds,... -
Page 61: Final Instructions
7 Commissioning 3. Use a 3 mm Allen key to set CO content at the adjustment screw for small load according to the Technical data 3.1. Clockwise: CO content is increased 3.2. Counter-clockwise: CO content is decreased 4. Replace safety cap on the adjusting screw for small load Important After successful adjustment of the gas valve, the CO content... -
Page 62: Documents
7 Commissioning 7.5.2 Documents The documents belonging to the heating plant must be handed over to the customer with the instruction that they have to be kept in the boiler installation room. System log with checklist for commissioning with confirmation and legally binding signature handed to the customer: Only components tested and marked according to the respective standard have been used. -
Page 63: Operation
8 Operation Operation Use of the control panel 8.1.1 Changing parameters Settings which are not directly changed via the operating panel must be carried out on the setting level. The basic programming process is depicted in the following using the example of the setting of Time of day and date. -
Page 64: Programming Procedure
8 Operation 8.1.2 Programming procedure The selection of the setting levels and menu items is done as follows: 1. Press OK. End user level are displayed. The menu items under the 2. Press information button for approx. 3 s. The setting levels appear. 3. -
Page 65: Setting Necessary Parameters
8 Operation 5. Use the operating mode key for heating mode to select the automatic operating mode on the boiler control unit xxxxxxxxxxxxxx RA-0000163 6. Set the required room temperature using the control of the control unit RA-0000164 8.2.3 Setting necessary parameters Normally, the parameters of the regulator do not need to be modified. -
Page 66: Adjusting Domestic Water Mode
8 Operation 8.2.5 Adjusting domestic water mode Switched on Domestic water is prepared according to the selected switching programme. Switched off Domestic water preparation has been de-activated. XXXXXXXXXXXXXX XXXX Important A setting between 50 and 60°C is recommended for domestic water heating. -
Page 67: Chimney Sweep Function
8 Operation 3. Adjust nominal value by using rotating knob 4. Acknowledge setting with OK. 8.2.9 Chimney sweep function The chimney sweep function is activated or deactivated using the Chimney-sweep button. 1. Press the Chimney-sweep button The activated special function is displayed by the symbol in the display. -
Page 68: Settings
9 Settings Settings List of parameters Subject to system configuration, not all parameters listed in the parameter list will be shown on the display. To reach the end user (Eu), Commissioning (C) and Engineer (E) setting levels: 1. Press the OK button. 2. - Page 69 9 Settings Wireless Prog. no. Level Standard value Room unit 1 Missing Missing | In operation | No recept'n | Change batt Room unit 2 Missing Missing | In operation| No recept'n | Change batt Room unit 3 Missing Missing | In operation | No recept'nChange batt Outside sensor Missing Missing | In operation| No recept'n | Change batt...
- Page 70 9 Settings Time program 5 Prog. no. Level Standard value 1st phase off 22:00 (h/min) 2nd phase on --:-- (h/min) 2nd phase off --:-- (h/min) 3rd phase on --:-- (h/min) 3rd phase off --:-- (h/min) Copy? Default values No | Yes Holiday Heating Heating...
- Page 71 9 Settings Heating circuit Level Standard value Prog. no. Prog. no. Prog. no. Floor curing function 1150 1450 0: Off 0: Off | 1: Functional heating | 2: Curing heating | 3: Functional/curing heating | 4: Curing/functional heating | 5: Manually Floor curing setp manually 1151 1451...
- Page 72 9 Settings Prog. no. Level Standard value Circulation setpoint 1663 55 °C Optg mode changeover 1680 1: Off 0: None | 1: Off | 2: On Consumer circuit / swimming pool circuit Consumer Consumer Swimming Level Standard value circuit 1 circuit 2 pool circuit Prog.
- Page 73 9 Settings Boiler Prog. no. Level Standard value Pump modulation 2320 3: Temp differential 0: None | 1: Demand | 2: Boiler setpoint | 3: Temp differential nominal | 4: nominal Burner output Pump speed min 2322 Pump speed max 2323 100% Output nominal...
- Page 74 9 Settings Boiler Prog. no. Level Standard value Switching diff on DHW 2460 4 °C Switching diff off min DHW 2461 5 °C Switching diff off max DHW 2462 7 °C Delay heat req special op 2470 Static press superv sh'down 2480 0: Start prevention 0: Start prevention | 1: Lockout position...
- Page 75 9 Settings Solar Prog. no. Level Standard value Pump speed min 3870 10 % Pump speed max 3871 100% Antifreeze 3880 3: Propylene glycol 1: None | 2: Ethylene glycol | 3: Propylene glycol | 4: Ethyl and propyl glycol Antifreeze concentration 3881 Pump capacity...
- Page 76 9 Settings DHW storage tank Prog. no. Level Standard value Discharging protection 5040 2: Automatically 0: Off | 1: Always | 2: Automatically Discharg protec after charg 5042 0: Off 0: Off | 1: On Charging temp max 5050 69 °C Recooling temp 5055 80 °C...
- Page 77 9 Settings Configuration Prog. no. Level Standard value Basic position DHW div valve 5734 1: Heating circuit 0: Last request | 1: Heating circuit | 2: DHW DHW separate circuit 5736 0: Off 0: Off | 1: On Optg action DHW div valve 5737 0: Position on DHW 0: Position on DHW | 1: Position on heating circuit...
- Page 78 9 Settings Configuration Prog. no. Level Standard value Contact type H1 5951 1: NO 0: NC | 1: NO Voltage value 1 H1 5953 Function value 1 H1 5954 Voltage value 2 H1 5955 10 V Function value 2 H1 5956 1000 Function input H4...
- Page 79 9 Settings Configuration Prog. no. Level Standard value Check no. heating circuits 6217 Software version 6220 Info 1 OEM 6230 Info 2 OEM 6231 Parameter set number OEM 6236 Info 3 OEM 6258 Info 4 OEM 6259 LPB system Prog. no. Level Standard value Device address...
- Page 80 9 Settings Error Prog. no. Level Standard value History 1 6800 Date / Time Fault code 1 SW diagnostic code 1 6805 Burner control phase 1 History 2 6810 Date / Time Fault code 2 SW diagnostic code 2 6815 Burner control phase 2 History 3 6820...
- Page 81 9 Settings Service/special operation Prog. no. Level Standard value PStick command 7252 0: No operation 0: No operation | 1: Reading from stick | 2: Writing on stick PStick progress 7253 PStick status 0: No stick 0: No stick | 1: Stick ready | 2: Writing on stick | 3: Reading from stick | 4: EMC test active | 5: Writing error | 6: Reading error | 7: Incompatible data set | 8: Wrong stick type | 9: Stick format error | 10: Check data set | 11: Data set disabled | 12: Reading disabled...
- Page 82 9 Settings Config extension module Prog. no. Level Standard value Input value 2 H2/H21 module 1 7326 10 V Funct value 2 H2/H21 module 1 7327 1000 Funct input EX21 module 1 7342 0: None 0: None | 25: Limit thermostat HC Funct output UX21 module 1 7348 0: None...
- Page 83 9 Settings Config extension module Prog. no. Level Standard value Contact type H2/H21 module 2 7397 1: NO 0: NC | 1: NO Input value 1 H2/H21 module 2 7399 Funct value 1 H2/H21 module 2 7400 Input value 2 H2/H21 module 2 7401 10 V Funct value 2 H2/H21 module 2...
- Page 84 9 Settings Config extension module Prog. no. Level Standard value Input value 2 H2/H21 module 3 7476 10 V Funct value 2 H2/H21 module 3 7477 1000 Funct input EX21 module 3 7492 0: None Parameters see Funct output UX21 module 1 (prog. no. 7342)! Funct output UX21 module 3 7498 0: None...
- Page 85 9 Settings Input/output test Prog. no. Level Standard value Sensor temp BX21 module 3 7834 Sensor temp BX22 module 3 7835 Voltage signal H1 7840 Contact state H1 7841 0: Open | 1: Closed Voltage signal H2/H21 module 1 7845 Contact state H2/H21 module 1 7845 0: Open | 1: Closed...
- Page 86 9 Settings Diagnostics cascade Prog. no. Level Standard value Priority/state source 16 8130 Parameters see Priority/state source 1 (prog. no. 8100)! Cascade flow temp 8138 Cascade flow temp setp 8139 Cascade return temp 8140 Cascade return temp setp 8141 Source seq ch'over current 8150 Diagnostics heat generation Prog.
- Page 87 9 Settings Diagnostics heat generation Prog. no. Level Standard value dt collector 1/DHW 8513 dt collector 1/buffer 8514 dt collector 1/swimming pool 8515 Solar flow temp 8519 Solar return temp 8520 24-hour yield solar energy 8526 Total yield solar energy 8527 Hours run solar yield 8530...
- Page 88 9 Settings Diagnostics consumers Prog. no. Level Standard value Flow temp 3 8804 Flow temp setpoint 3 Room thermostat 3 8809 0: No demand | 1: Demand DHW pump 8820 0: Off | 1: On DHW interm circ pump Q33 8823 Off | On Speed DHW pump...
- Page 89 9 Settings Burner control Prog. no. Level Standard value Prepurge time 9500 20 s Required output prepurging 9504 EC five 400 kW: 338 EC five 470 kW: 362 EC five 540 kW: 364 EC five 610 kW: 343 9512 EC five 400 kW: 129 Required output ignition EC five 470 kW: 148 EC five 540 kW: 148...
-
Page 90: Description Of The Parameters
9 Settings Info Prog. no. Level Standard value 24-hour yield solar energy Total yield solar energy Solid fuel boiler temp Buffer temp 1 Swim pool temp State heating circuit 1 State heating circuit 2 State heating circuit 3 State DHW State boiler State solar State solid fuel boiler... - Page 91 9 Settings Rotary selector (room temperature comfort setpoint) Presence button (only room unit) Programming lock (27) If this lock is activated, parameters can be displayed but not changed. Temporary unlocking: Press OK and ESC simultaneously for at least 3 s. The lock will be re- activated after leaving the setting level.
-
Page 92: Wireless
9 Settings Heating circuit 1 only: The room temperature is sent exclusively to heating circuit 1. For all assigned HCs: The room temperature is sent to the heating circuits assigned under prog. no. 42. Action occupancy button (48) You can select the assignment of the presence key here. None: Pressing the presence key has no effect on the heating circuits. -
Page 93: Holiday Programs
9 Settings Heating phases (501 — 606) Up to 3 heating phases can be set per heating circuit. These are active on the days selected under Preselection (prog.no. 500, 520, 540, 560, 600). During the heating phases the system heats to the set comfort setpoint. Outside the heating phases, the system heats to the reduced setpoint. - Page 94 9 Settings Comfort setpoint (710, 1010, 1310) Setting of the comfort setpoint in the heating phases. Without room sensor or with the room influence switched off (prog.no. 750, 1050, 1350), this value is used for calculation of the flow temperature, to theoretically reach the set room temperature.
- Page 95 9 Settings The intersection of both lines provides the value for the heating curve gradient. Heating curve displacement (721, 1021, 1321) Heating curve correction by parallel offset if the room temperature is generally too high or too low. Heating curve adaption (726, 1026, 1326) Automatic adaptation of the heating curve to the actual conditions, as a result of which no correction of the heating curve slope is required.
- Page 96 9 Settings Delay heat request (746, 1046, 1346) The boiler heat request is forwarded to the burner delayed by the time set here. In this way a slowly opening mixer can already start up before the burner goes into operation. Important If the option Absolute is selected under prog.no.
- Page 97 9 Settings Boost heating (770, 1070, 1370) Fig.45 Boost heating TRw Room temperature setpoint TRx Room temperature actual value TRSA Room temperature setpoint-raised The boost heating becomes active when the room temperature setpoint is switched over from protection or reduced mode to comfort mode. During the boost heating, the room temperature setpoint is increased by the value set here.
- Page 98 9 Settings Optimum start control max (790, 1090, 1390) and Optimum stop control max (791, 1091, 1391) Fig.46 Optimum start and stop control Xon Start time set forward Xoff Stop time set forward ZSP Time program TRw Room temperature setpoint TRx Room temperature actual value The optimisation of the on/off switching times is a function of time and possible with or without room unit.
- Page 99 9 Settings The time of activation in direction OPEN corresponds to the drive running time. Floor curing function (850, 1150, 1450) Fig.48 Temperature profile of the floor X Start day curing function Fh Functional heating Ch Curing heating The floor curing function serves controlled drying out of screed floors Off: The function is switched off.
-
Page 100: Domestic Water
9 Settings Pump speed reduction (880, 1180, 1480) The speed of the heating circuit pump can be regulated according to the operating level or pump curve . Operating level : With this option the speed of the heating circuit pump is actuated according to the operating level. - Page 101 9 Settings On: The DHW charging is done automatically to the DHW nominal setpoint or the DHW reduced setpoint based on the set DHW release. Nominal setpoint (1610) Setting the drinking water nominal value Reduced setpoint (1612) Setting the DHW reduced setpoint. Nominal setpoint max (1614) Set the maximum permissible DHW nominal value.
- Page 102 9 Settings Legionella funct periodically (1641) Setting the interval for the legionella function periodically (recommended setting in case of additional drinking water heating by solar plant in connection with a storage tank mixing pump). Legionella funct weekday (1642) Selection of the weekday for the legionella function. Legionella funct time (1644) Setting the start time for the legionella function.
-
Page 103: Consumer Circuits/Swimming Pool Circuit
9 Settings → The circulation pump switches on if the sensor value falls below 45 °C, and runs for at least 10 minutes. Example 2 DHW setpoint: 50 °C (nominal setpoint) Circulation setpoint: 45 °C → The circulation pump switches on if the sensor value falls below 42 °C (50 °C - 8 °C), and runs for at least 10 minutes. -
Page 104: Primary Contr/System Pump
9 Settings Priority 3: Charging the swimming pool has lowest priority (after the domestic water and the buffer storage tank). Important Release and priority can also be affected by the Hx inputs (see also program no. 3822). Swimming pool temp max (2070) If the swimming pool temp reaches the heating limit set here, the collector pump is switched off. - Page 105 9 Settings Setpoint min (2210) andSetpoint max (2212) As a protection function the boiler temperature setpoint can be limited below by the minimum setpoint (prog.no. 2210) and above by the maximum setpoint (prog.no. 2212). Setpoint manual control (2214) Temperature to which the boiler is controlled in manual control mode. Burner running time min (2241) Here, the period following the commissioning of the burner is selected during which the shutdown differential is increased by 50%.
- Page 106 9 Settings For operation with a modulating pump, the temperature rise is specified with this parameter. Pump modulation (2320) None: The function is switched off. Demand: Actuation of the boiler pump occurs at the speed calculated for the DHW pump during DHW mode or with the highest calculated speed for the max.
- Page 107 9 Settings Controller delay fan output (2452) Boiler capacity which is used during the duration of the control delay. Controller delay duration (2453) Duration of the control delay. The time duration starts as soon as a positive flame is detected after ignition. Switching diff on HCs (2454), Switching diff off min HCs (2455), Switching diff off max HCs (2456), (2460), Switching diff on DHW (2461) and Switching diff off min DHW (2462)Switching diff...
-
Page 108: Cascade
9 Settings 9.2.12 Cascade Lead strategy (3510) The heat generators are switched on and off acc. to the set lead strategy taking the specified output range into account. To switch off the effect of the output range, the limits must be set to 0% and 100% and the lead strategy to late on, late off. -
Page 109: Solar
9 Settings Last: The last boiler in the addressing always remains the last boiler; for all other boilers the boiler sequence is changed after expiry of the time set in prog. no. 3540. Leading source (3544) The setting of the leading generator is only used in combination with the fixed sequence of the generator sequence (prog. - Page 110 9 Settings Important The setting "- - -" causes program no. 3813, 3814, 3816 and 3817 to apply the values from program no. 3810 (for program no. 3813 and 3816) and program no. 3811 (for program no. 3814 and 3817). The values from program no. 3810 and 3811 are always used for the DHW storage tank.
- Page 111 9 Settings Collector start function (3830) If the temperature at the collector with the pump turned off is not measured correctly (e.g. with vacuum tubes), then a periodic switching on of the pump is possible. Caution The temperatures at certain collectors cannot be measured correctly if the pump is switched off.
-
Page 112: Solid Fuel Boiler
9 Settings 9.2.14 Solid fuel boiler If the solid fuel boiler temperature is high enough, the boiler pump is switched on and the domestic water storage tank and/or the buffer storage tank is heated. The solid fuel boiler requires the Solid fuel boiler sensor B22. - Page 113 9 Settings Auto heat gen lock SD (4721) The heat generator is locked if the the temperature in the buffer storage tank is higher than the boiler setpoint+Auto heat gen lock SD. Temp diff buffer/HC (4722) If the temperature difference between buffer storage tank and heating circuit temperature request is large enough, the heat required by the heating circuit will be taken from the buffer storage tank.
-
Page 114: Dhw Storage Tank
9 Settings Important To activate the return redirection, a Qx relay output (program no. 5890-5892) for the Y15 buffer deflector valve and a Bx sensor input (program no. 5930-5932) for the B73 common return sensor must also be configured. Optg action return diversion (4796) The function can either be used as return temperature increase or as return temperature decrease. - Page 115 9 Settings Via solar collectors Via the buffer storage tank Via the oil/gas boiler, the solid fuel boiler or the cascade Via an additional generator Via an immersion heater The options available depend on the available components and their configuration. If required, the components can complement each other in the order that is most efficient in terms of energy use.
- Page 116 9 Settings Discharging protection (5040) This function ensures that the DHW circulation pump (Q3) only switches on when the temperature in the heat source is high enough. Application with sensor The charging pump is only switched on when the heat source temperature is above the DHW temperature plus half of the heating excess.
- Page 117 9 Settings Time program 4/DHW: Release of the immersion heater via the time programme 4 of the local controller. El immersion heater control (5062) External thermostat: The controller continuously releases the domestic water preparation with immersion heater within the release time, regardless of the storage tank temperature.
- Page 118 9 Settings Speed Xp (5103) The P-band Xp defines the amplification of the controller. A smaller Xp value leads to a higher actuation of the charging pump with equal control difference. Speed Tn (5104) The reset time Tn determines the reaction speed of the controller when compensating for remaining controller differences.
-
Page 119: Configuration
9 Settings Flow setp compensation Tn (5144) The mixer valve reset time Tn determines the reaction speed of the controller when compensating for remaining controller differences. A shorter reset time Tn leads to faster compensating. Flow setp compensation Tv (5145) The mixer valve preholding time Tv determines how long a spontaneous change of the control difference continues to have an effect. - Page 120 9 Settings Charging pump: DHW charging via the connection of a charging pump to Q3/Y3. Diverting valve: DHW charging via the connection of a diverting valve to Q3/Y3. Basic position DHW div valve (5734) The base position of the diverting valve is the position in which the diverting valve (DV) is in if no request is active.
- Page 121 9 Settings Diverting valve: When used with a diverting valve only one exchanger can be flowed through. Only alternative mode is possible. External solar exchanger (5841) For solar schemes with two storage connections it must be set whether the together for DHW and external heat exchanger is present and is used for one of the two .
- Page 122 9 Settings St tank transfer pump Q11: The DHW storage tank can be heated by the buffer storage tank subject to it being hot enough. This transfer is brought about by transfer pump Q11. DHW mixing pump Q35: Separate pump for storage circulation during active legionella function.
- Page 123 9 Settings Optg mode changeover HC1 to Optg mode changeover HC3: Operating mode changeover for heating circuits to protection or reduced operation. Important Locking of domestic hot water charging is only possible under the setting Optg mode change HCs+DHW. Heat generation lock: The boiler is locked if contact at Hx is closed. Depending on parameter 2305, the domestic hot water and consumer circuits are blocked.
- Page 124 9 Settings Flow measurement Hz: A flow sensor can be connected here which indicates the flow volume via a frequency. The measured frequency signal is converted into a flow rate signal using a parametrisable curve function. This flow rate signal can be assigned to either the domestic water flow rate or the boiler flow rate.
- Page 125 9 Settings None | Boiler pump Q1 | DHW pump Q3 | DHW interm circ pump Q33 | Heat circuit pump HC1 Q2 | Heat circuit pump HC2 Q6 | Heat circuit pump HC3 Q20 | Collector pump Q5 | Solar pump ext exch K9 | Solar pump buffer K8 | Solar pump swi pool K18 Signal logic output P1 (6086) The PWM output P1 can be output inverted using signal logic output P1.
-
Page 126: Lpb System
9 Settings Tab.17 Check no. storage tank (prog.-no. 6215) Domestic water storage tank No buffer storage tank No DHW storage tank Buffer storage tank Immersion heater Buffer storage tank, heat generation shutoff valve Primary pump Buffer storage tank, solar connection, source shut-off Charging pump, solar connection valve Diverter valve... - Page 127 9 Settings Action changeover functions (6620) If the setting Central is activated under prog. no. 6221 and 6223 respectively, the action for this setting can be set. The following settings are possible: Segment: The changeover is done for all controllers in the same segment.
-
Page 128: Modbus
9 Settings Slave without remote setting: The time cannot be adjusted at the controller. The controller time is constantly synchronised to the system time. Slave with remote setting: The time can be adjusted at the controller. The system time is synchronised simultaneously as the change is adopted by the master. - Page 129 9 Settings Important The burner hours are only counted, when the maintenance message has been activated. Burner start interval (7042) Setting of the interval for burner starts for maintenance. Burn starts since maint (7043) Burner starts since the last maintenance. Important The burner starts are only counted, when the maintenance message has been activated.
- Page 130 9 Settings Telephone customer service (7170) Here the desired telephone number of customer service can be entered. PStick storage pos (7250) Via the parameter PStick storage pos the data set (data set number on the stick) can be selected which should be written or read. If a data set is selected, the name of the data set is displayed bottom.
-
Page 131: Configuration Of Extension Modules
9 Settings 9.2.22 Configuration of extension modules Function extension module 1 (7300), Function extension module 2 (7375) and Function extension module 3 (7450) When a function is selected, the inputs and outputs are occupied on the extension module with the functions according to the following table: Connection ter... - Page 132 9 Settings Cons circuit pump VK1 Q15/Cons circuit pump VK2 Q18: Connection of a pump at the input Q15/18 for an additional consumer, which is requested via an Hx-input. Boiler pump Q1: the connected pump is used for recirculation of the boiler water.
- Page 133 9 Settings input BX22 module 2 (7383), Sensor input BX21 module 3 (7457) and Sensor input BX22 module 3 (7458) Functions in addition to the basic functions are made possible by configuring the sensor inputs. None: Sensor inputs deactivated. DHW sensor B31: Lower domestic water sensor, which is used for full charging of the Legionella function.
- Page 134 9 Settings Excess heat discharge: an active excess heat discharge enables, for example, an external source to force the consumers (heating circuit, DHW storage tank, heating circuit pump) to draw off the excess heat using a signal. Release swi pool solar: this function enables the solar swimming pool heater to be released externally (e.g.
-
Page 135: Input/Output Test
9 Settings Boiler pump Q1: The connected pump is used for recirculation of the boiler water. DHW pump Q3: Actuator for DHW storage tank. DHW interm circ pump Q33: Actuation of a charge pump for domestic hot water storage with external heat exchanger. Heat circuit pump HC1 Q2/Heat circuit pump HC2 Q6/Heat circuit pump HC3 Q20: Activation of the pump heating circuits HC1-HC3. - Page 136 9 Settings End user (Eu) Commissioning, Engineer (menu Status) Boost heating Comfort heating mode Reduced heating mode Optimum stop control Reduced heating mode Frost protection active Frost prot room active Frost protection flow active Frost prot plant active Summer operation Summer operation 24-hour Eco active Setback reduced...
- Page 137 9 Settings Tab.22 Status table boiler The following messages are possible under Boiler: End user (Eu) Commissioning, Engineer (menu Status) SLT has tripped SLT has tripped Fault Fault Limiter has tripped Limiter has tripped Manual control active Manual control active Chimney sweep funct active Chim sweep fct, high-fire Chim sweep fct, low-fire...
- Page 138 9 Settings End user (Eu) Commissioning, Engineer (menu Status) Temp diff insufficient Radiation insufficient Tab.24 Status table solid fuel boiler The following messages are possible under Solid fuel boiler: End user (Eu) Commissioning, Engineer (menu Status) Manual control active Manual control active Fault Fault Overtemp prot active...
-
Page 139: Diagnostics Caskade/Heat Generation/Consumers
9 Settings End user (Eu) Commissioning, Engineer (menu Status) Frost protection active Frost protection active Charg el imm heater El charg, emergency mode El charg, source protection Electric charging defrost Electric charging, forced Electric charging, substitute Charging restricted Charging locked Restricted, DHW priority Charging active Forced charging active... -
Page 140: Burner Control
9 Settings Important Prog.no. 8380 and 8383 are the result of adding the previous parameters. 9.2.26 Burner control Prepurge time (9500) Pre-venting time. Caution This parameter must only be changed by a heating specialist! Required output prepurging (9504) Nominal output fan speed during preventing. Required output ignition (9512) Nominal output fan speed during ignition. -
Page 141: 10 Maintenance
10 Maintenance 10 Maintenance 10.1 General 10.1.1 General instructions In heating and air conditioning systems, a regular inspection and maintenance as required by qualified personnel contribute to correct operation according to the product specification, and therefore to ensuring high efficiency and low environmental pollution in the long term. Danger of electric shock Before any work, switch off the mains supply to the boiler. -
Page 142: Lifetime Of Safety-Relevant Components
If the lifetime Potterton in accordance with the following table is exceeded, recommends replacing the relevant components. Design-related rated lifetime Safety-relevant compo... -
Page 143: Standard Inspection And Maintenance Operations
10 Maintenance Phase number Display Operating state Description of function Standby (no heat demands) Burner on stand-by THL1 Fan start-up Self-test for burner start and fan start-up THL1A Pre-purging time Pre-purging, fan deceleration time to starting load speed TBRE Waiting time Internal safety tests Ignition phase Ignition and start of safety time for flame formation, ionisation... -
Page 144: Cleaning The Burner Pipe
10 Maintenance Fig.58 Loosening the screwed connections 5. Loosen the screws on the connection piece to the venturi tube on the bottom of the fan 6. Remove connection screws to the mixing adapter RA-0000271 Fig.59 Removing the fan 7. Remove fan with air flap 8. -
Page 145: Checking And Replacing Ignition And Ionization Electrode
10 Maintenance Fig.61 Removing the burner pipe 5. Pull the burner pipe out of the opening 6. Clean the burner pipe with compressed air RA-0000301 Fig.62 Replacing the cover plate and the 7. In the event of a defect, remove retaining clip, replace cover plate and insulation insulation Retaining clip... -
Page 146: Cleaning The Heat Exchanger And Siphon
10 Maintenance Fig.64 Removing the ignition and 4. Loosen the screws and remove the ignition and ionization electrode ionization electrode with seal RA-0000298 Fig.65 Electrode spacing 5. Check the setting of the ignition and ionization electrode Important 3±0,5 The electrode spacing must be 3±0.5 mm (see Fig.) 6. - Page 147 10 Maintenance Fig.67 Removing the inspection cover 3. Loosen nuts and remove the inspection cover with seal RA-0000304 Fig.68 Dry cleaning the heat exchanger 4. Clean the heat exchanger with the cleaning rod (accessory) horizontally and vertically 5. Remove the fan, mixing adapter and burner pipe (see sections Cleaning the fan and Cleaning the burner pipe ) 6.
-
Page 148: Checking Co Content
10 Maintenance Fig.71 Rinsing the condensate trough 11. Rinse out the condensate trough with water through the opening RA-0000308 12. Remove pipe connection 13. Loosen the screwed connection on the condensate connection and remove the siphon 14. Rinse out the siphon with clear water and reinstall in the reverse order Danger Risk of life due to escaping flue gas! Before installing the siphon and commissioning of the gas... -
Page 149: Filling The System
10 Maintenance 10.3.8 Filling the system Danger Risk of burns! Water-carrying pipes get hot! Only top up with heating water that is of domestic water quality. Chemical additives must not be used. Important Observe the following sequence in order to prevent the water pressure increasing in the hose. -
Page 150: 11 Troubleshooting
11 Troubleshooting 11 Troubleshooting 11.1 Fault code table The following is an extract from the fault code table. If other fault codes are displayed, please inform the installer. Fault Error description Explanations/causes code No fault Outside temp sensor fault Check connection or outside temp sensor, emergency opera tion Boiler temperature 1 sensor fault Check connection, inform heating specialist... - Page 151 11 Troubleshooting Fault Error description Explanations/causes code Legionnaire's disease germs temperature not reached Flame failure during operation Gas pressure Monitor fault or air pressure monitor Lack of gas, contact GW opened, external temperature moni fault No flame during the safety time Reset, if the fault re-occurs several times contact installer, lack of gas, polarity of mains connection, safety period, check ignition electrode and ionization current...
-
Page 152: Fault Finding
11 Troubleshooting Fault Error description Explanations/causes code Storage buffer address error Primary controller/supply pump address error Low-loss header address error Common flow sensor B10 missing Flow temperature 3 (Heating circuit 3) monitoring Temperature monitor HK3 Expansion module 3 fault (collective fault) Repetition counter internal fault expired Repetition counter fan fault expired External light... - Page 153 11 Troubleshooting Burner goes into fault mode: Without flame formation: No ignition Ionization electrode has ground connection Ionization electrode is not connected No gas Gas pressure too low In spite of flame formation the burner goes into fault mode after expiration of the safety time: Ionization electrode defective or soiled Ionization electrode does not penetrate the flame...
-
Page 154: 12 Decommissioning
12 Decommissioning 12 Decommissioning 12.1 Decommissioning procedure 12.1.1 Decommissioning the domestic water storage tank Caution Risk of water damage! Ensure the stored water can flow unimpeded into the drain. The domestic water storage tank is decommissioned as follows: 1. Close the disconnector valve to stop the cold water supply. 2. -
Page 155: 13 Disposal/Recycling
Please follow the legal requirements applicable to disposal in your country. 13.2 Appliance disposal The appliance can be returned to Potterton for disposal via a specialist company. The manufacturer undertakes to recycle the appliance correctly. Important The appliance is recycled by a disposal company. If possible, the materials, especially the plastics, are identified. - Page 156 14 Appendix 14 Appendix 14.1 Declaration of conformity 7713465 - 05 - 23102019...
- Page 157 Index Index Additives ........28 INFO .
- Page 158 Index 7713465 - 05 - 23102019...
- Page 159 © Copyright All technical and technological information contained in these technical instructions, as well as any drawings and technical descriptions supplied, remain our property and shall not be multiplied without our prior consent in writing. Subject to alterations.
- Page 160 Potterton Commercial Part of Baxi Heating UK Ltd | Brooks House, Coventry Road, Warwick, CV34 4LL | Phone 0345 070 1055 | www.pottertoncommercial.co.uk 7713465 - 05 - 23102019...
Need help?
Do you have a question about the Eurocondense five 400 kW and is the answer not in the manual?
Questions and answers