Table of Contents
Advertisement
Quick Links
OWNER'S MANUAL
BBQLHS
RESIDENTIAL PELLET GRILL-SMOKER
This Grill Protected Under Patent Numbers:
370,823 and 4,823,684
FOR OUTDOOR USE ONLY!
WARNING
!
DO NOT STORE OR USE COMBUSTIBLE MATERIALS
NEAR THIS APPLIANCE!
USE ONLY TRAEGER BRAND HARDWOOD
BBQ PELLETS IN THE OPERATION OF THIS UNIT.
"TASTE THE DIFFERENCE"
Advertisement
Table of Contents

Summary of Contents for Traeger BBQLHS
- Page 1 This Grill Protected Under Patent Numbers: 370,823 and 4,823,684 FOR OUTDOOR USE ONLY! WARNING DO NOT STORE OR USE COMBUSTIBLE MATERIALS NEAR THIS APPLIANCE! USE ONLY TRAEGER BRAND HARDWOOD BBQ PELLETS IN THE OPERATION OF THIS UNIT. “TASTE THE DIFFERENCE”...
-
Page 2: Tools Required For Assembly
INTRODUCTION Congratulations on your purchase of this Traeger Wood Pellet Grill, Model BBQPIG. With proper set-up, operation, and maintenance, the Grill will provide you with delicious food and years of cooking enjoyment. NOTE: NUMBERS FOLLOWING PART NAMES REFER TO THE COMPONENT DIAGRAM FOUND NEAR THE END OF THIS MANUAL. -
Page 3: Section One: Assembly Instructions
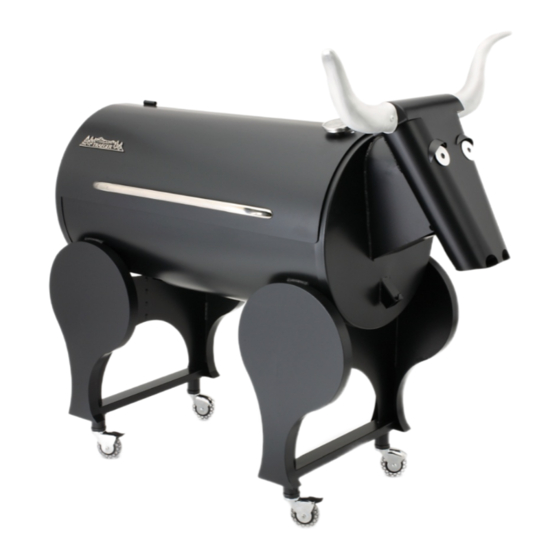
SECTION ONE: ASSEMBLY INSTRUCTIONS REMOVING THE SHIPPING BRACKETS: Remove the four Shipping Brackets securing the Grill to the pallet using your 1/4” socket / driver or wrench. INSTALLING THE CASTERS: This process will be much easier and safer if you have another person to help. Carefully lay the Grill on its back on a non-abrasive surface. - Page 4 INSTALLING THE HORNS: Insert the horn (95) onto the tube and align with the hole in the steer head tube as shown. Secure using 1/4-20 x .75 hex bolt (96). Repeat the process on the other side. See figure 1. Figure 1 INSTALLING THE TAIL: Insert tail onto the back of the steer and align with threaded holes.
- Page 5 NOTE: If at this point you are ready to start your Grill, refer to the INITIAL FIRING INSTRUCTIONS in SECTION TWO of this manual or on a separate sheet in the PELLET HOPPER before proceeding with further assembly. WARNING! Many parts of the Grill will become very hot during operation. Care must be taken to avoid burns, both during operation and afterwards, while the Grill is still hot.
-
Page 6: Section Two: Initial Firing Instructions
Look to see if the Hot Rod is getting hot (it will start to turn red). CAUTION! Do not touch it. Turn the Temperature/dial to SHUT DOWN CYCLE. 4) Fill the Pellet Hopper with TRAEGER BBQ PELLETS. WARNING! Use only TRAEGER BRAND BBQ PELLETS, which are specifically made to work in our Grills. -
Page 7: Section Three: Subsequent Start-Up
Once the Hot Rod is disconnected, replace the Hopper Bottom Panel and plug the Power Cord back into an appropriate, grounded electrical outlet. 2) Open the Pellet Hopper and fill with TRAEGER BBQ PELLETS. WARNING! USE ONLY TRAEGER BRAND BBQ WOOD PELLETS, which are... - Page 8 3) Remove the Porcelain Grill, Grease Drain Pan and Heat Baffle to expose the Firepot In the bottom of the Grill. 4) Pour 1/2 cup of TRAEGER BBQ PELLETS into the Firepot. 5) Squirt 2 tablespoons of Alcohol Gel fire lighter into the Firepot on top of the Pellets.
-
Page 9: Section Four: Operating Tips
SMOKE setting can also be used to “hold” foods at approximately 180 to 200 degrees F. 2) Your TRAEGER PELLET GRILL should never be moved while it is hot. If you are transporting your Grill in a vehicle after cooking on it, make sure the fire is completely out and the Grill is COLD before placing it in any vehicle. -
Page 10: Section Six: Frequently Asked Questions
Pellet Hopper. Wood pellets, when wet, expand greatly and will jam your Auger. A TRAEGER GRILL COVER to protect the Grill is highly recommended! Covers are available from your Traeger Dealer, or log on to our Web Site –... - Page 11 While watching the fan blade, turn the Switch/Dial to ON. If the fan blade does not turn, turn the Switch/Dial to OFF. This indicates a defective Auger Drive Motor and it will need to be replaced. Contact your Traeger Dealer or the Traeger Parts Department (SECTION SEVEN) to place an order.
- Page 12 WHERE CAN I GET A NEW PART FOR MY GRILL? Check with your Traeger Dealer. They may have the part in stock or can order the part for you. Or you can contact the Traeger Parts Department (SECTION SEVEN) to place an order.
-
Page 13: Section Seven: Traeger Support
SECTION SEVEN: TRAEGER SUPPORT Parts are identified by number on the following COMPONENT DIAGRAM PAGE. To order parts: Call, E-mail or write to your Traeger Dealer or Traeger Pellet Grills. Please provide your name, phone number, address, Model and Serial Number of the Grill (located on a label inside the Hopper Lid), along with the part identification number from the Component Diagram. - Page 14 BBQLHS COMPONENT DIAGRAM...
- Page 15 BBQLHS PARTS LIST Item Description Grill Frame Assembly SUB152 3” Caster with Brake HDW302 3” Caster W/O Brake HDW301 Auger Assembly SUB094 Auger Bushing BRN109 #8 X .500 Tek Screw HDW119 Steer Tail BCA092 Steer Horn HDW230, HDW231 1/4-20 x .750 Hex Bolt...


Need help?
Do you have a question about the BBQLHS and is the answer not in the manual?
Questions and answers