
Related Manuals for Everlast PoweTig 185 Micro


Summary of Contents for Everlast PoweTig 185 Micro
- Page 1 EVERLAST POWERTIG 185 MICRO AC/DC TIG (GTAW) WELDER Operator’s Manual for the PowerTig 185 Micro Safety, Setup and General Use Guide Rev. 1 0 00131-11...
-
Page 2: Table Of Contents
Table of contents Section……………………………………………….Page Letter to the Customer ………………...………… Everlast Contact Information……………………. Safety Precautions………………………………… Introduction and Specifications………………… Quick Setup Guide…………….…………………… Specifications……………………….……………… Know Your Machine……………………………….. 2.1 Upper Panel …………………………………… 2.2 Lower Panel…………….……………………… 2.3 Rear Panel………………………….…………… Getting Started…………...………………………... 3.1 TIG Torch………………….……..…………….. 3.2 TIG Operation and Welding Principles……. -
Page 3: Letter To The Customer
Your unit registration is important should any information such as product updates or re- calls be issued. It is also important so that we may track your satisfaction with Everlast products and services. If you are unable to register by website, contact Everlast directly through the sales department through the main customer service number in your country. -
Page 4: Everlast Contact Information
Model number: ____________________________ Date of Purchase___________________________ EVERLAST Contact Information Everlast US: Everlast consumer satisfaction email: sales@everlastwelders.com Everlast Website: everlastwelders.com Everlast Technical Support: support@everlastwelders.com Everlast Support Forum: http://www.everlastgenerators.com/forums/index.php Main toll free number: 1-877-755 WELD ( 9353 ) 9am—5pm PST M-F 11am-4pm PST Sat. -
Page 5: Safety Precautions
Safe operation and proper maintenance is your responsibility. We have compiled this operator’s manual, to instruct you in basic safety, oper- ation and maintenance of your Everlast product to give you the best possible experience. Much of welding and cutting is based upon experience and com- mon sense. - Page 6 SAFETY PRECAUTIONS These safety precautions are for protection of safety and health. Failure to follow these guidelines may result in serious injury or death. Be careful to read and follow all cautions and warnings. Protect yourself and others. Welding and cutting processes produce high levels of ultraviolet (UV) radiation that can cause severe skin burn and damage.
- Page 7 SAFETY PRECAUTIONS WARNING! Persons with pacemakers should not weld, cut or be in the welding area until they consult with their physician. Some pacemakers are sensitive to EMF radiation and could severely malfunction while welding or while being in the vicinity of someone welding.
- Page 8 SAFETY PRECAUTIONS continued WARNING! Electrical shock can kill. Make sure all electrical equipment is properly grounded. Do not use frayed, cut or otherwise damaged cables and leads. Do not stand, lean or rest on ground clamp. Do not stand in water or damp areas while weld- ing or cutting.
-
Page 9: Introduction And Specifications
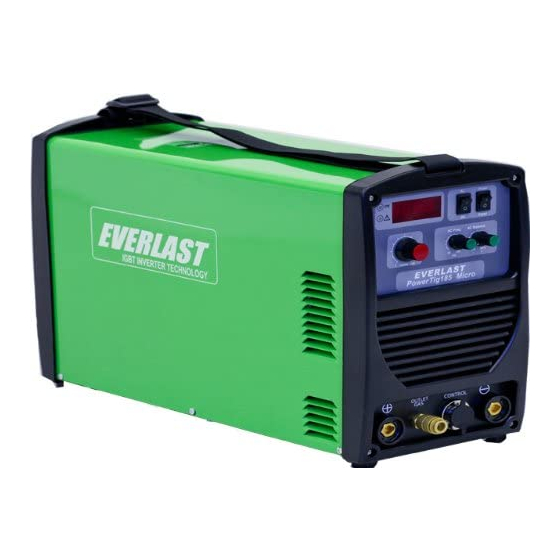
Section 1 Introduction and Specifications PowerTig 185 MICRO PowerTig WP 17 Torch Assembly PowerTig PowerTig Work Clamp Consumable Kit PowerTig Optional Foot Pedal Assembly... -
Page 10: Quick Setup Guide
Section 1 Introduction and Specifications QUICK SETUP GUIDE (US/Canada) FOOT PEDAL (OPTIONAL) TORCH OR FOOT PEDAL CONTROL GAS OUT EVERLAST WORK TORCH SWITCH ON/OFF GREEN (Ground) EVERLAST RECEPTACLE SIDE L1,BLACK 120V L2,WHITE 120V (OPT. NEUTRAL FOR 120 /240V UNITS) 30/50 AMP... -
Page 11: Specifications
Section 1 Introduction and Specifications PowerTig 185 Micro Technical Parameters* Open Circuit Voltage Input Voltage Output Voltage Inrush Current ( Maximum Amp Demand) 1max Operating Current ( Amperage use after start) 1 ef f Output Amps Duty Cycle *Early 2011 Models 35% duty cycle @ 160 Amps Max amps at 185 @20% duty cycle... - Page 12 Section 1 Introduction and Specifications 1.1 General Description, Purpose and Fea- duty cycle as well. tures. The PowerTig 185 Micro, is a simple AC/DC TIG (GTAW) machine with basic func- 6. Torch Switch or Pedal Operation. Hav- tions designed for home, fabrication, and ing the option of welding without a foot pe- general industrial use.
-
Page 13: Know Your Machine
With a 5 amp DC start product improvements. If any additional in- and full AC frequency and AC balance con- formation is needed contact Everlast. As trol. The PowerTig 185 is an ideal portable with any product, some changes in specifi-... -
Page 14: Upper Panel
Section 2 Know Your machine 2.1 Upper Panel Features. The Everlast is below a given level, and before the full 10 PowerTig 185 Micro has a simple panel lay- minutes expires. However, it may not have out with basic, functional controls and fea- been able to adequately dissipate some of tures. -
Page 15: Lower Panel
100% and the re- passed in Pedal mode because the foot pe- maining number is the equal setting on an dal controls min/max amps as the pedal is Everlast welder. (See section 3 for more pressed or released with the operator’s information.) foot. -
Page 16: Rear Panel
This chart includes maxi- made. Everlast is not responsible or liable in mum input, output amps and voltage. It also any way for an improperly wired unit, its fail-... -
Page 17: Getting Started
Assembly the torch to other brands, siz- practice and skill can provide the results seen es and styles. Consult Everlast for more help. on fabrication shows and videos online. Ever- Image 3.8b Typical Torch Parts last provides this basic information as a gen- eral guideline to assist the new welder in get- ting started. - Page 18 Section 3 Getting Started the metal.) To start the arc, simply press the es and thicker welds. Using this low amp ap- trigger on the torch (select panel setting) or proach will keep heat distortion to a minimum step lightly on the foot pedal (select pedal on thin materials.
- Page 19 The years such as using 1 amp for every .001”. Everlast PowerTig 185 offers an extended But these were developed around trans- range so that almost any welding require- former welders with little adjustability ment can be met.
-
Page 20: Tig Operation And Welding Principles
Section 3 Getting started ed solvents. Even small amounts of it if it from the electrode. Too much AC positive comes in contact with the welding arc and concentrates the heat on the electrode and hot surfaces will kill you. A small wisp of not on the work, overheating the electrode. -
Page 21: 3.3 Shielding Gas Selection
Section 3 Getting started job. These frequencies have been around a tank of shielding gas. Sometimes a rental is long time. People have welded components available as well, if you will only be needing it from submarines to power plants with excel- for a short amount of time. -
Page 22: Machine Setup (Wiring)
Each color has its own basic proper- recommendations and codes may be differ- ties and suitability for different types of weld- ent. Everlast has determined that a high num- ing. The color represents the presence and ber of customers have non standard plug... - Page 23 Section 3 Getting started is possible to weld with only a slightly blunt- Micro, green (pure) tungsten, should not be ed tip. Given the nature of TIG welding, the used. Typically green tungsten has been point is frequently dulled or contaminated used for AC welding aluminum.
-
Page 24: Filler Rod
Section 3 Getting started contaminated area. Use the other pair to or gray, oxidized welds and is recommended grasp the tungsten and gently break the tung- for very well prepped metals. Even though ER sten. Be careful not to shatter the tungsten. A 70S-3 is cheaper than other filler metals, it is quick snap of the wrist is required. -
Page 25: 4.0 General Advice
A fire extinguisher should be kept fully welders with HF start, we recommend that charged within easy reach of the weld area. you contact Everlast Technical support if you are not certain of the procedure. Be sure not Before welding on any vehicle, disconnect to contact any other components, especially the battery and alternator. - Page 26 If any stray wires are found and cannot be ac- counted for, please contact Everlast tech- nical support. To reassemble, replace the main cover, careful not to pinch or pull any wires.
-
Page 27: Trouble Shooting
Check oxidized. gas flow. Adjust for higher flow of gas. Listen for audible click of gas solenoid. If no click is heard, then contact Everlast Support. Clean weld properly, especially in Aluminum. Over current LED illuminates. Machine Duty cycle exceeded.
Need help?
Do you have a question about the PoweTig 185 Micro and is the answer not in the manual?
Questions and answers