
Related Manuals for Elation DLED 12 BRICK


Summary of Contents for Elation DLED 12 BRICK
- Page 1 PROFESSIONAL HIGH POWER LED USER’S MANUAL DLED 12 BRICK KEEP THIS MANUAL FOR FUTURE NEEDS...
- Page 2 Keep this device away from rain and moisture! Unplug mains lead before opening the housing! For your own safety, please read this user manual carefully before you initial start-up. Every person involved with the installation, operation and maintenance of this device has to - be qualified - follow the instructions of this manual...
-
Page 3: Safety Instructions
SAFETY INSTRUCTIONS CAUTION Be very careful during installation. Since you will be working with a dangerous voltage you can suffer a life-threatening electric shock when touching live wires. This device has left the factory in perfect condition. In order to maintain this condition and to ensure a safe operation, it is absolutely necessary for the user to follow the safety instructions and warning notes written in this user manual. - Page 4 it. Only handle the power cord by the plug. Never pull out the plug by tugging the power cord. During initial start-up some smoke or smell may arise. This is a normal process and does not necessarily mean that the device is defective, it should decrease gradually. CAUTION Never touch the device during operation! The housing may heat up...
-
Page 5: Description Of The Device
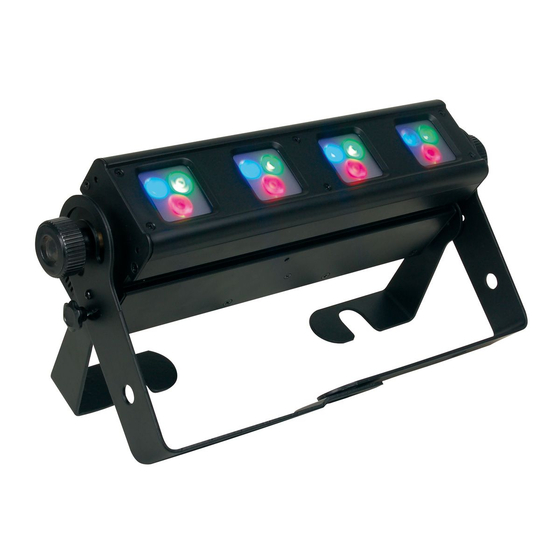
DESCRIPTION OF THE DEVICE Features ・With 12 x 1 W high power LEDS: 4 x red, 4 x blue, 4 x green. ・100 000 hours LED life ・Extremely low power con sumption ・Control signal: Standard DMX-512 ・Three DMX control channel modes o ptional: 6 channels, 12 channels or 15 channels ・Each Le... - Page 6 Overview 1:Fixation screw 8:Power output 2:Floor-stand 9:Power input / Fuse holder 3:Mounting bracket 10:Safety eyelet 4:Housing 11:DMX-Out socket 5:LEDs 12:DMX-In socket 6:DIP-switches 7:Power switch - 6 - V1.0 01NR...
-
Page 7: Dmx-512 Control Connection
DMX-512 control connection Connect the provided XLR cable to the female 3-pin XLR output of your controller and the other side to the male 3-pin XLR input of the LED lighting. You can chain multiple LED lighting together through serial linking. The cable needed should be two core, screened cable with XLR input and output connectors. - Page 8 Address 13 Address 7 Address 1 Please note: to ensure maximal stability, only ten devices may be connected together in this manner! From the 11th devices, please connect to power supply to get power for the second link. Installation Screw the bolt of the clamp into the hold of the bracket, and tighten the screw underneath. Pull the safety-rope through the holes on the bracket of the base and over the trussing system or a safe fixation spot.
- Page 9 Connecting two DLED 12 BRICK LED-Bar You can connect two DLED 12 BRICK LED- Bars together by using the mounting set included in the delivery (see graphic). Please note: to ensure maximal stability, only four devices may be...
-
Page 10: Operation
OPERATION 1.DMX control Mode: There is 3 different DMX operation modes available by different settings of Dip #11 and Dip #12: ( Table 1) DIP# DIP# LED control Mode LEDs Preset Strobe Master operation control programs channel dimming/pro mode channels channel gram speed 15CH... - Page 11 0-255 Dimming from 0% ~ 100% (Valid while Preset programs channel is not activated) 0~ 255 Preset program run from Min. speed to Max speed (Valid only the Preset programs channel is activated). 2. NON-DMX control by Dip switches 1) Different working mode with dip switches settings (Table 2) Working Mode Dip#10 Dip#...
- Page 12 static Red, Green, Blue. DIP#1 and #2 control the intensity of Red ,DIP#3 and 4 control the intensity of Green,DIP#5 and 6 control the intensity of Blue: (Table 3) Dip#1 Dip#2 Dip#3 Dip#4 Dip#5 Dip#6 Intensity 3) When DIP # 10 is OFF, DIP #11 is ON, DIP#7 is ON, the fixture run in preset programs;...
-
Page 13: Cleaning And Maintenance
CLEANING AND MAINTENANCE We recommend a frequent cleaning of the device. Please use a soft lint-free and moistened cloth. Never use alcohol or solvents! There are no servicable parts inside the device. Maintenance and service operations are only to be carried out by authorized dealers. Should you need any spare parts, please use genuine parts.
Need help?
Do you have a question about the DLED 12 BRICK and is the answer not in the manual?
Questions and answers