Table of Contents
Advertisement
Advertisement
Table of Contents

Related Manuals for Elan HC4


Summary of Contents for Elan HC4
- Page 1 HC4/HC8 System Controller INSTALLATION MANUAL...
-
Page 2: Preface
This manual provides step-by-step installation instructions and connection examples, along with basic user information for installation and ongoing use of the HC4/HC8 System Controller. This manual is written for the installer of this equipment. Please see the Configurator Reference Guide and Integration Notes for programming information. -
Page 3: Safety Information
Water---- - Do not use the apparatus near water. Cleaning ---- - Unplug the apparatus from the power outlet before cleaning. Use only a dry cloth to clean the apparatus. © ELAN 2010 | All rights reserved. Page 2... - Page 4 Connect the equipment into an outlet on a circuit different from that to which the receiver is connected. • Consult the dealer or an experienced radio/TV technician for help. CAUTION: Changes or modifications not expressly approved by ELAN could void the user’s authority to operate the equipment. © ELAN 2010 | All rights reserved. Page 3...
-
Page 5: Table Of Contents
The ELAN Story ..................7 HC4/HC8 Features................... 8 Applications ..................9 HC4/HC8 Rear Panel Connections .............. 10 Chapter 2: HC4/HC8 System Design and Applications ...... 11 Introduction ..................11 Pre-Wire .................... 11 Applications ..................13 HC4 Controlling a Home Theater ................13 HC8 Controlling Multiple Sub-Systems............... - Page 6 Appendix A: Network Information ............... 51 IP Configuration ......................51 Port Forwarding ......................53 Appendix B: Mounting Options ..............54 Rack Mounting ......................54 Can Mounting ......................55 Specifications ..................56 Warranty…………………………………………………………Back Page © ELAN 2010 | All rights reserved. Page 5...
-
Page 7: Chapter 1: Introduction
• Quick Install Guide Chapter 1: Introduction The HC4/HC8 System Controller is an IP based device with multiple Serial I/O connections and IR outputs designed to facilitate the control of various third party systems such as Security Panels, Security Video and DVR, Climate, Lighting, Audio, Home Theater, Irrigation, Pool and Spa. -
Page 8: The Elan Story
The ELAN Story Located in Lexington, KY, USA, ELAN Home Systems has designed innovative multi-room audio/video systems since 1989. ELAN systems were the first to integrate music, intercom and TV distribution features that used the homeowner’s stereos, televisions and telephones to create the whole-house entertainment experience. -
Page 9: Hc4/Hc8 Features
HC8 when it is powered up. Impact or jarring can damage the hard drive. Before moving the HC8, power the unit down and allow one minute for the drive to spin down. © ELAN 2010 | All rights reserved. Page 8... -
Page 10: Applications
16 Groups (Virtual, for Demo Only) 16 Groups Irrigation 256 Zones (Virtual, for Demo Only) 256 Zones Pool/Spa Virtual (For Demo Only) All Supported Features Generic Serial Devices IR Devices Other Input/Output Devices E-Mail © ELAN 2010 | All rights reserved. Page 9... -
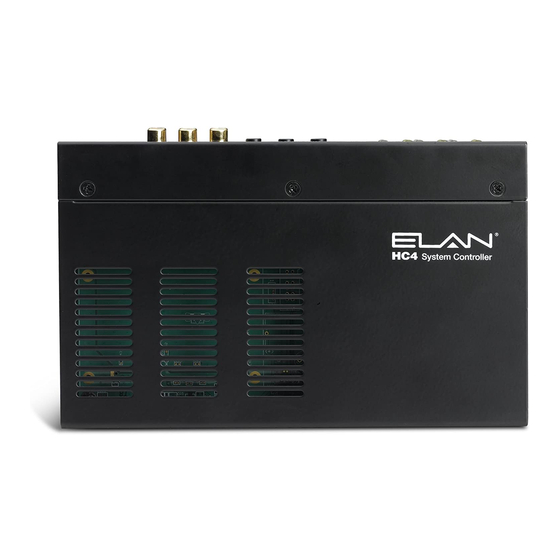
Page 11: Hc4/Hc8 Rear Panel Connections
The HC4 has 2 Sense Inputs and the HC8 Maps. has 4 Sense Inputs. Source IR Outputs The HC4 has 2 IR Out ports and the HC8 has 3 IR Out ports. © ELAN 2010 | All rights reserved. Page 10... -
Page 12: Chapter 2: Hc4/Hc8 System Design And Applications
Pre-Wire This section explains the specifics of pre-wiring for an HC4/HC8 system. Care should be taken at this stage to ensure a properly operational system. Most system wiring is “home-run” from the device being installed (a touchpad, for example) back to the equipment location. - Page 13 Video: RG6 or RG59 coax (if necessary) ELAN C2 Communications Category 5 cable Controller When using an ELAN C2 Communications Controller, run Cat-5 for telephones (FUTURE APPLICATION) and door stations. See the C2 Installation Manual for details. Sense Inputs Category 5 cable (3 conductors used) Use Cat-5 to extend sensor leads, if necessary.
-
Page 14: Applications
Please see Chapter 3: HC4/HC8 Connections for specific wiring configurations. HC4 Controlling a Home Theater With four RS-232 ports, two IR output ports and two on-board relays, the HC4, combined with the included HCREM remote, is a perfect choice to control a Home Theater System. - Page 15 HC4/HC8 E L A N INSTALLATION MANUAL Figure 2-1: HC4 Home Theater Control © ELAN 2010 | All rights reserved. Page 14...
-
Page 16: Hc8 Controlling Multiple Sub-Systems
Figure 2-2 shows a typical application controlling security, HVAC, and lighting. IP cameras add an additional level of security and relay control of the garage door adds a great convenience factor. Figure 2-2: HC8 Sub-System Connections © ELAN 2010 | All rights reserved. Page 15... -
Page 17: Hc4 As A System Extender
The HC4 can also be used in conjunction with other HC Series controllers as a System Extender. Using the HC4 as a System Extender allows the zone it is in to have an independent On Screen Display (OSD). It can also control local equipment and provide a “pass through”... - Page 18 HC4/HC8 E L A N INSTALLATION MANUAL Figure 2-3: HC4 – System Extender Connections © ELAN 2010 | All rights reserved. Page 17...
-
Page 19: Hc4 Internal Player And Ip Video Server
INSTALLATION MANUAL HC4 Internal Player and IP Video Server Both the HC4 and the HC8 can play streaming audio files using the Internal Player. (Uncompressed WAV and constant bit rate MP3 formats only.) While the HC8 has an integrated hard drive for file storage, the HC4 requires a Network Attached Storage (NAS) device to hold the files. -
Page 20: Chapter 3: Hc4/Hc8 Connections
RS-232 controlled devices. As shown in Figure 3-1, the HC4 has four RS-232 ports and the HC8 has eight RS-232 ports. Ports 1 and 2 have full hand-shaking capabilities and ports 3 and up have partial hand-shaking. - Page 21 RS-232 Port Pin # 568A Color Code 568B Color Code (Ports 1 & 2) (Ports 3 +) White/Green White/Orange Green Orange White/Orange White/Green Blue Blue White/Blue White/Blue Orange Green White/Brown White/Brown Brown Brown © ELAN 2010 | All rights reserved. Page 20...
-
Page 22: Rs-485 Connections
RD (B) Green Orange RxD - RD (A) White/Orange White/Green TxD + TD (B) Blue Blue White/Blue White/Blue Orange Green TxD - TD (A) White/Brown White/Brown Brown Brown Figure 3-2: RS-485 Connections © ELAN 2010 | All rights reserved. Page 21... -
Page 23: Vianet Connection
INSTALLATION MANUAL VIANet Connection The VIANet connection allows the HC4 and HC8 to receive VIANet commands from TS2 Touchpads (connected to PPVN Precision Panels); transmit source and system status to the TS2s and to communicate with ELAN VIANet devices like the M86A and the C2 Communication Controller. -
Page 24: Relay Connections
INSTALLATION MANUAL Relay Connections The HC4 and HC8 each have two relays that can be programmed to provide automated events such as lift operation, screen operation, and drapery control. Connections include COMMON, NORMALLY CLOSED and NORMALLY OPEN. See Figure 3-5. -
Page 25: Sense Input Connections
E L A N INSTALLATION MANUAL Sense Input Connections The Sense Inputs of the HC4 (2) / HC8 (4) are used to conditionally execute macros and to trigger Event Maps that have been programmed into the System Controller using the ELAN configuration software. -
Page 26: Ir Output Connections
INSTALLATION MANUAL IR Output Connections The HC4 has two routable 3.5mm mono IR output ports, and the HC8 has three routable 3.5mm mono IR outputs. These allow IR control of sources, shades, fans or any other IR controlled device. Use an IR distribution block if additional IR ports are needed. -
Page 27: External Ir Input Connection
INSTALLATION MANUAL External IR Input Connection This connection allows the HC4 and HC8 to receive IR input from a Quad plug IR receiver (as shown in Figure 3-9), from an IR sensor connected to a PPIR Precision Panel (see pages 41 and 45), or from the PPVN Precision Panel (see page 45). This provides control of the On Screen Display (OSD) from one IR receiver. - Page 28 HC4/HC8 E L A N INSTALLATION MANUAL Figure 3-10: GC-IRE Integration © ELAN 2010 | All rights reserved. Page 27...
-
Page 29: Audio Output Connections
Home Theater System just like any analog audio source. The HC4 has one audio output. The HC8 has two outputs that are independent of each other and can be treated as two sources. Connect using stereo 3.5 mm to RCA cables as shown in Figure 3-11. -
Page 30: Component Video Input / Output Connections
This allows any component source’s video to be viewed. Figure 3-12 shows the video connections from the V85, through the HC8 and then to a monitor. Figure 3-12: Component Video Connections © ELAN 2010 | All rights reserved. Page 29... -
Page 31: Ethernet Connections
Storage (NAS) devices and the Internet. It also allows control from a computer’s Viewer interface. The ELAN configuration programming and remote access to the System Controller is accomplished through the Ethernet connection. The Ethernet connection may be made to a router or switch connected to a router. Typical networks connections are shown in Figure 3-13. -
Page 32: Usb Connections
The USB connections allow the System Controller to connect to up to two incoming phone lines using USB modems. When the Messaging Pro App is activated, the HC4 and HC8 can function as an answering machine with up to 8 Voice Mail boxes and allow Remote Home Control and Remote Message Retrieval from any touchtone phone. -
Page 33: Chapter 4: Operation
HC4/HC8 E L A N INSTALLATION MANUAL Chapter 4: Operation Rear Panel LEDs The HC4 and HC8 have 4 System Status LEDs on the rear panel that provide system information. (Fig. 4-1) Figure 4-1: System Status LEDs Item Function Illuminates when the unit has AC power. -
Page 34: Serial Ports
LED indicates VIANet data is being received and the amber (left) LED indicates VIANet data is being transmitted. (Fig. 4-3) The transmit (amber) LED should always be illuminated. Figure 4-3: VIANet Port Status LEDs © ELAN 2010 | All rights reserved. Page 33... -
Page 35: Ethernet Port
LED is illuminated it indicates that the System Controller is “Linked” (physically connected) to the switch or router. The amber LED indicates Ethernet activity on the port. (Fig. 4-4) Figure 4-4: Ethernet Port Status LEDs © ELAN 2010 | All rights reserved. Page 34... -
Page 36: Chapter 5: Precision Panels
1000’. PPCM Precision Panel The PPCM is a can mounted panel that is the interface between the HC4 and HC8 System Controllers and the precision panels that are located in zone locations. Figure 5-1 shows the PPCM connections for IR Outputs, Sense Inputs, Relays, External IR Input, Cat5 cables and VIANet. -
Page 37: External Ir In
PPIS precision panels and GC-IREs as shown in Figure 3-10 on page 27 of this manual. The GC-IREs receive IR signals from zone located TS2s connected to the PPVN precision panel and convert those signals into RS-232 data. The HC4 and HC8 use this RS-232 data to trigger Event Maps. -
Page 38: Ir Outputs
Use Cat5 to extend the IR signals to emitters connected to PPRM panels located in zones. IR can also be routed directly to IR controlled devices using emitters or hardwired connections. Figure 5-3: 3.5mm IR Connections © ELAN 2010 | All rights reserved. Page 37... -
Page 39: Sense Inputs
PPCM Precision Panel (Continued) Sense Inputs The Sense Inputs of the HC4/HC8 are used to conditionally execute macros and to trigger Event Maps that have been programmed into the System Controller using the ELAN configuration software. The Sense Input ports of the PPCM connect to the Sense Input ports of the System Controller using stereo 3.5mm cables. -
Page 40: Relay Connections
PPCM Precision Panel (Continued) Relay Connections The HC4/HC8’s two relays can be programmed to provide automated events such as lift operation, screen operation, and drapery control. Connections include COMMON, NORMALLY CLOSED and NORMALLY OPEN. If a voltage trigger is required, an external power supply can be connected (as shown on page 23) to the HC4/HC8’s relays. -
Page 41: Vianet Connections
PPCM Precision Panel (Continued) VIANet Connections VIANet provides communication between the HC4/HC8 and TS2 user interfaces and other VIANet devices like the M86A. The PPCM has two VIANet connection points; the 110 punch down block and the RJ-45 port. Use the 110 punch down block to connect to PPVN precision panels and the RJ-45 port to connect to the VIANet port of the system controller. -
Page 42: Ppir Precision Panel
PPCM. Use Cat5 from the “RJ-45” punch-down of the PPIR to a serial port connection on the HC4/HC8 or network switch. See Figure 5-7. Optionally, a PPIR may be connected to a PPVN located at the head end as shown in Figure 5-11 on page 45. -
Page 43: Ppis Precision Panel
Global Caché GC-RG1 IR receiver (not sold by ELAN) can be connected to a PPIS located in a room if desired. Connect a Cat5 from the PPIS to an HC4/HC8’s serial port. (Maximum wire run from the System Controller to the PPIS cannot exceed 50’.) Figure 5-8 shows the connection from the PPIS to Comm port eight of the HC8. -
Page 44: Pprm Precision Panel
RS-232 controlled devices or as an Ethernet jack. Figure 5-9 shows a typical application and connections from the PPRM to the PPCM and the System Controller. Figure 5-9: PPRM Connections © ELAN 2010 | All rights reserved. Page 43... -
Page 45: Ppsp Precision Panel
4-8 TS7s will be connected to one PPSP. The PPSP screw down terminals accommodate up to 16 gauge wire. Figure 5-10 shows the connections required. DO NOT CONNECT BOTH POWER SUPPLIES AT THE SAME TIME. Figure 5-10: PPSP Connections © ELAN 2010 | All rights reserved. Page 44... -
Page 46: Ppvn Precision Panel
# 3 connection is being converted to RS-232 data by the GC-IRE and the IR received by the TS2 connected to the # 4 connection is going to the EXT IR IN port of the HC8. Each PPVN requires a separate power supply. Figure 5-11: PPVN Connections © ELAN 2010 | All rights reserved. Page 45... -
Page 47: Chapter 6: Troubleshooting
3. Verify cable length, move equipment, use RS-232 to RS- 485 adapters 4. Incorrect / No Password (on 4. Use correct password Security Systems) Verify Serial activity using the Serial port LEDS. See page 33 for information. © ELAN 2010 | All rights reserved. Page 46... -
Page 48: Vianet
4. Verify Sensor operation (See sensor manual) 4. Sensor not being activated 5. Use correct Sensor 5. Incorrect Sensor for the application Verify Sense Input activity using the Sense Input Status LED. See page 32 for information. © ELAN 2010 | All rights reserved. Page 47... -
Page 49: Ir Operation
3. Connect to correct Source Inputs connected to incorrect Source Inputs 4. Select track, press “Play” 4. Internal Player has no track playing 5. Troubleshoot NAS device 5. Problem with NAS device © ELAN 2010 | All rights reserved. Page 48... -
Page 50: Video
2. Connect correct output of matrix switcher to Video Input Incorrect Video output of matrix switcher connected to Video Input of System Controller of System Controller © ELAN 2010 | All rights reserved. Page 49... -
Page 51: Ethernet
Use correct Default Gateway and DNS Server information. connect to the information in g! ConnectPro World Wide Web configuration software Verify Ethernet activity using the Ethernet Activity Status LED. See page 34 for information. © ELAN 2010 | All rights reserved. Page 50... -
Page 52: Appendix A: Network Information
Appendix A: Network Information IP Configuration The HC4 and HC8 System Controllers come from the factory as DHCP clients. We recommend changing the IP address to a dedicated static address outside of the DHCP range of your network. This is done from the g! ConnectPro log-in screen as shown in Figure A-1, or from the g! ConnectPro System Tab using the “Config IP Info”... - Page 53 Once the IP Settings tab has been accessed, click in each field and enter the appropriate information for your network. Figure A-3. Figure A-3: IP Settings Additional IP configuration / networking information can be found at www.elanhomesystems.com/dealer. © ELAN 2010 | All rights reserved. Page 52...
-
Page 54: Port Forwarding
Port 2199 - Service: this port enables service connections, so that support personnel from ELAN or from the dealer’s office can access the System Controller remotely to troubleshoot issues or change programming. (On older systems, this was assigned to port 5001.) Figure A-4 shows the standard port forwarding settings. -
Page 55: Appendix B: Mounting Options
Figure B-1 2. Once the brackets are securely mounted, install the entire assembly into a standard 19” equipment rack from the front using four rack screws (not included). (Figure B-2) Figure B-2 © ELAN 2010 | All rights reserved. Page 54... -
Page 56: Can Mounting
(included) through the side mounting flanges into the holes in the sides of the unit as shown in Figure B-3. Hand tighten screws! Over-tightening could damage the chassis. Figure B-3 2: Slip the hooks into the mounting grid to secure the unit. (Figure B-4) Figure B-4 © ELAN 2010 | All rights reserved. Page 55... -
Page 57: Specifications
INSTALLATION MANUAL Specifications Item Description Connections Connector Type Power HC4 – 12VDC Power Adapter / HC8 - 3-Prong Heavy Duty AC Power Cord RS-232 Ports (4-HC4 / 8-HC8) RJ-45 (EIA 561 pinout) RS-485 Ports (1-HC4 / 2-HC8) RJ-45 VIA!NET RJ-45 ELAN Sense Inputs (2-HC4 / 4-HC8) 3.5mm Connectors (stereo) -
Page 58: Limited Warranty
If within the applicable warranty period above purchaser discovers that such item was not as warranted above and promptly notifies ELAN in writing, ELAN shall repair or replace the item at the company’s option. This warranty shall not apply (a) to equipment not manufactured by ELAN, (b) to equipment which shall have been installed by other than an ELAN authorized installer, (c) to installed equipment which is not installed to ELAN’s specifications,...
Need help?
Do you have a question about the HC4 and is the answer not in the manual?
Questions and answers