
Subscribe to Our Youtube Channel
Related Manuals for Nautilus K2


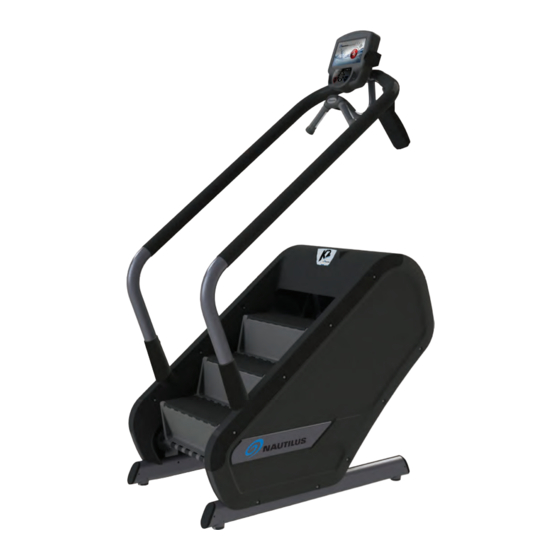
Summary of Contents for Nautilus K2
- Page 1 STRONGER THAN EVER Owner’s Instructions and Assembly of the K2 Vertical Climber ™ Med-Fit Systems Inc., exclusive manufacturers of Nautilus® Commercial Fitness Equipment P/N 19-1026 06-18-12...
- Page 2 Please carefully read through this manual to familiarize yourself with the operation of your new Nautilus ® K2 Vertical Climber. Doing so will help to ensure that your users get the most out of your machine, enjoying safe and e ective workouts ahead.
-
Page 3: Table Of Contents
Wireless Communication Regulatory Notice ..................5 Regulatory Notices for Commercial Cardiovascular Exercise equipment ........5 Safety Warning Labels/Locations ......................6 Assembling & Setup of the K2 Vertical Climber Getting Started ............................. 8 Items Required for Assembly ........................9 Unpacking the Equipment ........................10 Installing the Transportation Wheels &... - Page 4 IMPORTANT SAFETY INSTRUCTIONS – SAVE THESE INSTRUCTIONS This icon means a potentially hazardous situation exists which, if not avoided, could result in death or serious injury When using an electrical appliance, basic precautions should always be followed, including the following: Read all instructions before using this appliance.
-
Page 5: Product Specifications
Product Specifications Model K2 Vertical Climber Dimensions: 32 W x 50.5 L x 80 H (81 cm x 128 cm x 203 cm) Unit Weight: 350 lbs (155 kg) Shipping Package Weight: 435 lbs (193 kg) Workout Area: 70 W x 88.5 L (178 cm x 225 cm) Power Adapter Ratings: 100V - 240 V~, 50/60 Hz input, 1.5A... -
Page 6: Safety Warning Labels/Locations
SAFETY WARNING LABELS The following safety warnings are located on the Nautilus K2 Vertical Climber. Please read all safety ® precautions and warning information prior to using your product. Be sure to replace any warning label if damaged, illegible, or missing. If you need replacement labels, please call a Med-Fit Systems Inc. Representative at (800) 235-2233. - Page 7 SAFETY WARNING LABELS The following safety warnings are located on the unit. Please review and understand the safety warning labels and their locations on the unit prior to use. If you do not have, or cannot nd, or need to replace a warning label please call 1-800-235-2233 to obtain a new label. Label 1: See Figure 1 for general warning label.
-
Page 8: Getting Started
9. Relax, maintain an erect posture, and use handrails for balance. Supporting your weight with the handrails while exercising decreases the exercise intensity. 10. Before stepping o the K2, have the rotating steps come to a complete stop. Holding onto the handrails carefully place one foot on the oor and repeat for the other foot. -
Page 9: Items Required For Assembly
Pry Bar (1) CUPHOLDER – WRAPPED FOR PROTECTION (2) TRANSPORT WHEEL (1) QUICK SETUP MANUAL (1) OPERATION / SERVICE MANUAL DVD (1) K2 Vertical Climber Console (1) 15V GLOBAL POWER SUPPLY (4) END CAP (4) HOLE PLUG (4) LEVELING PAD... -
Page 10: Unpacking The Equipment
Assembly ™ The following instructions provide direction on the assembly of the Nautilus® K2 Vertical Climber. All instructions in the manual are given with the orientation of standing on a level surface and facing the machine. Step 1: Unpacking the K2 ™... -
Page 11: Installing The Transportation Wheels & Foot Levelers
Assembly Continued The following instructions provide direction on the assembly of the Nautilus® K2 Vertical Climber. All instructions in the ™ manual are given with the orientation of standing on a level surface and facing the machine. Step 3: Install Transport Wheels and Leg Levelers Parts &... -
Page 12: Installing The Handrails
Assembly Continued The following instructions provide direction on the assembly of the Nautilus® K2 Vertical Climber. All instructions in the ™ manual are given with the orientation of standing on a level surface and facing the machine. Step 4: Install Handrails Tools &... -
Page 13: Installing The Ergobar/Contact Heart Rate Assembly
Assembly Continued The following instructions provide direction on the assembly of the Nautilus® K2 Vertical Climber. All instructions in the ™ manual are given with the orientation of standing on a level surface and facing the machine. Step 5: Installing the Ergobar... -
Page 14: Console Installation
Assembly Continued The following instructions provide direct ion on the assembly of the Nautilus® K2 Vertical Climber. All instructions in the ™ manual are given with the orientation of standi ng on a level surface and facing the machine. Step 6: Installing the console... -
Page 15: Cup Holder Installation
Assembly Continued ™ The following instructions provide direction on the assembly of the Nautilus® K2 Vertical Climber. All instructions in the manual are given with the orientation of standing on a level surface and facing the machine. Step 7: Installing the Cupholder... -
Page 16: Tv Scanning Process
1. Connect the Coaxial cable to the connector located on the bottom cover. 2. With the power supply connected to the wall outlet, touch and hold the “Nautilus” icon for five seconds to enter the “SETUP” mode. 3. Tap the Customize icon. - Page 17 STRONGER THAN EVER Operating and Maintaining the 10.2” Touch Screen Console Med-Fit Systems Inc., exclusive manufacturers of Nautilus® Commercial Fitness Equipment P/N 19-1026-06-18-12...
-
Page 18: Machine Operation Menu Structure And Screen Flow
Console Screen Flow & Structure Program list: Main Menu The user is able to choose the desired exercise program; SETUP page is to be entered from this page. SETUP Page Setting the workout gures: According to the program chosen, the Setting Page user is asked to set the required gures to run the program. -
Page 19: Auxiliary Keypad Operation
KEYPAD CONTROL There are 11 keys in total. By using these keys, the user will be able to control most console functions. Key Function Action Result Press this key to change TV Channel up. Operates the TV Channel Up channels or audio les. channel or MP3 music. -
Page 20: Introduction Screen ("Splash Screen")
Setup Screen Page Entry Press and hold the LOGO for 5 seconds to enter the SETUP page FUNCTION NAME ACTION RESULT SETUP Page Entry Press and hold the LOGO for 5 seconds to SETUP page displayed enter the SETUP page Press to Start Tap the “Press to Start”... -
Page 21: Program Selection Screen
Main Menu - Basic Exercise Programs FUNCTION NAME ACTION RESULT Quick Start Press Quick Start button to enter the workout page Workout Page displayed Manual Press Manual button to enter the setting page Setting Page displayed Fat Burner Press Fat Burner button to enter the setting page Setting Page displayed Calorie Press Calorie button to enter the setting page... - Page 22 Main Menu - More Exercise Programs Controlling by keypad: FUNCTION NAME ACTION Action Fit Test Menu page Fit Test Press the Fit Test button to enter the Fit Test Menu displayed Press the Calories Goal button to enter the setting Setting Page displayed Calories Goal page...
- Page 23 Main Menu - FIT TEST FUNCTION NAME ACTION RESULT Fitness Test Program Press on Fitness Test Program button Checking for HR page displayed CPAT Stair Climb Program Press on CPAT Test program button CPAT Test initializes WFI Test Program Press on WFI Test Program button Checking for HR page displayed Back Press on Back button...
- Page 24 USER DEFINED SETTING PAGE The setting requests in the Setting Page are di erent according to the requirement from each program. FUNCTION NAME ACTION RESULT Body Weight Value entered Value entered Press + - to adjust the value Press + - to adjust the value Press + - to adjust the value Press + - to adjust the value Workout Level...
- Page 25 WORKOUT PAGE The workout starts automatically once the workout page is entered. The user is allowed to adjust the level manually, and access the media functions. DISPLAY NAME ACTION METs Shows the total METs (Multiple of the resting metabolic rate) WATTS Shows the accumulated Watts generated Time...
- Page 26 FUNCTION ACTION RESULT LEVEL / Press + icon to increase level / SPM. Resistance will be adjusted according to the SPM + (1~20 / 20~165) entered value. LEVEL / Press - icon to decrease level / SPM. Resistance will be adjusted according to the SPM - (1~20 / 20~165) entered value.
- Page 27 Function Action Result Press the THR + - icon to adjust the Target The Target Heart Rate will change Heart Rate according to the value entered. Stop Press the Stop icon to stop the workout. Workout is terminated. Report Page shows. Continue Press the Continue icon to continue the workout Workout is continued.
- Page 28 REPORT PAGE Function Action Result Next Press the Next button to the next Report page Next Report page shows Previous Report page Previous Press the Previous button back to the last page displayed Exit Press the Exit button to exit Report page. Back to Main Menu Controlling by keypad: Press Up and Down arrow keys to select Next,...
- Page 29 TV / Video Screen This is a Full Video screen with an invisible Control Bar at the bottom of the screen. When the user needs to switch channels or control the volume, tap the screen and the control bar will display.
- Page 30 MP3 FUNCTION The workout program continues while playing media. FUNCTION ACTION RESULT Previous Tap the PREVIOUS icon to play the previous audio le Previous song played Next Tap the NEXT icon to play the next audio le Next song played Volume Down Tap the VOLUME DOWN icon to decrease volume Volume decreased...
- Page 31 iPOD FUNCTION - Playing Page The workout program continues while playing an iPod/iPhone device. FUNCTION ACTION RESULT Backward Tap the PREVIOUS icon to play the previous audio le Previous song played Forward Tap the NEXT icon to play the next audio le Next song played Volume Down Tap the VOLUME DOWN icon to decrease volume...
- Page 32 iPod FUNCTION - Playlist Page FUNCTION ACTION RESULT Back Arrow Tap the Back Arrow to go back to the previous page Back to the previous page Playlists Tap the Playlists icon to view the playlists Playlist displayed Artists Tap the Artists icon to view the artist list Artist list displayed Albums Tap the Albums icon to view the album list...
- Page 33 QUICK START WORKOUT PAGE: 1. Step rate may be changed anytime. a. Press LEVEL + button to increase the step rate (SPM) b. Press LEVEL - button to decrease the step rate (SPM) change accordingly) 3. Default time = 20 minutes (Count Down) PROFILE:...
- Page 34 MANUAL INPUT MODE SETTING PAGE: 1. WEIGHT 2. STEP RATE: 20 - 165 (Default Step Rate = 41) 3. TIME: 2 - 99 WORKOUT PAGE: 1. 30 equal intervals within the selected workout time, based on the MET level. 2. Step rate may be changed anytime. a.
-
Page 35: Fat Burner Program
FAT BURNER PROGRAM SETTING PAGE: 1. WEIGHT 2. LEVEL: 1 - 20 3. TIME: 2 - 99 WORKOUT PAGE: 1. 30 interval 2. Intensity Level may be changed anytime by pressing LEVEL + - button. a. Press LEVEL + to increase the level b. -
Page 36: Calorie Burner Program
CALORIE BURNER PROGRAM SETTING PAGE: 1. WEIGHT 2. LEVEL: 1 - 20 3. TIME: 2 - 99 WORKOUT PAGE: 1. 30 interval 2. Intensity Level may be changed anytime by pressing LEVEL + - button. a. Press LEVEL + to increase the level b. - Page 37 INTERVAL SETTING PAGE: WEIGHT 2. WORK STEP RATE: 20 - 165 3. REST STEP RATE: 20 - 165 4. TIME: 2 - 99 WORKOUT PAGE: 1. 8 Rest Interval x 2 + 7 Work Intervals x 2; Total 30 Intervals 2.
- Page 38 HEART RATE ZONE 1. Enter Checking for HR page to detect user heart rate. 2. Setting Page shows once the heart rate is detected. 3. Start the Workout. CHECKING FOR HR PAGE: Keypad Control: Press STOP key to go back to the Main Menu. FLOWCHART: Checking for Heart Rate Page...
- Page 39 HEART RATE ZONE cont. SETTING PAGE: 1. WEIGHT 2. AGE 10 - 99 TARGET HR (A suggested Target Heart Rate will be displayed based on the age) 4. TOTAL TIME 2 - 99 Max HR = 215 - (Age * 0.75) Target HR = Max HR * 0.7 The default THR = 70% of the Maximum HR THR range = 75 - 200 bpm...
- Page 40 FIT TEST - FITNESS TEST PROGRAM 1. Enter Checking for HR page to detect user heart rate. 2. Setting Page shows once the heart rate is detected. 3. Start the Workout. 4. No changes to the Level or SPM during the exercise. CHECKING FOR HR PAGE: Flow of Check for Heart Rate refers to the Checking for heart rate process SETTING PAGE:...
- Page 41 FIT TEST FLOW CHART: Warmup - 3 Minutes SPM is auto controlled METs = 4 Yes, Fail Time > 15 min? No, Count = 0 No, Fail HR > Condition last phase? > 115? achieved? No, Fail Yes, count + 1 Count = 2? Finish...
- Page 42 6 ~ 15 mintes Warmup Phase 1: Phase 2: Phase 3: Phase 4: 4 METs Intensity Intensity Intensity Intensity During one phase: 4 seconds 4 seconds INDEX 1st minute 2nd minute 3rd minute 4th minute 5th minute If the di erence between Index & X is within 5 BPM between, the program advances to the next phase. If not, maintain for an additional minute.
- Page 43 CPAT STAIR CLIMB 20 seconds steps / min WARMUP 20 seconds steps / min 3 minutes Time = 0 PROFILE: !" #" $" %" &"...
- Page 44 FLOW CHART: Warmp - Phase 5 - CPAT Program 20 seconds 20 seconds 50 SPM 60 SPM Time & Interval Time both show the 20 second count-down Phase 1 - Phase 6 - 20 seconds 20 seconds 60 SPM 60 SPM Phase 2 - Phase 7 - 20 seconds...
- Page 45 WFI TEST 1. Enter Checking for HR page to detect user heart rate. 2. Setting Page shows once the heart rate is detected. 3. Start the Workout. CHECKING FOR HR PAGE: Flow of Check for Heart Rate refers to the Checking for heart rate process SETTING PAGE: 1.
- Page 46 REPORT: 1. EST VO2 MAX (estimated VO2 max) 2. HIGHEST STEP RATE 3. ELAPSED TIME HR > THR for 15 seconds 46 steps / min 39 steps / min 53 steps / min 1 min Warmup 1 min Cool down 2 minutes 2 minutes TOTAL TEST TIME (TT)
- Page 47 WFI FLOW CHART: WFI Program Warmup: 2 minutes 46 SPM Warmup: 2 minutes 53 SPM Add SPM When HR > Target HR for 15 sec, success! Not Acheived! Acheived! Cool Down: 2 minute Time > Phase X: 1 minute 39 SPM 16 Minutes? Yes, Fail Report...
-
Page 48: Calorie Goal
CALORIE GOAL SETTING PAGE: 1. WEIGHT 2. STEP RATE 3. TARGET CALORIES (Lets user enter the desired target number of calories to burn) 4. Time counter will begin at ZERO. If Time exceeds 99:59 before the calorie goal achieved, the time will reset to 00:00, and workout until the calorie goal is achieved 5. - Page 49 CUSTOM INTERVAL SETTING PAGE: 1. WEIGHT 2. WORK STEP RATE: 20 ~ 165 3. WORK TIME: 00:30 ~ 09:59 4. REST STEP RATE: 20 ~ 165 5. REST TIME: 00:30 ~ 09:59 6. NUMBER OF INTERVALS: 1 ~ 15...
- Page 50 7: Recovery Phase Time Limit = 3 minutes; Step Rate = 20 if Speed > 80, Speed = 40 else if 48 < Speed < 80, Speed = Speed / 2 else if Speed < = 48, Speed = 20 if the time is over, the program will stop =>...
- Page 51 RANDOM PLAY Randomly changes the Intensity LEVEL through out the workout time. SETTING PAGE: 1. BODY WEIGHT 2. STEP RATE 3. TOTAL TIME PROFILE: downhill, respectively . 2. The Intensity Level at the middle 22 Intervals will randomly change from level 1 ~ 20.
- Page 52 HR INTERVAL 1. Enter Checking for HR page to detect user heart rate. 2. Setting Page shows once the heart rate is detected. 3. Start the Workout. CHECKING FOR HR PAGE: SETTING PAGE:...
- Page 53 1. WEIGHT 2. AGE 10 - 99 WORK TARGET HR (A suggested Target Heart Rate will be displayed based on the age) WORK TIME: 30 seconds - 9:59 minute 5. REST TARGET HR (A suggested Target Heart Rate will be displayed based on the age) REST TIME: 30 seconds - 9:59 minute 7.
- Page 54 SETUP PAGE There are 2 ways to enter the SETUP page as follows: Touch Panel : Press on the logo for 5 seconds. Keypad : Press CH Up twice / Volume Up / CH Down / Volume Down buttons in sequence. Keypad Control: Press Up and Down key to select the setup option.
- Page 55 “SETUP” SCREEN OPTIONS/FLOWCHART SETUP 2 Pages 3 Pages 2 Pages 1 Page 1 Page Workout Machine Customize Diagnostic Maintenance Status Default Default Max Time Fan Test Run Hours Error Clear Weight Limit Default Number of Alternator Maint Hour Language Workout Time Workouts Test Reset...
- Page 56 SETUP PAGE of SETUP for di erent needs are as follows: FUNCTION NAME ACTION RESULT Workout Default Tap the Workout Default icon to enter Workout Default page Workout Default page shows Customize Tap the Customize icon to enter Customize page Customize page shows Machine Status Tap the Machine Status icon to enter Machine Status page...
- Page 57 WORKOUT DEFAULT - Page 1 Shows the page number FUNCTION NAME ACTION RESULT Tap + - icons to adjust value The default weight = the inserted Default Weight Weight Limit: 0 ~ 999 value Default Weight = 80 Kg (176 lbs.) Tap + - icons to adjust value The default workout time = the Default Workout Time...
- Page 58 WORKOUT DEFAULT - Page 2 Displays the page number FUNCTION NAME ACTION RESULT Tap + - icons to adjust value The machine default THR = the value Default Target Heart THR Limit: 10% ~ 90% inserted Rate Default THR = 70% Tap + - icons to adjust value The machine default Starting Level = Default Starting Level...
- Page 59 CUSTOMIZE - Page 1 FUNCTION NAME ACTION RESULT Tap + - icons to adjust value The machine default Max Time Limit = Max Time Limit Max Time Limit: 20 ~ 99 min the value inserted Tap + - icons to change language The selected language become the default Language 1.
- Page 60 CUSTOMIZE - Page 2 Displays the page number FUNCTION NAME ACTION RESULT Tap + - icons to switch the unit value: The machine default Unit = the value Units Metric / USA inserted Tap + - icons to adjust the Minimum The machine default Min Step Rate = Min Step Rate step rate:...
- Page 61 CUSTOMIZE - Page 3 Displays the page number FUNCTION NAME ACTION RESULT Tap + - icons to adjust the TV screen The TV screen Brightness = the value Brightness Brightness: 1-99 inserted Tap + - icons to adjust the TV screen The TV screen Contrast = the value Contrast Contrast: 1-99...
- Page 62 MACHINE STATUS - Page 1 Shows the page number FUNCTION NAME ACTION RESULT Shows the total run hours on this The content will change according to the Run Hours machine workout time Shows the number of workout has The content will change according to the Number of Workout been done on this machine number of workout which has been done...
- Page 63 MACHINE STATUS - Page 2 Shows the page number FUNCTION NAME ACTION RESULT The context shows the installed AP le name. Shows the Software Version AP Version A message box will be displayed to con rm the Tap the Upgrade icon to update action.
- Page 64 DIAGNOSTIC Shows the page number FUNCTION NAME ACTION RESULT Fan Test Automatically testing Fan O /Low/High Tap the Test Fan icon to test the fan Tap the Test Alternator icon to test the Show current SPM Alternator Test Alternator function (Resistance) Tap the Heart Rate test to determine if The user has to wear chest belt or hold Heart Rate Test...
- Page 65 MAINTENANCE SCREEN ENTRY Shows the page number FUNCTION NAME ACTION RESULT Shows all error codes Shows all error codes Total Error Log Clear all error codes Error code eliminated Clear Hours displayed since maintence screen was reset Maint. Hour Clear the Maintenance hours Value = 0 Reset Next...
-
Page 66: Machine Maintenance
Lubrication The K2 Vertical Climber requires periodic lubrication at the points of the step transport chains and bearing plates. Use a Multi-Purpose grease to ensure that your unit has a long life. Apply the grease directly to the transport chains and bearing plate. -
Page 67: Proper Disposal Of Components
MACHINE MAINTENANCE continued Proper disposal of Mechanical and Electrical components Electronic Component/Battery Disposal When ordering new batteries, you will need to properly dispose of (recycle) your old lead-acid batteries. Most federal and state regulations require lead-acid batteries to be recycled. Do not throw away old batteries. Lead is a toxic heavy metal, hazardous to living organisms. -
Page 68: Commercial Cardiovascular Equipment Limited Warranty
LIMITED WARRANTY. Med-Fit warrants all new Nautilus® Commercial products to be free from defects in materials and manufacture for the warranty periods set forth below. The warranty periods commence on the invoice date of the original purchase. This warranty applies only against defects discovered within the warranty period and extends only to the original purchaser of the product. - Page 69 2. Repairs performed on Nautilus® Commercial product missing a serial number or with a serial tag that has been altered or defaced, 3.
- Page 70 COMMERCIAL LIMITED WARRANTY INFORMATION continued EXCLUSIVE REMEDIES. For any product described above that fails to conform to its warranty, Med-Fit will provide, at their option, one of the following: (1) repair; (2) replacement; or (3) refund of the purchase price. Med-Fit Limited Warranty service may be obtained by contacting the authorized dealer from whom you purchased the item.
-
Page 71: Contact Information
CONTACT INFORMATION If you need assistance, please have both the serial number of your machine and the date of purchase available when you call Med-Fit Systems Customer Excellence Technical Support. TECHNICAL & CUSTOMER SERVICE phone: 276-773-2881 toll free: 800-235-2233 fax: 276-773-2298 e-mail: info@medfitsys.com web: www.medfitsystems.com CORPORATE HEADQUARTERS...
Need help?
Do you have a question about the K2 and is the answer not in the manual?
Questions and answers