
Related Manuals for EuroLite LED SCY-Bar TCL lightset


Summary of Contents for EuroLite LED SCY-Bar TCL lightset
- Page 1 BEDIENUNGSANLEITUNG USER MANUAL LED SCY-Bar TCL lightset Für weiteren Gebrauch aufbewahren! © Copyright Keep this manual for future needs! Nachdruck verboten! Reproduction prohibited!
-
Page 2: Table Of Contents
Diese Bedienungsanleitung gilt für die Artikelnummer: / This user manual is valid for the article number: 51918575 Das neueste Update dieser Bedienungsanleitung finden Sie im Internet unter: You can find the latest update of this user manual in the Internet under: www.eurolite.de 2/26 00058934.DOC, Version 1.0... -
Page 3: Einführung
- sich die letzte Version der Anleitung im Internet herunter laden EINFÜHRUNG Wir freuen uns, dass Sie sich für eine EUROLITE LED SCY-Bar entschieden haben. Wenn Sie nachfolgende Hinweise beachten, sind wir sicher, dass Sie lange Zeit Freude an Ihrem Kauf haben werden. - Page 4 Unbedingt lesen: Bei Schäden, die durch Nichtbeachtung der Anleitung verursacht werden, erlischt der Garantiean- spruch. Für daraus resultierende Folgeschäden übernimmt der Hersteller keine Haftung. Das Gerät darf nicht in Betrieb genommen werden, nachdem es von einem kalten in einen warmen Raum gebracht wurde.
-
Page 5: Bestimmungsgemäße Verwendung
GESUNDHEITSRISIKO! Blicken Sie niemals direkt in die Lichtquelle, da bei empfindlichen Menschen u. U. epileptische Anfälle ausgelöst werden können (gilt besonders für Epileptiker)! Kinder und Laien vom Gerät fern halten! Das Gerät darf niemals unbeaufsichtigt betrieben werden! BESTIMMUNGSGEMÄßE VERWENDUNG Bei diesem Gerät handelt es sich um einen Effektstrahler, mit dem sich dekorative Lichteffekte erzeugen lassen. -
Page 6: Gerätebeschreibung
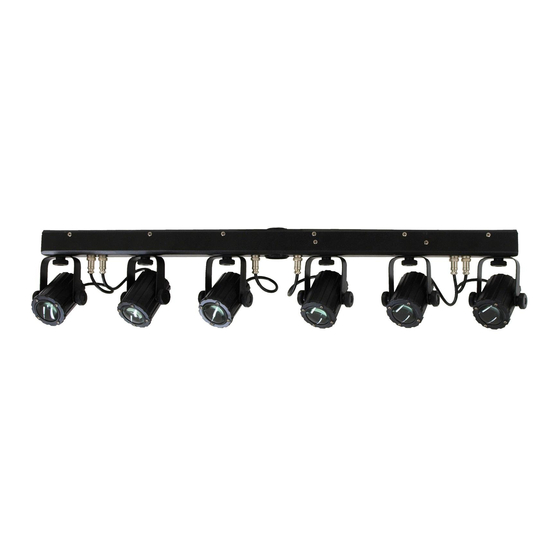
Adressierung und Einstellung über Steuereinheit mit 4-stelliger LED-Anzeige und drei Bedientasten • Zusätzliche Steuermöglichkeit über EUROLITE RC-2 Fernsteuerung (nicht im Lieferumfang enthalten) • Bestückung mit 6 x 3 W TCL LED • Absolutes Leichtgewicht bestens geeignet für mobilen Einsatz • Geeignet zur Montage auf einem Boxenhochständer (nicht inkl.) •... -
Page 7: Installation
6. Empfindlichkeitsregler 7. Montageloch (36 mm) mit Feststellschraube zur Stativmontage 8. Sicherung mit Netzanschluss 9. Feststellschrauben zur Befestigung der Hängebügel (Schwenkbereich fixieren) 10. Feststellschrauben zur Befestigung der Scheinwerfer (Neigungswinkel fixieren) INSTALLATION Montage auf einem Stativ Für den mobilen Einsatz setzen Sie das Lichtset auf ein Leuchten-Stativ auf. Der Aufnehmer des Stativs muss einen Durchmesser von 35 mm haben. - Page 8 Bitte beachten Sie: Bei Überkopfmontage in öffentlichen bzw. gewerblichen Bereichen ist eine Fülle von Vorschriften zu beachten, die hier nur auszugsweise wiedergegeben werden können. Der Betreiber muss sich selbständig um die Beschaffung der geltenden Sicherheitsvorschriften bemühen und diese einhalten! Der Hersteller haftet nicht für Schäden, die durch unsachgemäße Installation und unzureichende Sicher- heitsvorkehrungen verursacht werden! Ein Sicherungsseil, das einmal der Belastung durch Absturz ausgesetzt war oder beschädigt ist, darf nicht mehr als Sicherungsseil eingesetzt werden.
-
Page 9: Dmx512-Ansteuerung
LEBENSGEFAHR! Vor der ersten Inbetriebnahme muss die Einrichtung durch einen Sachverständigen geprüft werden! DMX512-Ansteuerung Achten Sie darauf, dass die Adern der Datenleitung an keiner Stelle miteinander in Kontakt treten. Die Geräte werden ansonsten nicht bzw. nicht korrekt funktionieren. Beachten Sie, dass die Startadresse abhängig vom verwendeten Controller ist. Unbedingt Bedienungsanleitung des verwendeten Controllers beachten. -
Page 10: Anschluss Ans Netz
Anschluss ans Netz Schließen Sie das Gerät über die beiliegende Netzanschlussleitung ans Netz an. Die Belegung der Anschlussleitungen ist wie folgt: Leitung International Braun Außenleiter Blau Neutralleiter Gelb/Grün Schutzleiter Der Schutzleiter muss unbedingt angeschlossen werden! Wenn das Gerät direkt an das örtliche Stromnetz angeschlossen wird, muss eine Trennvorrichtung mit mindestens 3 mm Kontaktöffnung an jedem Pol in die festverlegte elektrische Installation eingebaut werden. -
Page 11: Dmx-Gesteuerter Betrieb
DMX-GESTEUERTER BETRIEB Über Ihren DMX-Controller können Sie die einzelnen Geräte individuell ansteuern. DMX-MODUS Über das Control Board können Sie die DMX Startadresse definieren. Die Startadresse ist der erste Kanal, auf den das Gerät auf Signale vom Controller reagiert. Adressierung des Geräts Um die Startadresse einzustellen drücken Sie die MODE Taste bis das Display Addr anzeigt. - Page 12 240 – 249 Programm 10 (Schleife von 1 – 9) 250 – 255 Musikgesteuert Kanal: Wert: Funktion: 000 – 255 Rot (0 – 100%) wenn Kanal 2: 000 - 010 Zunehmende Geschwindigkeit; 000 – 255 wenn Kanal 2: 011 - 255 Kanal: Wert: Funktion:...
-
Page 13: Fernbedienung Über Optionalen Rc-2 Controller
000 – 255 Linse 2 Grün (0 – 100%) 000 – 255 Linse 2 Blau (0 – 100%) 000 – 255 Linse 3 Rot (0 – 100%) 000 – 255 Linse 3 Grün (0 – 100%) 000 – 255 Linse 3 Blau (0 – 100%) 000 –... -
Page 14: Sicherungswechsel
0,50 m Mindestabstand zum angestrahlten Objekt: 0,10 m Sicherung: F 1 A, 250V Zubehör: Best.-Nr.: EUROLITE RC-2 Fernsteuerung 10m 51918558 EUROLITE TH-50 Theaterhaken, silber 58000650 EUROLITE TH-50S Theaterhaken, schwarz 58000651 Bitte beachten Sie: Technische Änderungen ohne vorherige Ankündigung und Irrtum vorbehalten. -
Page 15: Introduction
- download the latest version of the user manual from the Internet INTRODUCTION Thank you for having chosen a EUROLITE LED SCY-Bar. If you follow the instructions given in this manual, we are sure that you will enjoy this device for a long period of time. - Page 16 If the device has been exposed to drastic temperature fluctuation (e.g. after transportation), do not switch it on immediately. The arising condensation water might damage your device. Leave the device switched off until it has reached room temperature. Please make sure that there are no obvious transport damages. Should you notice any damages on the A/C connection cable or on the casing, do not take the device into operation and immediately consult your local dealer.
-
Page 17: Operating Determinations
OPERATING DETERMINATIONS This device is a lighting effect for creating decorative effects. This product is only allowed to be operated with an alternating voltage of 230 V, 50 Hz and was designed for indoor use only. This device is designed for professional use, e.g. on stages, in discotheques, theatres etc. Lighting effects are not designed for permanent operation. -
Page 18: Device Description
Addressing and setting via control panel with 4-digit LED display and three operating buttons • Additional controlling possiblity via the EUROLITE RC-2 remote control (not included in delivery) • Equipped with 6 x 3 W TCL LED • Ultra-light ideally suited for mobile use • Suited for installation on a speaker stand (not included) •... -
Page 19: Rigging On A Truss
Rigging on a truss The LED SCY-Bar can be fixed onto a truss using two theatre hooks. Attach the theatre hooks on the SCY-Bar. Tighten the fixation screws Suspend the theatre hooks in the truss and tighten the theatre hook screws. Before rigging, make sure that the installation area can hold a minimum point load of 10 times the device's weight. -
Page 20: Dmx512 Control
When rigging, derigging or servicing the device staying in the area below the installation place, on bridges, under high working places and other endangered areas is forbidden. The operator has to make sure that safety-relating and machine-technical installations are approved by an expert before taking into operation for the first time and after changes before taking into operation another time. -
Page 21: Master/Slave Operation
If you are using controllers with this occupation, you can connect the DMX output of the controller directly with the DMX input of the first device in the DMX chain. If you wish to connect DMX controllers with other XLR outputs, you need to use adapter cables. Building a serial DMX chain: Connect the DMX output of the first device in the DMX chain with the DMX input of the next device. -
Page 22: Operation
OPERATION After you connected the spot to the mains, the EUROLITE LED SCY-Bar starts running and the display lights The device has two operating modes. It can be operated in Stand-Alone or in DMX-controlled mode. You can choose the desired mode via the buttons MENU, UP and DOWN: Internal Programs –... -
Page 23: Choosing A Dmx Channel Mode With 7 Or 20 Channal Occupation
Choosing a DMX Channel Mode with 7 or 20 Channal Occupation The device has 2 DMX-modes. The Control Board allows you to assign the DMX-Mode. Setting DMX Mode After setting the desired address via the UP or DOWN buttons, press the MODE button again and the display shows 7_CH. - Page 24 018 – 026 Lens 2 on 027 – 035 Lens 3 on 036 – 044 Lens 4 on 045 – 053 Lens 5 on 054 – 062 Lens 6 on 063 – 071 Lenses 1, 2 on 072 – 080 Lenses 2, 3 on 081 –...
-
Page 25: Remote Control Via Optional Rc-2 Controller
Remote control via optional RC-2 controller Connect the remote control with the LED SCY-Bar device via the connection cable with stereo jack. 1. Press the SPEED-button in order to select Sound Control or Auto Mode: - When the corresponding LED is on, it is in Auto Mode - When the corresponding LED is off, it is in Sound Control Mode 2. -
Page 26: Technical Specifications
0.50 m Min.distance to lighted object: 0.10 m Fuse: F 1 A, 250V Accessories: EUROLITE RC-2 remote control 10m 51918558 EUROLITE TH-50 Theatre hook, silver 58000650 EUROLITE TH-50S Theatre hook, black 58000651 Please note: Every information is subject to change without prior notice. 31.03.2011 ©...
Need help?
Do you have a question about the LED SCY-Bar TCL lightset and is the answer not in the manual?
Questions and answers