Elinchrom EL-Skyport User Manual
Transmitter plus hs
Hide thumbs
Also See for EL-Skyport:
- Quick manual (2 pages) ,
- Instructions for use manual (13 pages) ,
- User manual (79 pages)

Related Manuals for Elinchrom EL-Skyport


Summary of Contents for Elinchrom EL-Skyport
- Page 1 USER MANUAL GEBRAUCHSANLEITUNG MANUEL D’UTILISATION MANUAL DE FUNCIONAMIENTO MANUALE D’USO GEBRUIKSAANWIJZING РУКОВОДСТВО ПО ЭКСПЛУАТАЦИИ ユーザーマニュアル 用户手册...
-
Page 2: Table Of Contents
User Manual TABLE OF CONTENTS DECLARATION OF CONFORMITY VERSIONS FEATURES INSTALLING THE BATTERIES BATTERIES COMPATIBILITY TRIGGERING REMOTE CONTROL FREQUENCY CHANNELS TECHNICAL DATA HOT-SHOE ADAPTER MOUNTING ON THE CAMERA DISPLAY BUTTONS SETUP MENU MANUFACTURING RESET TROUBLESHOOTING FIRMWARE UPDATE Tolerances and specifications conform to IEC and CE standards. Technical data subject to change without notice. - Page 3 We trust that it will give you many years of reliable service. Please read this User Manual carefully before you use your new Elinchrom product. You will find information for your safety and how to benefit from all the programmable features.
- Page 4 User Manual The Product is classified as a Class 3R laser product, according to the following standards IEC/EN 60825-1 “Radiation Safety of Laser Products”. Class 3R: A Class 3R Laser is considered safe if handled carefully, with restricted beam viewing. With a class 3R laser, the MPE can be exceeded, but with a low risk of injury.
-
Page 5: Declaration Of Conformity
User Manual DECLARATION OF CONFORMITY USA AND CANADA EN This device complies with Part 15 of the FCC Rules and with Industry Canada licence-exempt RSS standard(s). Operation is subject to the following two conditions: (1) this device may not cause harmful interference, and (2) this device must accept any interference received, including interference that may cause undesired operation. -
Page 6: En Versions
• RESET to standard settings. For all the latest Elinchrom flash units with 20 frequency channels, and compatible with earlier models. For all Elinchrom flash units with built-in EL-Skyport Receiver and Transceiver. *** Extended features for Canon and Nikon cameras with TTL Hot-shoe (Limited features for Nikon, see below). -
Page 7: Installing The Batteries
User Manual INSTALLING THE BATTERIES Press the battery compartment cover and slide it in the direction of the arrow to open the battery cover (See Picture 1). Insert the batteries. Make sure the “+” and “-” battery contacts are correctly oriented (See Picture 2). (Note: Please use 2 pieces of AA alkaline batteries or AA type NIMH batteries). -
Page 8: Compatibility
EL-Syport Transmitter Plus HS, but they will be triggered normally. FREQUENCY CHANNELS Some older Elinchrom flash units with EL-Skyport built-in will support Frequency channels 1 to 4 or 1 to 8 (such as BRX, D-Lite RX, Quadra). The latest Elinchrom flash units with EL-Skyport built-in will support up to 20 different Frequency channels 1 to... -
Page 9: Technical Data
Outdoor > 200m. Note: The full distance range is available with the latest Elinchrom flash units such as ELC or ELB. Other, or older Elinchrom flash units will have a limited distance range. BATTERIES 2x AA batteries (standard or rechargeable). -
Page 10: Hot-Shoe Adapter
HOT-SHOE ADAPTER FEATURES The Elinchrom Skyport Plus HS transmitter can be used for basic trigger with power control for any camera having a “hot shoe’ type flash connection. The features described below require a Canon or Nikon camera that is compatible with the Skyport system. To operate properly, the Skyport HS transmitter offers special connection pins for communication with the attached camera. -
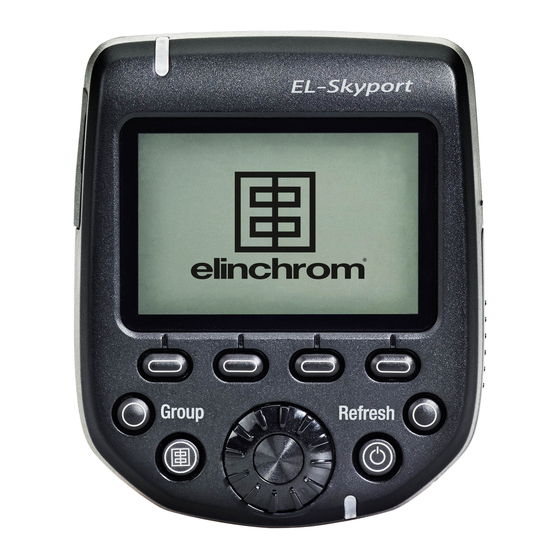
Page 11: Display
The top bar of the display shows the status of the Elinchrom Transmitter. The bottom bar in the display shows the functions of the 4 speed buttons. The middle area shows a list of the Elinchrom flash units detected, It also shows setup items for the Setup menu when selected. -
Page 12: Buttons
SETUP is selected. SPEED BUTTON 3 (MIDDLE RIGHT) Select toggle between the displayed (found) Elinchrom flash units. Flash and modelling lamp settings can be individually adjusted on the selected flash unit, when highlighted with a frame. - Page 13 Pressing the TEST button will fire all flashes when “ALL” is selected or any single group, 1 through 4 is selected. Please remember to deactivate photocells for accurate EL-Skyport triggering of your flash units. REFRESH BUTTON Press the Refresh button any time power setting has been done on a separate EL flash unit to update the power setting display of the Skyport HS.
-
Page 14: Setup Menu
SETUP MENU SCAN.. When the Skyport HS is switched ON, it will automatically search for Elinchrom flash units with built-in or plug- in EL-Skyport Transceiver modules. The Scan feature is also available in the Setup Menu. A re-scan is required, when new flash units have been added to the lighting setup. - Page 15 (Not supported by Nikon) • The Elinchrom flash units will switch on their modelling lamp for as long as the DOF (Depth of field) button on the camera is held.
-
Page 16: Manufacturing Reset
2 seconds) will reset the Skyport HS to manufacture settings. All user settings, except the display contrast, will be reset. FIRMWARE UPDATE To update the Firmware of the Transmitter Plus HS, the Elinchrom Transmitter HS Updater is required. Available from the Elinchrom website. TROUBLESHOOTING Pressing and holding in the Left and Right Speed buttons while switching the Skyport HS ON (approximately 2 seconds) will reset the Skyport HS to manufacture settings. - Page 17 SCANNING EL-UNITS: • Switch on all enabled EL-units, than switch on the EL-Skyport Transmitter Plus HS on or go to setup and rescan. NO EL-UNIT FOUND, OR SOME UNITS ARE • Frequency, group and ELSP mode settings MISSING.
-
Page 18: Firmware Update
User Manual FREQUENCY CHANNEL FOR EL-SKYPORT SPEED RECEIVERS This is not relevant to this product, but it may help with frequency set-up on legacy EL-Skyport units. DOWNLOAD THE EL-SKYPORT TRANSMITTER PLUS HS USER GUIDE Obtain the complete user guide using this link: http://bc.gs/elspths DOWNLOAD CONFORMITY Find your declaration for EC and USA &...
Need help?
Do you have a question about the EL-Skyport and is the answer not in the manual?
Questions and answers