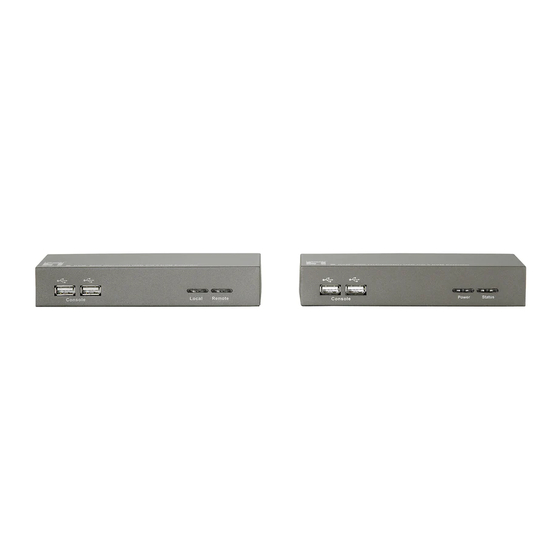
Summary of Contents for LevelOne KVM-9006
-
Page 1: User Manual
User Manual KVM CAT5 USB Extender Kit KVM-9006 KVM-9006 (Transmitter) & KVM-9006 (Receiver) V1.0... -
Page 2: Table Of Contents
Table of Contents INTRODUCTION ..............1 ..................1 ODEL NFORMATION ......................2 EATURES .................... 2 ACKAGE ONTENTS HARDWARE OVERVIEW............3 ’ ............3 RANSMITTER UTTON AND ORTS ’ ..............5 ECEIVER UTTON AND ORTS HARDWARE INSTALLATION ..........8 ..................8 NSTALLATION IAGRAM -1 VGA C... -
Page 3: Introduction
1 Introduction The CAT5 USB KVM Extender enables user to access the computer, server or KVM switch up to 150 meters away with superior auto-adjust RGB gain/delay control capability. The CAT5 USB Extender is a pair of Transmitter KVM-9006T and Receiver KVM-9006R for high-density applications where you want full use of keyboard, mouse, and monitor, but there is no room for a server nearby. -
Page 4: Features
1.2 Features Compact box design Locate CAT5 console up to 150 meters Collocate computers and servers on one location, ideal for hazardous or unsecured environments Switch computers by push button or hotkey commands Audible feedback when switching ... -
Page 5: Hardware Overview
2 Hardware Overview 2.1 Transmitter’s LEDs, Button and Ports Power/Status LED Status Description KVM-9006T is power off. KVM-9006T is connected to a computer which is power Power off. KVM-9006T is power on or connected to a computer which is power on. KVM-9006T’s RJ-45 port is not connected to the remote site KVM-9006R. - Page 6 USB Console USB Console Port: for connecting to USB type keyboard and mouse RJ-45 Port: for connecting to a CAT5 cable Local Host Port: for connecting to the local host via 3-in-1 VGA cable Console Port: for connecting to monitor Power Jack: for connecting to the power adapter Power Jack Console Port...
-
Page 7: Receiver's Leds, Button And Ports
Receiver’s LEDs, Button and Ports Local/Remote LED Status Description The Local port is not selected. The Local port is selected and a computer connected to the Local port is power on. Local The Local port is selected, but no computer is Flash connected to the Local port or the computer is power off. - Page 8 Local/Remote Button USB Console Power Jack Console Port RJ-45 Port Local Host Port Local/Remote Button: for selecting local or remote computer USB Console Port: for connecting to USB type keyboard and mouse RJ-45 Port: for connecting to a CAT5 cable Local Host Port: for connecting to the local host via 3-in-1 VGA cable Console Port: for connecting to monitor Power Jack: for connecting to the power adapter...
- Page 9 Cable Diagrams 3-in-1 VGA Cable HDDB15 male to one HDDB15 male plus two mini din 6-pin PS/2 connectors. PS/2 Keyboard to USB Changer PS/2 (keyboard) to USB (keyboard and mouse) changer. CAT5/5E/6 Straight Through UTP/STP Cable CAT5/5E/6 Straight Through Cable Connector (8P8C) ...
-
Page 10: Hardware Installation
3 Hardware Installation 3.1 Installation Diagram It is recommended to power off all the computers and server before the installation. If it is difficult to turn off the computers, for PS/2 computer, connect the Transmitter KVM-9006T and KVM-9006R in the following order: first the PS/2 mouse connector followed by PS/2 keyboard connector, and then the VGA connector to the computer. -
Page 11: 3-In-1 Vga Cable Installation
3.2 3-in-1 VGA Cable Installation The 3-in-1 VGA cable has a HDDB15 male connector at one end. Plug it into the Local Host port of the KVM-9006R. The other end of input cable has three connectors: a HDDB15 male type for computer video, a purple mini din 6-pin PS/2 connector for keyboard and a green mini din 6-pin PS/2 connector for mouse. -
Page 12: Operations
4 Operations 4.1 Keyboard Hotkey Commands You can switch the KVM-9006R between “Local Host” port and “RJ-45” port through simple key sequences made by the remote console side. To send commands to the KVM-9006R, you must press the hotkey (default is Scroll Lock) twice within 2 seconds. -
Page 13: Troubleshooting
Make sure that all cables are well seated. Label all cables with the name/number for each respective computer to avoid confusion. KVM-9006 (Transmitter) or KVM-9006R’s LED is not ON. Make sure the computer connected to KVM-9006T or KVM-9006R is power on. - Page 14 Video signal is foggy or un-cleared on the screen. Make sure the VGA cable is properly connected. There are various CAT5 cables, such as CAT5/CAT5E/CAT6 and STP/UTP types; If your application need long distance with high VGA resolution, please select higher quality cables. ...
-
Page 15: Appendix A. Specifications
Appendix A. Specifications KVM-9006 (Transmitter) Connector 2 USB connectors for keyboard and mouse 2 HDDB15 connectors VGA Connector (one for VGA monitor, one for Connecting 3-in-1 VGA cables to local computer) RJ-45 Port (CAT5) 1 RJ-45 port for connecting to KVM-9006R... -
Page 16: Appendix B. Cat5 Cable Connector Pin Definition
Appendix B. CAT5 Cable Connector Pin Definition Wire Color Pair Function White/Orange Orange White/Green Blue White/Blue Green White/Brown Brown... -
Page 17: Appendix C. Certificates
Appendix C. CERTIFICATES This equipment has been tested and found to comply with Part 15 of the FCC Rules. Operation is subject to the following two conditions: (1) This device may not cause harmful interference, and (2) This device must accept any interference received, including interference that may cause undesired operation.


Need help?
Do you have a question about the KVM-9006 and is the answer not in the manual?
Questions and answers