
Related Manuals for SVAT CLEARVU3


Summary of Contents for SVAT CLEARVU3
-
Page 1: Instruction Manual
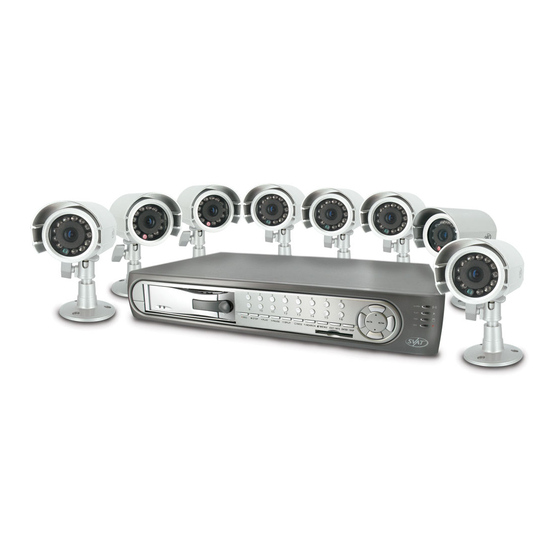
SVAT ELECTRONICS now you can see Web Ready 8CH DVR System w/ 8 Outdoor Night Vision CCD Cameras and 8" LCD Monitor COMPLETE SYSTEM INSTRUCTION MANUAL Version 1.0 Model# CLEARVU3 www.svat.com... - Page 2 NEED HELP? DO NOT RETURN THIS PRODUCT TO THE STORE Please contact a SVAT customer support representative first regarding any additional information on product features, specifications or help with set-up. Please contact us via one of the methods below: Email: support@svat.com...
- Page 3 Website: www.svat.com Warranty Terms 1. SVAT products are guaranteed for a period of one year from the date of purchase against defects in workmanship and materials. This warranty is limited to the repair, replacement or refund of the purchase price at SVAT’s option.
-
Page 4: Table Of Contents
SVAT ELECTRONICS now you can see TABLE OF CONTENTS 1. WHAT IS INCLUDED ..................1 2. DVR BUTTON AND FUNCTIONS ..................1 3. INSTALLATION TO DVR ................2 3.1 Camera Installation ................3 3.2 Monitor Installation ................3 3.3 Audio Installation ................... 3 4. - Page 5 SVAT ELECTRONICS now you can see 8. FUNCTION SETUP ..................34 8.1 Main Display ..................34 8.1.1 View ....................35 8.1.2 Image Recording.................35 8.1.2.1 Save As JPEG..............36 8.1.2.2 Save As AVI ..............36 8.1.2.3 DVR Control ..............36 8.2 Advanced Network Setup ..............38 8.2.1 Advanced Network Setting ...........38...
-
Page 6: What Is Included
SVAT ELECTRONICS now you can see 1. WHAT IS INCLUDED 1 10ft RCA to RCA 1 RCA Female to 8” Ultra Slim LCD 8 Indoor/Outdoor Night 8 Camera Mounts w/ 1 DVR (160GB HDD) (male) A/V Wire 3.5mm (male) Monitor... -
Page 7: Installation To Dvr
SVAT ELECTRONICS now you can see 2.2 Rear Panel BNC Video Inputs – Connects the cameras to the DVR Power Input – DC power input (12V) Alarm Input/Output Port RCA Audio Input – For connecting a microphone/audio supported camera (not included) RCA Audio Output –... -
Page 8: Camera Installation
SVAT ELECTRONICS now you can see 3.1 Camera Installation Plug the 4 pin DIN female connection on the camera into the 4 PIN DIN male connection on the 60ft video/power wire. Match the two arrows on top of both connecting cables. -
Page 9: Power To Dvr
SVAT ELECTRONICS now you can see 4. POWER TO DVR Insert the power supply wire into the rear DC 12V Port on the DVR. Insert the power cord into the power supply. Plug the power cord into a power outlet. We recommend using a surge protected power bar and/or Uninterrupted Power Supply (UPS) backup. -
Page 10: Dvr Operation
SVAT ELECTRONICS now you can see 5. DVR OPERATION 5.1 Live Mode Press the “DISP” button to turn the onscreen display ON or OFF. The onscreen display shows the channel, date, and time. Press the “INFO” button to display system information and configuration. - Page 11 SVAT ELECTRONICS now you can see System Information: Screen shot CLEARVU3...
-
Page 12: Record Mode
DVR. You must buy these alarm sensors separately from a 3rd party, and SVAT does not offer support on motion sensors. This feature is for advanced users only. If you have alarm sensors wired correctly, the alarm record function will allow you to specify which hours of the day you want to record when your alarm sensor is triggered. -
Page 13: Playback Mode
SVAT ELECTRONICS now you can see 5.3 Playback Mode When pressing the PLAY button and when the playback password is set to “ON”, the system will request to enter a password. When the correct password has been entered, all recording activities will stop and playback mode will begin. -
Page 14: Search
SVAT ELECTRONICS now you can see 5.4 Search When you press the SEARCH button and the playback password is set to “ON”, the system will request password entry. When the correct password has been entered, all recording activities will stop. -
Page 15: Menu Setup Description
SVAT ELECTRONICS now you can see 6. MENU SETUP DESCRIPTION The password is requested after the “MENU” button is pressed. In order to enter the main menu, the password entered must be correct. After entering the main menu all recording activities will stop. -
Page 16: Date/ Time Setup
SVAT ELECTRONICS now you can see 6.1 Date/ Time Setup DATE FORMAT (Three Types of Date Format Setup) : Y/M/D: Year/ Month/ Day M/D/Y: Month/ Day/ Year D/M/Y: Day/ Month/ Year 6.2 Camera Setup CLEARVU3... -
Page 17: Edit Camera Title 1-8
SVAT ELECTRONICS now you can see 6.2.1 Edit Camera Title 1-8 Maximum 8 character titles. Move the cursor to the desired camera number by using the “UP/DOWN” buttons. Move between the characters of the camera title by using the “LEFT/ RIGHT”... -
Page 18: Motion Detection
SVAT ELECTRONICS now you can see 6.2.3 Motion Detection You can use these settings to adjust the area and sensitivity of motion detection on each camera channel. These settings are important if you are using motion activated recording, because if adjusted correctly, they can help prevent false triggering of motion recording. -
Page 19: Record Setup
SVAT ELECTRONICS now you can see 3. Sensitivity: The blue bar shown on the Motion Detection screen indicates the motion variation of the detection window. When the amount of motion detected exceeds the preset sensitivity threshold, it triggers motion detection recording. For example, if there is slight movement in your camera’s view (e.g. -
Page 20: Schedule Setup
SVAT ELECTRONICS now you can see 6.4 Schedule Setup Use this menu to set up a 24 hour recording schedule. Specify which hours to record when motion is detected, and when to record continuously or not at all. The recording schedule is based on a 24 hour clock that goes from 0~24. Using the directional arrows, move the cursor to the hour of the day you would like to change, and adjust the letter to the one that represents the type of recording you would like. -
Page 21: Hard Disk Setup
SVAT ELECTRONICS now you can see 6.5 Hard Disk Setup Displays the hard disk total capacity and the remaining capacity. Displays the start and end date of the recorded material and when no recorded materials are available, current date is displayed. - Page 22 SVAT ELECTRONICS now you can see 6.6.1 CF Card Copy Use this feature to backup your footage onto CF card (CF card reader required to view on a computer). Note that only one camera channel can be recorded at a time.
-
Page 23: Others
SVAT ELECTRONICS now you can see 6.7 Others PASSWORD: ON: Enable password protection, password is required before entering the main menu. OFF: Disable password protection, password will not be required before entering the main menu. KEY STOP BUZZER/ RELAY: Use this option if you have an external relay device attached (advanced users). -
Page 24: Password
SVAT ELECTRONICS now you can see 6.7.1 Password Search/ Playback Password: Specify whether the search or playback mode is password protected. When password is stored on the CF card, after inserting the CF card the password will not be requested by the system. -
Page 25: Relay Output (Advanced Users)
DISK FULL: Disable/enable disk full alarm. 6.7.3 Relay Output (Advanced users) The installation of any relay output alarm is optional and SVAT does not offer technical support on such alarms. Contact the alarm sensor manufacturer for more information. RELAY OUTPUT: A relay output can be connected to an external sounding device or warning device. -
Page 26: Alarm Input (Advanced Users)
SVAT ELECTRONICS now you can see 6.7.4 Alarm Input (Advanced users) The installation of any external alarm sensor is optional and SVAT does not offer technical support on such alarms. Contact the alarm sensor manufacturer for more information. Sensor Type NC →... -
Page 27: Sequence Dwell Time
SVAT ELECTRONICS now you can see 6.7.5 Sequence Dwell Time 1. SEQUENCE: Specify how long each camera will be displayed when in sequence mode. 2. SPOT MONITOR: Specify how long video will be displayed on the SPOT monitor when motion is detected. -
Page 28: Dvr Networking Guide
SVAT ELECTRONICS now you can see 7.DVR NETWORKING GUIDE 7.1 Introduction Congratulations on taking a step forward in protecting your valued possessions. Now that you have your video security system in place, connecting it to the internet will allow you to view what’s important to you with ease. -
Page 29: Prepare Your Computer
SVAT ELECTRONICS now you can see 7.2 Prepare Your Computer Following these steps will allow your computer to view the video. Before starting to set-up your network connection, you have to be sure that your computer is able to view the footage from the DVR. If you are running Windows XP, you will most likely have this pre-installed. -
Page 30: Prepare Your Dvr
SVAT ELECTRONICS now you can see 7.3 Prepare Your DVR Next we will set up the DVR to connect to the internet and allow you to view online. Place the CD-ROM that was included with the DVR system into your computer’s CD-ROM drive. -
Page 31: Connect To The Internet
SVAT ELECTRONICS now you can see The first time you logon to the DVR, an ActiveX Installation window will appear. Install the ActiveX control. 7.4 Connect To The Internet If your Internet connection is DSL (a broadband connection that comes through your phone line) you may need to configure PPPoE settings in your DVR. - Page 32 SVAT ELECTRONICS now you can see NOTE: Your router may require a user name and password. If you do not know it, ask the person who configured your network. Portforward.com will provide you with each router’s default user name and password.
-
Page 33: Find Your External Ip
SVAT ELECTRONICS now you can see Select the Virtual Server tab. • Enable the Virtual server • In the Name field type in “DVR” • In the Private IP field enter the DVR’s IP address. • In the Protocol field, select Both (This will enable both TCP and UDP). -
Page 34: Forwarding Outside Your Network
You may have to configure PPPoE settings in the DVR to match the settings provided to you by your Internet Service Provider (ISP). Consult your ISP for more information. SVAT technical support cannot troubleshoot modems, since changing these settings can potentially render your modem inoperable. - Page 35 SVAT ELECTRONICS now you can see 5. Now check your email for the confirmation message. You will need to click the link in the body of this message to activate your account. The message may take up to 24 hours to arrive in your inbox.
- Page 36 SVAT ELECTRONICS now you can see 9. Click on the Get Started link located on the right menu 10. Type in a host name (subdomain name). We recommend you use your first name or company name. 11. Choose a domain name from the dropdown menu. We recommend using the dvrdns.org suffix.
-
Page 37: Finalizing The Set-Up
SVAT ELECTRONICS now you can see 7.7 Finalizing The Set-Up Now you must associate your DVR with the DynDNS account you just created. This will ensure that when your external IP address changes, your domain name (address in the Internet Explorer Address Bar) will remain associated with your new IP address. This will... -
Page 38: Additional Troubleshooting
SVAT ELECTRONICS now you can see Enter the username, password, and full domain name you configured at www. dyndns.com. Example: UserName: myname Password: mypassword DomainName: myname.dvrdns.org Click the OK button located in this section to save your configuration. Reboot the DVR by powering it off and then on again to confirm the changes. You must reboot the DVR any time a change is made in the configuration menu. -
Page 39: Function Setup
SVAT ELECTRONICS now you can see NOTE: When entering an external or internal IP address, the port number is required and should be in the following format: 192.168.0.100 :80 OR 192.168.0.100:80 (some browser versions require a space, some do not) 8. -
Page 40: View
SVAT ELECTRONICS now you can see 8.1.1 View Two types of display methods: Re-sizable: Adjustable image size. Actual size: The actual image size. Status Bar: Reveals current status. 8.1.2 Image Recording This mode allows you to save picture or video files from the DVR to your computer. -
Page 41: Save As Jpeg
SVAT ELECTRONICS now you can see 8.1.2.1 Save As JPEG The following options allow you to customize how the jpeg image files are saved: • No Limit: Unrestricted image storage (continuous jpeg saving) • Number: Image storage according to number of frames. For example, if set to 50, 50 frames will be stored in 50 separate jpeg files. - Page 42 SVAT ELECTRONICS now you can see 4.PLAY Play Button 5.PAUSE Pause Button 6. SPLIT Full Screen/ Quad Screen/ 9-Split Screen 7.SEQ Automatically cycle between cameras 8.SEARCH Quick search of recorded videos Change DVR settings 9.MENU 10.EXIT/INFO Returns to Previous Menu/ System...
-
Page 43: Advanced Network Setup
SVAT ELECTRONICS now you can see 8.2 Advanced Network Setup Only “Admin” can select “configuration” (advanced setup). 8.2.1 Advanced Network Setting LAN Setting: LAN IP address setting is the same as IPEdit. DHCP: Select item “Automatically by DHCP” to get an IP address. -
Page 44: User Setup
SVAT ELECTRONICS now you can see PPPoE: If you have an ADSL modem, you may need to set up PPPoE in order to view your DVR from outside your network. You will need your login information. If you do not have it, please contact your Internet Service provider to provide you with the login information. -
Page 45: Dvr Troubleshooting
Reboot: Restart the Network DVR. Firmware update: Updates the firmware, if a new firmware version becomes available. Firmware updates may be available at www.SVAT.com (advanced users only). Restore factory default configuration: Click “Restore factory default configuration” to return to factory default settings (Please restart the Network DVR after setup has been completed). -
Page 46: System Configuration
SVAT ELECTRONICS now you can see 10. SYSTEM CONFIGURATION 11. HARD DISK INFORMATION Supports 3.5” ATA 2/ 3/ 4/ 5/ 6 format hard disk. Supports high-capacity hard disk storage (up to 500 GB capacity). This HDD is not hot swappable. To prevent damage, please enter the main menu to stop all HDD activities, then power-off the device before replacing the hard disk. -
Page 47: Monitor Guide
SVAT ELECTRONICS now you can see 13. MONITOR GUIDE 13.1 Button Functions And Connections 13.1.1 Monitor LCD Screen 10. Pics Button Changes Watch your footage. picture setting. Power Button 11. AV1/AV2 Button Turn LCD Monitor On / Off. Switch input channels. -
Page 48: Remote Control
SVAT ELECTRONICS now you can see 13.1.2 Remote Control Mute Power Channel Up/Up Navigation Volume Menu - Enter the onscreen menu and adjust settings Channel Down/Down Navigation Call – Display the input channel you are currently viewing Timer – Adjust timer settings Language –... -
Page 49: Option 2: Connecting To A Dvr
SVAT ELECTRONICS now you can see Ensure that the cameras are plugged in. 13.2.2 OPTION 2: Connecting To A DVR Plug the “3.5mm to RCA (female) wire” into the AV1/IN port on the monitor. Plug one end of an RCA wire into the DVR’s VIDEO OUT port. -
Page 50: Powering On
SVAT ELECTRONICS now you can see 13.2.3 Powering On Plug the monitor’s power adapter into a wall outlet. Plug the other end of the power adapter into the DC IN port on the monitor. Press the POWER button on the front of the unit. -
Page 51: Clock
SVAT ELECTRONICS now you can see 13.2.8 Clock Press the menu button three times to display the CLOCK menu. In this menu you can adjust the Time, On-Time, Off-Time, and Attention mode time. To adjust the time, select it and press the volume down button to adjust the hour. -
Page 52: Troubleshooting
SVAT ELECTRONICS now you can see 13.2. Troubleshooting Before calling technical support, try the following troubleshooting tips: Problem Solution - Check all connections to make sure camera/ DVR is powered on and connected to the AV1 or AV2 input of the monitor. -
Page 53: Camera Installation Tips
SVAT ELECTRONICS now you can see IMPORTANT INFORMATION While this camera is weatherproof, it is not waterproof. Please do not install it in areas that receive direct rain or under eaves trough draining spots. Do not cut the DC power cable of this camera to fit with another power source. Do not cut the video connection wire to fit with a different video connection type. -
Page 54: Troubleshooting
SVAT ELECTRONICS now you can see Plug the camera’s power supply into the power jack located on the 60ft video/ power wire. Plug the camera’s power adapter into an AC outlet. Connect the 60ft video/ power wire’s male RCA plug to the VIDEO IN port of your TV/ monitor/VCR/DVR. -
Page 55: Specifications
SVAT ELECTRONICS now you can see 15. SPECIFICATIONS 8 Channel DVRFunctionality ..............Simplex Video Compression ..................MJPEG File Format ....................... AJP Live Resolution ..........NTSC : 704 X 480 / PAL: 704 X 576 Recording Frame Rate .................30FPS Recording Time ..........580 Days (0.5 Frames Per Second) Recording Resolution ........NTSC : 704 X 240 / PAL: 704 X 288... - Page 56 SVAT ELECTRONICS now you can see Operating Temperature ..............41°F ~ 104°F Operating Humidity ..................<80% Alarm Sensor Inputs ..................Yes, 16 Alarm Sensor Connection..............D-SUB (DB25) Dimensions ................16.94” x 11.63” x 2.63” Weight ......................8.75 lbs LCD Monitor Display ....................8” Color LCD Resolution....................480 x 468...
- Page 57 SVAT ELECTRONICS now you can see IR LED Control ..............Automatic (CDS Sensor) Min. Illumination....................0 lux IR Wavelength ....................850nm Video Output ................ 60ft 4 PIN DIN to RCA (male) Video /Power Wire TV System .....................NTSC Microphone ......................No Motion Detection....................No Viewing Angle ..................
- Page 58 SVAT ELECTRONICS now you can see NOTES CLEARVU3 www.svat.com...
- Page 59 SVAT ELECTRONICS now you can see SVAT SUPPORTS CRIME STOPPERS Crime Stoppers programs are operated as non-profit charities and are managed by a volunteer board of directors who raise funds and pay rewards to individuals who anonymously call with information that helps solve crime.
- Page 60 SVAT ELECTRONICS now you can see SVAT SUPPORTS CRIME STOPPERS To receive more information about Crime Stoppers or to make a charitable donation please fill in the fields below, cut on the dotted line an mail in. CLEARVU3 www.svat.com...
- Page 61 Disclaimer SVAT does not endorse any of SVAT products for any illegal activities. SVAT is not responsible or liable in any way shape or form for any damage, vandalism, theft or any other action that may occur while a SVAT product is in use by the purchaser.
Need help?
Do you have a question about the CLEARVU3 and is the answer not in the manual?
Questions and answers