Sign In
Upload
Manuals
Brands
Tascam Manuals
Measuring Instruments
DR-40X
Tascam DR-40X Manuals
Manuals and User Guides for Tascam DR-40X. We have
3
Tascam DR-40X manuals available for free PDF download: Owner's Manual, Reference Manual, Quick Start Manual
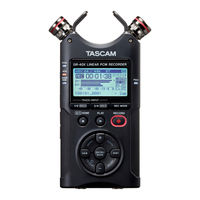
Tascam DR-40X Owner's Manual (112 pages)
Linear PCM Recorder
Brand:
Tascam
| Category:
Measuring Instruments
| Size: 5.28 MB
Table of Contents
English
5
Unità Principale
1
Unidad Principal
1
Main Unit
1
Para Orientable
1
Piedino DI Inclinazione
1
Manual de Instrucciones (Este Documento) Incluyendo Garantía
1
Tilt Foot
1
AA Alkaline Batteries
3
Introduction
5
Note about the Reference Manual
5
Items Included with this Product
5
Cleaning the Unit
5
Precautions for Placement and Use
5
Beware of Condensation
5
Names and Functions of Parts
6
Top Panel
6
Front Panel
6
Left Side
6
Right Side Panel
7
Bottom Panel
7
Making Preparations
7
Installing Batteries
7
Inserting a Card
7
Turning the Unit on
7
Using the Built-In Microphone
8
Attaching the Tilt Foot
9
Screen Overview
9
Using the Menu
10
Recording
10
Setting the Recording Mode
10
Using the Low-Cut Filter
11
Setting the Limiter
11
Playing Recordings
12
Selecting Files
12
Using as an Audio Interface
13
Preparation
13
Connection
13
Monitoring
13
Disconnecting
13
Troubleshooting
14
Specifications
15
Ratings
15
Inputs and Outputs
15
Audio Performance
15
Recording Times
16
Other Specifications
16
Français
19
Mode D'emploi (Ce Document) Incluant la Garantie
1
Pied D'inclinaison
1
Unité Principale
1
Piles Alcalines AA
3
Table of Contents
5
(Http://Teac-Global.com/)
19
Note À Propos du Manuel de Référence
19
Nettoyage de L'unité
19
Précautions Concernant L'emplacement Et L'emploi 19 Attention À la Condensation
19
Éléments Fournis Avec Ce Produit
19
Introduction
19
Nomenclature Et Fonctions des Parties
20
Face Supérieure
20
Face Avant
20
Face Latérale Gauche
20
Face Latérale Droite
21
Face Inférieure
21
Préparatifs
21
Installation des Piles
21
Insertion D'une Carte
21
Allumage de L'unité
21
Emploi des Microphones Intégrés
22
Montage de la Cale D'inclinaison
23
Présentation des Écrans
23
Emploi du Menu
24
Enregistrement
24
Réglage du Mode D'enregistrement
24
Emploi du Filtre Coupe-Bas
25
Réglage du Limiteur
25
Lecture des Enregistrements
26
Sélection de Fichiers
26
Emploi Comme Interface Audio
27
Préparation
27
Connexion
27
Écoute de Contrôle (Monitoring)
27
Déconnexion
27
Guide de Dépannage
28
Caractéristiques Techniques
29
Données
29
Entrées Et Sorties
29
Performances Audio
29
Durées D'enregistrement
30
Autres Caractéristiques
30
Español
33
Cuidado con la Condensación
33
Precauciones de Ubicación y Uso
33
Elementos Incluidos
33
Introducción
33
Nota Acerca del Manual de Referencia
33
Limpieza de la Unidad
33
Nombres y Funciones de las Partes
34
Panel Superior
34
Panel Frontal
34
Lateral Izquierdo
34
Lateral Derecho
35
Panel Inferior
35
Preparativos
35
Instalación de las Pilas
35
Inserción de una Tarjeta
35
Encendido de la Unidad
35
Uso del Micrófono Interno
36
Colocación de la Pata Orientable
37
Resumen de la Pantalla
37
Uso del Menú
38
Grabación
38
Ajuste del Modo de Grabación
38
Uso del Filtro de Corte de Graves
39
Ajuste del Limitador
39
Reproducción de Grabaciones
40
Selección de Ficheros
40
Uso como un Interface Audio
41
Preparativos
41
Conexión
41
Monitorización
41
Desconexión
41
Resolución de Problemas
42
Especificaciones Técnicas
43
Valores Medios
43
Entradas y Salidas
43
Rendimiento Audio
43
Tiempos de Grabación
44
Otras Especificaciones
44
Pilas Alcalinas AA
44
Deutsch
47
Wenn ein Symbol einer Durchgestrichenen Mülltonne Wichtige Sicherheitshinweise
45
Auf einem Produkt, der Verpackung Und/Oder der Hinweise und Warnungen
46
Ergänzende Sicherheitshinweise zur Aufstellung
48
Kondensation Vermeiden
48
Das Gerät Reinigen
48
Bevor Sie Beginnen
48
Auspacken/Lieferumfang
48
Wichtige Sicherheitshinweise
48
Hinweise und Warnungen
48
Hinweis zum Referenzhandbuch
48
Wichtige Hinweise zu Speicherkarten
49
Die Bedienelemente und Ihre Funktionen
49
Geräteoberseite
49
Gerätevorderseite
50
Linke Geräteseite
50
Rechte Geräteseite
50
Geräteunterseite
50
Informationen zum Kundendienst von Tascam
49
Vorbereitung
50
Batterien Einlegen
50
Eine Speicherkarte Einlegen
50
Den Recorder Einschalten
51
Die Eingebauten Mikrofone Nutzen
51
Den Fuß Für Schräge Aufstellung Befestigen
52
Grundsätzliche Bedienung des Menüs
53
Das Display IM Überblick
53
Aufnehmen
54
Den Aufnahmemodus Wählen
54
Das Tiefenfilter Nutzen
55
Einen Modus Für Die Aussteuerung Wählen
55
Aufnahmen Wiedergeben
56
Dateien Auswählen
57
Den Recorder als Audiointerface Nutzen
57
Vorbereitende Schritte
57
Die Verbindung Herstellen
57
Abhören
58
Die Verbindung Trennen
58
Fehlerbehebung
59
Technische Daten
60
Italiano
65
Introduzione
65
Articoli Inclusi con Questo Prodotto
65
Precauzioni Per Il Posizionamento E L'uso
65
Nota Sul Manuale DI Riferimento
65
Pulizia Dell'unità
65
Attenzione Alla Condensa
65
Nomi E Funzioni Delle Parti
66
Pannello Superiore
66
Pannello Frontale
66
Pannello Sinistro
66
Pannello Laterale Destro
67
Pannello Inferiore
67
Preparativi
67
Installare Le Batterie
67
Inserimento DI una Card
67
Accensione Dell'unità
67
Uso del Microfono Incorporato
68
Inserire Il Piedino DI Inclinazione
69
Panoramica Dello Schermo
69
Uso del Menu
70
Registrazione
70
Impostazione Della Modalità DI Registrazione
70
Uso del Filtro Low-Cut
71
Impostazione del Limitatore
71
Riproduzione Delle Registrazioni
72
Selezione Dei File
72
Uso Come Interfaccia Audio
73
Preparativi
73
Connessione
73
Monitoraggio
73
Disconnessione
74
Risoluzione Dei Problemi
74
Specifiche
75
Dati
75
Ingressi E Uscite
75
Prestazioni Audio
75
Tempi DI Registrazione
75
Altre Specifiche
76
Batterie Alcaline AA
76
Русский
80
Вступление
80
Руководство По Эксплуатации
80
Комплект Изделия
81
Меры Предосторожности При Размещении И Использовании
81
Избегайте Конденсации
81
О Картах Microsd
81
Очистка Устройства
81
Использование Web-Сайта Компании TEAC
82
Названия И Функции Узлов
82
Верхняя Панель
82
Передняя Панель
83
Левая Боковая Панель
83
Правая Боковая Панель
83
Нижняя Панель
83
Услуги Клиентской Поддержки TASCAM
82
Подготовка К Работе
83
Установка Батарей
83
Установка Карты Памяти
83
Включение Устройства
84
Использование Встроенного Микрофона
84
Крепление Подставки
85
Использование Меню
86
Обзор Дисплея
86
Запись
87
Настройка Режима Записи
87
Использование Фильтра Высоких Частот
88
Настройка Лимитера
88
Воспроизведение Записей
88
Выбор Файлов
89
Использование В Качестве Аудио Интер- Фейса
89
Подготовка К Работе
89
Подключение
90
Монитор
90
Отключение
90
Устранение Неполадок
91
Характеристики
92
Параметры
92
Входы И Выходы
92
Входные/Выходные Параметры Разъёмов Управления
92
Звуковые Характеристики
92
Длительность Записи
92
Прочие Характеристики
93
安全にお使いいただくために
95
日本語
97
はじめに
97
リファレンスマニュアルについて
97
本製品の構成
97
設置上の注意
97
アフターサービス
98
トップパネル
98
ユーザー登録について
98
各部の名称
98
結露について
98
製品のお手入れ
98
フロントパネル
99
ボトムパネル
99
右サイドパネル
99
左サイドパネル
99
カードを入れる
100
準備する
100
電池を入れる
100
電源を入れる
100
チルトフットを取り付ける
101
内蔵ステレオマイクについて
101
メニューを操作する
102
画面の説明
102
録音する
103
録音モードを設定する
103
リミッターを設定する
104
低域カットフィルターを設定する
104
ファイルを選ぶ
105
再生する
105
オーディオインターフェースとして使用する
106
モニターする
106
トラブルシューティング
107
接続解除
107
リファレンスマニュアルは、Tascamのウェ
110
取扱説明書(本書)では、本機の各機能につい
110
Advertisement
Tascam DR-40X Reference Manual (80 pages)
Linear PCM Recorder
Brand:
Tascam
| Category:
Voice Recorder
| Size: 1.86 MB
Table of Contents
Table of Contents
2
1 Introduction
4
Features
4
Conventions Used in this Manual
4
Trademarks and Copyrights
5
About SD Cards
5
Precautions for Use
5
2 Names and Functions of Parts
6
Top Panel
6
Front Panel
8
Left Side Panel
8
Right Side Panel
8
Bottom Panel
9
Home Screen
10
Recording Screen
11
Menu Item List
13
Using the Menu
14
Basic Operation
15
3 Preparation
16
Powering the Unit
16
Using AA Batteries
16
Using an AC Adapter (Sold Separately)
16
Using USB Bus Power
16
Turning the Power on and off (Standby Mode)
17
Turning the Unit on
17
Turning the Unit off (Standby)
17
Resume Function
17
Setting the Date and Time
18
Inserting and Removing SD Cards
19
Inserting Cards
19
Removing the Card
19
Card Write Protection
19
Preparing an SD Card for Use
19
Using the Built-In Speaker
20
Connecting Monitoring Equipment
20
Using the Built-In Microphone
21
Setting the Mics to Record a Wide Stereo Sound (A-B Position)
21
Setting the Mics to Record a Clear Stereo Sound (X-Y Position)
21
Swapping the Left-Right Channels of the Built-In Microphone Pair
22
Microphone Position Detection
22
Attaching the Tilt Foot
22
4 Recording
23
Setting File Format and Sampling Frequency (REC SETTING)
23
Preparing the Recording Inputs
24
Recording with the Built-In Mics
24
Recording with External Mics (EXT MIC IN)
24
Recording an External Device (LINE IN)
24
Setting the External Input Type
24
Using Phantom Power
25
Adjusting the Input Level
25
Manually Adjusting the Input Level
25
Independent L/R Channel EXT in Input Level Setting Function
27
Using the LEVEL MODE Function
27
Overview of Recording Modes
28
Recording (MONO/STEREO Recording)
28
Make Recording Settings
28
Setting Where Files Are Saved
29
Starting the Recording
29
File Names When Recording in MONO/STEREO
29
Simultaneously Recording Two Files at Different Input Levels (DUAL REC)
30
Enabling Dual Recording
30
Starting Dual Recording
31
Dual Recording File Names
31
Recording 3 or 4 Channels
31
Making Settings for 3/4-Channel Recording
31
Starting 3/4-Channel Recording
32
File Names When Recording in 4-Channel
32
Recording Playback and Input Sounds Together (Overdubbing)
33
Setting the Overdubbing Mode
33
Select the File You Want to Overdub
34
Conducting Overdubbing
34
File Names When Overdubbing
34
Using the Automatic Recording Function (AUTO REC)
35
Continuing to Record in a New File (Track Incrementing)
36
Manually Incrementing Files During Recording
36
Automatically Incrementing Files by a Set Time
36
Using the Low-Cut Filter
37
Capturing a few Seconds before Starting Recording (PRE REC)
37
Using Tone Output
38
Setting the AUTO TONE Function
38
Setting the AUTO TONE Length
38
Adjusting the AUTO TONE Volume
38
Self-Timer Function
39
Solo Function
39
Recording Duration
40
5 Working with Files and Folders (BROWSE Screen)
41
Screen Navigation
41
Icons on the BROWSE Screen
41
File Operations
41
Folder Operations
43
Creating a New Folder
43
6 Playback
44
Adjusting the Playback Volume
44
Setting the Playback Area (AREA)
44
Selecting a Folder for the Playback Area (1)
45
Selecting a Folder for the Playback Area (2)
45
Using the Playlist
46
Adding Files to the Playlist
46
Editing the Playlist
46
Selecting Files for Playback (Skipping)
47
Playing Recordings
47
Pausing
47
Stopping Playback
47
Searching Backward and Forward
47
Repeating Playback (REPEAT)
48
Special Playback Control Functions
48
Playback Control Screen
48
Loop Playback of a Selection
48
Changing the Playback Speed (VSA)
49
Setting the Playback Equalizer
50
Increasing Perceived Sound Pressure to Enhance Listenability (LEVEL ALIGN)
50
Using the Jump Function
51
Setting the Jump Back Time
51
Setting the Jump Forward Time
52
Playback of Files Recorded Using Dual Recording
52
OVERDUB INPUT MUTE Function (During Playback)
52
Solo Function
52
7 Quick Operations
53
Features of the QUICK Button
53
Quick Menu
55
Deleting Files
55
Dividing the Selected File (DIVIDE)
55
Dividing the Selected File Automatically at Marks (AUTO DIVIDE)
56
Overwrite Recording
57
Selecting a File to Overwrite Record
57
Activating Overwrite Mode
57
Conducting Overwrite Recording
57
Checking the Result of Recording
57
Undoing and Redoing (UNDO/REDO)
57
Ending Overwrite Recording Mode
57
Transcribing Recorded Files (DICTATION PLAY)
58
Enabling DICTATION PLAY Mode
58
Adjusting Playback Equalization
58
Changing the Playback Position
58
Ending DICTATION PLAY Mode
58
Mixdown
59
8 Mark Functions
60
Adding Marks Manually
60
Adding Marks Automatically to a Recording
60
Moving to Mark Positions
60
Clearing Marks
60
9 Using Effects
61
Setting the Effect
61
Effects Preset List
61
10 - Mixer
62
Making Mixer Settings
62
Using the MS Decoder
63
Decoding the Input Sound as You Record
63
Decoding the Playback Sound
63
MS Decoder Settings
63
11 - Tuning Instruments
64
Using the Tuner
64
Setting the Tuner
64
Tuning a Musical Instrument
64
12 - USB Connections
65
Powering the Unit with USB Bus Power
65
Using as an SD Card Reader
65
Disconnecting the Unit from a Computer
66
Transferring Files from a Computer
66
Using as a USB Audio Interface
66
The AUDIO I/F Screen will Open
66
Setting the Connected Device Type
67
Connecting
67
13 - Settings and Information
68
Viewing Information (INFORMATION)
68
File Information Page
68
Card Information Page (CARD)
68
System Information Page (SYSTEM)
68
System Settings
69
Setting the Automatic Power Saving Function
69
Setting the Backlight
69
Adjusting the Display Contrast
69
Setting the Battery Type
69
Setting the Phantom Power Voltage
69
Setting the Language
69
Restoring the Factory Settings
70
Formatting SD Cards
70
Completely Formatting SD Cards
70
Setting the File Name Format
71
File Name Format
71
Setting the WORD Item
71
Resetting the Number
71
14 - Using the REMOTE Jack
72
Footswitch (TASCAM RC-3F)
72
Setting Footswitch Operation
72
Using the Footswitch
72
Remote Control (TASCAM RC-10)
73
Setting the Wired Remote Control
73
Using the Wired Remote Control
73
15 - Messages
74
16 - Troubleshooting
76
17 - Specifications
77
Ratings
77
Input/Output Ratings
77
Analog Audio Input and Output Ratings
77
Control Input/Output Ratings
77
Audio Performance
77
Other Specifications
77
Dimensional Drawings
79
Tascam DR-40X Quick Start Manual (4 pages)
Portable Four-Track Digital Audio Recorder & USB Interface
Brand:
Tascam
| Category:
Recording Equipment
| Size: 7.51 MB
Advertisement
Advertisement
Related Products
Tascam DR-70D
Tascam DR-07X
Tascam DR-44WLB
Tascam DR-60D MK II
Tascam DR-40
Tascam dr-44wl
Tascam DR-08
Tascam DR-100 MKIII
Tascam DR-03
Tascam DR-V1HD
Tascam Categories
Recording Equipment
Music Mixer
Voice Recorder
CD Player
Accessories
More Tascam Manuals
Login
Sign In
OR
Sign in with Facebook
Sign in with Google
Upload manual
Upload from disk
Upload from URL