Table of Contents
Advertisement
Quick Links
Advertisement
Table of Contents

Related Manuals for Edimax BR-6288ACL


Summary of Contents for Edimax BR-6288ACL
- Page 1 BR-6288ACL User Manual 09-2014 / v1.0...
-
Page 2: Table Of Contents
CONTENTS I. Product Information ................1 I-1. Package Contents ...................... 1 I-2. LED Status ........................2 I-3. Back Panel ......................... 3 I-4. RJ-45 Splitter Cable ....................4 I-5. Wi-Fi Power Switch ....................5 I-6. Safety Information ..................... 6 II. Installation .................... 7 II-1. - Page 3 III-3-5-3. WPS ......................... 77 III-3-5-4. Access Control ......................78 III-3-5-5. Schedule ........................80 III-3-6. Firewall ........................82 III-3-6-1. URL Blocking ......................82 III-3-6-2. Access Control ......................84 III-3-6-3. DMZ ......................... 88 III-3-6-4. DoS .......................... 89 III-3-7. QoS .......................... 91 III-3-7-1. QoS ..........................
- Page 4 IV-1-2-4. Windows 8 ......................131 IV-1-2-5. Mac ........................135 IV-1-3. How to Find Your Network Security Key ..............138 IV-1-3-1. Windows 7 & Vista ....................138 IV-1-3-2. Mac ........................140 IV-1-4. How to Find Your Router’s IP Address ..............143 IV-1-4-1.
-
Page 5: Product Information
I. Product Information I-1. Package Contents Before you start using this product, please check if there is anything missing in the package, and contact your dealer to claim the missing item(s): BR-6288ACL CD-ROM RJ-45 Splitter Cable Power Adapter USB Cable... -
Page 6: I-2. Led Status
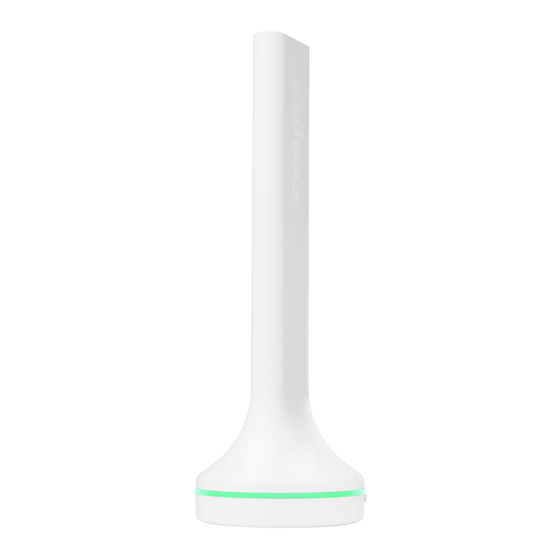
Resetting to factory default status or Wi-Fi Flashing (Fast) Protected Setup (WPS) is active. Light Green Internet is connected and Wi-Fi is full power. Internet is connected and Wi-Fi is in green Dark Green mode (25% power). BR-6288ACL is off. -
Page 7: I-3. Back Panel
I-3. Back Panel Wi-Fi Power Switch WPS/Reset Button Power Port Network Port... -
Page 8: I-4. Rj-45 Splitter Cable
I-4. RJ-45 Splitter Cable The BR-6288ACL includes an RJ-45 splitter cable in the package contents. This plugs into the “Network” port of the BR-6288ACL and splits the port into two separate Ethernet ports – providing two ports instead of one, as shown below. -
Page 9: I-5. Wi-Fi Power Switch
I-5. Wi-Fi Power Switch After setup you can use the Wi-Fi power switch to adjust the strength of the BR-6288ACL’s wireless radio if you wish. Normal mode uses full 100% wireless power while green mode uses 25% wireless power. -
Page 10: I-6. Safety Information
2. Do not place the device in or near hot/humid places, such as a kitchen or bathroom. 3. Do not pull any connected cable with force; carefully disconnect it from the BR-6288ACL. 4. Handle the device with care. Accidental damage will void the warranty of the device. -
Page 11: Ii. Installation
II. Installation Plug in the BR-6288ACL using the included power adapter and/or USB cable. The BR-6288ACL requires 1 A of current – please ensure that your USB port can provide sufficient power. If not, use the 5V DC adapter. Wait until the circular LED at the base of the product is flashing "... - Page 12 Wi-Fi device is set to use a dynamic IP address. This is a simple procedure and step-by-step instructions to do this on a computer can be found in the user manual. Choose if you want to use your BR-6288ACL in its default Wi-Fi router mode or in a different mode.
- Page 13 The BR-6288ACL’s five available modes are outlined below: Wi-Fi Router Mode The device connects to your modem and provides 2.4GHz and/or 5GHz Internet (wireless and Ethernet) access for your network devices. Access Point Mode The device connects to an existing router via Ethernet cable and provides 2.4GHz and/or 5GHz...
-
Page 14: Ii-1. Wi-Fi Router Mode
Select whether to use the iQ Setup wizard (recommended) to detect your Internet connection type, or enter the settings manually. Manual configuration is only recommended for advanced users. Connect the blue Internet port of your BR-6288ACL to the LAN port of your modem using an Ethernet cable, and then click “Next”. - Page 15 Please wait a moment while the BR-6288ACL tests the connection. Click “Next” to continue and configure the device’s wireless network. Enter a name and password for your 2.4GHz & 5GHz wireless networks, then click “Next” to continue.
- Page 16 A summary of your configuration will be displayed, as shown below. Check that all of the details are correct and then click “Next” to proceed. If you wish to backup the device’s settings, click “Backup this configuration” to open a new window and save your current configuration to a .txt file.
- Page 17 Please wait while the BR-6288ACL applies your settings. A final congratulations screen will indicate that setup is complete. You can now connect to the device’s new SSID(s) which are shown on the screen then close the browser window.
- Page 18 The BR-6288ACL is working and ready for use. Refer to IV-2. Connecting to a Wi-Fi network if you require more guidance.
-
Page 19: Ii-2. Access Point Mode
II-2. Access Point Mode Select “Access Point” from the top menu and click “Next”. Connect the network port of your BR-6288ACL to the LAN port of your existing router using an Ethernet cable, then click “Next”. Select whether to use the 5GHz wireless frequency, 2.4GHz wireless... - Page 20 Select “Obtain an IP address automatically” or “Use the following IP address” for your BR-6288ACL. If you are using a static IP, enter the IP address, subnet mask and default gateway. Click “Next” to proceed to the next step. “Obtain an IP address automatically” is the recommended setting for most users.
- Page 21 Enter a name and password for your 2.4GHz & 5GHz wireless networks, then click “Next” to continue. A summary of your configuration will be displayed, as shown below. Check that all of the details are correct and then click “Next” to proceed. If you wish to backup the device’s settings, click “Backup this configuration”...
- Page 22 Please wait a moment until the BR-6288ACL is ready. A final congratulations screen will indicate that setup is complete. You can now connect to the device’s new SSID(s) which are shown on the screen then close the browser window.
- Page 23 The BR-6288ACL is working and ready for use. Refer to IV-2. Connecting to a Wi-Fi network if you require more guidance.
-
Page 24: Ii-3. Range Extender Mode
II-3. Range Extender Mode Select “Range Extender” from the top menu and click “Next”. Please ensure your BR-6288ACL is within Wi-Fi range of your existing wireless router. Click “Next” to continue. - Page 25 Select whether to use the 5GHz wireless frequency, 2.4GHz wireless frequency or both. If you are not sure, select both and then click “Next”. Select the Wi-Fi network name (SSID) which you wish to connect to for the specified frequency and click “Next” to continue. If the Wi-Fi network you wish to connect to does not appear, try clicking “Refresh”.
- Page 26 Enter your existing wireless network’s security key/password in the “Security Key” field and click “Next” to continue.
- Page 27 Wait a moment while the BR-6288ACL tests the wireless connection. Select “Obtain an IP address automatically” or “Use the following IP address” for your BR-6288ACL. If you are using a static IP, enter the IP address, subnet mask and default gateway. Click “Next” to proceed to the next step.
- Page 28 The device will use the same wireless password/security key as the existing wireless network. If you wish to backup the BR-6288ACL’s settings, click “Backup this configuration” to open a new window and save your current configuration to a .txt file.
- Page 29 Please wait a moment until the BR-6288ACL is ready.
- Page 30 A final congratulations screen will indicate that setup is complete. You can now connect to the device’s new SSID(s) which are shown on the screen then close the browser window. The BR-6288ACL is working and ready for use. Refer to IV-2. Connecting to a Wi-Fi network...
-
Page 31: Ii-4. Wireless Bridge Mode
II-4. Wireless Bridge Mode Select “Wireless Bridge” from the top menu and click “Next”. Please ensure your BR-6288ACL is within Wi-Fi range of your existing wireless router. Click “Next” to continue. Select the frequency (2.4GHz or 5GHz) of your existing wireless network. - Page 32 Select the Wi-Fi network name (SSID) which you wish to connect to and click “Next” to continue. If the Wi-Fi network you wish to connect to does not appear, try clicking “Refresh”. To connect to a hidden SSID, check the “Setup extender manually” box and enter the details manually on the next page, as shown below.
- Page 33 Enter your existing wireless network’s security key/password in the “Security Key” field and click “Next” to continue.
- Page 34 Wait a moment while the BR-6288ACL tests the wireless connection. Select “Obtain an IP address automatically” or “Use the following IP address” for your BR-6288ACL. If you are using a static IP, enter the IP address, subnet mask and default gateway. Click “Next” to proceed to the next step.
- Page 35 A summary of your configuration will be displayed, as shown below. Check that all of the details are correct and then click “Next” to proceed. If you wish to backup the BR-6288ACL’s settings, click “Backup this configuration” to open a new window and save your current...
- Page 36 A final congratulations screen will indicate that setup is complete. Please close the browser window. The BR-6288ACL is working and ready for use. You can now connect the BR-6288ACL to your network device using an Ethernet cable and connect to your network as usual.
-
Page 37: Ii-5. Wisp Mode
II-5. WISP Mode Select “WISP” from the top menu and click “Next”. Please ensure your BR-6288ACL is within Wi-Fi range of your WISP network and click “Next” to continue. - Page 38 Select whether to use the iQ Setup wizard (recommended) to detect your Internet connection type, or enter the settings manually. Manual configuration is only recommended for advanced users. Select the wireless frequency (2.4GHz or 5GHz) of your WISP network.
- Page 39 Select the WISP SSID which you wish to connect to and click “Next” to continue. If the Wi-Fi network you wish to connect to does not appear, try clicking “Refresh”. To connect to a hidden SSID, check the “Setup extender manually” box and enter the details manually on the next page, as shown below.
- Page 40 Enter your existing wireless network’s security key/password in the “Security Key” field and click “Next” to continue. Wait a moment while the BR-6288ACL tests the wireless connection.
- Page 41 Click “Next” to continue your Internet service type configuration. Wait a moment while the BR-6288ACL connects to the Internet.
- Page 42 When the Internet is connected, click “Next” to configure your wireless network. Enter a name and password for your 2.4GHz & 5GHz wireless networks, then click “Next” to continue.
- Page 43 A summary of your configuration will be displayed, as shown below. Check that all of the details are correct and then click “Next” to proceed. If you wish to backup the device’s settings, click “Backup this configuration” to open a new window and save your current configuration to a .txt file.
- Page 44 A final congratulations screen will indicate that setup is complete. You can now connect to the device’s new SSID(s) which are shown on the screen then close the browser window. The BR-6288ACL is working and ready for use. Refer to IV-2. Connecting to a Wi-Fi network...
-
Page 45: Ii-6. Wps Setup
II-7. Reset to Factory Default Settings If you experience problems with your BR-6288ACL, you can reset the device back to its factory settings. This resets all settings back to default. Press and hold the WPS/Reset button found on the rear base of the product for at least 10 seconds. -
Page 46: Iii. Browser Based Configuration Interface
III. Browser Based Configuration Interface After you have setup the BR-6288ACL as detailed in II. Installation or the included Quick Installation Guide, you can use the browser based configuration interface to configure advanced settings. Please ensure that your computer is set to use a dynamic IP address. - Page 47 You will arrive at the “Status” screen. Use the menu down the left side to navigate.
-
Page 48: Iii-2. Save Settings
III-2. Save Settings After you configure any settings, click the “Save Settings” button at the bottom of the screen to save your changes. The device needs to restart in order to bring any changes into effect. Then, click “Click here to restart” in order to restart the device and bring the changes into effect. -
Page 49: Iii-3. Main Menu
III-3. Main Menu The main menu displays different options depending on your device’s operating mode. For Range Extender mode: WPS please refer to 2.4GHz Wireless & 5GHz Wireless WPS Wi-Fi Router Access Point Range Extender Wireless Bridge WISP... -
Page 50: Status
III-3-1. Status The “Status” page displays basic system information about the device, arranged into categories. Screenshots displayed are examples.The information shown on your screen will vary depending on your configuration. -
Page 51: Setup Wizard
III-3-2. Setup Wizard You can run the setup wizard again to reconfigure the basic settings of the device, or you can run a wizard to help you switch the device to a different operating mode. Select “Setup Wizard” or “Switch to Router/Access Point/Range Extender/Wireless Bridge/WISP mode”... - Page 52 Follow the on-screen wizard to setup your device in a different mode. Refer to II. Installation Step 3 onwards for help if needed. If you don’t see the “Get Started” screen, try reconnecting to the edimax.setup SSID and go to http://edimax.setup in a web browser.
-
Page 53: Iii-3-3
Enable or disable your WISP connection. SSID The name of the WISP network which your BR-6288ACL is connected to. Manually enter an SSID if you wish or use “Site Survey” below. Site Survey Select wireless frequency and click “Show List” to open a new window and select your WISP network. -
Page 54: Wan Setup
III-3-3-1. WAN Setup Select a Wide Area Network (WAN) connection mode and configure the settings. If you are unsure about your connection type, contact your ISP. In WISP mode, only Dynamic IP, Static IP & PPPoE are available for WAN Connection Mode. III-3-3-1-1. - Page 55 Host Name Enter the host name of your computer. MAC Address For some applications, you may need to designate a specific MAC address for the router. Please enter the MAC address here. If you are connecting the router to a computer, press “Clone Mac” to automatically enter your computer’s MAC address.
-
Page 56: Iii-3-3-1-2
III-3-3-1-2. Static IP Select “Static IP” if your ISP provides Internet access via a fixed IP address. Your ISP will provide you with such information as IP address, subnet mask, gateway address, and DNS address. Fixed IP Address Input the IP address assigned by your ISP here. Subnet Mask Input the subnet mask assigned by your ISP here. - Page 57 (URL) DNS proxy server. Enable/Disable time to live (TTL) function which limits the lifespan of network data to improve performance.
-
Page 58: Iii-3-3-1-3
III-3-3-1-3. PPPoE Select “PPPoE” if your ISP is providing you Internet access via PPPoE (Point-to-Point Protocol over Ethernet). User Name Enter the user name assigned by your ISP here. Password Enter the password assigned by your ISP here. MAC Address For some applications, you may need to designate a specific MAC address for the router. - Page 59 DNS Address Select “Obtain an IP address automatically” or “Use the following IP address”. Check with your ISP if you are unsure. DNS Address 1, 2 & 3 Enter the DNS address(es) assigned by your ISP here. DNS Proxy Enable or disable a DNS proxy server. DNS Proxy Rules When DNS proxy is enabled, enter the URL of a (URL)
-
Page 60: Iii-3-3-1-4. Pptp
III-3-3-1-4. PPTP Select “PPTP” if your ISP is providing you Internet access via PPTP (Point-to-Point Tunneling Protocol). Then select “Obtain an IP address automatically” or “Use the following IP address” depending on your ISP. - Page 61 Host Name Enter the host name of your computer here If required. MAC Address For some applications, you may need to designate a specific MAC address for the router. Please enter the MAC address here. If you are connecting the router to a computer, press “Clone Mac”...
- Page 62 Connection Type Specify a connection type: 1. “Continuous”: Connected all the time. 2. “Connect on Demand”: Connect when you initiate an Internet connection. 3. “Manual”: Connect/disconnect manually using the “Connect” and “Disconnect” buttons. Idle Time Out Specify the amount of time the router waits before shutting down an idle connection.
-
Page 63: Iii-3-3-1-5. L2Tp
III-3-3-1-5. L2TP Select “L2TP” if your ISP is providing you Internet access via L2TP (Layer 2 Tunneling Protocol). Host Name Enter the host name of your computer here If required. MAC Address For some applications, you may need to designate a specific MAC address for the router. - Page 64 a computer, press “Clone Mac” to automatically enter your computer’s MAC address. Static IP Address Input the IP address assigned by your ISP here. Subnet Mask Input the subnet mask assigned by your ISP here. Default Gateway Input the default gateway assigned by your ISP here. Address Some ISPs may call this “Default Route”.
-
Page 65: Iii-3-3-2. Ddns
III-3-3-2. DDNS Dynamic DNS (DDNS) is a service which provides a hostname-to-IP service for dynamic IP users. The changing nature of dynamic IPs means that it can be difficult to access a service provided by a dynamic IP user; a DDNS service though can map such dynamic IP addresses to a fixed hostname, for easier access. - Page 66 ZoneEdit http://www.zoneedit.com CyberGate http://cybergate.planex.co.jp/ddns/ NS2GO http://www.ns2go.com/ NO-IP http://www.noip.com/...
-
Page 67: Iii-3-4. Lan
IP address instead of using the URL http://edimax.setup. IP Address Specify the IP address here. This IP address will be assigned to the BR-6288ACL and will replace the default IP address. Subnet Mask Specify a subnet mask. The default value is 255.255.255.0... - Page 68 Your device’s DHCP server automatically assigns IP addresses to computers on its network, between a defined range of numbers. Start IP Enter the start IP address for the DHCP server’s IP address leases. End IP Enter the end IP address for the DHCP server’s IP address leases.
- Page 69 The LAN IP page will be displayed as below when your device is set to access point mode. You can set theBR-6288ACL to obtain an IP address automatically or you can specify an IP address.
-
Page 70: Iii-3-5
III-3-5. 2.4GHz Wireless & 5GHz Wireless The “2.4GHz Wireless” & “5GHz Wireless” menu allows you to configure SSID and security settings for your Wi-Fi network along with a guest Wi-Fi network. WPS, access control and scheduling functions can also be managed from here. - Page 71 Check the box to enable wireless clients isolation. Clients Isolation This prevents wireless clients connected to the BR-6288ACL from communicating with each other and improves security. Typically, this function is useful for corporate environments or public hot spots and can prevent brute force attacks on clients’...
- Page 72 information about wireless clients. Please disable any pop-up blockers if you have difficulty using this function. AP Bridge-WDS: Wireless Distribution System (WDS) can bridge/repeat access points together in an extended network. WDS settings can be configured as shown below. When using WDS, configure the IP address of each access point to be in the same subnet and ensure there is only one active DHCP server among connected access points, preferably on the WAN side.
- Page 73 Wireless Security: Select an encryption type from the drop-down menu: “WPA Pre-shared Key” is the recommended and most secure encryption type. In WISP mode, WPA RADIUS is unavailable for the wireless band that is used to connect to WISP’s AP.
-
Page 74: Iii-3-5-1-1
III-3-5-1-1. Disable Encryption is disabled and no password/key is required to connect to the BR-6288ACL. Disabling wireless encryption is not recommended. When disabled, anybody within range can connect to your device’s SSID. Enable 802.1x Check the box to enable the 802.1x authentication. -
Page 75: Iii-3-5-1-2. Wep
III-3-5-1-2. WEP (Wired Equivalent Privacy) is a basic encryption type. For a higher level of security consider using WPA encryption. Key Length Select 64-bit or 128-bit. 128-bit is more secure than 64-bit. Key Format Choose from “ASCII” (any alphanumerical character 0-9, a-z and A-Z) or “Hex” (any characters from 0-9, a-f and A-F). -
Page 76: Iii-3-5-1-3
III-3-5-1-3. WPA Pre-Shared Key WPA pre-shared key is the recommended and most secure encryption type. WPA Unicast Select from WPA (TKIP), WPA2 (AES) or WPA2 Cipher Suite Mixed. WPA2 (AES) is safer than WPA (TKIP), but not supported by all wireless clients. Please make sure your wireless client supports your selection. -
Page 77: Iii-3-5-1-4
III-3-5-1-4. WPA Radius WPA RADIUS is a combination of WPA encryption and RADIUS user authentication. If you have a RADIUS authentication server, you can authenticate the identity of every wireless client against a user database. WPA Unicast Select from WPA (TKIP), WPA2 (AES) or WPA2 Cipher Suite Mixed. -
Page 78: Guest/ Multiple Ssid
“Basic” menu. In access point mode, the “Guest” feature in the menu is replaced by “Multiple SSID”. The BR-6288ACL supports up to four additional SSIDs for each wireless band in access point mode. Enable Guest SSID Check/uncheck the box to enable/disable the guest Wi-Fi network. - Page 79 WPA RADIUS encyrption type is not available for the guest network. MULTIPLE SSID: The BR-6288ACL supports up to four additional SSIDs for each wireless band in access point mode. Once configured, these SSIDs are displayed in the “Multiple SSID Status” table as shown below. Use the “Multiple SSID Basic Settings”...
- Page 80 Check the box to enable wireless clients isolation. Clients Isolation This prevents wireless clients connected to the BR-6288ACL from communicating with each other and improves security. Typically, this function is useful for corporate environments or public hot spots and can prevent brute force attacks on clients’...
-
Page 81: Iii-3-5-3. Wps
III-3-5-3. WPS Wi-Fi Protected Setup is a simple way to establish connections between WPS compatible devices. WPS can be activated on compatible devices by pushing a WPS button on the device or from within the device’s firmware/configuration interface. When WPS is activated in the correct manner and at the correct time for two compatible devices, they will automatically connect. -
Page 82: Access Control
This function allows you to define a list of network devices permitted to connect to the BR-6288ACL. Devices are each identified by their unique MAC address. If a device which is not on the list of permitted MAC addresses attempts to connect to the BR-6288ACL, it will be denied. - Page 83 MAC address Select a PC name from the drop-down list and click “>>” to add enter it into the blank field to the right. Click “Refresh’ in the drop-down menu to refresh the list of available MAC addresses. If the address you wish to add is not listed, enter it manually.
-
Page 84: Iii-3-5-5. Schedule
Check/uncheck the box “Enable Schedule Settings” to enable/disable the wireless on/off scheduling function. The BR-6288ACL must remain connected to the Internet and use an NTP server for the schedule feature to function correctly. Wireless scheduling can save energy and increase the security of your network. - Page 85 Add the schedule to the table of active schedules. Active schedules will be displayed in the table as shown below. Select an entry using the “Select” checkbox. Delete Selected / Delete selected or all entries from the table. Delete All...
-
Page 86: Iii-3-6. Firewall
III-3-6. Firewall The “Firewall” menu provides access to URL blocking, access control, DMZ and DoS functions to improve the security of your wireless network. SPI firewall Enable or disable the Stateful Packet Inspection (SPI) firewall. III-3-6-1. URL Blocking This function can block Internet access by either specific URLs or keywords. Check/uncheck the “Enable URL Blocking”... - Page 87 URL/Keyword Enter the URL or keyword to be blocked. Add the URL or keyword to the blocked table. Blocked URLs/keywords entries will be listed in the table as shown below. Select an entry using the “Select” checkbox. Delete Selected / Delete selected or all entries from the table.
-
Page 88: Access Control
This function allows you to define a list of network devices permitted or denied to connect to the BR-6288ACL. Devices are each identified by their unique MAC address or IP address. Specific services can also be allowed/denied for IP addresses. - Page 89 MAC Filtering: Enable MAC Filtering Check the box to enable MAC filtering and select whether to “Deny” or “Allow” access for specified MAC address. Client PC MAC Enter a MAC address of computer or network Address device manually without dashes or colons e.g. for MAC address ‘aa-bb-cc-dd-ee-ff’...
- Page 90 IP Filtering: Enable IP Filtering Check the box to enable IP filtering and select whether to “Deny” or “Allow” access for specified IP address. Add PC Opens a new window to add a new IP to the list, to deny or allow access/services according to above.
- Page 91 Enter a description for reference/identification of Client PC Description up to 16 alphanumeric characters. Client PC IP address Enter a starting IP address in the left field and the end IP address in the right field to define a range of IP addresses;...
-
Page 92: Iii-3-6-3. Dmz
III-3-6-3. DMZ A Demilitarized Zone (DMZ) is an isolated area in your local network where private IP addresses are mapped to specified Internet IP addresses, allowing unrestricted access to the private IP addresses but not to the wider local network. You can define a virtual DMZ host here. -
Page 93: Iii-3-6-4. Dos
to enter its IP address into the “Client PC” field (above). Click “Add” to add the client to the “Current DMZ Table”. DMZ entries will be displayed in the table shown below: Delete Selected / Delete selected or all entries from the table. Delete All III-3-6-4. - Page 94 Ping of Death Specify the frequency of ping of death packets which will trigger the router’s DoS protection function. Discard Ping from Check this box and the router will not answer ping requests from the Internet. Port Scan Intruders use “port scanners” to detect open Internet IP address ports.
-
Page 95: Iii-3-7. Qos
QoS allows you to ensure that sufficient bandwidth is available. Minimum or maximum bandwidth can be guaranteed for a specified application. BR-6288ACL QoS can improve the ’s performance. QoS is recommended to optimize performance for online gaming. - Page 96 Rule Name Enter a name for the QoS rule for reference/identification. Bandwidth Set the bandwidth limits for the QoS rule: 1. Select “Download” or “Upload” for the QoS rule. 2. Enter the bandwidth limit. 3. Select whether the bandwidth is a “Guarantee”...
- Page 97 Local Port Range Enter the port range to activate the QoS rule. Enter a single port number e.g. 110 or a range of port numbers e.g. 110-120 Remote IP Address Enter the remote IP address range which will activate the QoS rule. Enter a starting IP address in the left field and the end IP address in the right field to define a range of IP addresses;...
-
Page 98: Iii-3-7-2. Iqos
III-3-7-2. iQoS iQoS is a more intuitive and automated tool to manage internet bandwidth than manually configuring the settings using QoS. For online gamers or users with bandwidth requirements for audio/video, iQoS is a useful function. iQoS cannot be used in conjunction with QoS and vice-versa. When one is enabled, the other is automatically disabled. - Page 99 The icons represent the following categories: Internet Browsing P2P/BT Downloads Multimedia Online Gaming The iQoS table is ordered left to right, high to low priority. Click a small icon below the table to insert it into the table, and click a large icon in the table to remove it.
-
Page 100: Iii-3-8. Advanced
III-3-8. Advanced Advanced features of the BR-6288ACL can be configured from the “Advanced” menu. III-3-8-1. Static Routing Static routing is a method of configuring path selection of routers, characterized by the absence of communication between routers regarding the current topology of the network. The opposite of static routing is dynamic routing, sometimes also referred to as adaptive routing. -
Page 101: Port Forwarding
Default Gateway Enter the default gateway of the destination network. Hop Count Enter the hop count (the distance between destination network and this broadband router) here. Interface Enter the interface which leads to destination network. Add the route to the current static routing table. Static Routing Table entries will be displayed in the table shown below: Delete Selected/ Delete selected or all entries from the table. - Page 102 Private IP Enter the IP address of the computer on the local network. Computer Name Windows computers on the local network will be listed here – select a computer from the list and click << to automatically add the IP address to the “Private IP”...
-
Page 103: Iii-3-8-3. Virtual Server
III-3-8-3. Virtual Server This function allows you to set up an internet service on a local computer, without exposing the local computer to the internet. You can also build various sets of port redirection, to provide various internet services on different local computers via a single internet IP address. -
Page 104: Iii-3-8-4. 2.4Ghz Wireless
Delete Selected/ Delete selected or all entries from the table. Delete All III-3-8-4. 2.4GHz Wireless These settings are for experienced users only. Please do not change any of the values on this page unless you are already familiar with these functions. Fragment Threshold Set the Fragment threshold of the wireless radio. - Page 105 Channel Width Select wireless channel width (bandwidth used by wireless signals from the device) – the recommended value is Auto 20/40MHz. Preamble Type Set the wireless radio preamble type. The default value is “Short Preamble”. CTS Protect Enabling this setting will reduce the chance of radio signal collisions between 802.11b and 802.11g wireless access points.
-
Page 106: Iii-3-8-5. 5Ghz Wireless
III-3-8-5. 5GHz Wireless These settings are for experienced users only. Please do not change any of the values on this page unless you are already familiar with these functions. Fragment Set the Fragment threshold of the wireless radio. The Threshold default value is 2346. - Page 107 Channel Width Select wireless channel width (bandwidth used by wireless signals from the device) – the recommended value is 20/40/80MHz. Preamble Type Set the wireless radio preamble type. The default value is “Short Preamble”. CTS Protect Enabling this setting will reduce the chance of radio signal collisions between 802.11b and 802.11g wireless access points.
-
Page 108: Iii-3-8-6. Igmp
III-3-8-6. IGMP IGMP is a communications protocol used to establish multicast group memberships. It allows for a more efficient use of resources and better performance for applications such as IPTV video streaming. IGMP Snooping IGMP snooping monitors traffic between hosts and multicast routers to facilitate bandwidth conservation. -
Page 109: Iii-3-9. Administration
III-3-9. Administration Various administrative functions can be accessed from the “Administration” menu. III-3-9-1. Time Zone Set Time Zone Select the time zone of your country or region. Time Server Address The travel router supports NTP (Network Time Protocol) for automatic time and date setup. -
Page 110: Iii-3-9-2. Password
III-3-9-2. Password You can change the password used to login to the browser-based configuration interface here. It is advised to do so for security purposes. Please make a note of the new password. In the event that you forget the password and are unable to login to the browser based configuration interface, see II-7. -
Page 111: Remote Access
III-3-9-3. Remote Access Check “Enabled” to enable the remote access feature and then enter the appropriate values. Host IP Address Specify the IP address which is allowed remote access. Port Specify a port number (0–65535) used for remote access. -
Page 112: Iii-3-9-4. Backup/Restore
III-3-9-5. Upgrade The upgrade page allows you to upgrade the system firmware to a more recent version. You can download the latest firmware from the Edimax website. After the upgrade, the system will restart. Do not switch off or disconnect the device during a firmware upgrade, as this could damage the device. -
Page 113: Iii-3-9-6. Restart
III-3-9-6. Restart In the event that the router malfunctions or is not responding, then it is recommended that you restart the device. III-3-9-7. Logs You can view the system log and security log here. Use the drop down menu in the top-right corner to select which log to view. -
Page 114: Iii-3-9-8. Active Dhcp Client
Save Click “Save” to save the log on your computer as .txt file. Clear Click “Clear” to clear/erase the existing log. Refresh Click “Refresh” to refresh the log and update any activity. III-3-9-8. Active DHCP Client Information about active DHCP clients is shown in the table, which displays the DHCP server assigned IP address, MAC address and time expired for each computer or device on the local network. -
Page 115: Iv. Appendix
IV. Appendix IV-1. Configuring your IP address For first time access to the URL http://edimax.setup please ensure your computer is set to use a dynamic IP address. This means your computer can obtain an IP address automatically from a DHCP server. You can check if your computer is set to use a dynamic IP address by following IV-1-1. -
Page 116: Iv-1-1. How To Check That Your Computer Uses A Dynamic Ip Address
IV-1-1. How to check that your computer uses a dynamic IP address Please follow the instructions appropriate for your operating system. IV-1-1-1. Windows XP Click the “Start” button (it should be located in the lower-left corner of your computer), then click “Control Panel”. Double-click the “Network and Internet Connections”... -
Page 118: Iv-1-1-2. Windows Vista
IV-1-1-2. Windows Vista Click the “Start” button (it should be located in the lower-left corner of your computer), then click “Control Panel”. Click “View Network Status and Tasks”, then click “Manage Network Connections”. Right-click “Local Area Network”, then select “Properties”. The “Local Area Connection Properties” window will then appear, select “Internet Protocol Version 4 (TCP / IPv4)”, and then click “Properties”. -
Page 120: Iv-1-1-3. Windows 7
IV-1-1-3. Windows 7 Click the “Start” button (it should be located in the lower-left corner of your computer), then click “Control Panel”. Under “Network and Internet” click “View network status and tasks”. Click “Local Area Connection”. - Page 121 Click “Properties”. Select “Internet Protocol Version 4 (TCP/IPv4) and then click “Properties”.
- Page 122 Select “Obtain an IP address automatically” and “Obtain DNS server address automatically” should be selected.
-
Page 123: Iv-1-1-4. Windows 8
IV-1-1-4. Windows 8 From the Windows 8 Start screen, you need to switch to desktop mode. Move your curser to the bottom left of the screen and click. In desktop mode, click the File Explorer icon in the bottom left of the screen, as shown below. - Page 124 In the window that opens, select “Change adapter settings” from the left side. Choose your connection and right click, then select “Properties”.
- Page 125 Select “Internet Protocol Version 4 (TCP/IPv4) and then click “Properties”. Select “Obtain an IP address automatically” and “Obtain DNS server address automatically” should be selected.
-
Page 127: Iv-1-1-5. Mac Os
IV-1-1-5. Mac OS Have your Macintosh computer operate as usual, and click on “System Preferences”. In System Preferences, click on “Network”. Click on “Wi-Fi” in the left panel and then click “Advanced” in the lower right corner. Select “TCP/IP” from the top menu and “Using DHCP” in the drop down menu labeled “Configure IPv4”... -
Page 129: Iv-1-2. How To Modify The Ip Address Of Your Computer
IV-1-2. How to modify the IP address of your computer Please follow the instructions appropriate for your operating system. In the following examples we use the IP address 192.168.2.10 though you can use any IP address in the range 192.168.2.x (x = 3 – 254) in order to access iQ Setup/browser based configuration interface. - Page 130 Your existing static IP address will be displayed in the “IP address” field before you replace it. Please make a note of this IP address, subnet mask, default gateway and DNS server addresses. IP address: 192.168.2.10 Subnet Mask: 255.255.255.0 Preferred DNS Server: 192.168.2.1 Click ‘OK’...
-
Page 131: Iv-1-2-2. Windows Vista
IV-1-2-2. Windows Vista Click the “Start” button (it should be located in the lower-left corner of your computer), then click “Control Panel”. Click “View Network Status and Tasks”, then click “Manage Network Connections”. Right-click “Local Area Network”, then select “Properties”. The “Local Area Connection Properties” window will then appear, select “Internet Protocol Version 4 (TCP / IPv4)”, and then click “Properties”. -
Page 132: Iv-1-2-3. Windows 7
IV-1-2-3. Windows 7 Click the “Start” button (it should be located in the lower-left corner of your computer), then click “Control Panel”. Under “Network and Internet” click “View network status and tasks”. - Page 133 Click “Local Area Connection”. Click “Properties”.
- Page 134 Select “Internet Protocol Version 4 (TCP/IPv4) and then click “Properties”. Select “Use the following IP address” and “Use the following DNS server addresses”, then input the following values: Your existing static IP address will be displayed in the “IP address” field before you replace it. Please make a note of this IP address, subnet mask, default gateway and DNS server addresses.
-
Page 135: Iv-1-2-4. Windows 8
IV-1-2-4. Windows 8 From the Windows 8 Start screen, you need to switch to desktop mode. Move your curser to the bottom left of the screen and click. In desktop mode, click the File Explorer icon in the bottom left of the screen, as shown below. - Page 136 Right click “Network” and then select “Properties”. In the window that opens, select “Change adapter settings” from the left side.
- Page 137 Choose your connection and right click, then select “Properties”.
- Page 138 Select “Internet Protocol Version 4 (TCP/IPv4) and then click “Properties”. Select “Use the following IP address” and “Use the following DNS server addresses”, then input the following values: Your existing static IP address will be displayed in the “IP address” field before you replace it. Please make a note of this IP address, subnet mask, default gateway and DNS server addresses.
-
Page 139: Iv-1-2-5. Mac
IV-1-2-5. Mac Have your Macintosh computer operate as usual, and click on “System Preferences” In System Preferences, click on “Network”. Click on “Wi-Fi” in the left panel and then click “Advanced” in the lower right corner. Select “TCP/IP” from the top menu and select “Manually” from the drop down menu labeled “Configure IPv4”, then click “OK”. - Page 140 Your existing static IP address will be displayed in the “IP address” field before you replace it. Please make a note of this IP address, subnet mask, default gateway and DNS server addresses. In the “IPv4 Address” and “Subnet Mask” field enter IP address 192.168.2.10 and subnet mask 255.255.255.0.
- Page 141 Click “Apply” to save the changes.
-
Page 142: Iv-1-3. How To Find Your Network Security Key
IV-1-3. How to Find Your Network Security Key To find your network security key, please follow the instructions appropriate for your operating system. If you are using Windows XP or earlier, please contact your ISP or router manufacturer to find your network security key. IV-1-3-1. - Page 143 Click on “Manage wireless networks” in the left menu. You should see the profile of your Wi-Fi network in the list. Right click on your Wi-Fi network and then click on “Properties”. Click on the “Security” tab, and then check the box labeled “Show characters”.
-
Page 144: Iv-1-3-2. Mac
IV-1-3-2. Mac Open a new Finder window, and select “Applications” from the menu on the left side. Open the folder labeled “Utilities” and then open the application “Keychain Access”. Select “Passwords” from the sub-menu labeled “Category” on the left side, as shown below. - Page 145 Double click the SSID of your network and you will see the following window. Check the box labeled “Show password” and you will be asked to enter your administrative password, which you use to log into your Mac. Enter your password and click “Allow”.
- Page 146 Your network security password will now be displayed in the field next to the box labeled “Show password”. In the example below, the network security password is “edimax1234”. Please make a note of your network security password.
-
Page 147: Iv-1-4. How To Find Your Router's Ip Address
IV-1-4. How to Find Your Router’s IP Address To find your router’s IP address, please follow the instructions appropriate for your operating system. IV-1-4-1. Windows XP, Vista & 7 Go to “Start”, select “Run” and type “cmd”, then press Enter or click “OK”. A new window will open, type “ipconfig”... - Page 148 Your router’s IP address will be displayed next to “Default Gateway”.
-
Page 149: Iv-1-4-2. Windows 8
IV-1-4-2. Windows 8 From the Windows 8 Start screen, move your curser to the top right corner of the screen to display the Charms bar. Click “Search” and enter “cmd” into the search bar. Click the “Command Prompt” app which be displayed on the left side. - Page 150 A new window will open, type “ipconfig” and press Enter.
- Page 151 Your router’s IP address will be displayed next to “Default Gateway”.
-
Page 152: Iv-1-4-3. Mac
IV-1-4-3. Mac Launch “System Preferences” and click on “Network”. If you are using an Ethernet cable to connect to your network, your router’s IP address will be displayed next to “Router”. If you are using Wi-Fi, click “Wi-Fi” in the left panel, and then “Advanced” in the bottom right corner. - Page 153 Click the “TCP/IP” tab and your router’s IP address will be displayed next to “Router”.
-
Page 154: Iv-2. Connecting To A Wi-Fi Network
, or ) in the system tray and select “Connect to a network”. Search for the SSID of your BR-6288ACL and then click “Connect”. If you set a password for your network, you will then be prompted to enter it. - Page 155 After correctly entering your password, you will be successfully connected to the BR-6288ACL’s wireless network.
-
Page 156: Iv-3. Troubleshooting
IV-3. Troubleshooting 1. In range extender mode, is my BR-6288ACL dual-band? a. Yes. The BR-6288ACL can extend 2.4GHz & 5GHz Wi-Fi signals concurrently, but you must connect your BR-6288ACL to each (2.4GHz & 5GHz) network separately during iQ setup. During iQ Setup, you will be asked to select both a 2.4GHz &... - Page 157 Wi-Fi network name Enter the SSID (network name) of your existing, hidden network. Range extender SSID Enter an SSID for the BR-6288ACL or leave it blank to use a default which consists of your existing router’s SSID (above) +"_2EX". Encryption Select and enter the encryption information for your existing, hidden network.
- Page 158 BR-6288ACL. If you are too far away from your existing router, then it is difficult for the BR-6288ACL to receive a wireless signal.
- Page 159 Click “Browse” to locate the firmware file on your computer and then click “Upload” to upload the new firmware. It may take several minutes to complete, please wait and follow the instructions on screen.
- Page 160 V. Glossary Default Gateway (Wireless bridge): Every non-access point IP device needs to configure a default gateway’s IP address. When the device sends out an IP packet, if the destination is not on the same network, the device has to send the packet to its default gateway, which will then send it out towards the destination.
- Page 161 A network mask is also a 32-bit binary pattern, and consists of consecutive leading 1’s followed by consecutive trailing 0’s, such as 11111111.11111111.11111111.00000000. Therefore sometimes a network mask can also be described simply as “x” number of leading 1’s. When both are represented side by side in their binary forms, all bits in the IP address that correspond to 1’s in the network mask become part of the IP network address, and the remaining bits correspond to the host ID.
- Page 162 Port: Network Clients (LAN PC) uses port numbers to distinguish one network application/protocol over another. Below is a list of common applications and protocol/port numbers: Application Protocol Port Number Telnet SMTP POP3 H.323 1720 SNMP SNMP Trap HTTP PPTP 1723 PC Anywhere TCP 5631 PC Anywhere UDP...
- Page 163 Web-based management Graphical User Interface (GUI): Many devices support a graphical user interface that is based on the web browser. This means the user can use the familiar Netscape or Microsoft Internet Explorer to Control/configure or monitor the device being managed.
- Page 164 COPYRIGHT Copyright Edimax Technology Co., Ltd. all rights reserved. No part of this publication may be reproduced, transmitted, transcribed, stored in a retrieval system, or translated into any language or computer language, in any form or by any means, electronic, mechanical, magnetic, optical, chemical, manual or otherwise, without the prior written permission from Edimax Technology Co., Ltd.
-
Page 165: Federal Communication Commission Interference Statement
Federal Communication Commission Interference Statement This equipment has been tested and found to comply with the limits for a Class B digital device, pursuant to Part 15 of FCC Rules. These limits are designed to provide reasonable protection against harmful interference in a residential installation. - Page 166 EU Declaration of Conformity This equipment is in compliance with the essential requirements and other relevant English: provisions of Directive 1999/5/EC, 2009/125/EC. Cet équipement est conforme aux exigences essentielles et autres dispositions de la Français: directive 1999/5/CE, 2009/125/CE. Toto zařízení je v souladu se základními požadavky a ostatními příslušnými ustanoveními Čeština: směrnic 1999/5/ES, 2009/125/ES.
-
Page 167: Declaration Of Conformity
Declaration of Conformity We, Edimax Technology Co., Ltd., declare under our sole responsibility, that the equipment described below complies with the requirements of the European R&TTE directives. Equipment: AC600 Multi-Function Concurrent Dual-Band Wi-Fi Router Model No.: BR-6288ACL The following European standards for essential requirements have been followed:...