Marantz SR7300 User Manual
Marantz user guide av surround receiver sr7300
Hide thumbs
Also See for SR7300:
- Service manual (64 pages) ,
- User manual (54 pages) ,
- Specification (19 pages)
Table of Contents
Advertisement
Advertisement
Table of Contents

Related Manuals for Marantz SR7300


Summary of Contents for Marantz SR7300
- Page 1 Model SR7300 User Guide AV Surround Receiver...
- Page 2 CAUTION: TO REDUCE THE RISK OF ELECTRIC SHOCK, REFER SERVICING TO QUALIFIED SERVICE PERSONNEL WARNING TO REDUCE THE RISK OF FIRE OR ELECTRIC SHOCK, DO NOT EXPOSE THIS PRODUCT TO RAIN OR MOISTURE. CAUTION: TO PREVENT ELECTRIC SHOCK, MATCH WIDE BLADE OF PLUG TO WIDE SLOT, FULLY INSERT.
-
Page 3: Important Safety Instructions
IMPORTANT SAFETY This product was designed and manufactured to meet strict quality and safety standards. There are, however, some installation and operation precautions which you should be particularly aware of. Read Instructions – All the safety and operating instructions should be read before the product is operated. Retain Instructions –... - Page 4 Servicing – Do not attempt to service this product yourself as opening or removing covers may expose you to dangerous voltage or other hazards. Refer all servicing to qualified service personnel. Damage Requiring Service – Unplug this product from the wall outlet and refer servicing to qualified service personnel under the following conditions: When the power-supply cord or plug is damaged.
-
Page 5: Table Of Contents
REMOTE CONTROLER RC7300SR ... 10 NAMES AND FUNCTIONS ... 10 REMOTE CONTROL RANGE ... 12 LOADING BATTERIES ... 12 GENERAL INFROMATION OF RC7300SR TO SR7300 ... 13 CONNECTIONS ... 14 SPEAKER PLACEMENT ... 14 CONNECTING SPEAKERS ... 15 CONNECTING AUDIO COMPONENTS ... 16 CONNECTING VIDEO COMPONENTS ... -
Page 6: Introduction
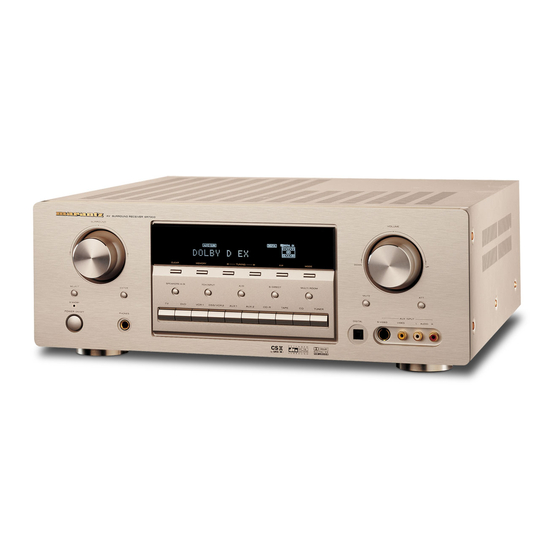
INTRODUCTION Thank you for purchasing the Marantz SR7300 Surround receiver. This remarkable component has been engineered to provide you with many years of home theater enjoyment. Please take a few minutes to read this manual thoroughly before you connect and operate the SR7300. - Page 7 Dolby Digital identifies the use of Dolby Digital (AC-3) audio coding for such consumer formats as DVD and DTV. As with film sound, Dolby Digital can provide up to five full-range channels for left, center, and right screen channels, independent left and right surround channels, and a sixth ( ".1") channel for low-frequency effects.
-
Page 8: Features
The new generation of Marantz Receivers are stylish and completely symmetrical. On the front panel of the SR7300, buttons are kept to a minimum. Source selectors and volume controls are intuitively placed. The large left dial knob on the left can be used as multi dial which allows all functions of the SR7300 to be operated via the front panel. -
Page 9: Front Panel
FRONT PANEL AV SURROUND RECEIVER SR7300 SURROUND SELECT ENTER STANDBY POWER ON/STANDBY PHONES q POWER switch and STANDBY indicator When this switch is pressed once, the unit turns ON and display appears on the display panel. When pressed again, the unit turns OFF and the STANDBY indicator lights. - Page 10 @0 PHONES jack for stereo headphones This jack may be used to listen to the SR7300’s output through a pair of headphones. Be certain that the headphones have a standard 1 / 4" stereo phone plug. Note that the main room speakers will automatically be turned off when the headphone jack is in use.
-
Page 11: Fl Display
AUTO SURR ¡8 a DISP (Display Off) indicator This indicator lights when the SR7300 is in the display off condition. s SLEEP timer indicator This indicator lights when the seep timer function in main-room is in use. d Multi-room system indicator This indicator lights when the multi-room system is active. -
Page 12: Rear Panel
The RS232C port may also be used in the future to update the operating software of the SR7300 so that it will be able to support new digital audio formats and the like as they are introduced. b MONITOR OUT This is a monitor output and each one includes both composite video and S-video configurations. -
Page 13: Subwoofer Output
The one marked UNSWITCHED is always live as long as the SR7300 is plugged into a live outlet. A component connected here may be left on permanently, or may be switched off with its own power switch. -
Page 14: Remote Controler Rc7300Sr
/ (open/close) button Used to open or close the door. Note: • This button is unavailable for SR7300. v Source POWER ON/OFF button Used to turn specific sources (such as DVD players, etc.) ON and OFF independently from the rest of the system. -
Page 15: Setup Button
ATT button When the input signal is too high and the voice distorts even by throt- tling the SR7300 VOLUME control, turn on this function. “ATT” is indi- cated when this function is activated. The input level is reduced. Attenuator is invalid for use with the output signal of “REC OUT”. -
Page 16: Remote Control Range
REMOTE CONTROL RANGE The distance between the transmitter of the remote control unit and the IR SENSOR of the SR7300 should be less than about 5 meters. If the transmitter is pointed to a direction other than the IR SENSOR or if there is an obstacle between them, remote control may not be possible. -
Page 17: General Infromation Of Rc7300Sr To Sr7300
GENERAL INFROMATION OF RC7300SR TO SR7300 To control the SR7300 by your RC7300SR, you have to select the device AMP or TUNER by function selector button. Please refer as below for the deatails in AMP and TUNER mode. AMP MODE... -
Page 18: Connections
CONNECTIONS SPEAKER PLACEMENT The ideal surround speaker system for this unit is 7-speaker systems, using front left and right speakers, a center speaker, surround left and right speakers, a surround back and a subwoofer. For best results we recommend that all front speakers be of the same type, with identical or similar driver units. -
Page 19: Connecting Speakers
PRE OUT SUBWOOFER jack and connect the subwoofer to the amplifier. SURROUND FRONT LEFT RIGHT LEFT RIGHT AC IN MODEL NO. SR7300 SERIAL NO. SWITCHED UNSWITCHED 120W 1A MAX 120W 1A MAX AC OUTLET AC OUTLET 120V 60H... -
Page 20: Connecting Audio Components
• Each type of audio jack works independently. Signals input through the digital and analog jacks are output through the corresponding digital and analog jacks, respectively. TAPE DECK OUT IN MODEL NO. SR7300 RS-232C DSS/VCR2 S-VIDEO MONI OUT ANALOG AUDIO 7.1CH... -
Page 21: Connecting Video Components
Use component video cable or 3 vdeio cords to connect the component video out jacks on the SR7300 to the monitor. NOTES • Be sure to connect the left and right audio channels properly. -
Page 22: Advanced Connecting
Therefore you need to aim the remote MULTI DC OUT signal only to the unit. Also, if a Marantz power amplifier (some models excluded) is connected with this terminal, the power amplifier’s power switch is synchronized with this unit’s power switch. -
Page 23: Connecting The Antenna Terminals
• Do not remove the AM loop antenna. • To avoid the risk of lightning and electrical shock, grounding is necessary. AM EXTERNAL ANTENNA AC IN MODEL NO. SR7300 SERIAL NO. SWITCHED UNSWITCHED 120W 1A MAX 120W 1A MAX AC OUTLET... -
Page 24: Connecting For The Multi Room
DC OUT DIGITAL OUT COAX DSS / VCR2 TAPE CDR / MD MULTI MULTI MULTI MULTI AUDIO (AUX2) MODEL NO. SR7300 AC IN RS-232C SERIAL NO. S-VIDEO MONI OUT SWITCHED UNSWITCHED 120W 1A MAX 120W 1A MAX AC OUTLET AC OUTLET... -
Page 25: Setup
After all components are connected, initial setup must be performed. ON SCREEN DISPLAY MENU SYSTEM The SR7300 incorporates an on-screen menu system, which makes various operations possible by using the cursor ( , , buttons on the remote control unit or MULTI FUNCTION dial, TUNING button and ENTER button on the front panel. -
Page 26: Input Setup (Assignable Digital Input)
In such cases, change the setting to DIGITAL. 2 SPEAKER SETUP After you have installed the SR7300, connected all the components, and determined the speaker layout, it is now time to perform the settings in the Speaker Setup menu for the optimum sound acoustics for your environment and speaker layout. - Page 27 This is important for the timing of the acoustics to create the proper sound space that the SR7300 and today’s sound systems are able to produce. Note that the speakers that you selected “None” for in the Speaker Config sub-menu will not appear here.
-
Page 28: Preference
(refer to page 32) OSD Info: Select the OSD information function to enable or disable with If you select “ENABLE”, SR7300 will display the status of the feature (Volume up/down, input select, etc..) on the TV monitor. But if you do not desire this information, select “DISABLE ”. -
Page 29: Pl Ii (Pro Logic Ii) Music Parameter
Pro Logic II-Music mode creates a rich and enveloping surround ambience from stereo sources such as CDs. In this mode, SR7300 includes three controls to fine-tune the soundfield as follow. 5 P L II MU S I C P ARAME T E R... -
Page 30: Ch Input Level
• The condition of these setup will be memorized to 7.1CH INPUT source. 9 DC TRIGGER SETUP SR7300 has two DC trigger control jacks, each one is selectable to link with input functions for the main room or multi room. Select “DC-TRIG SETUP” in SETUP MAIN MENU with cursor button, and press the OK button. -
Page 31: Basic Operation (Play Back)
OSD information on the video display.The input name will also appear in the display on the front-panel. • As the input is changed, the SR7300 will automatically switch to the digital input, surround mode, attenuation, and night mode status that were entered during the configuration process for that source. -
Page 32: Temporarily Turning Off The Sound
Press the MUTE button again to return to normal operation. USING THE SLEEP TIMER To program the SR7300 for automatic standby, press SLEEP buton on the remote. Each press of the button will increase the time before shut down in the following sequence. -
Page 33: Surround Mode
SURROUND MODE The SR7300 is equipped with many surround modes. These are provided to reproduce a variety of surround sound effects, according to the content of the source to be played. The available surround modes may be restricted depending on the input signal and speaker setup. - Page 34 DTS-digital output. You may not be able to play some DTS source signals from certain CD players and LD players even if you connect the player to the SR7300 digitally. This is because the digital signal has been processed (such as the output level, sampling frequency, or frequency response) and the SR7300 cannot recognize the signal as DTS data.
- Page 35 The relation between the selected surround mode and the input signal The surround mode is selected with the surround mode buttons on SR7300 or the remote control unit. However, the sound you hear is subject to the relationship between the selected surround mode and input signal. That relationship is as follows;...
-
Page 36: Other Function
The power to the SR7300 switches to STANDBY after approx. 5 minutes. Notes: • AUTO POWER OFF is canceled if the SR7300 is set to a source other than TV. The function reactivates when TV is selected again. • Some TV broadcasts may cause the TV AUTO FUNCTION to turn ON. -
Page 37: Recording An Analog Source
CD-R TAPE TUNER POWER ON/STANDBY PHONES SR7300 has speaker system - A and speaker system- B to front L/R channels. You can select these systems by pressing SPEAKRER A/B button on the front panel or SPKR A/B on the remote... -
Page 38: Ch Input
7.1 CH INPUT. The SR7300 is equipped for future expansion through the use of Multi channel SACD multi channel palyer or DVD-Audio player. This is selected, the input signals connected to the L(front left), R(front right), CENTER, SL (surround left), SR (surround right), SBL (surround back left) and SBR (surround back right) channels of the 7.1... -
Page 39: Basic Operation (Tuner)
For each station, you can memorize the frequency and reception mode if desired. AUTO PRESET MEMORY This function automatically scans the FM and AM band and enters all stations with proper signal strength into the memory. 2.4. AV SURROUND RECEIVER SR7300 SURROUND CLEAR MEMORY TUNING MODE SPEAKRS A/B 7.1CH INPUT... - Page 40 If you desire to stop the auto preset memory at anytime, press the CLEAR button. MANUAL PRESET MEMORY 2. 4. AV SURROUND RECEIVER SR7300 SURROUND CLEAR MEMORY TUNING SPEAKRS A/B 7.1CH INPUT...
- Page 41 SORTING PRESET STATIONS AV SURROUND RECEIVER SR7300 SURROUND CLEAR MEMORY TUNING SPEAKRS A/B 7.1CH INPUT S-DIRECT SELECT ENTER VCR1 DSS/VCR2 AUX1 AUX2 CD-R TAPE STANDBY POWER ON/STANDBY PHONES Stored preset stations number can be kept line. To sort the numbers, press and hold the MEMO and the F/P buttons.
-
Page 42: Multi Room System
OSD information, sleep timer and remote control. MULTI ROOM PLAYBACK USING THE MULTI ROOM OUT TERMINALS The SR7300 is equipped with audio pre-out terminals for which the volume is adjustable and composite video output terminals as the MULTI ROOM output terminals. -
Page 43: Remote Controller Operation
• For details, refer to the components’s user guide. • It may not be possible to operate some models. CONTROLLING A MARANTZ DVD PLAYER (DVD MODE) POWER ON/OFF Turns the DVD player on and off POWER ON Turns the DVD player on... - Page 44 CONTROLLING A MARANTZ MD DECK (MD MODE) POWER ON/OFF Turns the MD deck on and off POWER ON POWER OFF 0 - 9 MEMO MENU/OSD ¢ 5 / 6 CONTROLLING A MARANTZ TAPE DECK (TAPE MODE) POWER ON/OFF Turns the tape deck on and off...
-
Page 45: Learn Mode
DVD player. LEARNING PROCEDURE Place the remote controller so that its infrared signal transmitter is facing the infrared signal receiver on the Marantz remote controller at a distance of about 5 centimeters. Press and hold down the T.MODE and MEMObuttons until LEARN is displayed in the display. -
Page 46: Macro Mode
Erasing the all functions Press and hold down the T.MODE and MEMO buttons until LEARN is displayed in the display. Press and hold down the CL button and press POWER ON and POWER OFF button. • A-CLR and LEARN are blinking. Press OK button to continue erasing. - Page 47 When you are finished programming macros, press and hold the OK button until the display returns to USE mode. • Macros cannot be programmed for the MEMO, cursor/OK, or CL buttons. In the macro mode it is possible to program the memory to perform macros containing up to 10 steps.
- Page 48 EXAMPLES OF MACRO PROGRAMS Example 1 Change the input source for the amplifier to CD and play the 3rd track on a CD in the CD player. Press and hold the T.MODE and MENU button until the MACRO is displayed on the LCD. •...
- Page 49 CLEARING MACRO PROGRAMS The following procedure is used to erase macros you have programmed into the remote controller’s memory. Press and hold the T.MODE and MENU button until the MACRO is displayed on the LCD. • LEARN and MACRO is displayed blinking. Press and hold the CL button, then the button for the Function to be cleared (in this case DVD) for 3 seconds.
-
Page 50: Troubleshooting
If your trouble cannot be recovered with the remedy actions listed in the following table, malfunction of the internal circuitry is suspected; immediately unplug the power cable and contact your dealer, nearest Marantz distributor or the Marantz Service Center in your country. CAUSE Connect the power plug to the outlet. - Page 51 Should the operation or display seem to be abnormal, reset the unit with the following procedure. The SR7300 is turned on, press and hold the SELECT and ATT buttons simultaneously for 3 seconds or more. Remember that the procedure will reset the settings of the function selector, Surround mode, delay time, TUNER PRESET etc., to their...
-
Page 52: Technical Specifications
Frequency Response (Analog Input / Source Direct) ... 8 Hz - 70 kHz (± 3 dB) (Digital Input / 96 kHz PCM) ... 8 Hz - 45 kHz (± 3 dB) DIMENSION 17-5/16 ins. (440 mm) AV SURROUND RECEIVER SR7300 SURROUND CLEAR MEMORY TUNING... - Page 53 Ehte 4, 90503 Haapsalu, Estonia ul.Cedomir Kantargiev 21a, Skopje, Former Yugoslavian Republic of Macedonija Uudenmaankatu 4-6, Helsinki SF-00120, Finland A division of Marantz Europe B.V., P.O. Box 301, 92 156 Suresnes Cedex, France Hakenbusch 3, 49078 Osnabrück, Germany 188, Hippocratous Street, 11471 Athens, Greece P.O.