Marantz SR7300 User Manual
Hide thumbs
Also See for SR7300:
- Service manual (64 pages) ,
- User manual (54 pages) ,
- Specification (19 pages)
Table of Contents
Advertisement
Quick Links
Advertisement
Table of Contents

Related Manuals for Marantz SR7300


Summary of Contents for Marantz SR7300
- Page 1 Model SR7300 / SR7300 OSE User Guide AV Surround Receiver...
- Page 2 Kvitto eller faktura är tillräokligt bevis fö detta. NEDERLANDS DANSK GARANTIE Voor inlichtingen omtrent garantie dient u zich tot uw plaatselijke Marantz. GARANTI UW KWITANTIE, KASSABON E.D. BEWAREN Henvend dem til Deres MARANTZ-forhandler angående inrformation om garantien.
- Page 3 The SR7300 is in conformity with the EMC directive and low-voltage directive. Français Le SR7300 est conforme à la directive EMC et à la directive sur les basses tensions. Deutsch Das Modell SR7300 entspricht den EMC-Richtlinien und den Richtlinien für Niederspannungsgeräte.
-
Page 4: Table Of Contents
REMOTE CONTROL RANGE ............. 13 SPEAKER A/B ..................34 LOADING BATTERIES ................ 13 7.1 CH INPUT..................35 GENERAL INFORMATION OF RC7300SR TO SR7300 ..... 14 AUX2 INPUT ..................35 CONNECTIONS ........... 15 BASIC OPERATION (TUNER) ....36 SPEAKER PLACEMENT ..............15 LISTENING TO THE TUNER ............... -
Page 5: Foreword
EQUIPMENT MAINS WORKING SETTING POWER switch before proceeding with any connection. Your Marantz product has been prepared to comply with the • Connect one cable at a time observing the “input” and “output”. household power and safety requirements that exist in your area. -
Page 6: Introduction
INTRODUCTION Thank you for purchasing the Marantz SR7300 Surround receiver. DTS-ES Extended Surround is a new multi-channel digital signal This remarkable component has been engineered to provide you with format developed by Digital Theater Systems Inc. While offering high many years of home theater enjoyment. Please take a few minutes to... - Page 7 ® HDCD ® (High Definition Compatible Digital ® ) is a patented process for Dolby Digital identifies the use of Dolby Digital (AC-3) audio coding for delivering on Compact Disc the full richness and details of the original such consumer formats as DVD and DTV. As with film sound, Dolby microphone feed.
-
Page 8: Features
The new generation of Marantz Receivers are stylish and completely symmetrical. On the front panel of the SR7300, buttons are kept to a FM Antenna minimum. Source selectors and volume controls are intuitively placed. -
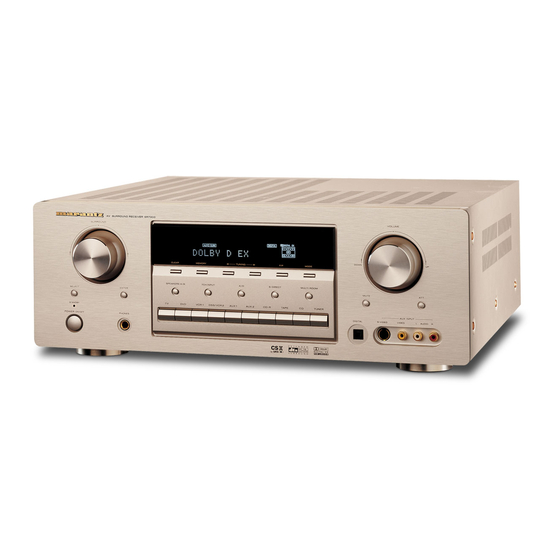
Page 9: Front Panel
FRONT PANEL !7 !8 !1 !2 AV SURROUND RECEIVER SR7300 SELECTOR VOLUME DOWN CLEAR MEMORY TUNING MODE SPEAKERS A/B 7.1CH INPUT S-DIRECT MULTIROOM SELECT ENTER MUTE VCR1 DSS/VCR2 AUX1 AUX2 CD-R TAPE TUNER STANDBY AUX1 INPUT DIGITAL S-VIDEO VIDEO AUDIO... - Page 10 @0 PHONES jack for stereo headphones This jack may be used to listen to the SR7300’s output through a pair of headphones. Be certain that the headphones have a standard 1 / 4" stereo phone plug. Note that the main room speakers will automatically be turned off when the headphone jack is in use.
-
Page 11: Fl Display
DISP (Display Off) indicator This indicator is a monitor for an analog audio input signal. If the This indicator lights when the SR7300 is in the display off condition. selected analog audio input signal is greater than the capable level of internal processing, this will light. -
Page 12: Rear Panel
The RS232C port may also be used in the future to update the video configurations. Connect VCRs, DVD players, and other video operating software of the SR7300 so that it will be able to support new components to the video inputs. -
Page 13: Subwoofer Output
These are the analog audio inputs and outputs. There are 7 audio This is always live as long as the SR7300 is plugged into a live outlet. inputs (4 of which are linked to video inputs) and 4 audio outputs (2 of A component connected here may be left on permanently, or may be which are linked to video outputs). -
Page 14: Remote Controller Rc7300Sr
⁄0 INPUT button Used to select monitor input. ⁄9 Note: • This button is unavailable for SR7300. ⁄1 T.MODE button (when TUNER mode is selected) Used to select the auto stereo mode or mono mode when the FM band is selected. -
Page 15: Mute Button
When this button is pressed, “NIGHT” indicator lights up. ATT button When the input signal is too high and the voice distorts even by throt- tling the SR7300 VOLUME control, turn on this function. “ATT” is indi- ¤8 PTY button (European model only) cated when this function is activated. -
Page 16: Remote Control Range
The distance between the transmitter of the remote control unit and on the LCD. the IR SENSOR of the SR7300 should be less than about 5 meters. If the transmitter is pointed to a direction other than the IR SENSOR or if there is an obstacle between them, remote control may not be possible. -
Page 17: General Information Of Rc7300Sr To Sr7300
GENERAL INFORMATION OF RC7300SR TO SR7300 To control the SR7300 by your RC7300SR, you have to select the device AMP or TUNER by function selector button. Please refer as below for the details in AMP and TUNER mode. AMP MODE... -
Page 18: Connections
CONNECTIONS HEIGHT OF THE SPEAKER UNITS Front left and right speakers, and a center speaker Align the tweeters and mid-range drivers on the three front speakers on the same height as well as possible. SPEAKER PLACEMENT Surround left and right speakers, and surround back speaker The ideal surround speaker system for this unit is 7-speaker systems, Place the surround left, right and surround back speakers higher to using front left and right speakers, a center speaker, surround left and... -
Page 19: Connecting Speakers
OUTPUT LEVEL MASTER SLAVE VIDEO/ SYSTEM OUT +5~13V DC SPEAKER SYSTEM MINIMUM 4 OHMS POWERED SUBWOOFER COMPONENT VIDEO ANTENNA MODEL NO. SR7300 DSS / VCR2 MONI OUT RS-232C SERIAL NO. FM (75Ω) S-VIDEO VCR1 DSS/VCR2 VIDEO VCR1 DSS / VCR2... -
Page 20: Connecting Audio Components
CD PLAYER CD RECORDER / MD DECK DIGITAL OUT IN OUTPUT OUT IN DIGITAL DIGITAL INPUT OUTPUT COMPONENT VIDEO ANTENNA MODEL NO. SR7300 AC IN DSS / VCR2 MONI OUT RS-232C SERIAL NO. FM (75Ω) VCR1 DSS/VCR2 S-VIDEO VIDEO VCR1... -
Page 21: Connecting Video Components
3 video cords to connect the component input jacks. video out jacks on the SR7300 to the monitor. • There is no Dolby Digital RF input jack. Please use an external RF demodulator with Dolby Digital decoder to connect a video... -
Page 22: Advanced Connecting
Therefore you need to aim the remote RC-5 RC-5 MULTI DC OUT DIGITAL IN DIGITAL OUT signal only to the unit. Also, if a Marantz power amplifier (some models SWITCHED UNSWITCHED 120W 1A MAX 120W 1A MAX COAX AC OUTLET AC OUTLET excluded) is connected with this terminal, the power amplifier’s power... -
Page 23: Connecting The Antenna Terminals
CONNECTING THE ANTENNA TERMINALS AM EXTERNAL FM EXTERNAL AM LOOP ANTENNA ANTENNA ANTENNA ANTENNA COMPONENT VIDEO ANTENNA ANTENNA MODEL NO. SR7300 DSS / VCR2 MONI OUT RS-232C SERIAL NO. FM (75Ω) FM (75Ω) S-VIDEO VIDEO VCR1 DSS/VCR2 VCR1 DSS / VCR2... -
Page 24: Connecting For The Multi Room
CONNECTING FOR THE MULTI ROOM (Same source as the main room) LEFT RIGHT SPEAKER SPEAKER COMPONENT VIDEO MODEL NO. SR7300 DSS / VCR2 MONI OUT RS-232C SERIAL NO. VCR1 DSS/VCR2 S-VIDEO DSS / VCR2 MONI MULTI MULTI MONI OUT RC-5... -
Page 25: Setup
If you enter to this menu by MULTI dial on the front panel. ON SCREEN DISPLAY MENU SYSTEM Press SELECT to show “SETUP MENU” in FL display and press The SR7300 incorporates an on-screen menu system, which makes ENTER button. various operations possible by using the cursor ( , ,... -
Page 26: Input Setup (Assignable Digital Input)
In this case, connect a 2 channel power amplifier to the PRE OUT SBL and SBR terminals on the SR7300, and connect the surround back left & right speakers to this power amplifier. (see page 16) You will also need to make the appropriate setting... - Page 27 This is important for the timing of the acoustics to create the proper • The speaker level settings is not available in 7.1 channel input sound space that the SR7300 and today’s sound systems are able to mode and S-Direct mode.
-
Page 28: Preference
Speaker size, then this setting will not appear. disable with cursor button. If you select “ENABLE”, SR7300 will display the If you finish the setup in this item, move cursor to “MAIN” with status of the feature (Volume up/down, input cursor buttons and press OK button. -
Page 29: Pl Ii (Pro Logic Ii) Music Parameter
TRUBASS produced by the speakers to be an octave ambience from stereo sources such as CDs. below the actual physical capabilities of the speakers In this mode, SR7300 includes three controls to fine-tune the adding exciting, deeper bass effects. soundfield as follow. -
Page 30: 7.1 Ch Input Level
• The condition of these setup will be memorized to 7.1CH INPUT source. 9 DC TRIGGER SETUP SR7300 has two DC trigger control jacks, each one is selectable to link with input functions for the main room or multi room. Select “DC-TRIG SETUP” in SETUP MAIN MENU with cursor button, and press the OK button. -
Page 31: Basic Operation (Play Back)
Maximum value of channel level) name will also appear in the display on the front-panel. • As the input is changed, the SR7300 will automatically switch to the digital input, surround mode, attenuation, and night mode status that were entered during the configuration process for that source. -
Page 32: Temporarily Turning Off The Sound
Press the MUTE button again to return to normal operation. USING THE SLEEP TIMER To program the SR7300 for automatic standby, press SLEEP button on the remote. Each press of the button will increase the time before shut down in the following sequence. -
Page 33: Surround Mode
This mode provides 6.1 channel surround for DOLBY DIGITAL EX, DTS-ES encoded source material such as DVD. The SR7300 is equipped with many surround modes. These are This mode cannot be used when an analog input has been selected. provided to reproduce a variety of surround sound effects, according Dolby Digital EX to the content of the source to be played. - Page 34 • When you use this mode with certain DVD and CD players, * You may not be able to play some HDCD source signals from performing operations such as “Skip” or “Stop” may certain CD players if you connect the player to the SR7300 OSE momentarily interrupt the output. digitally.
- Page 35 The relation between the selected surround mode and the input signal The surround mode is selected with the surround mode selector on SR7300 or the remote control unit. However, the sound you hear is subject to the relationship between the selected surround mode and input signal. That relationship is as follows;...
-
Page 36: Other Function
OTHER FUNCTION VIDEO ON/OFF When no video signals of a DVD, etc., are connected to the SR7300 or the DVD, etc., are connected directly to a TV, the unnecessary video TV AUTO ON/OFF FUNCTION circuit can be turned off by selecting the “VIDEO OFF” setting. -
Page 37: Recording An Analog Source
Below is an example of recording the sound from a compact disc player connected to CD IN and the video from a video camera SR7300 has speaker system - A and speaker system- B to front L/R connected to AUX1 IN to video cassette tape in a video cassette channels. -
Page 38: Ch Input
7.1 CH INPUT. The SR7300 is equipped for future expansion through the use of Multi channel SACD multi channel player or DVD-Audio player. This is selected, the input signals connected to the L(front left), R (front right), CENTER, SL (surround left), SR (surround right), SBL (surround back left) and SBR (surround back right) channels of the 7.1... -
Page 39: Basic Operation (Tuner)
2.4. 1. 3. (USING THE SR7300) To select tuner and desired band (FM or AM), press the TUNER AV SURROUND RECEIVER SR7300 SURROUND VOLUME button on the front panel Press the F/P (Frequency/Preset) button on front panel, to... - Page 40 Preset stations are recalled in sequence (No.1 → No.2 → etc.) for 2. 4. 5 seconds each. No stored preset number will be skipped. AV SURROUND RECEIVER SR7300 SURROUND You can fast forward the preset stations by pressing the ¢...
-
Page 41: Rds Operation
RDS OPERATION Now in use in many countries, RDS (Radio Data System) is a description of the station’s programming hidden space in the FM signal. AV SURROUND RECEIVER SR7300 SURROUND VOLUME Your new receiver is equipped with RDS to assist in the selection of... - Page 42 PTY AUTO SEARCH Your receiver is equipped to automatically search for stations transmitting any of 29 different programme types. To search for a PTY, follow these procedures: Press the PTY button in the TUNER MODE on the remote controller. The current station’s PTY will be displayed, or the currently selected PTY group will be displayed in blinking if no station or RDS data is present.
-
Page 43: Multi Room System
Press the MULTI on multi room remote control unit from the MULTI ROOM PLAYBACK USING THE MULTI ROOM. This operations will put the SR7300 into multi room mode and MULTI ROOM OUT TERMINALS “MULTI” will light in the display. The SR7300 is equipped with audio pre-out terminals for which the... -
Page 44: Remote Controller Operation
• For details, refer to the components’s user guide. • It may not be possible to operate some models. CONTROLLING A MARANTZ CD PLAYER (CD MODE) CONTROLLING A MARANTZ DVD PLAYER (DVD MODE) POWER ON/OFF Turns the DVD player on and off... - Page 45 CONTROLLING A MARANTZ MD DECK (MD MODE) POWER ON/OFF Turns the MD deck on and off POWER ON Turns the MD deck on POWER OFF Turns the MD deck off Eject the MD disc 0 - 9 Inputs the numeric...
-
Page 46: Learn Mode
LEARNING PROCEDURE Place the remote controller so that its infrared signal transmitter is facing the infrared signal receiver on the Marantz remote controller at a distance of about 5 centimeters. Press and hold down the CL button and press the learned button twice to be erased. -
Page 47: Macro Mode
Erasing the all functions MACRO MODE Press and hold down the T.MODE and MEMO buttons until LEARN is displayed in the display. PROGRAMMING MACROS Macros make it possible to use a single function button to perform more complex series of operations that would normally require pressing several buttons. - Page 48 EDITING MACROS When you are finished programming macros, press and hold the OK button until the display returns to USE mode. Macros may be edited using following procedure. Press and hold the T.MODE and MENU button until the MACRO is displayed on the LCD. •...
- Page 49 EXAMPLES OF MACRO PROGRAMS Example 2 Turn the main amplifier ON → Change the amplifier’s input source to Example 1 DVD → Set the Surround mode to VIRTUAL → Set the DVD player to Change the input source for the amplifier to CD and play the 3rd track PLAY on a CD in the CD player.
- Page 50 CLEARING MACRO PROGRAMS ADJUSTING THE INTERVAL TIME OF MACRO The following procedure is used to erase macros you have OPERATIONS TRANSMITTING programmed into the remote controller’s memory. Press and hold the T.MODE and SETUP button until the SETUP Press and hold the T.MODE and MENU button until the MACRO is displayed on the LCD.
-
Page 51: Troubleshooting
Are you operating the unit properly following user’s guide ? Marantz distributor or the Marantz Service Center in your country. Are the power amplifiers and speaker working properly ? SYMPTOM... - Page 52 Should the operation or display seem to be abnormal, reset the unit with the following procedure. The SR7300 is turned on, press and hold the SELECT and ATT buttons simultaneously for 3 seconds or more. Remember that the procedure will reset the settings of the function selector, Surround mode, delay time, TUNER PRESET etc., to their...
-
Page 53: Technical Specifications
Video Frequency Response ..5 Hz to 10 MHz (– 3 dB) AUDIO SECTION Component Video Frequency Response .. 5 Hz to 40 MHz (– 3 dB) Power Output (20 Hz - 20 kHz/THD=0.08%, SR7300) S/N ................60 dB Front L&R ..........8 ohms 105 W / Ch GENERAL Center ........... - Page 54 You can find your nearest Marantz sales company or distributor from this address. JAPAN Marantz Japan, Inc. 35-1 Sagami Ohno 7-Chome, Sagamihara-shi, Kanagawa 228-8505, Japan U.S.A Marantz America, Inc. 1100 Maplewood Drive Itasca, IL 60143, U.S.A EUROPE Marantz Europe B.V.