Table of Contents
Advertisement
Advertisement
Table of Contents

Related Manuals for Bosch HGG223329Z


Summary of Contents for Bosch HGG223329Z
- Page 1 Free standing cooker HGG223329Z [en] Instruction manual...
-
Page 3: Table Of Contents
Levelling the cooker ................8 Setting up the appliance ..............8 Additional information on products, accessories, replacement Measures to be noted during transport..........8 parts and services can be found at www.bosch-home.com and Your new cooker.................9 in the online shop www.bosch-eshop.com General information ................9 Control panel ..................9... -
Page 4: Important Safety Information
: Important safety information Read these instructions carefully. Only then This appliance may be used by children will you be able to operate your appliance over the age of 8 years old and by persons safely and correctly. Retain the instruction with reduced physical, sensory or mental manual and installation instructions for capabilities or by persons with a lack of... - Page 5 The appliance becomes very hot, and During operation, the surfaces of the ■ Risk of burns! ■ flammable materials can easily catch fire. appliance become hot. Do not touch the Do not store or use any flammable surfaces when they are hot. Keep children objects (e.g.
-
Page 6: Causes Of Damage
Unsuitable pan sizes, damaged or Risk of electric shock! ■ incorrectly positioned pans can cause Incorrect repairs are dangerous. Repairs ■ serious injury. Observe the instructions may only be carried out by one of our which accompany the cookware. trained after-sales engineers. If the appliance is faulty, unplug the mains plug Caution: Glass lids may shatter when Risk of injury! -
Page 7: Set-Up, Gas And Electricity Connection
Set-up, gas and electricity connection Gas connection For your safety This appliance is adjusted to operate on LPG only. Installation must only be performed by an approved expert or a licensed after-sales service engineer in accordance with the Faults in the gas installation/smell of gas instructions specified under "Gas connection and conversion to a different gas type". -
Page 8: Electrical Connection
Electrical connection Setting up the appliance Caution! Have the appliance set up by your after-sales service. A 16 A ■ fuse is required for connection. The appliance is designed for operation at 220-240 V. If the electricity supply drops below 180 V, the electrical ■... -
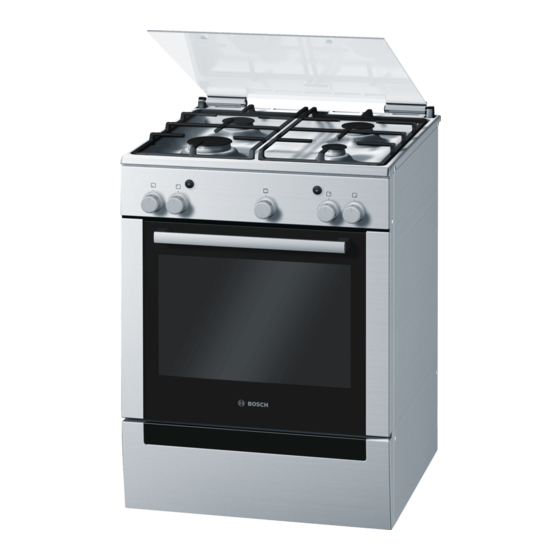
Page 9: Your New Cooker
Your new cooker Here you will learn about your new cooker. We will explain the You will find information on the cooking compartment and the control panel, the hob and the individual operating controls. accessories. General information The design depends on the respective appliance model. Control panel Here you can see an overview of the control panel. -
Page 10: Cooking Area
Cooking area Oven Here is an overview of the control panel. The design depends Function selector on the respective appliance model. Turn the function selector anti-clockwise to set the oven temperature or clockwise to select the grill. Positions Function Zero position Oven not hot. -
Page 11: Your Accessories
Your accessories The accessories supplied with your appliance are suitable for Note: Heat may cause the accessories to deform. As soon as making many meals. Ensure that you always insert the the accessories cool down, they regain their original shape. accessories into the cooking compartment the right way round. -
Page 12: After-Sales Service Products
Optional accessories HEZ number Function Baking stone HEZ327000 The baking stone is perfect for preparing home-made bread, bread rolls and pizzas which require a crispy base. The baking stone must always be preheated to the recommended temper- ature. Enamel baking tray HEZ331003 For cakes and biscuits. -
Page 13: Procedure For Setting The Gas Grill
Procedure for setting the gas grill Cleaning the accessories Before you use the accessories for the first time, clean them Open the top cover. The top cover must remain open for as thoroughly with hot soapy water and a soft dish cloth. long as the oven is in operation. -
Page 14: Suitable Pans
Suitable pans Do not cook without using a lid Burner/electric hot- Minimum pan Maximum pan diam- and make sure the lid is plate diameter eter properly fitted. This wastes Electric hotplate* 14.5 cm 14.5 cm energy. Wok burner** 3.6 kW 24 cm 28 cm High output burner 24 cm... -
Page 15: Setting The Oven
Table - Cooking Select the right saucepan size for each burner. The diameter of Minerals and vitamins are very quickly destroyed during the pot or pan base should be the same as that of the burner. cooking. Therefore, only use a little water. This will help you retain vitamins and minerals. -
Page 16: Grilling With The Rotary Spit
Close the oven door so that it is in contact with the protecting The gas leaving the gas grill is ignited using the ignition plate. button. To ensure that the ignition safety system responds, press and hold the function selector for 10 seconds. Press the function selector and turn it clockwise to the grill The ignition safety system is activated. -
Page 17: Care And Cleaning
Close the oven door so that it is in contact with the protecting Check whether the flame is lit. If the flame is not lit, repeat the plate. process from step 5. Press the function selector and turn it clockwise to the grill Press the multi-function button. -
Page 18: Detaching And Refitting The Rails
Wipe with some washing-up liquid and a damp cloth. Always wipe parallel to the natural grain. Otherwise, Stainless steel you may scratch the surface. Dry with a soft cloth. Remove flecks of limescale, grease, starch and albumin fronts (e.g. egg white) immediately. Do not use any abrasive materials, scouring sponges or rough cleaning cloths. -
Page 19: Detaching And Attaching The Oven Door
Detaching and attaching the oven door Fold back both locking levers (figure C). Close the oven door. For cleaning purposes and to remove the door panels, you can detach the oven door. The oven door hinges each have a locking lever. When the locking levers are closed (figure A), the oven door is secured in place. -
Page 20: Troubleshooting
Installation During installation, make sure that the lettering "top right" is upside down at the bottom left. Insert the panel at an angle towards the back (fig. A). Insert the top panel at an angle towards the back into the brackets. -
Page 21: After-Sales Service
After-sales service Our after-sales service is there for you if your appliance needs Please note that there will be a fee for a visit by a service to be repaired. We will always find the right solution in order to technician in the event of a malfunction, even during the avoid unnecessary visits from a service technician. -
Page 22: Cakes And Pastries
Cakes and pastries quantities may be slightly different to those indicated in your Cake tins recipe. When you are baking in the cake tin, insert the wire rack at the level indicated and place the cake tin on the wire rack. Baking tables for the lower burner in the gas oven Dark-coloured cake tins are the most suitable. -
Page 23: Meat, Poultry, Fish, Toast
Meat, poultry, fish, toast The rotary spit is particularly good for cooking large roasts, Table for the gas grill rolled roasting joints or poultry. The meat becomes crispy and The values in the table apply to dishes placed in a cold oven. brown. - Page 24 Robert Bosch Hausgeräte GmbH Carl-Wery-Straße 34 81739 München Germany www.bosch-home.com *9000986605* 290494 9000986605...