Table of Contents
Advertisement
Advertisement
Table of Contents

Related Manuals for COMPRO IP55


Summary of Contents for COMPRO IP55
- Page 1 V2-110328...
- Page 2 The information in this document is subject to change without notice. COMPRO reserves the right to make revisions to this publication without obligation to notify any person or entity of any such changes.
-
Page 3: Table Of Contents
Contents Contents Chapter 1: Important Notices ............1-1 Regulatory Notice . - Page 4 Contacting Compro Technical Support ........
-
Page 5: Chapter 1: Important Notices
Chapter 1: Important Notices Chapter 1: Important Notices Regulatory Notice This device complies with Part 15 of the FCC Rules. Operation is subject to the following two conditions: (1) This device may not cause harmful interference, and (2) This device must accept any interference received, including interference that may cause undesired operation. -
Page 6: About This Manual
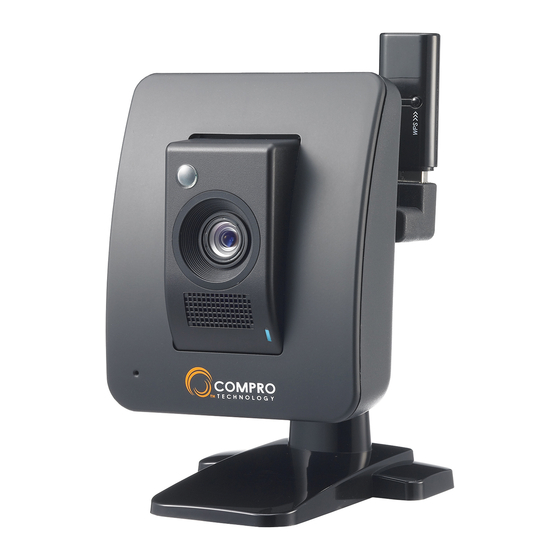
This manual is only intended for the users of Compro IP55, IP60, and IP70 network camera, and is applicable for firmware release 2.0. The camera appears on the cover of this manual is a IP60 which differs with IP55 and IP70 in appearance. -
Page 7: Chapter 2: Product Overview
Chapter 2: Product Overview Chapter 2: Product Overview Package Contents Please check the package contents on your hand. If anything is missing, please don’t hesitate to contact your local distributor. Figure 2-1. Parts list Network Camera RJ-45 LAN Cable Power Adaptor Quick Start Guide Installation CD Mounting Screw x 3 /Screw Mount x 3... -
Page 8: Features
Compro IP55 / 60 / 70 Network Camera Features The camera is an easy-to-install product for the indoor fixed camera solution. Its support of the H.264/MPEG- 4/MJPEG video compression format helps achieve superior performance and high video quality in small recording file size, which means a much lower cost for data storage. - Page 9 Chapter 2: Product Overview • Digital I/O for External Sensor and Alarm (2 In/1 Out) • Supports local storage (microSD), Snapshot • Easy to Install with IP camera Wizard • Remote Monitoring on 3GPP mobile phones or phones with web browser (e.g. iPhone/BlackBerry) • Bundled powerful 32-channel IP video management software --- ComproView IP70 Full Feature List • 1/3” CMOS Megapixel sensor • Day and night functionality with mechanical IR cut filter switching • Built-in IR lamp with light sensor • Supports real-time H.264, MPEG-4 and MJPEG compression (Triple Codec) • Supports dual streams simultaneously • Support 10x digital zoom • Video resolution is up to 1280 x 1024 pixels • Image frame rate is up to 30 frames under 640x480 or 15 frames under 1280 x 1024 • Smart motion detection • Two-way audio with built-in MIC and speaker • Supports UPnP (universal plug and play) • Supports 10/100 802.3/Ethernet • 802.11b/g/n WLAN on applicable model (Optional wireless adaptor) • Digital I/O for External Sensor and Alarm (2 In/1 Out)
-
Page 10: Application Diagram
For the list of compatible NAS products, please refer to the " " List of Compatible DVR / NVR / NAS section in the appendix. Compro does not guarantee other DVR / NVR / NAS products not on the list will work properly with this Compro IP camera. Application Diagram... -
Page 11: Camera Layout
Chapter 2: Product Overview Camera Layout For the IP55 and IP60 camera. Figure 2-3. Front and rear view of IP55/IP60 Lens. Microphone Speaker LED status indicator Wireless adaptor connector (USB type) Audio Output Reset Button microSD card slot (on the side) - Page 12 Compro IP55 / 60 / 70 Network Camera For the IP70 camera. Figure 2-4. Front and rear view of IP70 Light sensor. Lens IR Lamp x 6 (inside) Microphone Speaker LED status indicator USB Wireless adaptor connector Audio Output Reset Button...
-
Page 13: Led Status Indicator
Chapter 2: Product Overview LED Status Indicator When you power on the camera, it will start booting procedure. There are one blue LED and one red LED inside the camera case. Depending on the booting status, the LED indicator will be lit in the followings way: 1. -
Page 14: Digital I/O Connector Block
Compro IP55 / 60 / 70 Network Camera Digital I/O Connector Block The I/O connector on the back of the camera provides a central interface between your home security system and various output devices. The two digital inputs are normally used with security sensors, e.g. passive infrared sensors (PIR), smoke detectors, door/window sensors, etc. -
Page 15: Chapter 3: Installation
Ethernet port on camera: Use the bundled RJ-45 LAN cable to connect the Ethernet port of the IP camera to the Ethernet port of your hub/router. Wireless adaptor (Optional accessory): If you have purchased the Compro USB wireless adaptor for wireless connection, please plug it into the USB port of IP camera for wireless reception. -
Page 16: Wireless Connection
Compro IP55 / 60 / 70 Network Camera Wireless Connection With the Compro wireless adaptor installed, you can also opt for using the wireless connection. Please keep in mind that you can only have one active connection at a given time, either through LAN or wireless network. -
Page 17: Disassembling And Assembling The Camera Stand
Chapter 3: Installtion Disassembling and Assembling the Camera Stand The camera is already installed on the camera stand when delivered from Compro. If you need to disassemble and assemble the stand, please refer to the pictures below. Disassembly Please use a flat blade screwdriver to disassemble. Figure 3-2. Disassembly of camera stand Assembly Figure 3-3. -
Page 18: Mounting The Camera
Compro IP55 / 60 / 70 Network Camera Mounting the Camera If you want to mount the camera on the wall or ceiling, please use the screws to fix the bracket to a flat surface. After the bracket is fixed to a flat surface, please try to adjust the camera to the desired viewing angle. -
Page 19: Dismounting The Camera
Chapter 3: Installtion Dismounting the Camera If you like to remove the mounted camera from its mounting surface, prepare one flat blade screwdriver and one Phillips screwdriver, and then follow the instruction below to dismount the camera. Step 1: Detach the plastic mounting bracket from the metal mounting plate that has been screwed on the mounting surface, by inserting a flat blade screwdriver into the rectangular hole seen on the wide end of the plastic bracket base, and then pressing the screwdriver downward. Step 2: Use a Phillips screwdriver to unscrew the metal mounting plate from the mounting surface. -
Page 20: Installing Camera Software
Compro IP55 / 60 / 70 Network Camera Installing Camera Software The software for your camera includes 3 major parts which help you use the IP camera: 1. iWizard Installer and iWizard utility: For quick and convenient setup of your IP camera software/ hardware in steps. - Page 21 Running the iWizard Installer Before running Compro software, make sure you have the IP Camera beside you. To install the software, insert the installation CD supplied with the camera into your CD-ROM drive, and the iWizard installer will start and guide you during the installation process of the hardware and software for your IP camera.
- Page 22 Compro IP55 / 60 / 70 Network Camera 3. The default password is admin. We strongly recommend you enter a new password to protect your system. (Please note down your new password) You can also click [Next] to skip this step and retain default password.
- Page 23 Figure 3-14. Device configuration 7. (If you are not using wireless connection, please skip to point 9) If you have purchased and connected the Compro wireless adaptor to your IP camera, you will come to wireless network setup. Please click[Yes] to connect wirelessly by default.
- Page 24 Figure 3-17. iDDNS configuration Note: The iDDNS is a free DDNS (Dynamic Domain Name Service) service from Compro. If you are using floating IP, you need to apply for DDNS service to create a hostname that links to your home or office IP address, which provides easy- to-remember URL for quick access to your camera anytime, anywhere.
- Page 25 Chapter 3: Installtion 11. (Skip this part if you didn’t enable Seedonk ser vice.) After successful login to your Seedonk account, you may choose to download and install Seedonk Messenger by clicking on [Download and Install]. Click on [Next] if you wish to do so later manually.
- Page 26 Compro IP55 / 60 / 70 Network Camera 14. The iWizard indicates the setup has been completed successfully. You can click on the URL to view the live video now. Click [Yes] if you wish you set up another camera from scratch.
- Page 27 Chapter 3: Installtion Installing ComproView 1. After your iWizard setup completes, you can choose to install the professional video management software ComproView by choose [Install] as illustrated below. The ComproView Installation wizard in the installation CD will help you to step-by-step in the process. Please follow the on-screen instructions to install ComproView.
- Page 28 Compro IP55 / 60 / 70 Network Camera 3-14...
-
Page 29: Chapter 4: Accessing Camera
Chapter 4: Accessing Camera Viewing Streamed Video Compro provides a wide range of access method to view the live video streamed from the IP camera that you’ve just installed, which includes: 1. View the live video stream from a single camera on the Internet Explorer (WebVUer) which comes with all Desktop/Laptop/Nettop/Tablet with Windows system. -
Page 30: Accessing Via Pc Web Browser
Compro IP55 / 60 / 70 Network Camera Accessing via PC Web Browser User can check the current condition of the monitored area via Internet Explorer which comes with all Windows-based computer system. Please refer to the following steps to watch live view on WebVUer: 1. - Page 31 Chapter 4: Accessing Camera 5. And then the reconfirmation dialog box appears. Please click [Install] twice to install both the “USActiveX.cab” and “ComproClientActivex.cab” on your system. Figure 4-4. Security Warning 6. After ActiveX installation completes, the Windows Security Alert dialog appears. Please click [Unblock] to unblock it from firewall. Figure 4-5.
- Page 32 Compro IP55 / 60 / 70 Network Camera 7. Now you can start using web browser for watching live video and controlling IP camera. Figure 4-6. Live view Note: If your IP camera falls behind a firewall, you will need to enable ports 80 and 554 (default ports used by camera) in your firewall and link them to the internal IP address of the camera.
-
Page 33: Accessing Via Iphone/Smartphone
Chapter 4: Accessing Camera Accessing via iPhone/Smartphone As long as your device comes with built-in web browser, you can use the device to view the live video stream via MJPEG mode (video only), which is supported on popular smartphones like iPhone and a wide range of mobile devices such as NB, Mobil Phone, PDA, Nettop, MID, Tablet. -
Page 34: Accessing Via 3Gpp Mobile Phone
Compro IP55 / 60 / 70 Network Camera Accessing via 3GPP Mobile Phone You can access your IP camera via 3GPP-compatible mobile phones when the IP camera has a stable internet connection and the mobile device has a good connection on GPRS or to 3G network. There are several prerequisites which need to be met before using the 3GPP function successfully. -
Page 35: Accessing Via Seedonk Im Client
Chapter 4: Accessing Camera Accessing via Seedonk IM Client If you have installed the Seedonk IM client, you can also access your network camera through the easy-to- use Seedonk IM. Its intuitive instant-messenger-like interface lets your conveniently control, view, and share cameras over the Internet. If you have not installed the Seedonk IM client, you can download it from "http:// web.seedonk.com/download.html." Having downloaded the Seedonk IM, run the application and follow on- screen instruction to complete its installation. - Page 36 Compro IP55 / 60 / 70 Network Camera Figure 4-9. Seedonk IM Note: When your camera is installed in an indoor environment, live image of your network camera may appear darker than expected due to insufficient environmental lighting. When this happens, simply move your camera...
-
Page 37: Chapter 5: Live View
Chapter 5: Live View Chapter 5: Live View Page Layout On the first page, you can see the basic control panel at the top and on the left-hand side, and the live video on the right-hand side. Click on the icon to hide or show the control panels. -
Page 38: Icons On Live View Page
Compro IP55 / 60 / 70 Network Camera Icons on Live View Page Top Panel Icons seen on the top control panel: One of the view size buttons; The Fit Browser button resize the live video window to fit browser size. One of the view size buttons; The Actual Size button resize the live video window to original size. -
Page 39: Enable Digital Zoom
Chapter 5: Live View Enable Digital Zoom To enable the digital zoom feature: 1. Click on the magnifier icon located on the lower-left corner of real-time video display, and then the digital zoom control window will pop up. 2. Check [Enable Digital Zoom] option and set desired zoom ratio by dragging the adjustment bar. Then set the area to be enlarged by dragging the black square shown on preview window. -
Page 40: Voice Communication
Compro IP55 / 60 / 70 Network Camera Voice Communication Pressing the [Communicate] button allows you to speak into your PC microphone and broadcast through the camera’s speaker or audio line out. To talk through the external speaker connected to the IP camera, place your cursor on the [Communicate] button (the tool tip “Right click to setup” will appear), and... -
Page 41: Chapter 6: Configuration
Chapter 6: Configuration Chapter 6: Configuration Main Setup Page The main setup screen consists of all the basic settings options. To access the main setup page, click on the Setup button seen at the top-right location in the live view screen. Then the setup page as shown in the picture below will be displayed. -
Page 42: Video Settings
M-PEG4/M-JPEG/H.264 compression. Active Bandwidth Management When network congestion occurs, Compro network camera can intelligently force down current user-defined video bit rate and bring it back when healthy bandwidth level becomes available. This avoids video quality deterioration and frame dropping by restricting network camera from sending excessive amount of data while the network is already overloaded. -
Page 43: Video Preference
Chapter 6: Configuration If you have set up the iDDNS service during the installation process of your camera, you can directly enter the web address of your IP camera in a web browser and don’t bother with remembering the IP address. (In this case, replace the “compromk” what you entered in the installation process.) Video Preference Click on the bar to set your video preference (to stress motion smoothness or image quality). -
Page 44: Backlight Compensation
Compro IP55 / 60 / 70 Network Camera Backlight Compensation This lets you turn on and off backlight compensation and select the strength of the backlight compensation , which when enabled can make the subject appear clearer in the image when the backlight is too bright or the subject is too dark. -
Page 45: Ir Light Control (Ip70 Only)
Chapter 6: Configuration IR Light Control (IP70 only) The IP70 network camera is equipped with a IR light sensor and 6 IR LEDs (inside casing ), which makes it capable of fitting different lighting situations and providing 24/7 monitoring. IR Light Sensor IR LEDs (Inside) Normal lighting Without IR LEDs... -
Page 46: Audio Settings
Compro IP55 / 60 / 70 Network Camera Audio Settings Here you can choose to enable or disable the audio and also adjust the volume. The Stream-2 audio is only available for adjustment when you turn on the 2nd Stream and check its 3GPP mode option under video settings. -
Page 47: Network Settings
Wireless If you have installed the Compro wireless adaptor on your IP camera, you can set up the wireless connection in this page. To connect wirelessly, please check the [Use Wireless First] box to give priority to wireless connection when LAN network is also connected. And then provide the necessary information on IP address (to obtain IP address via DHCP or use specified static IP address) and access point. -
Page 48: Network Diagnostic
Compro IP55 / 60 / 70 Network Camera Network Diagnostic Here you can run the diagnostic tool for your current network settings and it will show error messages if any anomaly is detected. For further information on error messages, please refer to the FAQ section in this manual or visit www.comprosecurity.com for more information. -
Page 49: Ddns
If your operating system supports Universal Plug and Play (UPnP™) feature and DHCP is in use on current network, the Compro IP70 will be automatically detected and added to My Network Places on your Windows. If you want to use the IGD (Internet Gateway Device) protocol on your IP camera, please check the [Enable IGD] box to enable it. -
Page 50: Event Setup
Compro IP55 / 60 / 70 Network Camera Event Setup When an event happens, like detected motion or triggered I/O device, a snapshot can be instantly sent to your E-mail account, ftp server, image server, notification server, HTTP server, or SMS server to warn you about what’s happened. -
Page 51: Trigger Setup
Chapter 6: Configuration SMS server Here provides the configuration for SMS notification feature that allows the camera to send a SMS (Short Message Service) alert message to one or more pre-defined recipients when a pre-defined event scenario is being triggered. This feature does not require additional hardware GPRS modem and SIM card installed. Users only need to first apply an account with a third-party, web-based SMS gateway service provider. -
Page 52: Motion Detection Setup
Compro IP55 / 60 / 70 Network Camera Motion Detection Setup Motion detection feature provides a selection of 3 regions for motion detection. You can directly click and drag on the preview screen to set a detection region. Prior to that, please select the region (0, 1 or 2 ) and the sensitivity level (S1: Lowest, S2: Low, S3: Medium, S4: High, S5: Highest) from their drop down list. -
Page 53: Recording Setup
Having made your settings, press [Save] button to save your settings. To playback the recordings stored on the SD card, go to [Setup], and click on [Recording History] located on the left menu. Note: • This Compro IP camera uses a First In First Out storage method.Once the SD card is full, the oldest file will automatically be overwritten. • If you want to record video clips of detected motion to SD card, you need to set at least a motion detection region before setting up event-based recording in "Recording Setup."... -
Page 54: Recording History
Compro IP55 / 60 / 70 Network Camera Recording History Recording History lets you manage the video clips that have been recorded by the camera. You will also see a playback menu as shown below. Figure 6-12. Recording history To play a video clip, first select a video clip on the list and press [Playback]. (File format: AVI) -
Page 55: Chapter 7: Event Viewer
Chapter 7: Event Viewer Chapter 7: Event Viewer Here displays the history of past events successfully triggered by motion, I/O, schedule or audio detection. Click on any type of event trigger to view its history. Or click on the image link, if any, to view the snapshot taken at the occurrence of a pre-defined event. - Page 56 Compro IP55 / 60 / 70 Network Camera...
-
Page 57: Chapter 8: Maintenance
Maintenance You can reboot your IP camera, change UI language, export/import user profile, reset to factory default settings, or update camera firmware (please download the latest firmware from Compro’s website first). Figure 8-3. Maintenance page Information & Log & Maintenance... -
Page 58: Profile Management
Firmware Update You can download the latest firmware from Compro’s website (www.comprosecurity.com/en/supports.html). After downloading the firmware, please log in to the setup page of your IP camera and click [Maintenance] on the top menu and then look for firmware update section. Press the [Browse] button and locate the downloaded firmware file and press [Upgrade] button to update camera firmware. -
Page 59: Chapter 9: Troubleshooting
Start > Programs > ComproView > iWizard) to open the iWizard configuration tool. During the configuration, the iWizard will automatically scan for all of the available Compro IP surveillance products installed on your LAN network (even if they are not on the same subnet). The scanning generally takes around 1 minute to complete, and once the scanning completes, you will see the available IP cameras populating the list. -
Page 60: Reset To The Factory Default Settings
Compro IP55 / 60 / 70 Network Camera Reset to the Factory Default Settings If you forget your system password or if you feel your IP camera has been acting weird, you can follow the steps below to reset the camera to its default state in which it will be using the Ethernet port for network connection and obtaining IP from the available local DHCP server. -
Page 61: Trouble With The Activex Client
Once you launch the Internet Explorer and enter the camera’s IP address in the address field, you'll be asked for the user name and password combination (the default is admin/admin, case sensitive). Note: The ActiveX component developed by Compro currently only runs on Microsoft Internet Explorer 6 or greater. It does not function on other web browsers for the time being. - Page 62 Compro IP55 / 60 / 70 Network Camera Figure 9-6. Add-on management c. Inappropriate browser security setting: Please ensure that your security setting in Internet Explorer allows the installation of ActiveX component by adding the IP address of the camera to the list of trusted sites in Internet Explorer.
-
Page 63: Trouble With Remote Viewing On Browser
Chapter 9: Troubleshooting Trouble with Remote Viewing on Browser You can view your camera video remotely over the Internet. If you have problem in remote viewing, refer to the section below for preliminary troubleshooting. Figure 9-8. Remote viewing via browser The figure above shows a typical connection setup in which: • the IP camera has a static virtual IP address of 192.168.0.1 • the WAN IP address at the IP camera site is 61.220.20.16. - Page 64 Compro IP55 / 60 / 70 Network Camera after port forwarding is set. The following figure exemplifies the settings you need to make in order to remotely view the IP camera. Figure 9-10. Port forwarding Having taken the above steps, you should be able to log in to the IP camera from a remote location by entering the DDNS address or the static IP address in the location field of a web browser (depending on your configuration). For example, in this case, you should enter "http://61.220.20.16:80" into the location field of...
-
Page 65: Ddns Configuration
Figure 9-11. DDNS setup in iWizard The iDDNS is a free DDNS service provided by Compro. If you are using dynamic IP, you may want to apply for DDNS (Dynamic Domain Name Server) service to create a hostname that links to the IP address on your home or office network. -
Page 66: Symptoms, Causes And Solutions
Compro IP55 / 60 / 70 Network Camera Symptoms, Causes and Solutions Listed below are some other frequently asked questions and their answers. Symptom Possible Cause/Solution The camera is not powered on. Make sure the camera has been powered on for over 1 minute and its LED status indicator is lit. - Page 67 When this happens, try waiting a few minutes for the new IP information to be updated onto DNS server and then retry connection, or try to decrease the TTL value. If it still doesn't work, refer to other possible causes and solutions, or contact Compro for technical support.
- Page 68 Compro IP55 / 60 / 70 Network Camera Symptom Possible Cause/Solution Network connection error. The network connection test verifies if the camera has successfully connected to the LAN network. When the diagnosis result shows a red exclamation mark icon ( ) for network connection, it means the camera fails to connect to LAN network.
- Page 69 Chapter 9: Troubleshooting Symptom Possible Cause/Solution Network bandwidth is insufficient. Without sufficient bandwidth, video quality will deteriorate and image errors like pixelation or frame-drop may occur. When you view your camera remotely from the Internet, your camera needs sufficient upload bandwidth to transmit video stream and you need sufficient download bandwidth to download video stream at the remote location.
-
Page 70: Contacting Compro Technical Support
The speed class of SD card does not meet the requirement. You might experience minor issue in video recording when your SD card does not meet the writing speed requirement. Compro recommends using class 4 or above SD card for video recording. -
Page 71: Chapter 10: Technical Specifications
Chapter 10: Technical Specifications Chapter 10: Technical Specifications Category IP70 IP60 IP55 1/3" CMOS Megapixel Image Sensor 1/4" CMOS Megapixel sensor sensor • Focal Length: 4.0 mm • Focal Length: 4.0 mm • Max Aperture Ratio: Lens • Max Aperture Ratio: F1.5 F1.5 • Fixed iris • Fixed iris Zoom 10x digital zoom Camera Angle of View 60° horizontal 46°... - Page 72 Compro IP55 / 60 / 70 Network Camera Category IP70 IP60 IP55 • Multiple channel management • iDDNS service for dynamic IP and desktop shortcut creation Software ComproView • Recording search and playback • Scheduled and event driven management • Smart Detection • Monitor the current condition of the monitor area via Internet Explorer Internet Explorer • Capture a still image and save it in JPG format on PC (ActiveX) • Alarm and event management: FTP, I/O alarm, server notification and email Browser • PC, Laptop, Nettop, Tablet, MID with IE/ActiveX support. Supported Devices • Mobile phone, iPhone/iPod, PDA support in MJPEG mode.
-
Page 73: Chapter 11: Appendix
Chapter 11: Appendix Chapter 11: Appendix IP55 Available Video Modes Stream 1: Resolution SXGA (1280x1024) VGA (640x480) QVGA (320x240) QQVGA (160x120) Codec MPEG-4 MPEG-4 MPEG-4 MPEG-4 Turbo Picture mode: Turbo Picture mode: Turbo Picture mode: Turbo Picture mode: 15, 10, 7.5, 5 15, 10, 7.5, 5 15, 10, 7.5, 5... -
Page 74: Ip60 Available Video Modes
Compro IP55 / 60 / 70 Network Camera IP60 Available Video Modes Stream 1: Resolution SXGA (1280x1024) VGA (640x480) QVGA (320x240) QQVGA (160x120) Codec MPEG-4, H.264 MPEG-4, H.264 MPEG-4, H.264 MPEG-4, H.264 Turbo Picture mode: Turbo Picture mode: Turbo Picture mode: Turbo Picture mode: 15, 10, 7.5, 5... -
Page 75: Ip70 Available Video Modes
Below table shows the 3rd-party DVR / NVR / NAS products (running RTSP, Real Time Streaming Protocol) that are supported by Compro Network Cameras and their corresponding firmware version. Compro does not guarantee other DVR / NVR / NAS products not listed in the table will work properly with Compro IP cameras. Solution Partner... -
Page 76: List Of Figures And Tables
Figure 2-3. Front and rear view of IP55/IP60 ....... . . - Page 77 Chapter 11: Appendix Figure 7-1. Event Viewer ............7-1 Figure 8-1.
- Page 78 . c o m p r o s e c u r i t y . c o m Compro Technology Head Office 3F, No.12, Alley 6, Lane 45, Pao Shin Road, Hsintien District, New Taipei City 231, Taiwan...