Sharp XE-A207 Instruction Manual
Hide thumbs
Also See for XE-A207:
- Manual de instrucciones (108 pages) ,
- User manual (45 pages) ,
- Setup manual (10 pages)
Table of Contents
Advertisement
Quick Links
Advertisement
Table of Contents

Related Manuals for Sharp XE-A207


Summary of Contents for Sharp XE-A207
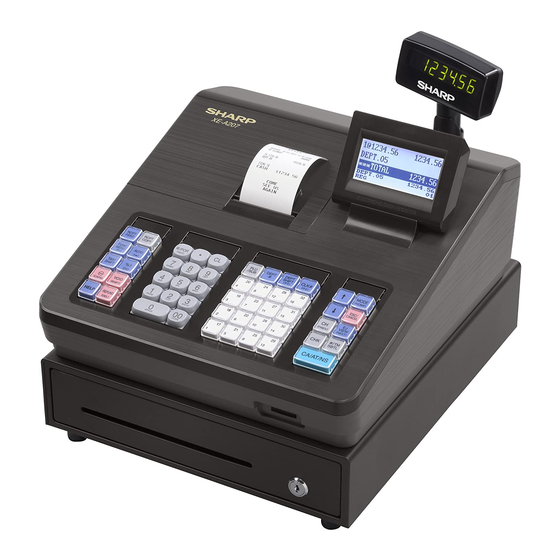
- Page 1 ELECTRONIC CASH REGISTER MODEL XE-A207 XE-A23S INSTRUCTION MANUAL...
- Page 3 Customer Service Hotline 1-800-BE-SHARP SD logo is a trademark of SD-3C, LLC.
- Page 16 (In case secret code is 0000) Clerk code Secret code...
- Page 17 To clear the error state Transaction...
- Page 43 total Taxable 1 total Gross tax 1 total Refund tax 1 total Net tax 1 total *3: When the Canadian tax system is selected, the following is printed here. Exempt total from GST PST total GST total...
- Page 49 Character code: 032 - 047 048 - 063 064 - 079 080 - 095 096 - 111 112 - 127 128 - 143 144 - 159 160 - 175 176 - 191 192 - 207 208 - 223 224 - 239 240 - 255 (DC) *(DC) : Double-size character code...
- Page 53 1 DEPARTMENT: 2 PLU: 3 PLU RANGE:...
- Page 56 1 $ DISC [(-)] 2 %1 DISC [%1] 3 %2 DISC [%2] 4 MANUAL TAX 5 RA 6 PO 7 CASH IN DRAWER...
- Page 60 1 CASH 2 CHECK 3 CHARGE 4 CONVERSION...
- Page 64 1 CLERK 2 MANAGER 3 MODE PASS CODE 4 TRAINING CLK...
- Page 67 1 BASIC SYSTEM 2 FUNC.PROHIBIT 3 FUNC.AUTHORITY 4 FUNCTION SELECT 5 PRINT SELECT...
- Page 74 1 0 SKIP 2 PRINT SELECT 3 Z COUNTER 4 Z1 GENERAL REPORT 5 E. JOURNAL...
- Page 78 1 RECEIPT LOGO...
- Page 79 1 KEYBOARD 2 DISPLAY 3 PRINTER 4 EFT...
- Page 81 1 TAX SYSTEM 2 TAX1 3 TAX2 4 TAX3 5 TAX4 6 DOUGHNUT EXEMPT...
- Page 88 Associated dept. code...
- Page 89 Report type HALO Programming data (00) Function text Entry of amount tendered (0:Non-Compulsory, 1:Compulsory) Programming data (00) Footer print on receipt (0:No, 1:Yes) Entry of amount tendered (0:Inhibit, 1:Compulsory) Footer print on receipt (0:No, 1:Yes) Rate...
- Page 91 Report type Clerk code Clerk name Auto key operation/Pass code 0: Enable 1: Disable Report type Training clerk code Training mode title text...
- Page 92 Report type Item Setting...
- Page 93 Report type Receipt logo text...
- Page 108 SHARP ELECTRONICS CORPORATION Sharp Plaza, Mahwah, New Jersey 07495-1163 1-800-BE-SHARP For additional information and product registration, www.sharpusa.com please visit Printed in Korea T(TINSE2624BHZZ)
- Page 109 XE-A207 XE-A23S Customer Support Tool User’’s Manual Thank you for downloading this PDF file. Before reading this file, please read Instruction Manual of XE-A207 and XE-A23S. Save or print this file so that you can read when necessary.
-
Page 110: Table Of Contents
Table of Contents Introduction ................................1 What is the Customer Support Tool? ........................1 Note on using Customer Support Tool ........................1 Trademarks ................................1 About this manual ..............................2 System requirements ..............................2 System Configuration..............................3 To start Customer Support Tool ..........................4 How to install the Customer Support Tool .......................4 To start Customer Support Tool........................4 To Start and Exit the Customer Support Tool ......................4 To start the Customer Support Tool........................4... - Page 111 LOGO TEXT................................23 Appearance and details of the logo text window..................23 LOGO ..................................24 Appearance and details of the logo screen....................24 TAX..................................26 Appearance and details of the tax screen....................26 To set taxes with the tax table ........................28 QuickBooks® ................................29 Appearance and details of the QuickBooks® screen ..................29 ®...
- Page 112 Note on using Customer Support Tool •• Sharp Corporation bears no responsibility for errors made during use by the customer or a third party, nor for any other malfunctions or damage to this product arising during use, except where indemnity liability is required by law.
- Page 113 If .NET Framework is not installed on your computer, you will need to install it from the Microsoft website. ® •• QuickBooks ® Customer Support Tool can export the sales data of a cash register to QuickBooks Pro, the following versions have been tested by Sharp Corporation ® ® QuickBooks Pro 2010 and QuickBooks Pro 2011...
- Page 114 •• To use an SD memory card with the cash register, refer to ““SD CARD Mode”” on page 95 in the Instruction Manual of XE-A207 and XE-A23S and ““Using SD Memory Card”” on page 5 in this manual. You can use either an SD memory card or an SDHC memory card with the cash register. In this Note manual, we call both of them ““SD memory card.””...
-
Page 115: To Start Customer Support Tool
To start Customer Support Tool How to install the Customer Support Tool To start Customer Support Tool 1. Download the Customer Support Tool from the web site www.sharpusa.com/registersoftware. 2. Unzip (extract / decompress) the contents of the .ZIP file to a directory where you will use the program. The Customer Support Tool software is provided in a .ZIP format and you may need a separate Note program to extract (unzip) the file. -
Page 116: Using Sd Memory Card
•• For handling an SD memory card, refer to the manual attached to the SD memory card. •• What you have saved on an SD memory card may be erased or destroyed in an accident or malfunction. Sharp Corporation does not take responsibility for damage to data on the SD card for any reason. -
Page 117: Inserting And Removing An Sd Memory Card
When you use an SD memory card with the cash register for the first time, be sure to format it on your cash register before writing programming data to it. Also refer to ““SD CARD Mode”” on page 93 in the Instruction Manual of XE-A207 and XE-A23S. Notice ••... - Page 118 For details of writing data to an SD memory card with the cash register, refer to ““Data saving”” on page 94 in the Instruction Manual of XE-A207 and XE-A23S. 2. Insert the SD memory card into an SD memory card slot of your computer or a card reader connected to your computer.
- Page 119 Writing Data to SD Memory Card This section explains the procedure for writing data to an SD memory card from your computer. Notice Appearance of the screen is different depending on data to be written. For details, refer to the section of each data.
- Page 120 Data in your computer is written into an SD memory card. Note For details of reading data from an SD memory card into the cash register, refer to ““Data loading”” on page 95 in the Instruction Manual of XE-A207 and XE-A23S.
-
Page 121: Main Window Of The Customer Support Tool
Main Window of the Customer Support Tool This page describes the appearance of the main window and details of each function. (1) Menu You can select one of three menus: [File], [Record] or [About]. Menu Command Description Page in this manual File Open Opens the Customer Support Tool data in... - Page 122 You can open the Customer Support Tool data saved in your computer and edit it. Note The data folder is set by default during installation. •• Windows Vista or Windows 7 C:\Users\(Username)\Documents\SHARP_ECR\A207U\SHOP_NAME1 •• Windows XP C:\Documents and Settings\(Username)\My Documents\SHARP_ECR\A207U\SHOP_NAME1 * The actual Windows account user name is represented by (Username) above. * You do not need to open the data folder or change the settings when using the default folder.
- Page 123 You can decide where to save the Customer Support Tool data. 1. Click [File], and then [Setting]. The data folder setting dialog appears. 2. Click [Select]. The data folder selection dialog appears. 3. Click a data folder. To create a new folder, click [Make New Folder], and type a Note folder name.
-
Page 124: To Edit And Import/Export Data
To Edit and Import/Export Data This chapter explains the details of each setting screen and importing/exporting data. DEPT (Department Screen) You can manage sales totals by classifying sales items into departments. Set the department data on the department screen. To open the department screen, click the [DEPT] tab in the main window of Customer Support Tool. - Page 125 Input HALO in the textbox, which can range from 0 to 999999.99. The default value is 999999.99. *Note For details of register settings refer to the Instruction Manual of XE-A207 and XE-A23S. (6) DEPT CODE The code of a selected department is displayed.
-
Page 126: To Create A New Department Data
Click this button to write the department setting data to an SD memory card. To create a new department data You can create new department data with the following procedure. 1. Click [Record], and then [New]. You can also create data by right-clicking on the list of department data and then clicking [New Record]. - Page 127 If there is already a department code in the cash register, you cannot delete the department code from the cash register with the Custommer Support Tool. Delete the department code in the cash register directly.
-
Page 128: Appearance And Details Of The Plu Screen
Type a sales item name or a classification name of up to 16 letters in the textbox. The default value is ““PLUXXXXX”” (XXXXX is five-digit PLU code). Notice Use letters only that can be displayed or printed by the cash register. For appropriate letters, refer to page 47 in the Instruction Manual of XE-A207 and XE-A23S. -
Page 129: To Create Plu Data
““PRESET,”” it is set as ““INHIBIT.””* This item is active only when you have selected a PLU code. *Note For details of register settings refer to the Instruction Manual of XE-A207 and XE-A23S. (5) PLU CODE The selected PLU code is displayed. -
Page 130: To Delete Plu Data
You can also create data by right-clicking on the list of PLU data and then clicking [New Record]. The PLU code input dialog appears. 2. Input a PLU code in the textbox. 3. Click [OK]. New PLU data is created. Notice If you input an already existing PLU code, an error message appears. -
Page 131: Appearance And Details Of The Clerk Screen
Type up to 16 letters such as a clerk name in the text box. The default value is ““CLERKXX,”” and XX indicates two-digit CLERK CODE. Notice Use letters only that can be displayed or printed by the cash register. For appropriate letters, refer to page 47 in the Instruction Manual of XE-A207 and XE-A23S. -
Page 132: To Create Clerk Data
(3) PROGRAM •• Pass code. Input a four-digit number in the textbox as a pass code. The default value is ““0000.”” •• Auto key. Before operating auto keys, check ““ENABLE.”” In the default setting, it is checked. (4) CLERK CODE The selected clerk code is displayed. -
Page 133: To Delete Clerk Data
To delete clerk data You can delete unnecessary clerk data in the procedure below. 1. Select the clerk data you want to delete, click [Record] and then [Delete]. You can also delete data by right-clicking the data in the clerk data list and clicking [Delete Record]. - Page 134 Notice Use letters only that can be displayed or printed by the cash register. For appropriate letters, refer to page 47 in the Instruction Manual of XE-A207 and XE-A23S. (2) Get from SD Click this button to read the logo text data from an SD memory card.
- Page 135 LOGO You can set header logo data (a graphic logo printed on the receipt) in the cash register. To open the LOGO screen, click [LOGO] in the main window of Customer Support Tool. Note Also refer to ““Creating Logo Data”” on page 35 in this manual. Appearance and details of the logo screen Preview (1) HEADER LOGO...
- Page 136 (3) Send to SD Click this button to write the logo data to an SD memory card. * Requirements of an image file for a logo When creating a logo, you can only use an image file that satisfies requirements below: Format : bitmap (*.bmp) Color : monochrome Size : 360 x 130 pixels...
- Page 137 There are two methods for setting taxes: the tax rate method and the table tax method. The tax rate method uses a straight percentage rate on sales. The tax-table method requires tax break information from your state or local tax authority (Sharp does not have tax table information since it changes by municipality). Appearance and details of the tax screen (1) List of tax data To see details of a tax, click the row of the tax.
- Page 138 (6) CYCLE The cycle is calculated when you click ““Table tax adjustment.”” You can also input the value manually. The default value is ““0.00.”” Also refer to ““Tax Programming”” on page 81 in the Instruction Manual of XE-A207 and XE-A23S.
- Page 139 To set taxes with the tax table 1. Input a tax rate. 2. Select ““TABLE TAX”” as a tax calculation type. 3. Input the initial minimum tax in the first cell of the ““Tax”” column. 4. Input the initial minimum breakpoint (0.01 through 999.99) of the sales amount in the first cell of the "Amount"...
- Page 140 QuickBooks® ® You can send sales data from the cash register to QuickBooks Pro via an SD memory card. To open the QuickBooks® screen, click [QuickBooks®] in the main window of Customer Support Tool. Appearance and details of the QuickBooks® screen (1) QuickBooks®...
- Page 141 ® To send sales data from an SD memory card to QuickBooks ® You can send today's sales data via an SD memory card to QuickBooks Pro. ® 1. Start QuickBooks Pro. 2. Insert an SD memory card. ® Note Disable write-protection on the SD memory card when you send data to QuickBooks Pro.
- Page 142 The EXPORT SALES DATA dialog appears. 8. Select a customer name. ® When you send sales data to QuickBooks Pro for the first time, no customer name is displayed. When you send sales data at the second time or later, the name you have selected at the previous time is displayed. 9.
-
Page 143: Sample Operations
This chapter explains two procedures with sample operations: exchanging and editing data and creating logo data. For details of exchanging data between the cash register and an SD memory card, refer to the Instruction Manual of XE-A207 and XE-A23S. Exchanging and Editing Data... - Page 144 All department data on the SD memory card are read. 6. Click inside of the DEPT CODE box. The DEPT CODE input dialog appears. 7. Input ““15,”” for example, in the textbox. 8. Click [OK]. Department data whose code is 15 is shown. 9.
- Page 145 Department data you have edited are saved in the data folder, and Customer Support Tool finishes. About how to send data from the SD memory card to the cash register, refer to ““Data loading”” on page Note 95 in the Instruction Manual of XE-A207 and XE-A23S.
- Page 146 Creating Logo Data This sample operation will demonstrate a procedure below, using the Customer Support Tool and Paint, a Microsoft Windows component: Note Other tools then Paint may be used for logo file creation. The logo file must meet the requirements defined in the LOGO section of this manual.
- Page 147 4. Based on Blank(.bmp), design your own logo, using various Paint tools. 5. Click at the upper left corner, and then [Save as]-[BMP picture]. The ““Save as”” dialog appears. 6. Type the name of logo you have created in the textbox, 7.
- Page 148 The main window of Customer Support Tool appears. 12. Click the [LOGO] tab. 13. Click [Select]. The Open dialog appears. 14. Select the logo you have created. 15. Click [Open]. The logo data is previewed. 16. Click [Send to SD]. The logo data is written to an SD memory card.
- Page 149 Logo data you have edited is saved in the data folder, and Customer Support Tool finishes. Note About how to send data from the SD memory card to the cash register, refer to ““Data loading”” on page 95 in the Instruction Manual of XE-A207 and XE-A23S.
-
Page 150: Before Calling For Service
Before Calling for Service Trouble Shooting If you have a problem while using Customer Support Tool, refer to the table below. Trouble Solution Cannot use an SD memory card •• Insert the SD memory card correctly. •• Disable write-protection on the SD memory card. ••... - Page 151 Error Message List If an error message appears, refer to the table below and solve the problem. N o t e •• If the [OK] button is displayed in the message box, click [OK] to close the message box. •• If the [Yes] or [No] button in the message box, click either of them to close the message box. Error Message Solution PC-LINK has already started.
- Page 152 •• Format an SD memory card with the cash register. Failed in import. •• For details of writing data to an SD memory card with the cash register, refer to page 9 in the Instruction Manual of XE-A207 and XE-A23S. User folder cannot be added.
- Page 153 SHARP ELECTRONICS CORPORATION Sharp Plaza, Mahwah, New Jersey 07495-1163 1-800-BE-SHARP For additional information and product registration, www.sharpusa.com please visit...