Oki C710 Maintenance Manual
Hide thumbs
Also See for C710:
- Brochure & specs (6 pages) ,
- Safety and regulatory information manual (48 pages) ,
- How to remove jammed paper (10 pages)
Table of Contents
Advertisement
Advertisement
Chapters
Table of Contents
Troubleshooting

Related Manuals for Oki C710


Summary of Contents for Oki C710
-
Page 1: Maintenance Manual
C710/MPS710 Maintenance Manual 072710C ... - Page 2 Copyright Information Copyright © 2010 by Oki Data. All Rights Reserved Disclaimer Every effort has been made to ensure that the information in this document is complete, accurate, and up-to- date. The manufacturer assumes no responsibility for the results of errors beyond its control. The manufacturer also cannot guarantee that changes in software and equipment made by other manufacturers and referred to in this guide will not affect the applicability of the information in it.
- Page 3 Oki Data CONFIDENTIAL Document Revision History Corrected items Person in Rev.No Date Corrected items charge Person in Page Description of change Rev.No Date charge Page Description of change 2008-05-07 Issue CSFP11 N. Sunaga 2008-11-25 61, 73 Addition of “Warning”, EP5 T. Sugiyama etc.
-
Page 4: Th Rev
• Manual may be revised and updated at any time without notice. • Unexpected mistakes may exist in the manual. OKI will not assume any responsibility whatsoever for damage to the equipmentrepaired/adjusted/changed by the user etc with this manual. • The parts used for this printer may be damaged when handling inappropriately. -
Page 5: Table Of Contents
Oki Data CONFIDENTIAL Index 1. Configuration ................6 3.6 Setting content print (Configuration) ..............56 3.7 Connecting method .................... 57 1.1 System configuration .................... 7 3.8 User used Paper confirmation ................59 1.2 The Configuration of printer .................. 8 4. Component replacement ............60 1.3 Optional parts ....................... - Page 6 Oki Data CONFIDENTIAL 5. Maintenance Menu ..............91 7. Troubleshooting and repair procedure ......125 5.1 System maintenance menu (for maintenance engineer) ........92 7.1 Before starting the repair work ................. 126 5.2 Maintenance Utilities ..................93 7.2 Confirmation items before taking corrective action against abnormalities ..126 5.3 Maintenance menu functions ................
-
Page 7: Configuration
Oki Data CONFIDENTIAL Configuration 1.1 System configuration ...............7 1.2 The Configuration of printer .............8 1.3 Optional parts ..................9 1.4 Specifications ................10 1.5 Specification of interface ...............13... -
Page 8: System Configuration
1.Configuration Oki Data CONFIDENTIAL 1.1 System configuration Figure 1-1-1 represents the system configuration of the printer. Cover Duplex Front Bottom oper Hopping paper Sensor sensor sensor Centronics sensor sensor sensor sensor size SW Duplex clutch Feeder clutch Separator CU PCB... -
Page 9: The Configuration Of Printer
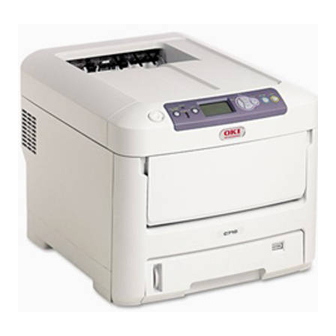
1.Configuration Oki Data CONFIDENTIAL 1.2 The Configuration of printer The parts in the C710n are shown as below. • Electrophotography process mechanism • Paper feed path • Control part (CU part/ PU part) • Operator panel • Power part (High-voltage part/low-voltage part) The Configuration of the printer is shown in Fig 1-2. -
Page 10: Optional Parts
1. Configuration Oki Data CONFIDENTIAL 1.3 Optional parts The optional parts for this printer are shown as below. (4) Built-in hard disk (Standard built-in hard disk, data protection kit A1) (1) Optional tray(second tray/ third tray) (2) Duplex Unit (3) Optional memory... -
Page 11: Specifications
1. Configuration Oki Data CONFIDENTIAL 1.4 Specifications Division Item Division Item Dimension Width 435mm Program+font 64MB Depth 536mm Power Input power supply (120V)110~127VAC±10%, consumption (230V)220~240VAC±10% Height 389mm Power save mode Less than 17W Weight About 28kg Idle 100W (Average) Width of print... - Page 12 1. Configuration Oki Data CONFIDENTIAL Division Item Division Item Operation life Printer operation life 600,000 pieces A4 transvers direction, 5years Paper handling Paper stack capacity Legal /Universal cassette 530 pieces (70kg) (1st tray) Print duty Max 100,000 pages / month...
- Page 13 1. Configuration Oki Data CONFIDENTIAL Division Item Division Item Option 256/512MB DIMM Control panel Resolution 128×64 dot graphic panel (can be Paper size is not displayed 2.5" IDE HDD • Standatd built-in HDD removed) It is possible to be • Data protection kit A1 LED (color) 2 (Green×1, dark umbar×1)
-
Page 14: Specification Of Interface
1. Configuration Oki Data CONFIDENTIAL 1.5 Specification of interface 1.5.1 Specification of USB interface (2) Cable The length of the cable: the cable of less than 5m with USB 2.0 spec. 1.5.1.1 General of USB interface (Less than 2m is recommended) (Please use the shielded wire for the cable.) -
Page 15: Specification Of Network Interface
1. Configuration Oki Data CONFIDENTIAL 1.5.2 Specification of network interface 1.5.2.2 Connector and cable of network interface (1) Connector 1.5.2.1 General of network interface 100BASE-TX/10 BASE-T (Auto switch, cannot be used simultaneously) Spec. Connector pins array Network Protocol TCP/IP sepc. Network layer... -
Page 16: Specification Of Parallel Interface
1. Configuration Oki Data CONFIDENTIAL 1.5.3 Specification of parallel interface 1.5.3.4 Signal of interface Pin NO. Name of signal Direction Function 1.5.3.1 General of parallel interface nStrobe (HostClk) TO PRINTER It is a pulse to read data. Data is read by posterior end. -
Page 17: Operating Instructions
Oki Data CONFIDENTIAL Operating instructions 2.1 Electrophotographic processing mechanism .........17 2.2 Printing process ................21... -
Page 18: Electrophotographic Processing Mechanism
2. Operating instructions Oki Data CONFIDENTIAL 2.1 Electrophotographic processing mechanism (1) Electrophotographic processing (2) Charging The voltage is impressed to the charging roller in contact with the surface of The general of Electrophotography process is described as below. OPC drum, and the surface of OPC drum is charged. - Page 19 2. Operating instructions Oki Data CONFIDENTIAL (4) Development (5) Transfer The toner adheres to the electrostatic latent image on the surface of the drum, The paper is overlapped on the surface of the OPC drum, and the electricity is and the electrostatic latent image is changed into the toner image.
- Page 20 2. Operating instructions Oki Data CONFIDENTIAL (6) Fusing (7) Drum cleaning When the paper passes through the heat roller and backup roller unit, heat The Unfused toner left on the OPC drum is cleaned up by the drum cleaning and pressure are applied to the toner image on the paper and the toner is blade, and all residual toner is collected in the waste toner area of the toner fused onto the paper.
- Page 21 2. Operating instructions Oki Data CONFIDENTIAL (9) Belt cleaning The toner left on the transport belt is cleaned up by the belt cleaning blade, and all residual toner is collected in the waste toner box of the transport belt unit.
-
Page 22: Printing Process
2. Operating instructions Oki Data CONFIDENTIAL 2.2 Printing process The paper fed from tray 1 or tray 2, tray.3 is transferred by feeder roller, resister roller L, and transfer roller. It is transferred by MPT paper feed roller and resister roller U when the paper is fed from MPT. - Page 23 2. Operating instructions Oki Data CONFIDENTIAL (1) Paper feed from 1st tray (2) Paper feed from MPT As shown in Fig.2-1, while the solenoid is set as ON, the paper-feeding motor is As shown in Fig.2-3, while the solenoid is set as OFF, the paper-feeding motor rotated (counter clockwise) to transfer the paper until the IN1 sensor is turned is rotated (clockwise) to transfer the paper until the IN2 sensor is turned ON.
- Page 24 2. Operating instructions Oki Data CONFIDENTIAL (3) Transport belt When the transport belt motor is rotated in the direction of the arrow, the transport belt is driven. As for the belt unit, a transfer roller is set over under each color drum. The belt is caught and installed between the transfer roller and drum.
- Page 25 2. Operating instructions Oki Data CONFIDENTIAL (4) Updown operation of ID unit The operation of each ID unit when color printing The up and down operation of the ID unit is done by driving the liftup motor. C-ID unit DOWN...
- Page 26 2. Operating instructions Oki Data CONFIDENTIAL (5) Fuse unit and paper delivery (6) Cover open operation of color blur sensor and density sensor The fuse unit and the delivery roller are driven by the DC motor as shown in Fig.
- Page 27 2. Operating instructions Oki Data CONFIDENTIAL General of color blur correction The color blur correction is operated by reading the pattern for correction printed on the belt with a sensor set in the sensor shutter under the belt unit. Transport belt The pattern is detected by this sensor, and the correction is operated.
- Page 28 2. Operating instructions Oki Data CONFIDENTIAL Error-confirming method and Error-solving method Use the color blur correction test function in self-diagnostic mode to confirm the error. (See 5.3.1.6) Error solving method • CALIBRATION(L or R), DYNAMICRANGE(L or R) Check 1: When the above display appears, please check the connection of sensor cable (FFC).
- Page 29 2. Operating instructions Oki Data CONFIDENTIAL General of the density correction The density correction is operated by reading the pattern for correction printed on the belt with a sensor set in the sensor shutter under the belt unit. Transfer belt Density correction auto-start timing •...
- Page 30 2. Operating instructions Oki Data CONFIDENTIAL Error-confirming method and Error-solving method Toner sensor detection principle Use the density correction test function in self-diagnostic mode to confirm the error. Toner low is detected by the toner sensor (reflect sensor) installed in the equipment.
- Page 31 2. Operating instructions Oki Data CONFIDENTIAL Counter spec Total printed page MPT printed page Tray 1 printed page Tray 2 printed page Tray 3 printed page Color-printed page number Mono-printed page number number number number number number Description Total printed page...
- Page 32 2. Operating instructions Oki Data CONFIDENTIAL A4/Letter conversion table The paper is counted up as this sheet. Paper size Simplex Duplex LETTER EXECUTIVE LEGAL14 LEGAL13.5 LEGAL13 COM-9 COM-10 MONARCH CUSTOM CUSTOM LENGTH > 330mm CUSTOM LENGTH > 900mm 31 /...
-
Page 33: Set Up
Oki Data CONFIDENTIAL Set up 3.1 Notes and precautions ..............33 3.2 Unpack method ................34 3.3 Setting method ................35 3.4 List of equipments and accessories ..........36 3.5 Assembling method ...............37 3.6 Setting content print (Configuration) ..........56 3.7 Connecting method ...............57 3.8 User used Paper confirmation ............59... -
Page 34: Notes And Precautions
3. Set up Oki Data CONFIDENTIAL 3.1 Notes and precautions • Do not set it in any high-temperature locations or near any heat sources. • If the liquid such as water enters the printer, please pull out the power plug from the •... -
Page 35: Unpack Method
3. Set up Oki Data CONFIDENTIAL 3.2 Unpack method Personal injuries may occur. Because the weight of the printer is approximately 33kg (in a state of packing), it needs more than two adults to lift it up. • Take out the gripe on each side as shown in the following figure, and lift the cardboard box up. -
Page 36: Setting Method
3. Set up Oki Data CONFIDENTIAL 3.3 Setting method • Set the printer under these conditions. Plan view Surrounding environment: : 10~32 Surrounding humidity: : 20~80%RH (Relative humidity) 20cm Highest wet bulb temperature: : 25 • Protect the printer from dew formation. -
Page 37: List Of Equipments And Accessories
3. Set up Oki Data CONFIDENTIAL 3.4 List of equipments and accessories • Make sure that the appearance of the equipment is not damaged or dirty etc. Printer software CD-ROM Power supply cord • Make sure that the following accessories are supplied with your printer. -
Page 38: Assembling Method
3. Set up Oki Data CONFIDENTIAL 3.5 Assembling method 3.5.1 Assemble the main body of the printer (3) Peel off the protection tape (2 places) on the back of the printer. Remove the protective materials. (1) Peel off the desiccant and the protection tape (four places) on the printer. - Page 39 3. Set up Oki Data CONFIDENTIAL (6) Pull the retainer out in the direction of the arrow (1). Return the paper cassette (8) Remove the stopper (orange) when pressing down the lever of the fuser unit to the main body of the printer.
- Page 40 3. Set up Oki Data CONFIDENTIAL Set the image drum cartridge. (2) Put the image drum cartridge on the newspaper etc, peel off the tape of protection sheet 1 and pull it out in the direction of the arrow. (1) Take the image drum cartridge (four) out slowly.
- Page 41 3. Set up Oki Data CONFIDENTIAL (5) Return the image drum cartridge back to the printer. (6) Close the top cover. Note! If the message of [please exchange the toner] on the control panel doesn't disappear indefinitely, please make sure that the lever of the toner cartridge is fully moved in the direction of the arrow.
- Page 42 3. Set up Oki Data CONFIDENTIAL Set the paper into the paper cassette. (4) Place the paper in the cassette with the side to be printed facing down. Notes! • Place the paper with the top of the page nearest the paper cassette tab.
- Page 43 3. Set up Oki Data CONFIDENTIAL Set the paper in multi-paper tray. (5) Press down the set button. (1) Open the multi-paper tray, and open the paper supporter. Multi-paper tray Set button (2) Match the manual insertion guide to the size of the paper.
-
Page 44: Cable Connect
3. Set up Oki Data CONFIDENTIAL 3.5.2 Cable connect Connect the power cord. Power condition Note! Confirm that the power switch is turned to OFF " ". (1) Insert the power cord into the printer. • Keep the following items. -
Page 45: Turn The Power Off
3. Set up Oki Data CONFIDENTIAL Turn the power off. When you do not use the printer for long time Note! If you turn off the power without properly shutting down, it may cause Please explain to the customer about the following items. -
Page 46: Optional Part Installation And Confirmation
3. Set up Oki Data CONFIDENTIAL 3.5.3 Optional part installation and confirmation (1)-2. Install the optional tray unit to the printer. Note! Because the weight of the printer body is approximately 31kg, it needs (1) Installation of the optional tray unit (second/ third tray) more than two adults to lift it up. - Page 47 For Windows 2000, click on [start] => [Settings] => [printers]. Click the [C710(PS)] icon with right- c l i ck bu t t o n o n yo u r m o u s e a n d Note! If the content of [tray 2] is not displayed, reinstall the second tray unit.
- Page 48 For Mac OS X When the optional device has been added into in Mac OS X before installing the Click [C710(**)] (** is PCL or PCL printer driver, the device information is gotten automatically. However, if the printer is XPS (printer driver type)) icon with...
- Page 49 3. Set up Oki Data CONFIDENTIAL (2) Installation of duplex unit (2)-3. Install Duplex Unit This unit is used for printing on two sides of paper. Insert the duplex unit into the lower part on the back of the printer as far as it will go.
- Page 50 MEM512C +512MB (768MB) Notes! • The operation cannot be guaranteed when using an unspecified OPEN button product. Please use OKI product. • It is recommended to add 256MB optional memory when long size Open the multi-purpose tray. printing.
- Page 51 3. Set up Oki Data CONFIDENTIAL (3)-3. Remove the side cover. (3)-4. Install the memory. Loose the screw (one place). Discharge any static electricity by Remove the side cover. touching a grounded metal object before taking the memory out of the Pull it outward to remove while holding the package.
- Page 52 3. Set up Oki Data CONFIDENTIAL (3)-5. Install the side cover. (4) Install the built-in hard disk. Install the side cover. Fix the side cover with the screw. (one Note! Be careful that the font cannot be place) downloaded. Close the top cover and front cover.
- Page 53 3. Set up Oki Data CONFIDENTIAL (4)-1.Turn the power of printer off, and pull out the power cord. (4)-3. Remove the side cover. Please turn off the power with following the procedure in chapter 3.5.2 [Turn the power off]. Notes! •...
- Page 54 3. Set up Oki Data CONFIDENTIAL (4)-4. Install the built-in hard disk. (4)-7. Print the setting content and confirm if the built-in hard disk is installed properly. Insert the tab of the built-in hard disk into the slot on the printer.
- Page 55 C h o o s e [ g e t i n fo r m a t i o n f r o m => [Settings] => [printers]. printer] in [Device options] tab. For Click the [C710(PS)] icon with right- (For Windows XP) USB connection, select the option click button on your mouse and [Hard disk] manually.
- Page 56 Set [Hard disk] as [Install], and click utility] ([Applications] => [Utility] [OK]. => [print center] in Mac OS X) Close [select]. Select [C710], click [Show info] and open [printer info]. Choose [installable options]. Select the [Hard disk] option, and click [Apply].
-
Page 57: Setting Content Print (Configuration)
3. Set up Oki Data CONFIDENTIAL 3.6 Setting content print (Configuration) To confirm the printer operates normally, please print the [Configuration]. (C710n sample) (1) Set A4 paper in tray. (2) Press the button for several times so that [printer Information] is displayed, and press down the button. -
Page 58: Connecting Method
3. Set up Oki Data CONFIDENTIAL 3.7 Connecting method <USB connection> Connect the computer to the printer. Note! Please refer to user’s manual for operation environment. (1) Insert the USB cable into the USB interface connector of printer. (2) Insert the USB cable into the USB interface connector of computer. - Page 59 3. Set up Oki Data CONFIDENTIAL < Ethernet cable connection> < Parallel connection> Note! Refer to user’s manual for operation environment. Prepare for Ethernet cable Note! The parallel cable is not included in printer. Provide it for special user. Prepare for Ethernet cable Note! The Ethernet cable and Hub is not included in printer.
-
Page 60: User Used Paper Confirmation
3. Set up Oki Data CONFIDENTIAL 3.8 User used Paper confirmation Load the paper used by user, set the media type/weight, print the setting content/demo, and confirm if the toner is chipped off. settings of control panel [Thickness of Media weight... -
Page 61: Component Replacement
Oki Data CONFIDENTIAL Component replacement In this chapter, the procedures for replacement of part and assembly and unit are described. The replacement procedure is described by removal of the parts. Please install the new parts with following the replacement procedure in reverse order. -
Page 62: Precautions On Component Replacement
4. Component replacement Oki Data CONFIDENTIAL 4.1 Precautions on component replacement (1) Remove the AC cord and the interface cable before replacing the parts. (2) Do not disassemble it if the printer works normally. (a) Remove the AC cord according to the following procedure. -
Page 63: Maintenance Tool
4. Component replacement Oki Data CONFIDENTIAL [Maintenance tool] The required tools for using the maintenance utility are shown in Table 4-1-2. The required tools for replacing the PCB and the unit are shown in Table 4-1-1. Table 4-1-2 required tools... -
Page 64: Method Of Component Replacement
4. Component replacement Oki Data CONFIDENTIAL 4.2 Method of component replacement In this chapter, the replacement of parts and assemblies is described by the disassemble (3) Rotate the lock lever (blue, 2 places) of the belt unit in the direction of arrow figures. -
Page 65: Fuser Unit
4. Component replacement Oki Data CONFIDENTIAL 4.2.2 Fuser unit 4.2.3 Left side cover (1) Open the top cover. (1) Open the top cover. (2) Push up the fix lever of fuser unit in the direction of arrow, and remove the fuser (2) Open the feeder unit. -
Page 66: Right Side Cover
4. Component replacement Oki Data CONFIDENTIAL 4.2.4 Right side cover 4.2.5 Faceup tray (1) Open the top cover. (1) Draw out the duplex unit (2) Open the feeder unit. (2) Open the faceup tray in the direction of arrow, and unlock the left and right pins while bending. -
Page 67: Rear Cover
4. Component replacement Oki Data CONFIDENTIAL 4.2.6 Rear cover 4.2.7 LED Assy/ LED Assy spring (1) Open the faceup tray. (1) Open the top cover (2) Remove the two screws (silver). (2) After removing the cable, as shown in fig 2, push the LED assy tightly in the direction of arrow. -
Page 68: Control Pcb
4. Component replacement Oki Data CONFIDENTIAL 4.2.8 Control PCB (1) Open the top cover. (2) Remove the right side cover. (See section 4.2.4) (3) Remove the Rear cover. (See section 4.2.6) (4) Remove the eight screws (silver), remove the connector and disengage the claw A to take the plate-shield-Assy (PCL) out. -
Page 69: Print Engine Controller Pcb
4. Component replacement Oki Data CONFIDENTIAL 4.2.9 Print engine controller PCB (1) Remove the plate shield Assy (PCL). (See section 4.2.8(1)-(3)) (2) Remove all connectors and two screws (silver) to take the print engine controller PCB out. DCID Print engine... -
Page 70: Top Cover Assy
4. Component replacement Oki Data CONFIDENTIAL 4.2.10 Top cover Assy ID-FAN cable RFID cable Stack full sensor cable Control Panel Controller PCB C-LED-HEAD ID Motor Cable M-LED-HEAD (1) Remove the left side cover. (See section 4.2.3) Y-LED-HEAD K-LED-HEAD (2) Remove the right side cover. (See section 4.2.4) (3) Remove the rear cover. -
Page 71: Top Cover
4. Component replacement Oki Data CONFIDENTIAL 4.2.11 Top cover 4.2.12 Control panel Assy (1) Remove the top cover Assy. (See section 4.2.10) (1) Open the top cover. (2) Remove ten screws (Black), and remove the top cover (2) Insert the minus driver into the upper side of the slit (3 places) to disengage the... -
Page 72: Board Prg/ Lcd
4. Component replacement Oki Data CONFIDENTIAL 4.2.13 Board PRG/ LCD (1) Remove the control panel Assy. (See section 4.2.12) (2) Remove the screws (2 places), remove the connector and cable of LCD and remove the Board PRG (3) Remove the screws... -
Page 73: Frame Panel Assy
4. Component replacement Oki Data CONFIDENTIAL 4.2.14 Frame panel Assy (8) Remove the lever lock , compression spring , torsion spring , button switch , cable Assy from the frame panel (1) Open the top cover. (2) Open the feeder unit. -
Page 74: Low Voltage Power Supply/Low Voltage Fan/ Hopping Motor/Fuse Motor
4. Component replacement Oki Data CONFIDENTIAL 4.2.15 Low voltage power supply/Low voltage FAN/ Hopping motor/ Fuse motor Warning Risk of Electric Shock There is a risk of electric shock during replacement of the low voltage power supply. Use insulating gloves or avoid direct contact with any conducting part of the power supply, and caution should be exercised during replacement. -
Page 75: Guide Eject Assy/ Color Resist Assy/ Board-Pry
4. Component replacement Oki Data CONFIDENTIAL 4.2.16 Guide eject Assy/ Color resist Assy/ Board-PRY (1) Remove the left side cover, right side cover, rear cover, top cover Assy. (See section 4.2.3, 4.2.4, 4.2.6, 4.2.10 ) (2) Remove the print engine controller PCB, control PCB and low-voltage power supply. -
Page 76: Fan(Fuser) / Belt Motor/ High-Voltage Board/Cover Open Switch
4. Component replacement Oki Data CONFIDENTIAL 4.2.17 FAN(Fuser) / Belt motor/ High-voltage board/ 4.2.18 MPT Assy Cover open switch (1) Open the MPT Assy (1) Remove the left side cover. (See section 4.2.3) (2) Remove the stoppers (2 places) while pushing the arms (2 places) on MPT... -
Page 77: Feeder Unit/ Board-Rsf/Mpt Hopping Roller/ Frame Assy Separator/Cover Front
4. Component replacement Oki Data CONFIDENTIAL 4.2.19 Feeder unit/ Board-RSF/MPT hopping roller/ Frame Assy separator/ Cover front (1) Open the top cover. (2) Remove the plate shield and remove the connector. (See section 4.2.8) (3) Disengage the claws of stay L... -
Page 78: Board-Prz Liftup Motor/ Hopping Motor/ Solenoid/Paper End Sensor
4. Component replacement Oki Data CONFIDENTIAL 4.2.20 Board-PRZ liftup motor/ Hopping motor/ Solenoid/ Paper end sensor ViewA (1) Remove the left side cover, right side cover, rear cover, top cover unit, feeder unit. (See section 4.2.3, 4.2.4, 4.2.6, 4.2.10, 4.2.19) (2) Remove the print engine controller PCB, control PCB. -
Page 79: Feed Roller
4. Component replacement Oki Data CONFIDENTIAL 4.2.21 Feed roller (1) Remove the cassette. (2) Remove the latch and remove the feed roller (2 pieces) . Side plate Assy Latch 78 / 43856301TH Rev.3... -
Page 80: Shaft Eject Assy (Fu)/ Shaft Eject Assy
4. Component replacement Oki Data CONFIDENTIAL 4.2.22 Shaft eject Assy (FU)/ Shaft eject Assy(FD/ Eject sensor (1) Remove the eject Assy. (See section 4.2.16) (2) Disengage the claws (2 places), and disassemble the Assy into guide eject lower and guide eject upper... -
Page 81: Oiling Spots
4. Component replacement Oki Data CONFIDENTIAL 4.3 Oiling spots This chapter shows the oiling spots. Do not oil the other spots that are not shown here. It is not necessary to inject the machine-oil during disassembling. However, please add the specified oil when you wipe the oil off. - Page 82 4. Component replacement Oki Data CONFIDENTIAL Plate-Assy.-Base EM-30L Class C Plate-Gear-HP-Caulking End surfaces EM-30L Class A Posts Stopper-HP Gear-Planet(Z12)-HP Holder-Planet-HP EM-30L Class A Sliding surfaces Gear-Z24-30-HP EM-30L Class C Gear bottom surfaces Shaft-Hopping EM-30L Class A Both-ended surfaces EM-30L Class A...
- Page 83 4. Component replacement Oki Data CONFIDENTIAL Gear-Assy.-HP -1 Plate-Assy. -Side R Holder-Gear-A EM-30L Class C Spread MOLYKOTE (EM-30L) evenly all around on the patching parts. EM-30L Class C Spread MOLYKOTE (EM-30L) evenly all around on the patching parts. Bracket-Inner (Caulking) Gear-Planet-Assy.
- Page 84 4. Component replacement Oki Data CONFIDENTIAL -2 Plate-Assy.-Side R -3 Plate-Assy.-Side R Do not spread the grease on these posts. EM-30L Class C Do not spread the grease here. Spread MOLYKOTE (EM-30L) Do not spread the grease on these gears.
- Page 85 4. Component replacement Oki Data CONFIDENTIAL -4 Plate-Assy.-Side R -5 Plate-Assy.-Side R EM-30L Class A EM-30L Class C Spread a small amount of MOLYKOTE (EM-30L) EM-30L Class C Spread MOLYKOTE (EM-30L) evenly on the bearing surface. on the patching parts.
- Page 86 4. Component replacement Oki Data CONFIDENTIAL Plate-Assy.-Side L Holder Assy.-Regist-L EM-30L Class C Spread MOLYKOTE (EM-30L) evenly on the gear tooth top surface. EM-30L Class A Spread a small amount of MOLYKOTE (EM-30L) on the Holder-Regist-L patching parts. Gear-LiftUp-Z56 Link-LiftUp-L...
-
Page 87: Fuser Assy
4. Component replacement Oki Data CONFIDENTIAL Fuser Assy Guide-Assy. -Eject-U EM-30L Class C Spread MOLYKOTE (EM-30L) evenly Cam-Release EM-30L Class C on the surface of the posts (rotor Spread MOLYKOTE (EM-30L) insert-in stands) and the flanges. evenly on the surface of the shaft. - Page 88 4. Component replacement Oki Data CONFIDENTIAL -1 Printer Unit-PX741 EM-30L Class C Plate-Assy.-Side-L Spread MOLYKOTE (EM-30L) evenly on the front end of terminals. Plate-Contact-TR Plate-Driver-PU(Caulking) Gear-Idle-Belt-Z20Z93 Grease spreading area EM-30L Class C Spread MOLYKOTE (EM-30L) evenly on the post. EM-30L Class C EM-30L Class C Spread MOLYKOTE (EM-30L) evenly on the end surface.
- Page 89 4. Component replacement Oki Data CONFIDENTIAL -2 Printer Unit-PX741 Belt-Assy. EM-30L Class C EM-30L Class A Spread MOLYKOTE (EM-30L) evenly on the patching parts. Spread a small amount of MOLYKOTE (EM-30L) on the inside of Bearing-TR (Belt) (total 8 places on both sides).
- Page 90 4. Component replacement Oki Data CONFIDENTIAL Sensor Assy. -Color Regist Roller-Assy. -Idle(FD) Plate-Sensor-C.Regist Gear Assy.-Shutter EM-30L Class A Spread a small amount of MOLYKOTE Exploded view (EM-30L) on the patching parts. (Total 8 places on both sides) Grease spreading method Do not touch the surface of Cover-Sensor-C.Regist...
- Page 91 4. Component replacement Oki Data CONFIDENTIAL Roller-Assy. -BIAS(FU)C Cassette-Assy-PX741 Plate-Receive Shaft-Liftup EM-30L Class B Apply a small amount of MOLYKOTE(EM-30L) to sliding portions of sheet metal and Grease spreading method shaft(the hatched area) Plate-Receive Do not touch this area with grease.
-
Page 92: Maintenance Menu
Oki Data CONFIDENTIAL Maintenance Menu Adjustment of this printer can be performed from the Maintenance Utilities by entering the corresponding menu from the keyboard of the operator panel. This printer contains the maintenance menu in addition to the normal operation menus. Select an appropriate menu in accordance with the objective of adjustment. -
Page 93: System Maintenance Menu (For Maintenance Engineer)
5. Maintenance Menu Oki Data CONFIDENTIAL 5.1 System maintenance menu (for maintenance engineer) While pressing the MENU+ and MENU- keys, turn on the power to enter the maintenance menu. Value Category Item (1st Line) Function (2nd Line) The menu indications are shown in English only regardless of the destination of the printer. -
Page 94: Maintenance Utilities
Factory mode as the default setting. Note! For the CU board of the C710, replace the entire EEPROM that is installed Switching from the Factory mode to the in CU using socket. - Page 95 5. Maintenance Menu Oki Data CONFIDENTIAL Operation on the Operation on the Maintenance Maintenance operator panel operator panel Utilities Utilities (Item number (Item number Item Adjustment contents Operation Item Adjustment contents Operation corresponds to that corresponds to that Manual item...
-
Page 96: Maintenance Menu Functions
5. Maintenance Menu Oki Data CONFIDENTIAL 5.3 Maintenance menu functions 5.3.1 Self-diagnostic mode (1) How to select the menu items LEVEL0 Menu items can be selected by long pressing of [BACK] or XXXX [ONLINE], or by short pressing of [MENU+] or [ONLINE]. - Page 97 5. Maintenance Menu Oki Data CONFIDENTIAL (1) How to select the menu items Menu items can be selected by pressing either [MENU+] or [MENU-] key, and executed by pressing [ENTER]. LEVEL1 XXXXX XXXXX Menu items can be entered by pressing of [ENTER] or [BACK], and can be selected by pressing of [MENU+] or [MENU-].
-
Page 98: Ordinary Self-Diagnostic Mode (Level 1)
5.3.1.2 Ordinary self-diagnostic mode (level 1) 5.3.1.2.1 How to enter the self-diagnostic mode (level 1) Note! For C710, password is required to enter the system maintenance menu Menu items of the ordinary self-diagnostic mode are shown below. mode. Refer to Table 5-1 (C710) -
Page 99: Switch Scan Test
5. Maintenance Menu Oki Data CONFIDENTIAL 5.3.1.3 Switch scan test This self-diagnostic menu is used to check the entry sensor and the switch. Enter the self-diagnostic mode (level 1) and press the MENU+, MENU- key TONER SNS Y until "SWITCH SCAN" is displayed in the upper row of the display area. - Page 100 5. Maintenance Menu Oki Data CONFIDENTIAL Table 5-3 SWITCH SCAN details <Item having no function> Asterisk mark (*) is displayed in the lower row of display area. * 1: “L” is displayed when the cover is opened. Display area, upper row...
-
Page 101: Motor Clutch Test
5. Maintenance Menu Oki Data CONFIDENTIAL 5.3.1.4 Motor clutch test This self-diagnostic menu is used to test the motor and clutch. 1. Enter the self-diagnostic mode (level 1) and press the MENU+, MENU- key until ID cooling fan "SWITCH SCAN" is displayed in the upper row of the display area. - Page 102 5. Maintenance Menu Oki Data CONFIDENTIAL Table 5-4 Unit name display Drive restriction condition Remarks ID MOTOR To be driven when all of the ID (K/Y/M/C) are − removed. BELT MOTOR To be driven when all of the ID (K/Y/M/C) are −...
-
Page 103: Test Print
5. Maintenance Menu Oki Data CONFIDENTIAL 5.3.1.5 Test print Display Setting value Function PRINT EXECUTE – Pressing the ENTER key starts print/Pressing the This self-diagnostic menu is used to print the test pattern that is built inside PU. Other test CANCEL key terminates print. - Page 104 5. Maintenance Menu Oki Data CONFIDENTIAL While the message "PRINT EXECUTE" that is set by the operation specified in step 2 is being displayed, press the ENTER key and the test print is executed with the setting value that has been set by steps 2 and 3.
- Page 105 5. Maintenance Menu Oki Data CONFIDENTIAL • During printing, the following messages are displayed. • Displays are switched by pressing the MENU+ key. P=*** ETMP=***UTMP=*** W=*** REG=****EXT=*** P : Number of test print copies (unit: copies) ETMP : Hopping motor constant speed correction parameter...
- Page 106 5. Maintenance Menu Oki Data CONFIDENTIAL • Displays are switched by pressing the MENU+ key. TR1:k**y**m**c** TR2:k**y**m**c** TRl : Transfer voltage parameter VTR1 table ID number [unit: HEX) TR2 : Transfer voltage parameter VTR2 table ID number [unit: HEX) • Displays are switched by pressing the MENU+ key.
-
Page 107: Color Registration Correction Test
5. Maintenance Menu Oki Data CONFIDENTIAL 5.3.1.6 Color registration correction test When the [CANCEL] key is pressed while test is in progress (while the [ON LINE] lamp is lighting), the screen returns to the state of step 2. This self-diagnostic menu item is used for the color registration error adjustment and to <<During execution of REG ADJ RESULT>>... -
Page 108: Density Correction Test
5. Maintenance Menu Oki Data CONFIDENTIAL Repeat steps 2 and 3 as required. 5.3.1.7 Density correction test Pressing the [BACK] terminates the test. (Returns to the status of step 1.) This self-diagnostic menu item is used to test the density correction function of a printer, Color registration correction test items and to refer to result of the test execution. - Page 109 5. Maintenance Menu Oki Data CONFIDENTIAL When the [CANCEL] key is pressed while test is in progress (while the [ON Pressing the [BACK] key terminates the test. (Returns to the status of step 1.) LINE] lamp is lighting), the screen returns to the state of step 2.
-
Page 110: Consumable Item Counter Display
5. Maintenance Menu Oki Data CONFIDENTIAL 5.3.1.8 Consumable item counter display Display area, Display area, Format Unit Details upper row lower row This self-diagnostic menu is used to display the consumption status of the consumable K-STC MODE ********TIMES Times Number of print dot counts of the items. -
Page 111: Number Of Print Copies Counter Display
5. Maintenance Menu Oki Data CONFIDENTIAL 5.3.1.9 Number of print copies counter display 5.3.1.10 Switching between the Factory mode and the Shipping mode This self-diagnostic menu is used to display status of the number of copies of a printer. This self-diagnostic menu item is used to switch between the Factory mode and the Shipping mode. -
Page 112: Self-Diagnostic Function Setting
5. Maintenance Menu Oki Data CONFIDENTIAL 5.3.1.11 Self-diagnostic function setting Operation at the Display Setting value Function setting value This self-diagnostic menu is used to set valid/invalid of the error detection by the various ID UNIT ENABLE Checks Valid/Invalid of ID installation check sensors. -
Page 113: Led Head Serial Number Display
5. Maintenance Menu Oki Data CONFIDENTIAL 5.3.1.12 LED head serial number display 5.3.2 Various prints with the printer as a standalone unit This self-diagnostic menu item is used to check whether the downloaded LED head data Menu map print matches the serial number of the actual LED head. -
Page 114: Functions Of Keys At Power On
5. Maintenance Menu Oki Data CONFIDENTIAL 5.3.3 Functions of keys at power on Functions of the respective keys when the printer power is turned on are displayed below. Each of the following keys becomes valid if the key is kept pressed until "RAM CHECK" is displayed in the upper row of LCD and the several asterisk (*) marks are displayed in the lower row. -
Page 115: Setups Upon Completion Of Part Replacement
5. Maintenance Menu Oki Data CONFIDENTIAL 5.4 Setups upon completion of part replacement The adjustments that are required upon completion of part replacement are described When access to the EEPROM of the board to remove is impossible: below. If the SERVICE CALL 104 (Engine EEPROM Error) is displayed on the operator... -
Page 116: Eeprom Setting Upon Completion Of Cu Board Replacement
5. Maintenance Menu Oki Data CONFIDENTIAL (2) Switching to the Shipping mode 5.4.2 EEPROM setting upon completion of CU board When the engine control board is replace with the new engine control board, replacement the new board has been set in the Factory working mode. Therefore, it should be switched to the Shipping mode. -
Page 117: Density Control Manual Setting
5. Maintenance Menu Oki Data CONFIDENTIAL 5.5 Density control manual setting When a printer is shipped from the factory, the automatic density correction mode has been set in "Automatic". If a printer is used after the density correction mode is set to "Manual", density may change during usage of a printer. -
Page 118: Printer Boot Menu List
5. Maintenance Menu Oki Data CONFIDENTIAL 5.6 Printer boot menu list While pressing the SET button, turn on the power to display the Boot Menu. Category Item Setting value Function Enable Setting Valid/Invalid of USB interface. Memo To display the Boot Menu, entry of password is required. Default value of password... -
Page 119: Periodic Maintenance
Oki Data CONFIDENTIAL Periodic Maintenance 6.1 Cleaning ..................119 6.2 How to clean the LED lens array ..........120 6.3 How to clean the pickup roller .............122 6.4 How to clean inside of printer ............123... -
Page 120: Cleaning
6. Periodic Maintenance Oki Data CONFIDENTIAL 6.1 Cleaning Clean inside and outside of the printer with clean dry cleaning cloth and small vacuum cleaner (hand cleaner) as required. Note! Be careful not to touch the image drum terminals, the LED lens array and the LED head connectors. -
Page 121: How To Clean The Led Lens Array
6. Periodic Maintenance Oki Data CONFIDENTIAL 6.2 How to clean the LED lens array Perform cleaning of the LED head. If the white banding, white stripe (white drop-out, light printing) in the vertical direction occurs on the print surface, clean the LED lens array. - Page 122 6. Periodic Maintenance Oki Data CONFIDENTIAL (3) Wipe the lens surface (at the four positions) of the LED head with soft tissue paper gently and lightly. Note! Do not use the solvents such as methyl alcohol or thinner for cleaning the LED head lens because they can damage the LED head.
-
Page 123: How To Clean The Pickup Roller
6. Periodic Maintenance Oki Data CONFIDENTIAL 6.3 How to clean the pickup roller If the vertical banding in the vertical direction occurs on the print surface, clean the pickup (3) Clean the separation roller of the paper tray with a clean cloth wrung out roller. -
Page 124: How To Clean Inside Of Printer
6. Periodic Maintenance Oki Data CONFIDENTIAL 6.4 How to clean inside of printer Clean inside of the printer. (3) Remove the image drum cartridge. 1. Remove the four image drum cartridges and place them on a flat workbench. Toner can adhere to the metal shaft located in between the fuser and the cyan image 2. - Page 125 6. Periodic Maintenance Oki Data CONFIDENTIAL (4) Remove the fuser unit. (5) Clean the metal shaft with soft clean cloth or soft tissue paper. Personal injuries may occur. The fuser unit gets very hot. Be very careful not to touch the fuser unit with your hands.
-
Page 126: Troubleshooting And Repair Procedure
Oki Data CONFIDENTIAL Troubleshooting and repair procedure 7.1 Before starting the repair work ............126 7.2 Confirmation items before taking corrective action against abnormalities ..............126 7.3 Precautions when taking corrective action against abnormality ..126 7.4 Preparation for troubleshooting ...........126 7.5 Troubleshooting method ..............127 7.6 Fuse check ..................199... -
Page 127: Before Starting The Repair Work
7. Troubleshooting and repair procedure Oki Data CONFIDENTIAL 7.1 Before starting the repair work (1) Confirm the basic check/inspection points described in User’s Manual. (2) Get the information/status from client at the time when the trouble has occurred as much in details as possible (3) Create the status close to the user’s status when the trouble has occurred, and... -
Page 128: Troubleshooting Method
7. Troubleshooting and repair procedure Oki Data CONFIDENTIAL 7.5 Troubleshooting method 7.5.1 LCD message list When a trouble occurs in this printer, perform troubleshooting by following the steps described below. Initializing Trouble occurs Panel display Inspection LINE Details (The mark indicates no... - Page 129 7. Troubleshooting and repair procedure Oki Data CONFIDENTIAL Panel display Panel display Inspection Inspection LINE Details LINE Details (The mark indicates no (The mark indicates no lamp lamp lamp lamp message in the upper row.) message in the upper row.)
- Page 130 7. Troubleshooting and repair procedure Oki Data CONFIDENTIAL Normal Panel display Inspection Remedial LINE Details (The mark indicates no lamp measure Panel display lamp Inspection Remedial message in the upper row.) LINE Details (The mark indicates no lamp measure lamp message in the upper row.)
- Page 131 7. Troubleshooting and repair procedure Oki Data CONFIDENTIAL Panel display Panel display Inspection Remedial Inspection Remedial LINE Details LINE Details (The mark indicates no (The mark indicates no lamp measure lamp measure lamp lamp message in the upper row.) message in the upper row.)
- Page 132 7. Troubleshooting and repair procedure Oki Data CONFIDENTIAL Warning Panel display Inspection Remedial LINE Details Panel display (The mark indicates no lamp measure Inspection Remedial lamp message in the upper row.) LINE Details (The mark indicates no lamp measure lamp message in the upper row.)
- Page 133 7. Troubleshooting and repair procedure Oki Data CONFIDENTIAL Panel display Panel display Inspection Remedial Inspection Remedial LINE Details LINE Details (The mark indicates no (The mark indicates no lamp measure lamp measure lamp lamp message in the upper row.) message in the upper row.)
- Page 134 7. Troubleshooting and repair procedure Oki Data CONFIDENTIAL Panel display Panel display Inspection Remedial Inspection Remedial LINE Details LINE Details (The mark indicates no (The mark indicates no lamp measure lamp measure lamp lamp message in the upper row.) message in the upper row.)
- Page 135 7. Troubleshooting and repair procedure Oki Data CONFIDENTIAL Panel display Panel display Inspection Remedial Inspection Remedial LINE Details LINE Details (The mark indicates no (The mark indicates no lamp measure lamp measure lamp lamp message in the upper row.) message in the upper row.)
- Page 136 7. Troubleshooting and repair procedure Oki Data CONFIDENTIAL Panel display Panel display Inspection Remedial Inspection Remedial LINE Details LINE Details (The mark indicates no (The mark indicates no lamp measure lamp measure lamp lamp message in the upper row.) message in the upper row.)
- Page 137 7. Troubleshooting and repair procedure Oki Data CONFIDENTIAL If a printer detects an un-recoverable error, the following service call error is displayed on Panel display Inspection Remedial the LCD. LINE Details (The mark indicates no lamp measure lamp message in the upper row.) Service call Feed paper.
- Page 138 7. Troubleshooting and repair procedure Oki Data CONFIDENTIAL Inspection Inspection Display on operator panel LINE Contents Code nnn Display on operator panel LINE Contents Code nnn lamp lamp lamp lamp Change paper of the Blink Indicates unmatch between the Error...
- Page 139 7. Troubleshooting and repair procedure Oki Data CONFIDENTIAL Inspection Inspection Display on operator panel LINE Contents Code nnn Display on operator panel LINE Contents Code nnn lamp lamp lamp lamp Wait for a while. Network Varies Varies Indicates the network initialization is Error Add memory.
- Page 140 MP %ERRCODE%: Paper jam after replacement of the toner %COLOR% toner is not tray. cartridge with a toner cartridge for the OKI Data genuine Error 390: MP Tray the printer. toner. Error 550: Y Open the front cover.
- Page 141 7. Troubleshooting and repair procedure Oki Data CONFIDENTIAL Inspection Inspection Display on operator panel LINE Contents Code nnn Display on operator panel LINE Contents Code nnn lamp lamp lamp lamp Open the rear cover. Blink Indicates that jam has occurred in Error Re-set the fuser.
- Page 142 7. Troubleshooting and repair procedure Oki Data CONFIDENTIAL Inspection Inspection Display on operator panel LINE Contents Code nnn Display on operator panel LINE Contents Code nnn lamp lamp lamp lamp Close the cover. Blink Indicates that the cover is open.
- Page 143 7. Troubleshooting and repair procedure Oki Data CONFIDENTIAL Table 7-1-2 Service Call Error List Inspection Display on operator panel LINE Contents Code nnn lamp Display Cause Error details Remedial measure lamp Restart the printer. If the RAM DIMM SERVICE CALL...
- Page 144 7. Troubleshooting and repair procedure Oki Data CONFIDENTIAL Display Cause Error details Remedial measure Display Cause Error details Remedial measure Restart the printer. Engine I/F Is the CU assembly installed Re-install the CU Service call Parameter Either EEPROM or Flash ROM Turn the printer Error.
- Page 145 7. Troubleshooting and repair procedure Oki Data CONFIDENTIAL Display Cause Error details Remedial measure Display Cause Error details Remedial measure Service call Environment Turn off the power Service call ID Up/Down Is the ID unit caught by Re-install the ID...
- Page 146 7. Troubleshooting and repair procedure Oki Data CONFIDENTIAL Display Cause Error details Remedial measure Display Cause Error details Remedial measure Service call Toner sensor Is the toner cartridge installed? Install the toner Service call The backup Turn on the power...
- Page 147 7. Troubleshooting and repair procedure Oki Data CONFIDENTIAL Display Cause Error details Remedial measure Display Cause Error details Remedial measure Re-start the printer. CU program Illegal processing is executed After turning off Re-start the printer. Duplex Fan error inside the duplex unit.
- Page 148 7. Troubleshooting and repair procedure Oki Data CONFIDENTIAL Display Cause Error details Remedial measure xxxxxxxxxxxxxxxx CRC check The CRC check error is After turning CRC CHECK NG ( ) error of detected upon completion of on the power the PU...
- Page 149 7. Troubleshooting and repair procedure Oki Data CONFIDENTIAL 7.5.2 Preparation for troubleshooting (8-4) Two-sided printing jam occurs during transporting paper inside the Duplex unit................170 LCD display error ....................149 (8-5) Paper is not supplied from the Duplex unit to the regist roller....170 (1-1) LCD does not display anything.
-
Page 150: Lcd Display Error
7. Troubleshooting and repair procedure Oki Data CONFIDENTIAL 7.5.2. (1) LCD display error Action to be taken Check item Check work Memo For the numbers from 1 through 26 after name of the respective connectors, at NG refer to section 7.5.2 (19) "Wiring diagram". -
Page 151: Please Wait
7. Troubleshooting and repair procedure Oki Data CONFIDENTIAL (1-3) Error messages related to Operator Panel are displayed. Action to be taken Check item Check work at NG Action to be taken Check item Check work at NG (1-1-5) LSI operation check... -
Page 152: Abnormal Operations Of Printer After The Power Is Turned On
7. Troubleshooting and repair procedure Oki Data CONFIDENTIAL 7.5.2. (2) Abnormal operations of printer after the power is turned on (2-2) Abnormal sound is heard. (2-1) Any operation does not start at all. Action to be taken Check item Check work... -
Page 153: Bad Odors Are Generated
7. Troubleshooting and repair procedure Oki Data CONFIDENTIAL (2-3) Bad odors are generated. Action to be taken Check item Check work at NG Action to be taken Check item Check work at NG (2-2-3) Check the jumping phenomena of gear tooth. (Abnormal load of the consumable item) - Page 154 7. Troubleshooting and repair procedure Oki Data CONFIDENTIAL (3) Paper Jams JAM location of occurrence outline chart When paper jams occur or paper remains in the printer, "Paper Jam", or "Paper Remain" is displayed on the operation panel. By pressing the Help button, a method to remove the paper is displayed, remove the...
- Page 155 7. Troubleshooting and repair procedure Oki Data CONFIDENTIAL (3) Return the tray to the printer. Pull the tray. Pull the tray. Paper Jam Paper Remains. [Tray Name] [Tray Name] When the above messages are displayed. Tray1 is applied here as an example.
- Page 156 7. Troubleshooting and repair procedure Oki Data CONFIDENTIAL (4) Close the front cover. Open the Cover. Open the Cover. Paper Jam Paper Remains. Front Cover Front Cover When the above messages are displayed. (1) Open the multipurpose tray. Front cover (5) Close the multipurpose tray.
- Page 157 7. Troubleshooting and repair procedure Oki Data CONFIDENTIAL (3) 2Uninstall the four image drum cartridges and put them on a flat table. Open the Cover. Open the Cover. Paper Jam Paper Remains. Top Cover Top Cover When the above messages are displayed.
- Page 158 7. Troubleshooting and repair procedure Oki Data CONFIDENTIAL (b) If you do not see the top edge of paper Set the fuser unit in the printer body and fold backward the lock lever (2 levers). Pull up the jammed paper slowly while pushing the jam release lever of the fuser Lock lever of the fuser unit (Blue) unit.
- Page 159 7. Troubleshooting and repair procedure Oki Data CONFIDENTIAL (3) Close the duplex print unit cover. Check the duplex unit. Check the duplex unit. Paper Jam Paper Remains. When the above messages are displayed. (1) Hold and press down the jam release lever of the duplex print unit to open the duplex print unit cover.
-
Page 160: Paper Feed Jam (Error Code 391: 1St Tray)
7. Troubleshooting and repair procedure Oki Data CONFIDENTIAL 7.5.2. (3) Paper feed jam (error code 391: 1st tray) (3-2) Jam occurs immediately after the paper feed is started. (1st tray) (3-1) Jam occurs immediately after the power is turned on. (1st tray) - Page 161 7. Troubleshooting and repair procedure Oki Data CONFIDENTIAL Action to be taken Action to be taken Check item Check work Check item Check work at NG at NG (3-2-4) Check the system connection (3-2-6) Check the system connection Paper feed motor Check the connection condition of the cable.
-
Page 162: Feed Jam (Error Code 380)
7. Troubleshooting and repair procedure Oki Data CONFIDENTIAL 7.5.2. (4) Feed jam (error code 380) (4-2) Jam occurs immediately after the paper feed is started. (4-1) Jam occurs immediately after the power is turned on. Action to be taken Check item... -
Page 163: Paper Feed Jam (Error Code 390: Multipurpose Tray)
7. Troubleshooting and repair procedure Oki Data CONFIDENTIAL 7.5.2. (5) Paper feed jam (error code 390: Multipurpose tray) Action to be taken Check item Check work at NG (5-1) Jam occurs immediately after the power is turned on. (Multipurpose tray) -
Page 164: Jam Occurs Immediately After Paper Feed Is Started
7. Troubleshooting and repair procedure Oki Data CONFIDENTIAL (5-2) Jam occurs immediately after paper feed is started. (Multipurpose tray) Action to be taken Check item Check work at NG Action to be taken Check item Check work at NG (5-2-3) Motor operation check... -
Page 165: Paper Running Jam (Error Code 381:)
7. Troubleshooting and repair procedure Oki Data CONFIDENTIAL 7.5.2. (6) Paper running jam (error code 381:) (6-2) Jam occurs immediately after a paper is taken into printer. (6-1) Jam occurs immediately after the power is turned on. Action to be taken... -
Page 166: Jam Occurs In The Middle Of Paper Running Path
7. Troubleshooting and repair procedure Oki Data CONFIDENTIAL (6-3) Jam occurs in the middle of paper running path. Action to be taken Check item Check work at NG Action to be taken Check item Check work at NG (6-2-4) Check the system connection... -
Page 167: Jam Occurs Immediately After Paper Has Reached The Fuser
7. Troubleshooting and repair procedure Oki Data CONFIDENTIAL (6-4) Jam occurs immediately after paper has reached the fuser. 7.5.2. (7) Paper unloading jam (error code 382) (7-1) Paper unloading jam occurs immediately after the power is turned on. Action to be taken... -
Page 168: Paper Unloading Jam Occurs After A Paper Is Taken Into Printer
7. Troubleshooting and repair procedure Oki Data CONFIDENTIAL Action to be taken Action to be taken Check item Check work Check item Check work at NG at NG (7-1-4) Check the system connection (7-2-2) Check condition of the mechanical parts... -
Page 169: Paper Unloading Jam Occurs In The Middle Of Paper Running Path
7. Troubleshooting and repair procedure Oki Data CONFIDENTIAL (7-3) Paper unloading jam occurs in the middle of paper running path. 7.5.2. (8) Two-sided printing jam (error code: 370, 371, 372, 373, 383) (8-1) Two-sided printing jam occurs immediately after the power is turned on. -
Page 170: Two-Sided Printing Jam Occurs During Taking In The Paper Into Duplex Unit
7. Troubleshooting and repair procedure Oki Data CONFIDENTIAL (8-2) Two-sided printing jam occurs during taking in the paper into Duplex unit. Action to be taken Check item Check work at NG Action to be taken Check item Check work at NG... -
Page 171: Two-Sided Printing Jam Occurs During Transporting Paper Inside The Duplex Unit
7. Troubleshooting and repair procedure Oki Data CONFIDENTIAL (8-4) Two-sided printing jam occurs during transporting paper inside the Duplex unit. 7.5.2. (9) Paper size error (error code 400) (9-1) Jam occurs when paper end is located near the IN1 sensor. -
Page 172: Id Unit Up/Down Error (Service Call 140 To 143)
7. Troubleshooting and repair procedure Oki Data CONFIDENTIAL 7.5.2. (10) ID unit Up/Down error (Service call 140 to 143) Action to be taken Check item Check work (10-1) Error occurs during the Up movement of the ID unit at NG... -
Page 173: Fuser Unit Error (Error 170 To 177)
7. Troubleshooting and repair procedure Oki Data CONFIDENTIAL 7.5.2. (11) Fuser unit error (error 170 to 177) Action to be taken Check item Check work (11-1) Error occurs immediately after the power is turned on. at NG (11-2-2) Temperature increase of fuser unit... -
Page 174: Motor Fan Error (Error Code 122, 127, 128, 918, 051)
7. Troubleshooting and repair procedure Oki Data CONFIDENTIAL 7.5.2. (12) Motor fan error (error code 122, 127, 128, 918, 051) (12-3) All fans of the printer do not rotate. (12-1) The low voltage power supply fan does not rotate immediately after the power is turned on. -
Page 175: Print Speed Is Slow. (Performance Is Low.)
7. Troubleshooting and repair procedure Oki Data CONFIDENTIAL 7.5.2. (13) Print speed is slow. (Performance is low.) 7.5.2. (14) Option unit cannot be recognized. (13-1) Print speed decreases. (14-1) Duplex unit cannot be recognized. Action to be taken Action to be taken... -
Page 176: Led Head Cannot Be Recognized. (Error Code 131, 132, 133, 134)
7. Troubleshooting and repair procedure Oki Data CONFIDENTIAL 7.5.2. (15) LED head cannot be recognized. (error code 131, 132, 133, 134) Action to be taken Check item Check work at NG (15-1) Service call 131 to 134 (LED HEAD Missing) -
Page 177: Toner Cartridge Cannot Be Recognized. (Error Code 540, 541, 542, 543)
7. Troubleshooting and repair procedure Oki Data CONFIDENTIAL 7.5.2. (16) Toner cartridge cannot be recognized. (error code 540, 541, 542, 543) Note! Toner sensor operation check method using the SWITCH SCAN function of the self-diagnostic mode. (16-1) Error caused by the consumable items. -
Page 178: Error Caused By The Defective Mechanism
7. Troubleshooting and repair procedure Oki Data CONFIDENTIAL (16-3) Error caused by the defective mechanism 7.5.2. (17) Fuse cut error (error codes 150 to 155) (17-1) Fuse cut error Action to be taken Check item Check work at NG Action to be taken... -
Page 179: Humidity Sensor Error (Error Code 123)
7. Troubleshooting and repair procedure Oki Data CONFIDENTIAL 7.5.2. (18) Humidity sensor error (error code 123) Action to be taken Check item Check work (18-1) Humidity sensor error at NG (18-1-2) Environment condition Action to be taken Check item Check work... -
Page 180: Wiring Diagram
7. Troubleshooting and repair procedure Oki Data CONFIDENTIAL 7.5.2 (19) Wiring diagram Internal temperature Cover open thermistor Fuser switch FAN1 Cover open Front Duplex Bottom sensor sensor sensor sensor Printer main unit RFID Antenna Board-POL DUPLEX clutch SNS03 SNS12 SNS4... -
Page 181: Troubleshooting The Abnormal Images
7. Troubleshooting and repair procedure Oki Data CONFIDENTIAL 7.5.3 Troubleshooting the abnormal images Color has faded-out and blurred entirely. (Refer to Figure 7-2A.) ......181 (1-1) Color are faded-out and blurred...............181 Stain on white print (Refer to Figure 7-2B.) ............182 (2-1) Stain on white print (Partial stain) .............182... -
Page 182: Color Has Faded-Out And Blurred Entirely. (Refer To Figure 7-2A.)
7. Troubleshooting and repair procedure Oki Data CONFIDENTIAL 7.5.3.(1) Color has faded-out and blurred entirely. (Refer to Figure 7-2A.) Action to be taken Check item Check work (1-1) Color are faded-out and blurred. at NG (1-1-5) ID unit installation condition... -
Page 183: Stain On White Print (Refer To Figure 7-2B.)
7. Troubleshooting and repair procedure Oki Data CONFIDENTIAL 7.5.3.(2) Stain on white print (Refer to Figure 7-2B.) (2-2) Stain on white print (overall stain) (2-1) Stain on white print (Partial stain) Action to be taken Check item Check work at NG... -
Page 184: White Print (Refer To Figure 7-2C.)
7. Troubleshooting and repair procedure Oki Data CONFIDENTIAL 7.5.3.(3) White print (Refer to Figure 7-2C.) Action to be taken Check item Check work (3-1) White print over entire page at NG (3-1-3) High voltage terminal Action to be taken Check item... -
Page 185: Black Banding/Black Streaking In Vertical Direction
7. Troubleshooting and repair procedure Oki Data CONFIDENTIAL 7.5.3.(4) Black banding/black streaking in vertical direction 7.5.3.(5) Cyclic abnormality (Refer to Figure 7-2E.) (4-1) Thin vertical line (with color) (Refer to Figure 7-2D.) (5-1) Cyclic abnormality occurs in vertical direction Action to be taken... -
Page 186: Heavy Color Registration Error
7. Troubleshooting and repair procedure Oki Data CONFIDENTIAL 7.5.3.(6) Heavy color registration error 7.5.3.(7) Entirely black print (6-1) Display of the message "Color adjustment is in progress" appears only short time. (7-1) All black print over entire page Action to be taken... - Page 187 7. Troubleshooting and repair procedure Oki Data CONFIDENTIAL Charge roller Ground Developer roller Toner feed roller Figure 7-3 186 / 43856301TH Rev.3...
-
Page 188: Network Troubleshooting
PC to a printer. gateway address normally. (5) Check the Utilities. Check setting of the Check the setting items of the OKI LPR Utilities. Set the OKI LPR OKI LPR Utilities. Utilities setting items correctly. (6) Check the following from an OS standard port... - Page 189 7. Troubleshooting and repair procedure Oki Data CONFIDENTIAL 7.5.4.1.1 Is the certificate created? 7.5.4.1.2 Is the SSL/TLS setting set to [ON]? Log-on in as the administrator, and select "Security" "Encryption (SSL/TLS)". Log-on in as the administrator, and select "Security" "Encryption (SSL/TLS)".
- Page 190 7. Troubleshooting and repair procedure Oki Data CONFIDENTIAL 7.5.4.1.3 Check version number of the Web browser For Netscape Launch the web browser and select "HELP" "Netscape". Check version number of the Web browser in use. Recommended version is Netscape 6 and higher.
- Page 191 "Standard". Either, upgrade the browser until it supports 128 bits (high encryption) or set the printer encryption strength to "Weak". Press the "Oki Device Setup" button, or alternately select "Setup" "Oki Device Setup", and open the setup screen. Input the administrator password and open the setup screen as an administrator.
- Page 192 7. Troubleshooting and repair procedure Oki Data CONFIDENTIAL Check the "Encryption Strength". A message prompting your confirmation will be displayed. Click "Yes". (NIC reboots in order to reflect the setup value.) If the printer is displayed in the printer list, the setup is complete with success.
- Page 193 7. Troubleshooting and repair procedure Oki Data CONFIDENTIAL Solution: Set the encryption strength to "Weak". How to change encryption strength with Telnet Note! Telnet cannot be used if it remains in the default setting. To change the encryption strength, Telnet must be set to Enable.
-
Page 194: Print Operation Is Not Possible
7. Troubleshooting and repair procedure Oki Data CONFIDENTIAL 7.5.4.2 Print operation is not possible 7.5.4.2.1 Check OS (Operating System) If print operation is not possible by using the encrypted IPP printer, check the followings. The IPP print (encryption) function is supported by Windows 2000, Windows XP, Windows 2003 Server and Windows Vista only. -
Page 195: Cannot Create Certificate
7. Troubleshooting and repair procedure Oki Data CONFIDENTIAL 7.5.4.3 Cannot create Certificate 7.5.4.4 Installation of Certificate is not possible When Certificate cannot be created, the following causes are probable. Take an When installation of Certificate fails, the following causes are probable. - Page 196 7. Troubleshooting and repair procedure Oki Data CONFIDENTIAL 7.5.4.4.2 "Network card is initialized" Press the "General" tab of the displayed Certificate information, and press "Install Certificate" button. If network card is initialized (to default setup) while creation of Certificate of certifying authority is in progress (during the period starting from creation of CSR up until installation of Certificate), the setup information of the Certificate is deleted.
-
Page 197: Other Questionnaires
7. Troubleshooting and repair procedure Oki Data CONFIDENTIAL 7.5.4.5 Other questionnaires 7.5.4.5.6 The error message "The security certificate was issued by a company you have not chosen to trust. View the certificate to Other probable questionnaires are described below. determine whether you want to trust the certifying authority" is displayed. - Page 198 7. Troubleshooting and repair procedure Oki Data CONFIDENTIAL Press the "General" tab of the displayed Certificate information, and press The "Certificate Import Wizard" is displayed. Install Certificate in accordance "Install Certificate" button. with the displayed procedure. Select "Automatically select the certificate store based on the types of certificate".
-
Page 199: Restrictions When Using Internet Explore 7
7. Troubleshooting and repair procedure Oki Data CONFIDENTIAL 7.5.4.6 Restrictions when using Internet Explore 7 Solution : When "Continue browsing this site (not recommended)" is clicked on the warning screen, the web page will be displayed. Several restrictions are imposed when using Internet Explore 7. This is because security However, it has no effect on the web page function. -
Page 200: Fuse Check
7. Troubleshooting and repair procedure Oki Data CONFIDENTIAL 7.6 Fuse check If the following error is issued, check the corresponding fuse of the CU control board, PU control board and high voltage power supply board. (Refer to Table 7-6.) Table 7-6 Fuse error... -
Page 201: Paper Cassette Switches Versus Paper Size Correspondence Table
7. Troubleshooting and repair procedure Oki Data CONFIDENTIAL 7.7 Paper cassette switches versus Paper size correspondence table Dial display size Bit No. TRAY1~3 Cassette: none Legal 14" Legal 13.5" Legal 13" Letter Executive Blank Blank Not used Not used Not used... -
Page 202: Data Protection Kit-A1
7. Troubleshooting and repair procedure Oki Data CONFIDENTIAL 7.8 Data protection kit-A1 7.8.1 Data protection kit-A1 (DPK-Al) overview HDD in which board is installed <Top panel> Purpose: By encrypting data to be stored in HDD, data is protected from eavesdropping even when HDD is stolen. - Page 203 7. Troubleshooting and repair procedure Oki Data CONFIDENTIAL Specification for safety: Error processing flow when the error 001-073, -254 has occurred (CU board related error) • If the data protection kit-A1 is removed from printer or swapped by others, it is Does the printer work normally when the CU (Analysis is not possible.)
- Page 204 7. Troubleshooting and repair procedure Oki Data CONFIDENTIAL Error processing flow when error 252, 253, 256 has occurred (HDD related error - ) Error processing flow when error 251, 253 has occurred (HDD related error - ) Error display Error contents...
- Page 205 7. Troubleshooting and repair procedure Oki Data CONFIDENTIAL Error processing flow when error 250, 257 has occurred (HDD related error - ) If the printer does not start up normally while showing communication error and LCD does not show any display.
-
Page 206: Connection Diagrams
Oki Data CONFIDENTIAL Connection diagrams 8.1 Resistance value check ...............206 8.2 Parts location ................210 8.3 F/W version number ..............221... -
Page 207: Resistance Value Check
8. Connection diagrams Oki Data CONFIDENTIAL 8.1 Resistance value check Unit Electrical circuit diagram, connection Part outside view Resistance value Transport belt Between pin-1 and pin-2: 3.4Ω motor Between pin-3 and pin-4: 3.4Ω ID motor Across both ends of F1: 1Ω or less 206 / 43856301TH Rev.3... - Page 208 8. Connection diagrams Oki Data CONFIDENTIAL Unit Electrical circuit diagram, connection Part outside view Resistance value Between pin-1 and pin-2: 6.1Ω ID up/down motor Between pin-3 and pin-4: 6.1Ω Fuser unit motor Across both ends of IP1: 1Ω or less 207 / 43856301TH Rev.3...
- Page 209 8. Connection diagrams Oki Data CONFIDENTIAL Unit Electrical circuit diagram, connection Part outside view Resistance value Between pin-1 and pin-2: 3.4Ω Feed motor Between pin-3 and pin-4: 3.4Ω Both-sided print Between pin-1 and pin-2: 2.4Ω motor Between pin-3 and pin-4: 2.4Ω...
- Page 210 8. Connection diagrams Oki Data CONFIDENTIAL Unit Electrical circuit diagram, connection Part outside view Resistance value Upper roller heater #1 Between pins -1 and -6: Several ohms to several ten ohms B - 6 Between pins -1 and -6: Several ohms to several ten ohms...
-
Page 211: Parts Location
8. Connection diagrams Oki Data CONFIDENTIAL 8.2 Parts location (1) Print Engine Controller PCB (PU PCB) Component side OPAMP1 RFID CUIF STKFL IDFAN C40 C41 210 / 43856301TH Rev.3... - Page 212 8. Connection diagrams Oki Data CONFIDENTIAL Soldering side C526 R551 C566 R550 R555 R567 C525 R554 R566 R602 R604 C524 R553 R565 C534 BF502 R552 R564 R627 C578 R549 R603 FET501 R548 R527 C523 R504 R626 C567 C503 R511 R503...
- Page 213 8. Connection diagrams Oki Data CONFIDENTIAL (2) Main Controller PCB Component side RM74 RM73 CLED1 CLED2 DLMODE RM81 IC_VREF C87 R119 CC10 CC13 RM82 RM32 RM48 CCP2 C154 C137 CC12 RM72 PAD25V RM47 OSC1 RM31 RM46 CC1ZA1 CC11 I2CS CP11...
- Page 214 8. Connection diagrams Oki Data CONFIDENTIAL Soldering side C798 C794 RM584 RM583 R745 C783 R743 RM580 R744 C780 RM579 RM577 RM576 C778 R727 R726 R725 RM575 RM574 R677 C779 RM571 RM570 R710 R706 RM567 R707 RM566 RM560 RM561 R703 R702...
- Page 215 8. Connection diagrams Oki Data CONFIDENTIAL (3) Host USB PCB(TBI PCB) (4) Rellay PCB Component side Component side PCIIF GND1 FUSER DENS GND2 R1 Soldering side Soldering side BFUSE BFUCUT R515 BF505 BF504 C520 C522 RM501 BF503 C511 C518 IC501...
- Page 216 8. Connection diagrams Oki Data CONFIDENTIAL (6) Both-sided Printing Control PCB Component side Soldering side MAIN1 D510 FET502 R542 R541 C535 R544 R543 R501 J520 R511 J503 R506 Q502 R557 R556 TR502 R555 R554 R553 R552 J514 C504 J505 R524...
- Page 217 8. Connection diagrams Oki Data CONFIDENTIAL (7) Second Tray Control PCB Soldering side Component side MAIN1 D510 FET502 R542 R541 C535 R544 R543 MAIN2 R501 J520 R511 J503 R506 Q502 R557 R556 C519 TR502 C518 R555 C517 R554 C516 R553...
- Page 218 8. Connection diagrams Oki Data CONFIDENTIAL (8) Control Panel PCB (9) Toner Low Sensor PCB SSNS C502 J560 J507 Q502 J559 J509 J510 J513 J557 J511 J515 J516 J517 R510 J522 J521 J520 J519 J526 J525 J524 J533 J530 J529...
- Page 219 8. Connection diagrams Oki Data CONFIDENTIAL (10) Entrance Sensor PCB (12) High-Voltage Power Supply PCB C710dn (11) Color Adjustment Sensor PCB TR-K TR-Y TR-M TR-C 218 / 43856301TH Rev.3...
- Page 220 8. Connection diagrams Oki Data CONFIDENTIAL (13) Low-Voltage Power Supply PCB (14) ID unit ID unit (for consumable parts) Contactor point Fuse Toner Low Sensor PCB (PRZ PCB) Contactor point ID unit 219 / 43856301TH Rev.3...
- Page 221 8. Connection diagrams Oki Data CONFIDENTIAL (15) Transfer belt unit Transfer belt unit (for consumable parts) Contactor point Fuse Relay PCB Contactor point Transfer belt unit Fuse 220 / 43856301TH Rev.3...
-
Page 222: F/W Version Number
8. Connection diagrams Oki Data CONFIDENTIAL 8.3 F/W version number 8.3.1 ROM control number Loader CU F/W nameplate 43965201FY01 NIC F/W 43965201FY02 43436808FY01 version Date Remarks number fill-out File File File Rev. Rev. version Rev. Page Rev. Rev. 2007.11.12 A0.14 b0.61... -
Page 223: Rom Version Check And Display
8. Connection diagrams Oki Data CONFIDENTIAL 8.3.2 ROM version check and display 8.3.3 PCB Maintenance Indication Stamp (1) Perform the menu map printing and confirm that the F/W version number has The specified article numbers are stamped in the PCB Maintenance Indication column on been upgraded.