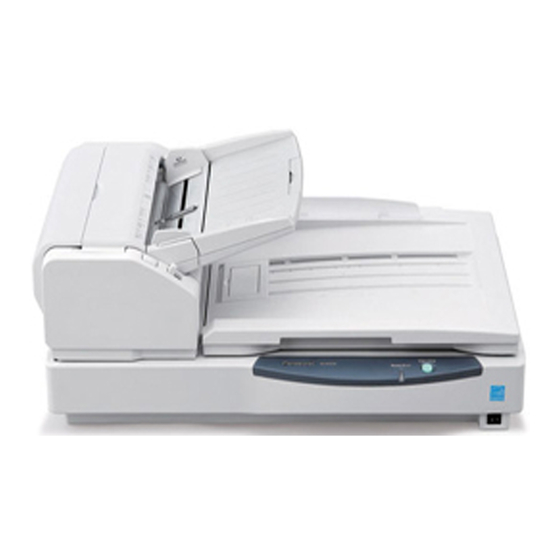
Panasonic KV-S7065C Reference Manual
High speed scanner pie
Hide thumbs
Also See for KV-S7065C:
- Operating instructions manual (46 pages) ,
- Reference manual (40 pages) ,
- Specifications (2 pages)

Related Manuals for Panasonic KV-S7065C


Summary of Contents for Panasonic KV-S7065C
- Page 1 High Speed Scanner PIE Reference Manual Panasonic Image Enhancement Technology (TWAIN/ISIS) Revision 1.9 Note: You must have Adobe® Acrobat® Reader 4.0 or a later version to display these instructions properly.
- Page 2 This software and this manual may be used only under the terms and conditions of this product’s license agreement. Panasonic will in no way be liable for any effects resulting from the use of this software and manual.
-
Page 3: Table Of Contents
Contents Introduction ........5 Image enhancements function . - Page 4 Black background ........152 How to use the Panasonic Multicolor Drop Out Utility ..153...
-
Page 5: Introduction
1. Introduction The Panasonic High Speed Scanner incorporates the Panasonic Image Enhancement Technology (PIE) as a standard feature. PIE provides functions that reproduce different kinds of documents faithfully to their originals. Panasonic High Speed Scanner KV-S7065C KV-SS905C 1.1 Image enhancements function The PIE functions can be accessed from either the ISIS driver or TWAIN driver which is packaged with the scanner. -
Page 6: Function List
function list S7065C (Op: option) ISIS TWAIN Page Flatbed: ~297 mm (11.7 in.) x 432 mm (17 in.) Paper Size ADF (Scanning size): 48 mm (1.9 in.) x 70 mm (2.8 in.)~ 297 mm (11.7 in.) x 635 mm (25 in.) Resolution 100~600 dpi 100~600 dpi... - Page 7 ISIS TWAIN Page Margin Available Available Detect Paper Width Available Available Detect Skew Data – – Skew Stop Available Available Available Available Detect Double Feed (Ultrasonic) (Ultrasonic) Manual Feed Mode Available Available Feeding Speed Normal/Slow Normal/Slow Control Sheet Available Available Separation Sheet Available Available...
- Page 8 function list SS905C (Op: option) ISIS TWAIN Page ADF (Scanning size): Paper Size 48 mm (1.9 in.) x 70 mm (2.8 in.)~ 297 mm (11.7 in.) x 2200 mm (86.665 in.) Resolution (B&W ,grayscale) 100~600 dpi 100~600 dpi (Color) 100~400 dpi 100~400 dpi MultiStream Available...
- Page 9 ISIS TWAIN Page Margin Available Available Detect Paper Width Available Available Detect Skew Data Available – Skew Stop Available Available Available Available Detect Double Feed (Ultrasonic) (Ultrasonic) Manual Feed Mode Available Available Feeding Speed Normal/Slow Normal/Slow Control Sheet Available Available Separation Sheet Available Available...
-
Page 10: Installation Method
Normally, choose Select Scanner from the File menu. A list of usable scanners is now displayed, and you can now select one of them. For more details, read the operating instructions of the application you are using. The Panasonic scanner selection is indicated as follows: S7065C “Panasonic KV-S7065C”... -
Page 11: Functions And Configuration Method
3. Functions and Configuration Method ISIS and TWAIN standard configuration screens are included in the description of the functions. Depending on the application used, separate configuration screen may be provided in place of the standard configuration screens. In this case, refer to the operating instructions of the application concerned. -
Page 12: Isis Driver Screens
ISIS driver screens (Example: S7065C... - Page 14 1. [ISIS] dialog box This is displayed first when the ISIS driver is started. 2. [Scan Area] dialog box This is displayed when the [Area…] button in the [ISIS] dialog box is pressed. 3. [Sub Area] dialog box This is displayed when the [Sub Area…] button in the [ISIS] dialog box is pressed.
- Page 15 How to delete scanning conditions 1 In the [ISIS] dialog box, select the setting which is to be deleted, from the [Custom Profiles] list box. 2 When the [Delete] button is now pressed, the specified setting is deleted from the [Custom Profiles] list box.
-
Page 16: Twain Driver Screens
TWAIN driver screens (Example: S7065C 1-1. 1-6. 1-3. 1-4. 1-5. 1-2. - Page 17 1-1. 1-10. 1-9. 1-7. 1-8.
- Page 18 1. [TWAIN] dialog box This is displayed first when the TWAIN driver is started. • When the tabs inside the dialog box are clicked, the functions to be set are switched. Tabs are not displayed for functions which cannot be set. •...
- Page 19 IMPORTANT NOTE: • When the [Advanced Image Enhancements] check box is set to off, all the items in the [Binary Image] tab, [Gray Image] tab and [Color Image] tab are returned to their default values with the exception of the [Halftone], [Automatic], [Brightness], [Contrast], [Image Emphasis] and [Drop Out] displayed in the [Image Enhance] tab.
-
Page 20: Page Size
3.1 Page Size S7065C SS905C This function specifies the page size of the documents to be scanned. Since the sizes in which documents can be scanned differ depending on the scanner concerned, refer to the scanner’s operating instructions. New sizes can also be saved. - Page 21 TWAIN configuration method 1 Select a page size from the [Page Size] list box in the [TWAIN] dialog box. 2 In the case of Landscape, set the [Landscape] check box to on. IMPORTANT NOTES: • Changing the page size initializes the scanning area and sub area. Complete the settings before selecting these items.
- Page 22 • Upper- and lower-case letters are managed as the same letters for the names. • The image width and image length which can be specified differ depending on the scanner concerned. 3 When the [Add] button is pressed, the page size is saved as a new size. 4 The saved name now appears in the [Page Size] list box of the [ISIS] or [TWAIN] dialog box.
-
Page 23: Resolution (Dots Per Inch)
3.2 Resolution (Dots per inch) S7065C SS905C This function specifies the resolution (dots per inch) for the main scanning and sub scanning. Dots per inch (dpi) are used as the resolution unit, and 200 dpi are equivalent to about 8 pixels per millimeter. When the resolution is increased, the image becomes clearer but proportionately more memory (disk space) and processing time are required. - Page 24 For the MultiStream mode 1 Select Binary&Gray or Binary&Color from the [Mode] list box in the [ISIS] dialog box. 2 When the [MultiStream...] button is now pressed, the [MultiStream Settings] dialog box appears. 3 Select the Binary Image resolution from the [Binary Resolution] list box. 4 In the [Rate with Binary Image] list box, select the ratio of the Color or Gray Image resolution to the Binary Image resolution.
-
Page 25: Paper Source
3.3 Paper Source S7065C SS905C This function sets the paper side or sides to be scanned. IMPORTANT NOTE: • When both sides of a document are to be scanned, they are scanned at the same time, and the front side is output first followed by the back side. ISIS configuration method 1 In the [Paper Source] list box, select Simplex, Duplex, Flatbed ( only) - Page 26 TWAIN configuration method 1 In the [Paper Source] list box in the [TWAIN] dialog box, select ADF Simplex, ADF Duplex or Flatbed ( only). S7065C 2 Click the [Feed] tab, and then in the [Page] section click [All Pages] button or the [Number Of Pages] button to select the number of pages to be scanned.
-
Page 27: Image Type
3.4 Image Type S7065C SS905C This function selects the scanning mode: the Black and White mode yielding black and white data, the grayscale mode yielding data in 256 levels, and the Color mode yielding color data. The Color mode and grayscale mode enable photos and other images with halftones to be scanned at a high level of quality but a large memory and a lengthy scanning time are required. - Page 28 IMPORTANT NOTES: • If configurations requiring a lot of memory (high resolution, color mode, etc.) are used with the , additional memory may have to be installed inside the SS905C scanner. For details, refer to the separate table (See “Additional memory” on page 30.).
- Page 29 TWAIN configuration method 1 Select the scanning mode from the [Image Type] list box in the [TWAIN] dialog box. When the Automatic mode has been selected Use the mouse to click and move the [Automatic Binary/Color Distinction] slider. The scanner differentiates color and binary pages by analyzing the ratio of color pixels to black pixels.
- Page 30 Additional memory Given below are the sizes of the additional memory required to scan the various paper sizes. These models do not require additional memory. S7065C SS905C Black and White mode Resolution Ledger Legal Letter Simplex 100dpi 200dpi 300dpi 400dpi 500dpi 600dpi Duplex...
- Page 31 Recommended additional memory The KV-S7065C Series scanners do not require any additional memory to perform the scanning and image enhancements outlined in their specifications and this manual. These scanner Series have the ability to pause the scanning process, relieving the memory buffer before resuming. The memory amounts listed in the chart below are recommedations only and may result in better performance.
- Page 32 (MB) Resolution (DPI) Side Mode Size Scanner’s Max Double Letter Legal Letter Black and White Scanner’s Max Double Letter Legal Letter 256-Level Duplex Gray Scanner’s Max Invalid Double Letter Legal Letter 24bit Color...
- Page 33 (MB) Resolution (DPI) Side Mode Size Scanner’s Max Double Letter Legal Letter Binary & Gray Simplex Scanner’s Max Double Letter Legal Letter Binary & Color Scanner’s Max Double Letter Legal Letter Binary & Gray Duplex Scanner’s Max Invalid Double Letter Legal Letter Binary &...
-
Page 34: Halftone (Dither)
3.5 Halftone (dither) S7065C SS905C Halftone (dither) is a technique for reproducing images with halftones such as photos in the Black and White mode. By using it in this mode, photo images can be scanned faster and with less memory than in the grayscale mode. PIE provides five Halftone (dither) patterns. - Page 35 ISIS configuration method 1 Select Black and White, Binary&Gray or Binary&Color from the [Mode] list box in the [ISIS] dialog box. 2 Select the desired Halftone (dither) pattern from the [Dither] list box. 3 The custom Halftone (dither) pattern can be used by selecting “User Downloaded”...
- Page 36 TWAIN configuration method 1 Select Black and White or Automatic from the [Image Type] list box in the [TWAIN] dialog box. 2 Click the [Image Enhance] or [Binary Image] tab, and select the desired Halftone (dither) pattern from the [Halftone] list box. To set duplex scanning where the front side and back side are different, set the [Advanced Image Enhancements] check box to on, and set the [Front/Back Same Settings] check box of the [Binary Image] tab to off.
-
Page 37: Scanning Area
3.6 Scanning Area S7065C SS905C This function scans a parts of the images of documents. The scanning area is specified by the start position (X: horizontal; Y: vertical) from the top left corner of the paper, the image width and the length. Paper What is scanned IMPORTANT NOTES:... - Page 38 Length Length of the scanning area Alternatively, specify the scanning area by directly dragging the gray area on the right of the screen. IMPORTANT NOTE: • When the Page Size, Page Layout or feed setting is changed, the scanning area is reconfigured as an area which is identical to the page size.
-
Page 39: Sub Area
3.7 Sub Area S7065C SS905C This function enables separate scanning conditions to be set in one part of the scanning range. If, for instance, there is a photo in part of a page consisting mainly of text, excellent scanning results can be obtained by specifying the whole page in the Black and White mode and then specifying the photo area as a Halftone (dither) pattern. - Page 40 ISIS configuration method 1 Set the main scanning conditions for the front and back sides. (Paper Source in 3.3) Click the [Sub Area...] button in the [ISIS] dialog box to display the [Sub Area] dialog box. 2 In the [Select Setting Side] section, set the scanning side of the sub area to be set and the [Region] number.
- Page 41 TWAIN configuration method 1 Click the [Area] tab in the [TWAIN] dialog box. 2 Select the Halftone (dither) pattern from the [Halftone] list box in the [Sub Area] section. 3 Set the [Enable] check box to on and set X, Y, Image Width, Image Length and Brightness of the sub areas for sub areas 1 to 3.
-
Page 42: Fit To Page
3.8 Fit To Page S7065C SS905C The Fit To Page mode scans the image in a range slightly larger than the specified scanning area and reduces it so that it has the same dimensions as the scanning area. Normally, the scanner scans an area which is 100% of the actual page size. When this is the case, depending on whether the paper is skewed and how the sheets are stacked, the paper may shift out of the scanning range so that some places along the edges of the image may be missing. - Page 43 TWAIN configuration method 1 Click the [Paper] tab of the [TWAIN] dialog box, and set the [Fit To Page] check box to on.
-
Page 44: Remove Shadow
3.9 Remove Shadow S7065C SS905C This function removes the shadows cast by the paper itself at its top, bottom, left and right edges. When it is used, about 3 mm along the edges of the paper are forcibly turned white. ISIS configuration setting 1 In the [Basic Image] section of the [Advanced Settings] dialog box, set the [Remove Shadow] check box to on. - Page 45 TWAIN configuration method 1 Set the [Advanced Image Enhancements] check box in the [TWAIN] dialog box to on. 2 Click the [Binary Image], [Gray Image] or [Color Image] tab. 3 Set the [Remove Shadow] check box in the [Basic Image] section to on.
-
Page 46: Brightness
3.10 Brightness S7065C SS905C This function adjusts the brightness of the scanned images. Three preset modes—Darken, Normal and Lighten—are available. (for ISIS only) When the brightness is set to be darkened, faint characters, etc. become easier to read; conversely, when it is set to be lightened, the noise in the background of colored documents is eliminated. - Page 47 3 Scan the document, and check the brightness. 4 If different settings are to be used for the front and back sides with Both scanning, select [Front] or [Back] in the [Select Setting Side] section, and then operate the slider bar. TWAIN configuration method 1 Click the [Image Enhance] tab of the [TWAIN] dialog box.
-
Page 48: Contrast
3.11 Contrast S7065C SS905C This function sets the contrast between the white and black in the Halftone (dither) mode, grayscale mode or Color mode. Any value from 1 to 255 can be set, and the default setting is 128. The lower the contrast value, the softer will be the images with less difference between the white and black. - Page 49 TWAIN configuration method 1 Click the [Image Enhance] tab of the [TWAIN] dialog box. 2 To set a different contrast level for each scanning mode, set the [Advanced Image Enhancements] box to on, and then click the [Binary Image], [Gray Image] or [Color Image] tab.
-
Page 50: Image Emphasis
3.12 Image Emphasis S7065C SS905C This function adjusts the image emphasis. One of five level settings—Smooth, None, Low, Medium and High—can be selected. When the Smooth setting is selected, the image becomes softer, and noise (black spots) generation is minimized. Conversely, when the High setting is selected, the images become crisper, and details such as narrow lines become sharper. - Page 51 ISIS configuration method 1 Select the Image Emphasis level from the [Image Emphasis] list box on the [Advanced Settings] dialog box. TWAIN configuration method 1 Click the [Image Enhance] tab of the [TWAIN] dialog box. 2 To set a different Image Emphasis level for each scanning mode, set the [Advanced Image Enhancements] check box to on, and click the [Binary Image], [Gray Image] or [Color Image] tab.
-
Page 52: Noise Reduction
3.13 Noise Reduction S7065C SS905C This function reduces the black or white spots (noise) which appear in scanned images. If there is a large amount of noise in the scanned images, the size of the file concerned after compression may be increased and/or the OCR recognition rate decreased. - Page 53 ISIS configuration method 1 Select the Noise Reduction level and type from the [Noise Reduction] list box in the [Front and Back] section of the [Advanced Settings] dialog box. 2 The Image filter function can also be used. For details, refer to Noise Removal 4.12.
-
Page 54: Moire Reduction
3.14 Moire Reduction S7065C When magazines and other printed matter or documents printed in color using a printer are scanned, moire (a wavy effect produced by superimposing different geometric patterns) sometimes appears in the images. Setting the Moire Reduction function to on reduces the moire effect. IMPORTANT NOTE: •... - Page 55 TWAIN configuration method 1 Set the [Advanced Image Enhancements] check box in the [TWAIN] dialog box to on. 2 Click the [Binary Image], [Gray Image] or [Color Image] tab. 3 Set the [Moire Reduction] check box in the [Basic Image] section to on.
-
Page 56: Invert
3.15 Invert S7065C SS905C This function inverts the white and black of the scanned images. Original document Invert IMPORTANT NOTE: • The Invert function can be used in the Binary mode only. ISIS configuration method 1 Set the [Invert] check box in the [Front and Back] section of the [Advanced Settings] dialog box to on. - Page 57 TWAIN configuration method 1 Set the [Advanced Image Enhancements] check box in the [TWAIN] dialog box to on. 2 Click the [Binary Image] tab. 3 Set the [Invert] check box in the [Basic Image] section to on.
-
Page 58: Mirror
3.16 Mirror S7065C SS905C This function produces a mirror image with the left of the scanned image appearing on the right and vice versa. Original document Mirror image ISIS configuration method 1 Set the [Mirror] check box in the [Basic Image] section of the [Advanced Settings] dialog box to on. - Page 59 TWAIN configuration method 1 Set the [Advanced Image Enhancements] check box in the [TWAIN] dialog box to on. 2 Click the [Binary Image], [Gray Image] or [Color Image] tab. 3 Set the [Mirror] check box in the [Basic Image] section to on.
-
Page 60: White Level From Paper
3.17 White Level From Paper S7065C SS905C This function uses white as the reference for the colors in the background of documents when scanning. Normally, when text written on paper in red, blue or some other color is scanned, the texture of the paper is scanned, and the resulting images have a great deal of noise. - Page 61 ISIS configuration method 1 Select one of the following settings from the [White Level From Paper] list box in the [Front and Back] section of the [Advanced Settings] dialog box. Off: The White Level From Paper function is set to off. The scanner’s white reference is used.
- Page 62 TWAIN configuration method 1 Set the [Advanced Image Enhancements] check box in the [TWAIN] dialog box to on. 2 Click the [Binary Image] tab. 3 Select one of the following settings from the [White Level From Paper] list box. Off: The White Level From Paper function is set to Off.
-
Page 63: Automatic Threshold
3.18 Automatic Threshold SS905C Some functions (Brightness, Contrast, white level, gamma etc.) are automatically set in accordance with the scanning resolution. Mode 1: Suitable for dark document. Mode 2: Suitable for normal document. Mode 3: Suitable for light document. IMPORTANT NOTE: •... - Page 64 TWAIN configuration method 1 Check the [Enable] check box from the [Binary Mode] section in the [More Settings] dialog box. 2 Click the [Automatic Threshold] radio button. 3 Select the mode that is best suited for the application from list box.
-
Page 65: Dynamic Threshold Mode
3.19 Dynamic Threshold mode S7065C SS905C The Dynamic Threshold mode function is a useful scanning means for documents with areas whose background is in color. Original Binary Dynamic Threshold IMPORTANT NOTE: • The Dynamic Threshold mode function is valid only in the Black and White mode. Settings such as Halftone (dither), Sub Area, Image Emphasis, Gamma and Automatic Separation cannot be used. - Page 66 TWAIN configuration method 1 Set the [Advanced Image Enhancements] check box in the [TWAIN] dialog box to on. 2 Click the [Binary Image] tab. 3 With the , set the [Dynamic Threshold] check box to on in the [Binary S7065C Mode] section.
-
Page 67: Automatic Separation
3.20 Automatic Separation S7065C SS905C This function enables the scanner to automatically differentiate between text areas and photo areas, and scan them accordingly. Text areas are scanned in the binary mode whereas photo areas are scanned using a Halftone (dither) pattern specified Halftone (dither) in 3.5. - Page 68 ISIS configuration method 1 Select the pattern from the settings on the [Dither] list box in the [ISIS] dialog box. 2 Open the [Advanced Settings] dialog box, and set the [Automatic Separation] check box in the [Front and Back] section to on. TWAIN configuration method 1 Set the [Advanced Image Enhancements] check box in the [TWAIN] dialog box to on.
-
Page 69: Gamma
3.21 Gamma S7065C SS905C This function selects the gamma curve (shading adjustment curve). The settings are available for the gamma curve: Normal, CRT and Linear. Select CRT if the primary objective of scanning documents is to view them on the display. - Page 70 This is the recommended setting when scanning in color, grayscale or halftone mode. • With the KV-S7065C, this is the most suitable setting when scan- ning business documents. Select CRT when scanning the kind of document most of whose pages consist of photos.
- Page 71 This is the recommended setting when scanning in color, grayscale or halftone mode. • With the KV-S7065C, this is the most suitable setting when scan- ning business documents. Select CRT when scanning the kind of document most of whose pages consist of photos.
- Page 72 Customized gamma curve creation method (same for ISIS and TWAIN) Customized gamma curves can be created and registered. Up to 50 curves can be registered. Registration method 1 Press the [Custom Gamma...] button to open the [Custom Gamma] dialog box. In the Black and White or grayscale mode, the black and white slider bar is displayed;...
- Page 73 Deletion method 1 On the [Custom Gamma Settings] list box, select the setting to be deleted. 2 The setting is deleted from the list by pressing the [Delete] button.
-
Page 74: Chroma
3.22 Chroma S7065C This function is used to adjust the color scanning hue. IMPORTANT NOTE: • This function is effective only for color images in the Color mode or MultiStream mode. • This function is effective only when None has been selected by Color Matching. ISIS configuration method 1 Use the mouse to click and move the [Chroma] slider bar in the [Advanced Settings] dialog box. - Page 75 TWAIN configuration method 1 Set the [Advanced Image Enhancements] check box in the [TWAIN] dialog box to on. 2 Click the [Color Image] tab. 3 When the [Chroma] slider bar is moved to the right, the colors become more vivid; when it is moved to the left, they become grayer. Alternatively, a number (1 to 255) can be entered directly in the [Chroma] edit box.
-
Page 76: Color Matching
3.23 Color Matching S7065C This function provides color matching with other equipment. “sRGB” is an international standard for correctly reproducing colors between computer displays, printers and scanners. With “ICM”, the color matching is controlled using the ICC profile describing the color range the scanner can effectively reproduce. - Page 77 TWAIN configuration method 1 Set the [Advanced Image Enhancements] check box in the [TWAIN] dialog box to on. 2 Click the [Color Image] tab. 3 Select the setting from the [Color Matching] list box. None: The scanned color image is directly displayed within the color space of the scanner.
-
Page 78: Color Drop Out
3.24 Color Drop Out S7065C SS905C This function scans documents while deleting the text and illustrations printed on documents in the specified colors of red, blue and green. It is used, for instance, to facilitate OCR processing by deleting the red frame around OCR forms. The Multi Color Drop Out function can be used to specify and delete up to three colors. - Page 79 1 Set the [Multi Color Drop Out] check box in the [Advanced Settings] dialog box to on. 2 If the Panasonic Multicolor Drop Out utility has not been specified, press the [Configure…] button in the [Multi Color Drop Out] section to start the utility.
-
Page 80: Border Removal
3.25 Border Removal S7065C SS905C This function removes the black borders, formed during scanning or copying, from around the images. Before Border Removal After Border Removal IMPORTANT NOTES: • Set the reference plate and flatbed sheet to black when using the Border Removal function (refer to Changing the Reference Plate Setting in the Operating Instructions). - Page 81 TWAIN configuration method 1 Set the [Advanced Image Enhancements] check box in the [TWAIN] dialog box to on. 2 Click the [Binary Image], [Gray Image] or [Color Image] tab. 3 Set the [Border Removal] check box to on.
-
Page 82: Automatic Crop
3.26 Automatic Crop S7065C SS905C This function automatically recognizes the image size and crops it. When it is used to scan documents of different sizes continuously, the documents are scanned in the respective sizes and no memory is wasted. Before Automatic Crop After Automatic Crop IMPORTANT NOTES: •... - Page 83 ISIS configuration method 1 Set the [Automatic Crop] check box in the [Basic Image] section of the [Advanced Settings] dialog box to on. TWAIN configuration method 1 Click the [Paper] tab. 2 Set the [Automatic Crop] check box to on.
-
Page 84: Deskew
3.27 Deskew S7065C SS905C This function corrects the skew in scanned images, restoring the images to the upright position. Deskewed images (text or graphics) may appear serrated. In a case like this, this serration in the image can be smoothed out by setting Smooth to on. Before deskew After deskew IMPORTANT NOTES:... - Page 85 ISIS configuration method 1 Set the [Deskew] check box in the [Basic Image] section of the [Advanced Settings] dialog box to on. TWAIN configuration method 1 Click the [Paper] tab. 2 Set the [Deskew] check box to on.
-
Page 86: Length Control (Paper Length Control)
3.28 Length Control (paper length control) S7065C SS905C When the Length Control function is selected, the scanner scans the documents in the size that corresponds to their length. If, for instance, Length Control is set to off when A4 and A5 width documents are to be scanned continuously, the documents with the A5 width will also be scanned in the A4 size, and the roller will be scanned for the parts corresponding to their bottom halves. - Page 87 ISIS configuration method 1 Set the [Length Control] check box in the [Reading Mode] section of the [Advanced Settings] dialog box to on. TWAIN configuration method 1 Click the [Paper] tab in the [TWAIN] dialog box, and set the [Length Control] check box to on.
-
Page 88: Long Paper
3.29 Long Paper SS905C This function scans long documents. The scanned images are split into the size specified by Page Size in 3.1 and filed. The document length which can be scanned varies according to the size of the memory installed inside the scanner. Original document Image Page 1... - Page 89 For Simplex scanning in the Black and White mode SS905C Letter image width m (feet) Memory 64MB 128MB 256MB 55.9 (183.3 55.9 (183.3 55.9 (183.3 55.9 (183.3 32.4 55.9 55.9 55.9 (106.3 (183.3 (183.3 (183.3 14.2 29.1 43.9 55.9 (46.8 (95.3 (143.9 (183.3...
-
Page 90: Margin
3.30 Margin S7065C SS905C When Margin is selected, documents are scanned over a slightly larger area at their tops and bottoms than the size specified by Page Size. By setting Margin and Image Width which is a little wider than the actual width, the documents can be scanned without missing any parts of the document images even when the paper is skewed. - Page 91 TWAIN configuration method 1 Click the [Paper] tab of the [TWAIN] dialog box, and set the [Margin] check box to on.
-
Page 92: Detect Paper Width
3.31 Detect Paper Width S7065C SS905C When it is used, the Size and Page Layout specified by Page Size in 3.1 are ignored, and the scanner sets the page size as determined by the paper guide position. ISIS configuration method 1 Set the [Detect Paper Width] check box in the [Reading Mode] section of the [Advanced Settings] dialog box to on. - Page 93 TWAIN configuration method 1 Click the [Paper] tab in the [TWAIN] dialog box, and set the [Detect Paper Width] check box to on.
-
Page 94: Detect Skew Data
3.32 Detect Skew Data SS905C This function detects document skew, and informs the application. IMPORTANT NOTES: • The Detect Skew Data function cannot be used from the TWAIN driver. • The function cannot be used at the same time as Long Paper or Deskew. •... -
Page 95: Skew Stop
3.33 Skew Stop S7065C SS905C This function stops the scanning when the paper fed by ADF is significantly skewed. IMPORTANT NOTES: • The Skew Stop function does not work if the paper width is less than 148 mm. • When Skew Stop has been activated, open the scanner door and remove the paper remaining inside. - Page 96 TWAIN configuration method 1 Click the [Feed] tab in the [TWAIN] dialog box, and set the [Skew Stop] check box to on.
-
Page 97: Detect Double Feed
3.34 Detect Double Feed S7065C SS905C This function detects the feeding of more than one sheet of the document at a time. If a double feed is detected, you can select to beep or stop the scan. IMPORTANT NOTES: • With this function, ultrasonic waves are aimed at the document to detect double feed by the level at which the waves pass through the sheets. - Page 98 TWAIN configuration method 1 Click the [Feed] tab in the [TWAIN] dialog box, and set the [Detect Double Feed] check box to on. 2 In the [Action] list box, select the operation to be performed in the event that double feed has been detected. 3 If the Detect Double Feed function operates incorrectly, adjust the sensitivity level by selecting one of the levels in the [Sensitivity] list box.
-
Page 99: Manual Feed Mode
3.35 Manual Feed Mode S7065C SS905C While the Manual Feed Mode function is activated, every time one sheet has been scanned, the next sheet can be scanned without instructing the scanner to scan it. IMPORTANT NOTES: • Some applications may not support the Manual Feed Mode function. •... - Page 100 key is pressed, scanning starts again. This setting is useful when placing the documents after aligning them. Automatic: When documents are placed on the scanner, scanning starts automatically. When all the placed sheets have been scanned, the scanner returns to the paper wait status, and when the next document is placed on the scanner, scanning starts again.
- Page 101 TWAIN configuration method 1 Click the [Feed] tab in the [TWAIN] dialog box, and select one of the functions in the list box in the [Manual Feed Mode] section. Off: Manual feed is not used. The documents are inserted manually one sheet at a time. Scanning starts when a sheet is inserted.
-
Page 102: Feeding Speed
3.36 Feeding Speed S7065C SS905C This function is set to the slow mode when thin paper, badly creased paper, fragile paper, etc. is to be scanned by ADF. In the slow mode, documents are fed at about one-half of the speed in the Normal mode. The image quality in the slow mode is no different from the Normal mode. - Page 103 TWAIN configuration method 1 Click the [Feed] tab in the [TWAIN] dialog box, and select the speed from the [Feeding Speed] list box.
-
Page 104: Detect Control Sheet
3.37 Detect Control Sheet S7065C SS905C Use of control sheets enables the scanning conditions to be changed at any time while scanning is in progress. When control sheets are inserted between the sheets of the document to be scanned, the scanning conditions are changed starting with the document sheet that comes after each control sheet. - Page 105 ISIS configuration method 1 Set the [Detect Control Sheet] check box in the [Advanced Settings] dialog box to on. 2 If the images on the control sheets themselves are not to be scanned, set the [Skip Control Sheet] check box to on. TWAIN configuration method 1 Click the [Control Sheet] tab of the [TWAIN] dialog box, and set the [Detect Control Sheet] check box to on.
-
Page 106: Detect File Separation Sheet
3.38 Detect File Separation Sheet S7065C SS905C This function detects File Separation sheets and informs the application of their presence. It is used when a multiple number of documents are to be scanned at once or when a document is to be saved in multiple folders. Document saved in folder 1 File Separation sheet Document saved in folder 2... - Page 107 ISIS configuration method Using separation sheets, the folder in which the document is saved can be changed at any time while scanning is in progress. When a separation sheet is inserted between the sheets of the document to be scanned, the sheets that come after the separation sheet are saved in a different folder.
- Page 108 5 Select one of the following items from the [Schema] list box or input the item directly. $$$$####; With Simplex scanning $$$####a;$$$####b With Duplex scanning When the [Add Schema] button is now pressed, the item will appear on the list starting from the next operation.
- Page 109 TWAIN configuration method 1 Click the [Control Sheet] tab of the [TWAIN] dialog box, and set the [Detect Separation Sheet] check box to on. 2 If the images on the separation sheets themselves are not to be scanned, set the [Skip Separation Sheet] check box to on. 3 To stop scanning when a separation sheet has been detected, set the [Stop Scanning] check box to on.
-
Page 110: Patchcode
3.39 Patchcode S7065C SS905C This function enables standard patchcode types as well as patchcode Type T to be detected. When areas where patchcodes are present have been specified, the codes are analyzed, and the resulting information is passed along each time one sheet of the document is scanned. - Page 111 TWAIN configuration method 1 Click the [Patchcode] tab of the [TWAIN] dialog box. 2 Set the [Enable] check box to on. 3 Select the Front or Back patchcode in the [Patchcode Settings For] list box. 4 Select the patchcode orientation using the [Horizontal Orientation] or [Vertical Orientation] button.
-
Page 112: Blank
3.40 Blank Page Removal S7065C SS905C This function skips the scanning of pages (perfectly white, perfectly black or plain) with no text or images. It enables scanning without wasting any memory of the storage unit at times when, for instance, scanning a document some sheets of which are printed on one side while others are printed on both sides. - Page 113 TWAIN configuration method 1 Click the [Paper] tab of the [TWAIN] dialog box, and set the [Blank Page Removal] check box to on. 2 Conduct a test scan. If blank pages are scanned, use the [Pixel Ratio (%)] slider bar to set the ratio to a higher value; conversely, if pages which are not blank are skipped, set it to a lower value.
-
Page 114: Imprinter (Endorser)
The printed results are also reflected on the scanned images. Post Imprinter prints on the back sides of document sheets after they are scanned. The printed results are not reflected on the scanned images. KV-S7065C does not support Post Imprinter. KV-SS905C does not support Pre Imprinter. IMPORTANT NOTE: •... - Page 115 For the SS905C Unit: 2.40 mm per increment (printing orientation: 90°, 270°) 1: 12.40 mm 2: 14.80 mm Unit: 3.46 mm per increment (printing orientation: 0°, 180°) 1: 13.46 mm 2: 16.92 mm 7 Select the printing orientation in the [Orientation] list box. Setting Printing orientation 90°...
- Page 116 Example of specifying a character string to be printed Specify the characters, counter, date and time in the character string field as follows (refer to the next page). What is input in the character string field “Panasonic Date %1d Count#” What is printed “Panasonic Date 00/12/24 Count...
- Page 117 Characters which can be printed " SP ! % & ' 0 1 2 3 4 5 6 7 8 ; < = > ? @ A B C D E F G H I J K L M N O P Q R S T U V W X Y Z [ ^ _ a b c d e ¯...
-
Page 118: Compression
3.42 Compression S7065C SS905C This function compresses the data to make it smaller when images are scanned. Use of this function has a number of benefits: for instance, the size of the files transferred from the scanner is reduced, enabling many images to be saved, and the scanning speed is not decreased. - Page 119 ISIS configuration method 1 The JPEG compression quality is changed by using the [JPEG Quality] slider bar in the [Advanced Settings] dialog box. 2 Perform the other settings in the [Scanned Document Name] dialog box. Read Scanning Instructions in 5.
- Page 120 TWAIN configuration method 1 The JPEG compression quality is changed using the [JPEG Quality] slider bar by clicking the [Color Image] or [Gray Image] ( only) tab of the SS905C [TWAIN] dialog box. The other compression settings are not performed on the TWAIN setting screen. Read the instructions accompanying the application you are using.
-
Page 121: Default
3.43 Default S7065C SS905C When the [Default] button is pressed, all the settings on the window displayed are returned to their default values. -
Page 122: Image Filters (Isis)
4. Image Filters (ISIS) The following image filters are provided with the ISIS driver. • Barcode Detection This recognizes barcodes. • Border Removal This removes the black areas around the images. • Crop This removes the white areas around the images. •... - Page 123 To stop using the image filters: 1 On the [Selected Filters] list, click the image filter whose use is no longer required to select it. Then press the [Remove] button. 2 The image filter selected from [Selected Filters] is now deleted. To stop using all the image filters, set the [Enhance Image] check box in the [Advanced Settings] dialog box to off.
-
Page 124: Barcode Detection
4.1 Barcode Detection This image filter recognizes the barcodes in the scanned images. Refer to the application’s operating manual how to use the barcode. If the barcodes cannot be recognized properly, the quality of the scanned images can be improved by using another image filter, examples of which are given below. Deskew This straightens out the image skew. - Page 125 Multiband analysis The multiband analysis function is used to improve the recognition accuracy when the quality of the images scanned is poor. Exact Length Set to string length if the length of the barcode character string is known ahead of time. The recognition accuracy and speed can be improved by specifying this length.
-
Page 126: Border Removal
4.2 Border Removal This image filter removes the black edges, which are produced by scanning or copying, around the images. Before Border Removal After Border Removal IMPORTANT NOTE: • Depending on the images to be scanned, the Border Removal function may not work properly. -
Page 127: Crop
4.3 Crop This image filter removes the white margins around images. The dimensions of the white margins to remain at the top and bottom and at the left and right can be set separately. Furthermore, by setting the [Force symmetry] check box to on, the same dimensions can be left at the top and bottom and at the left and right. -
Page 128: Deskew
4.4 Deskew This image filter straightens out the skew of scanned images. Image skew arises when documents are fed by the scanner, fax machine or copier. The Deskew image filter analyzes the scanned images and detects skew. The skew is detected from the text alignment and line orientation of the images. The images are then rotated on the basis of the angle of the skew detected. - Page 129 Min Angle Input the minimum angle of the skew to be detected. The angle is measured in 0.1 degree increments. If setting the angle for 25 degrees, enter 250. (Setting range: 0 to 449) Normally, satisfactory results are achieved when “1” is set. Max Angle Input the maximum angle of the skew to be detected.
- Page 130 Remove Shear Since an angle of 90 degrees is normally retained when an image is skewed, the image can be deskewed simply by rotating it. However, there are times when the images are distorted. In cases like this, a process of simple rotation can align the top and bottom or left and right edges, but it cannot eliminate the distortion itself.
-
Page 131: Dilate
4.5 Dilate This image filter enlarges the black areas. When it is used, the image quality and legibility of the text are improved. Before Dilate After Dilate T T T [Dilate Properties] dialog box Amount Input here the number of times the Dilate image filter is to be applied. When this number is increased, the text and patterns appear thicker. - Page 132 Diagonal The four pixels on the diagonals around the black pixel in the center are replaced with black. Horizontal The two pixels at the left and right of the black pixel in the center are replaced with black. Vertical The two pixels at the top and bottom of the black pixel in the center are replaced with black.
-
Page 133: Erode
4.6 Erode This image filter makes the black areas smaller. When it is used, some information of the image’s detailed areas is lost. Before Erode After Erode T T T [Erode Properties] dialog box Amount Times Input here the number of times the Erode image filter is to be applied. When this number is increased, the text and patterns appear finer. - Page 134 Diagonal The four pixels on the diagonals around the white pixel in the center are replaced with white. Horizontal The two pixels at the left and right of the white pixel in the center are replaced with white. Vertical The two pixels at the top and bottom of the white pixel in the center are replaced with white.
-
Page 135: Halftone Removal
4.7 Halftone Removal This image filter removes the background and shading of images. Before Halftone Removal After Halftone Removal IMPORTANT NOTE: • Depending on the images to be scanned, the Halftone Removal function may not work properly. -
Page 136: Hole Removal
4.8 Hole Removal This image filter removes the images of punched holes from one edge of the images. It searches for the round shapes which resemble punched holes near the edges of the images. It may also remove any patterns which resemble punched holes. Before Hole Removal After Hole Removal IMPORTANT NOTES:... -
Page 137: Image Scaling
4.9 Image Scaling This image filter enlarges or reduces the size of the images. When the image width and height of the result are specified, the image size is changed accordingly while retaining its original width-to-height ratio. If the width-to-height size ratio specified differs from the image’s original width-to-height ratio, the image size is changed to the maximum size that the width-to-height ratio can be retained within the specified width and height. -
Page 138: Invert Image
4.10 Invert Image This image filter converts the white pixels into black pixels and vice versa. 4.11 Line Removal This image filter reconstructs or removes the ruled lines on images. When it is used, the OCR results can be improved. Before Line Removal After Line Removal [Line Removal Properties] dialog box... - Page 139 Reconstruct form The lines are detected and removed. Next, straight lines are redrawn at the same locations. Lines which are considered to be parts of ruled lines are joined to each other. Horizontal/Vertical Enable This setting is for enabling the processing of the horizontal and vertical lines. Straight line algorithm This setting is for detecting straight lines.
-
Page 140: Noise Removal
4.12 Noise Removal This image filter reduces the noise (black spots) of images. Noise is caused by particles of carbon deposited from the printing by the copier or fax machine and by dirt and other foreign matter on the documents when they are scanned by the scanner. - Page 141 Max Area The area which is smaller than a percentage of the area defined by Maximum Height and Maximum Width is to be considered as noise. This percentage is set here. Normally, a setting of 100 is selected. Min Separation The gap between what is considered as noise and other characters, etc.
-
Page 142: Patchcode Detection
4.13 Patchcode Detection This image filter detects the patchcodes on the images and decodes them. If a patchcode cannot be recognized satisfactorily, the quality of the scanning images can be improved by using other image filters. For instance, the filters listed below can be used. -
Page 143: Skeleton
4.14 Skeleton This image filter reduces black areas down to a skeleton, that is to say, the thickness of a single pixel. When it is used, the images become grossly distorted. It is normally used only when so required by OCR or some other application. Before Skeleton After Skeleton IMPORTANT NOTE:... -
Page 144: Rotation
4.15 Rotation This image filter rotates the images in 90-degree increments. It can be used to rotate images by 90 degrees either clockwise or counterclockwise. It can be used to rotate images by 180 degrees as well. Mirror processing can also be executed at the same time as Rotation. -
Page 145: Smooth
4.16 Smooth This image filter removes the protrusions and indentations appearing in characters and patterns. When five or six surrounding pixels have a different color, this function inverts the pixel concerned. It enables the size of files to be reduced when they are compressed with no accompanying loss of image information. -
Page 146: Scanning Instructions
5. Scanning Instructions This section describes the basic procedure to be followed in order to start scanning. For more details, refer to the operating instructions of the application concerned. With ISIS (when PixUtil is used) 1 First, set the scanning conditions. (Refer to Functions and Configuration Method in 2 Select [Scan Batch to File...] on the [File] menu. - Page 147 7 When [Use Naming Schema] has been specified, press the [Edit Schema...] button. Select the file naming schema from the [Schema] list box. For instance, select as follows: Select $$$$####; for Simplex scanning. Select $$$####a;$$$####b for Both scanning. In these cases, the first continuous $ and the 4-digit number specified in FileName serve as the filename.
- Page 148 11 Select the scanning method in [Paper Source] in the [Scanning Options] section. Feeder (single sided) Simplex scanning using ADF Feeder (double sided) Both scanning using ADF Flatbed Scanning using flatbed 12 Be absolutely sure to set the [ScanAhead] check box to on. Otherwise, the scanning speed will be extremely slow.
-
Page 149: Appendix
APPENDIX A. Preview window (TWAIN) The TWAIN driver comes with a preview function for checking the scanning conditions on-screen. How to display the preview window 1 Select a page size from the [Page Size] list box. 2 In the [Paper Source] list box, select ADF Simplex, ADF Duplex or Flatbed. 3 Press the [PreScan] button. - Page 150 Preview window configuration 3 4 5 6 1 [Front] button, [Back] button • To establish the setting for Both scanning, select Front and Back by clicking the respective buttons. • The image and areas shown on the preview window are also switched. 2 [Switch Area] list box •...
- Page 151 4 [Move Screen Mode] button • This scrolls the screen when the images on the preview window is dragged using the mouse. 5 [Set Zoom In Mode] button • This zooms in on the display image. • The cursor turns into a (+) magnifying glass. •...
-
Page 152: Black Background
B. Black background Some applications have a function for cropping and saving only the image of a document on a black background without having to specify the size of the document to be scanned. A black background is required when using such applications. The scanner can switch between a white and black S7065C... -
Page 153: How To Use The Panasonic Multicolor Drop Out Utility
C. How to use the Panasonic Multicolor Drop Out Utility The Panasonic Multicolor Drop Out Utility is used to specify the colors for which Color Drop Out is to be executed. IMPORTANT NOTES: • Color Drop Out can be executed only for single colors. Catalogs and other printed matter as well as documents printed out by a printer generally have text and images appearing in a combination of a multiple number of colors. - Page 154 4. [Zoom In] button: This is for zooming in on the image of the original view or dropout view area. 5. [Zoom Out] button: This is for zooming out the image of the original view or dropout view area. 6. [Undo] button: This is for undoing the change in the color.
- Page 155 Description of Color Drop Out Setting dialog box screen 2, 3 1. [Setting Name] list box: The Color Drop Out Settings which have been saved are called here. If a pre-scanned image has been saved with the Color Drop Out Setting, it is called and displayed in the original view and dropout view areas.
- Page 156 7. [Hue] edit boxes: The range of the hue in which Color Drop Out is to be executed is specified in these boxes. 8. [Saturation] edit boxes: The range of the saturation in which Color Drop Out is to be executed is specified in these boxes. 9.
- Page 157 8 Upon completion of the settings, press the [OK] button in the [Color Drop Out] dialog box. The Panasonic Multicolor Drop Out Utility is exited. • When the [OK] button is selected, the settings of the selected setting name...
- Page 158 Try taking the following steps if the Color Drop Out execution cannot be specified satisfactorily. Procedure 1 1 Use the mouse to drag the part where the colors were not removed on the dropout view area (black and white expected image), and change the range of the Color Drop Out colors.