Lexmark 5400 Series User Manual
Lexmark all-in-one user's guide 5400
Hide thumbs
Also See for 5400 Series:
- User manual (131 pages) ,
- Setup (25 pages) ,
- Quick start manual (2 pages)
Table of Contents
Advertisement
5400 Series All-In-One
User's Guide
July 2006
www.lexmark.com
Lexmark and Lexmark with diamond design are trademarks of Lexmark International, Inc., registered in the United States and/or other countries.
All other trademarks are the property of their respective owners.
© 2006 Lexmark International, Inc.
All rights reserved.
740 West New Circle Road
Lexington, Kentucky 40550
Advertisement
Table of Contents
Troubleshooting

Related Manuals for Lexmark 5400 Series


Summary of Contents for Lexmark 5400 Series
- Page 1 User's Guide July 2006 www.lexmark.com Lexmark and Lexmark with diamond design are trademarks of Lexmark International, Inc., registered in the United States and/or other countries. All other trademarks are the property of their respective owners. © 2006 Lexmark International, Inc.
-
Page 2: Important Safety Information
Refer service or repairs, other than those described in the user documentation, to a professional service person. This product is designed, tested, and approved to meet strict global safety standards with the use of specific Lexmark components. The safety features of some parts may not always be obvious. -
Page 3: Table Of Contents
Contents Finding information about the printer...9 Setting up the printer...12 Checking the box contents...12 Installing another language control panel...13 Getting the printer ready to fax...13 Choosing a fax connection ... 13 Using an RJ11 adapter ... 14 Connecting directly to a telephone wall jack... 16 Connecting to a telephone... - Page 4 Loading paper and original documents...43 Loading paper...43 Loading various paper types...43 Loading original documents into the Automatic Document Feeder...46 Loading original documents on the scanner glass...48 Printing...49 Printing a document...49 Printing a Web page...49 Printing photos or images from a Web page...50 Printing collated copies...50 Printing the last page first (reverse page order)...51 Printing transparencies...51...
- Page 5 Scanning...65 Scanning a document...65 Customizing scan settings using the computer...65 Scanning documents or images for e-mailing...66 Scanning text for editing...67 Scanning images for editing...67 Scanning clear images from magazines or newspapers...67 Scanning to a computer over a network...68 Faxing...69 Sending a fax...70 Entering a fax number ...
- Page 6 Cleaning the print cartridge nozzles ... 89 Wiping the print cartridge nozzles and contacts ... 90 Preserving the print cartridges...91 Cleaning the scanner glass...91 Ordering supplies...91 Using genuine Lexmark print cartridges...92 Refilling a print cartridge...92 Recycling Lexmark products...92 Troubleshooting...93 Setup troubleshooting...93 Incorrect language appears on the display...
- Page 7 Cannot scan to an application ... 101 Cannot scan to a computer over a network ... 102 Fax troubleshooting...102 Cannot send or receive a fax ... 102 Can send but not receive faxes ... 103 Can receive but not send faxes ... 104 Printer receives a blank fax ...
-
Page 9: Finding Information About The Printer
5400 Series folder. Double-click the printer Help icon. Where to find You can find this document in the printer box or on the Lexmark Web site at www.lexmark.com. Where to find You can find this document in the printer box or on the Lexmark Web site at www.lexmark.com. - Page 10 The Help gives you instructions for using the software, if your printer connects to a computer. Lexmark Solution Center Description The Lexmark Solution Center software is included on your CD. It installs with the other software, if your printer connects to a computer. Customer support...
- Page 11 Where to find (US) To view the limitations and conditions of this limited warranty, see the Statement of Limited Warranty included with this printer, or set forth at www.lexmark.com. Click CUSTOMER SUPPORT. Click Warranty Information. From the Statement of Limited Warranty section, click Inkjet &...
-
Page 12: Setting Up The Printer
Setting up the printer Checking the box contents Name Black print cartridge Color print cartridge Telephone cord Power cord Setup sheet Installation software CD User's Guide or Setup Solutions Printed booklet that serves as a guide. Description Cartridges to be installed into the printer. Note: Cartridge combinations vary depending on the product purchased. -
Page 13: Installing Another Language Control Panel
Installing another language control panel These instructions apply only if you received one or more additional language control panels with the printer. Lift and remove the control panel (if one is installed). Choose the correct control panel for your language. Align the clips on the control panel with the holes on the printer, and then press down. -
Page 14: Using An Rj11 Adapter
Equipment Benefits Receive both incoming voice messages and • The printer faxes. • A telephone • An answering machine • Three telephone cords Send faxes using the computer or the printer. “Connecting to a computer with a • The printer •... - Page 15 If your telecommunications equipment uses a US-style (RJ11) telephone line, follow these steps to connect the equipment: Remove the plug from the EXT port on the back of the printer. Note: Once this plug is removed, any country- or region-specific equipment you connect to the printer by the adapter, as shown, will not function properly.
-
Page 16: Connecting Directly To A Telephone Wall Jack
Connect your telecommunications equipment directly to the EXT port on the back of the printer. Note: Once this plug is removed, any country- or region-specific equipment that you connect to the printer by the adapter, as shown, will not function properly. Country/region •... -
Page 17: Connecting To A Telephone
Connect the other end of the telephone cord into an active telephone wall jack. Connecting to a telephone Connect a telephone to the printer to use the fax line as a normal telephone line. Then set up the printer wherever your telephone is located to make copies or to send and receive faxes without using a computer. -
Page 18: Connecting To An Answering Machine
Connect the other telephone cord to a telephone, and then plug it into the EXT port Connecting to an answering machine Connect an answering machine to the printer to receive both incoming voice messages and faxes. Note: Setup steps may vary depending on your country or region. For more information on connecting the printer to telecommunications equipment, see “Using an RJ11 adapter”... -
Page 19: Connecting To A Computer With A Modem
Remove the protective plug from the EXT port Connect a second telephone cord from the telephone to the answering machine. Connect a third telephone cord from the answering machine to the EXT port of the printer. of the printer. - Page 20 Connect a telephone cord into the LINE port Remove the protective plug from the EXT port Connect a second telephone cord from the telephone to the computer modem. of the printer, and then plug it into an active telephone wall jack. of the printer.
- Page 21 Connect a third telephone cord from the computer modem to the EXT port of the printer.
-
Page 22: Learning About The Printer
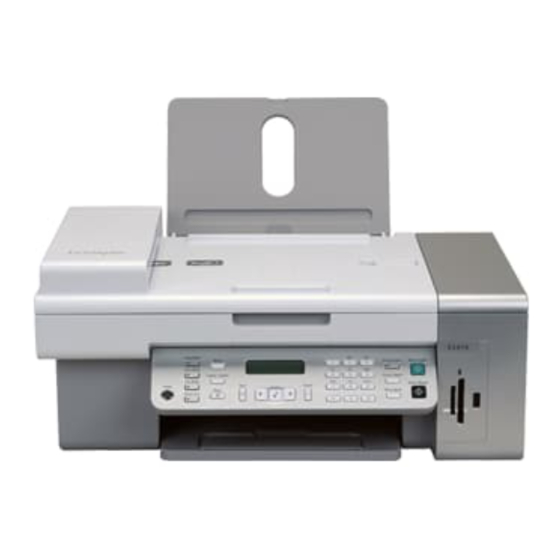
Learning about the printer Understanding the parts of the printer Use the Paper support Automatic Document Feeder (ADF) paper stop PictBridge port Memory card slots Control panel Paper exit tray Automatic Document Feeder (ADF) paper guide Automatic Document Feeder (ADF) Automatic Document Feeder (ADF) tray Paper guide Top cover... -
Page 23: Using The Control Panel Buttons And Menus
Use the Scanner unit Print cartridge carrier USB port EXT port LINE port Power supply with port Using the control panel buttons and menus Using the control panel The display shows: • Printer status • Messages • Menus Access the print cartridges. Install, replace, or remove a print cartridge. - Page 24 Press • Turn the printer on and off. • Stop the print, copy, scan, or fax process. Copy Mode Access the copy default screen and make copies. Note: The mode is selected when the button light is on. Scan Mode Access the scan default screen and scan documents.
- Page 25 Press • Return to the previous screen. • Delete a letter or number. • Decrease a number. • Delete a letter or number. • Scroll through menus, submenus, or settings on the display. • Select a menu or submenu item that appears on the display. •...
-
Page 26: Using The Copy Menu
Press A keypad number or In Copy mode or Photo Card mode: Enter the number of copies or prints you want to make. symbol In Fax mode: • Enter fax numbers. • Navigate an automated answering system. • Select letters when creating a Speed Dial list. •... -
Page 27: Using The Scan Menu
Press Note: Pressing selects a setting. An * appears next to the selected setting. To go into additional submenus and settings, repeat step 6 and step 7 as needed. If needed, press repeatedly to return to the previous menus and make other setting selections. Press Start Color or Start Black. -
Page 28: Using The Fax Menu
Press Press repeatedly until the submenu item you want or the setting you want appears. Press Note: Pressing selects a setting. An * appears next to the selected setting. To go into additional submenus and settings, repeat step 7 and step 8 as needed. If needed, press repeatedly to return to the previous menus and make other setting selections. -
Page 29: Using The Photo Card Menu
Use this Quality Phone Book On Hook Dial Delay Fax Auto Answer Lighter / Darker Fax Setup Tools Temporary setting. For information on saving temporary and other settings, see “Saving settings” on page 31. Using the Photo Card menu If necessary, press Photo Card, or insert a memory card or a flash drive into the printer. For more information, see “Inserting a memory card”... - Page 30 Menu item Proof Sheet Print Photos Save Photos Photo Effects Paper Size Photo Size Layout Quality Paper Type Tools Setting will return to factory default setting when a memory card or flash drive is removed. Setting must be saved individually. For more information, see Note below table. Note: To save Paper Size, Paper Type, or Photo Size settings: Press Press...
-
Page 31: Saving Settings
Saving settings In a setting menu, an * appears next to the default setting. To change the setting: Press repeatedly until the setting you want appears. Press • To save most settings. An * appears next to the saved setting. •... - Page 32 Press repeatedly until Never appears. Press To change one or more temporary settings into new default settings: Press Press repeatedly until Tools appears. Press Press repeatedly until Defaults appears. Press Press repeatedly until Set Defaults appears. Press Press repeatedly until Use Current appears. Press...
-
Page 33: Learning About The Software
This chapter tells how to use the printer with Windows operating systems. If you are using a Macintosh operating system, see the Mac Help: From the Finder desktop, double-click the Lexmark 5400 Series folder. Double-click the printer Help icon. Using the printer software... - Page 34 Click the Imaging Studio button for the task you want to complete. Click Print photos Share photos Use memory card photos Browse photos Print an album page Scan & edit text (OCR) Scan Copy Access the Web Learn more about what you can do with this software. Details Print common photo sizes from saved images on the computer.
-
Page 35: Using The All-In-One Center
Click Scan Copy Details Method 2 Click Start Programs or All Programs 5400 Series. Select All-In-One Center. • Select a program to send a scanned image to. • Select what type of image is being scanned. • Select the scan quality. -
Page 36: Using The Saved Images Tab
Click Creative Tasks Preview Now Note: For more information about the Scanning & Copying tab, click Help in the top center of the screen. Using the Saved Images tab Use the Saved Images tab to perform tasks with images that are saved on the computer. From here Preview Open With... -
Page 37: Using The Maintain/Troubleshoot Link
E-mail an image or document. • Edit – Edit text found in a scanned document (OCR). – Modify an image with a photo editor. Lexmark 5400 Series. Method 2 Click Start 5400 Series. Select Solution Center. You can • View the status of the printer. For example, while printing, the status of the printer is Busy Printing. -
Page 38: Using Print Properties
From here How To Troubleshooting Maintenance Contact Information Advanced Note: For more information, click Help in the lower right corner of the screen. Using Print Properties Opening Print Properties Print Properties is the software that controls the printing function when the printer is connected to a computer. You can change the settings in Print Properties based on the type of project you want to create. -
Page 39: Using The Save Settings Menu
Using the Save Settings menu From the “Save Settings” menu, you can name and save the current Print Properties settings for future use. You can save up to five custom settings. Using the I Want To menu The “I Want To” menu contains a variety of task wizards (printing a photo, an envelope, a banner, a poster, or printing on both sides of the paper) to help you select the correct print settings for a project. -
Page 40: Using The Photo Editor
Enter a file name and file type, and then click Save. From here Quick Fixes Image Adjust Image Size Lexmark 5400 Series. You can • Reduce the red-eye effect caused by light reflection. • Fix the photo with one click. -
Page 41: Using The Toolbar
Pick up a color using the eyedropper. • Select Page Setup options. • Select Options to customize the toolbar appearance or select a different setting for printing photos. • Access links to the Lexmark Web site. • Access Help for additional information. • Uninstall the Toolbar. -
Page 42: Using Fast Pics
Click Text Only Print only the text of a Web page. Photos Print only the photos or images on a Web page. Note: The number of photos or images valid for printing appears next to Photos. Preview Preview a Web page before printing. Using Fast Pics Use Fast Pics to save or print photos from a digital camera memory card or flash drive. -
Page 43: Loading Paper And Original Documents
Loading paper and original documents Loading paper Make sure: • You use paper designed for inkjet printers. • If you are using photo, glossy, or heavyweight matte paper, you load it with the glossy or printable side facing you. (If you are not sure which side is the printable side, see the instructions that came with the paper.) •... - Page 44 Load up to 10 envelopes 25 sheets of labels 50 transparencies Make sure • The print side of the envelopes faces you. • The stamp location is in the upper left corner. • The envelopes are designed for use with inkjet printers. •...
- Page 45 Load up to 10 iron-on transfers 25 greeting cards 25 index cards 25 photo cards 25 postcards 100 sheets of custom-size paper Make sure • You follow the loading instructions that came with the iron-on transfers. • The print side of the transfers faces you. •...
-
Page 46: Loading Original Documents Into The Automatic Document Feeder
Load up to 20 sheets of banner paper Loading original documents into the Automatic Document Feeder You can load up to 10 sheets of an original document into the Automatic Document Feeder (ADF) for scanning, copying, and faxing. You can load A4, letter, or legal-size paper into the ADF. Notes: •... - Page 47 Load the original document facedown and top edge first into the ADF until you hear a beep. Document Loaded appears on the display, and the document feeds into the ADF. Note: Preview is not supported when using the Automatic Document Feeder. You can preview one page at a time when using the scanner.
-
Page 48: Loading Original Documents On The Scanner Glass
Loading original documents on the scanner glass You can scan and then print photos, text documents, magazine articles, newspapers, and other publications. You can scan a document for faxing. Note: Place postcards, photos, small items, transparencies, photo paper, or thin items (such as magazine clippings) on the scanner glass instead of in the ADF. -
Page 49: Printing
Load paper. Open a Web page using Microsoft Internet Explorer 5.5 or later. If you want to check or change your print settings: From the toolbar area, click Lexmark Adjust the print settings. Click OK. Note: For additional print setting options, see “Using Print Properties” on page 38. -
Page 50: Printing Photos Or Images From A Web Page
Open a Web page with Microsoft Internet Explorer 5.5 or later. On the Toolbar, the number of photos valid for printing appears next to Photos. If no number appears next to Photos: From the Lexmark logo drop-down menu, select Options. Select the Advanced tab. Select a lower minimum photo size. -
Page 51: Printing The Last Page First (Reverse
If you want to print with reverse page order, select the Print Last Page First check box. Click OK. Click OK or Print. Printing the last page first (reverse page order) Load paper. With a document open, click File Click Properties, Preferences, Options, or Setup. From the Quality/Copies tab, select Print Last Page First. -
Page 52: Printing Multiple Pages On One Sheet
Select a Quality/Speed setting. Select Photo for photos and greeting cards and Normal for other types of cards. Select the Paper Setup tab. Select Paper. From the Paper Size list, select a card size. Click OK. Click OK or Print. Notes: •... -
Page 53: Working With Photos
Photo Effects, Layout, Paper Size, Paper Type, Photo Size, and Quality. • For best results, use Lexmark Premium Photo Paper or Lexmark Photo Paper. • To prevent smudging, avoid touching the surface of a printed photo. For best results, remove each printed sheet individually from the paper exit tray, and allow the prints to dry at least 24 hours before stacking, displaying, or storing. -
Page 54: Inserting A Flash Drive
Wait for the light on the printer to come on. The light blinks to indicate the memory card is being read or is transmitting data. Warning: Do not remove cables or media devices, or touch the printer in the area shown while the light is blinking. When reading of images is complete, the number of photos found appears on the display. -
Page 55: Transferring Photos From A Memory Device To A Computer Using Fast Pics
Transferring photos from a memory device to a computer using Fast Pics If the printer is connected directly to a computer, you can transfer photos to the computer from a memory card or flash drive. Note: You cannot transfer photos from a memory device to a computer through an external network adapter. Make sure the printer is connected to a computer, and both the printer and computer are on. -
Page 56: Printing Photos Using The Control Panel
Press repeatedly until Camera Card or the specific type of your camera card appears. Press Press repeatedly until Save Photos appears. Press If needed, press repeatedly until the setting you want appears. Notes: • If photos on the memory card were taken on more than one date, selections will include Last Date and Date Range. -
Page 57: Printing All Photos
If needed, press repeatedly until Scan Proof Sheet appears. Press Press Start Color or Start Black to scan the proof sheet. Load photo paper with the glossy or printable side facing you. (If you are not sure which side is the printable side, see the instructions that came with the paper.) For more information, see “Loading paper”... -
Page 58: Printing Photos Using Color Effects
Press Start Color or Start Black. The print settings to be used on the print job are displayed sequentially on the second line of the display. Press Start Color or Start Black again. Printing photos using color effects You can use the control panel to apply color effects to your photos. Note: You can also print photos with color effects using a proof sheet. -
Page 59: Using A Pictbridge-Enabled Digital Camera To Control Printing Photos
Using a PictBridge-enabled digital camera to control printing photos You can connect a PictBridge-enabled digital camera to the printer, and use the buttons on the camera to select and print photos. Insert one end of the USB cable into the camera. Note: Use only the USB cable that came with the digital camera. -
Page 60: Printing Photos Stored On The Computer Using The Imaging Studio
Select the size for each photo, the paper size in the printer, and the number of copies. Click Print Now. Printing photos stored on the computer using the Imaging Studio Load photo or heavyweight matte paper with the glossy or printable side facing you. (If you are not sure which side is the printable side, see the instructions that came with the paper.) From the desktop, double-click the Imaging Studio icon. - Page 61 Click Print Album Page. From the directory in the right panel, select the folder where your photos are stored. Close the directory in the right panel. Click Change the category of layouts listed above. Select Only Scrapbook Pages. Click OK. Select a paper size for the photos.
-
Page 62: Copying
Copying Use the ADF for multiple-page A4, letter or legal size documents. Note: If you want to customize copy settings, see “Using the Copy menu” on page 26. Making a copy Load paper. Load an original document facedown into the ADF or on the scanner glass. Note: Do not load postcards, photos, small items, transparencies, photo paper, or thin media (such as magazine clippings) into the ADF. -
Page 63: Collating Copies
Press Press repeatedly until Paper Size appears. Press Press repeatedly until the size you want appears. Press Press repeatedly until Original Size appears. Press Press repeatedly until the size you want appears. Press Start Color or Start Black. Collating copies If you print multiple copies of a document, you can choose to print each copy as a set (collated) or to print the copies as groups of pages (not collated). -
Page 64: Enlarging Or Reducing An Image
Press Press repeatedly until Repeat Image appears. Press Press repeatedly until the number of images you want to print on one page appears. Press Start Color or Start Black. Enlarging or reducing an image Load paper. Note: If you are copying photos, use photo or heavyweight matte paper, with the glossy or printable side facing you. (If you are not sure which side is the printable side, see the instructions that came with the paper.) Load an original document facedown into the ADF or on the scanner glass. -
Page 65: Scanning
Scanning Use the ADF for multiple-page A4, letter, or legal size documents. Note: If you want to customize scan settings, see “Using the Scan menu” on page 27. Scanning a document Make sure the printer is connected to a computer, and both the printer and the computer are on. Load an original document facedown into the ADF or on the scanner glass. -
Page 66: Scanning Documents Or Images For E-Mailing
If you want to scan only a portion of the document, click and drag the dotted line box to select a specific area of the preview image to scan. From the “Send scanned image to” menu, select a program. Select what is being scanned. Select a scan quality. -
Page 67: Scanning Text For Editing
Scanning text for editing Use the Optical Character Recognition (OCR) software feature to turn scanned images into text you can edit with a word- processing application. Make sure: • The printer is connected to a computer, and both the printer and the computer are on. •... -
Page 68: Scanning To A Computer Over A Network
Click Display Advanced Scan Settings. Select the Image Patterns tab. Select the Remove image patterns from magazine/newspaper (descreen) check box. From the “What was scanned?” menu, select Magazine or Newspaper. Click OK. From the “Send scanned image to” menu, select the destination to which you want to send the scan. Click Scan Now. -
Page 69: Faxing
Faxing Use the ADF for: • Multiple-page A4 or letter-size documents. • Legal-size documents. Note: If you want to customize fax settings: • Using the control panel, see “Using the Fax menu” on page 28. • Using the computer, see “Customizing settings using the Fax Setup Utility” on page 78. Scanner glass Use the scanner glass for single pages, small items (such as postcards or photos), transparencies, photo paper, or thin media (such as... -
Page 70: Sending A Fax
Sending a fax Entering a fax number From the control panel, press Fax Mode. Enter a fax number using: The text box Speed Dial or Group Dial If you want to send a fax to a group of numbers (broadcast fax): Press Repeat step 2, using any combination of the previous methods, until a maximum of 30 fax numbers have been entered. -
Page 71: Sending A Fax Using The Computer
If you want to send a fax to a group of numbers (broadcast fax): Press Repeat step 4 and press Press Start Color or Start Black. Sending a fax using the computer You can scan a document to the computer and then fax it to someone using the software. Make sure the printer is connected to a computer, and both the printer and the computer are on. -
Page 72: Sending A Fax While Listening To A Call (On Hook Dial)
Note: At the designated time, the fax numbers are dialed and the fax is sent to all of the designated fax numbers. If the fax transmission is unsuccessful to any of the numbers on the broadcast list, the unsuccessful numbers will be dialed again. -
Page 73: Receiving A Fax Manually
Receiving a fax manually Make sure the Auto Answer light is off. To receive the fax: • Press Start Color or Start Black. • Press * 9 * on the telephone after you answer it and hear fax tones. Hang up the telephone. The printer receives the fax. Using Caller ID Caller ID is a service provided by some telephone companies that identifies the telephone number (and possibly the name) of the person who is calling. -
Page 74: Printing Fax Activity Reports
Press repeatedly until Ringing and Answering appears. Press Press repeatedly until Fax Forward appears. Press Press repeatedly until the setting you want appears. Press Enter the number to which you want to forward the fax. Press to save the setting. Note: If you select Forward or Print &... -
Page 75: Using The Phone Book
Enter a contact name. Repeat step a through step d as necessary using lines 2–89. To add a fax group: Scroll down and click on line 90. A new entry box appears. Click on the next empty line in the list. Enter up to 30 fax numbers for the group. -
Page 76: Customizing Dial Settings
Note: For instructions on how to add Speed Dial or Group Dial entries to the Phone Book using the computer, see “Setting up Speed Dial numbers” on page 74. Customizing dial settings Setting up a dialing prefix You can add a prefix of up to eight characters to the beginning of each number dialed. Characters can include numbers, commas, and/or the symbols * and #. -
Page 77: Setting The Number Of Rings Before Receiving A Fax Automatically
Press repeatedly until the ring pattern you want appears. Press to save the setting. Setting the number of rings before receiving a fax automatically From the control panel, press Fax Mode. Press Press repeatedly until Fax Setup appears. Press Press repeatedly until Ringing and Answering appears. -
Page 78: Customizing Fax Settings
Customizing fax settings Customizing settings using the Fax Setup Utility You can adjust the fax settings in the Fax Setup Utility. These settings apply to the faxes you send or receive. From the desktop, double-click the Imaging Studio icon. Click Fax. Click Manage fax history or All-In-One fax settings. -
Page 79: Setting Up A Fax Header
Click each tab, and change the settings as needed. Dialing and Sending Ringing and Answering Fax Printing / Reports Speed Dial Click OK after you finish customizing the settings. Close the Fax Setup Utility. Setting up a fax header During the initial setup of your printer, you were prompted to enter your name, fax number, date, and time. This information is used to create a fax header for faxes you send. -
Page 80: Setting Up A Fax Footer
Press repeatedly until Dialing and Sending appears. Press Press repeatedly until Your Fax Name appears. Press Enter your name using the keypad. Note: You can enter a maximum of 20 characters. Press to save the setting. Press repeatedly until Your Fax Number appears. Press Enter your fax number using the keypad. -
Page 81: Blocking Unwanted Changes To Fax Settings
Press repeatedly until Fax Printing appears. Press Press repeatedly until Fax Footer appears. Press Press repeatedly until On appears. Press During the initial setup of your printer, you were prompted to enter the date and time. If you have not entered this information: Press twice. -
Page 82: Blocking Junk Faxes
Press until Block appears. Press to save this setting. Blocking junk faxes If you have Caller ID, you can block faxes sent from specific numbers and/or all faxes which do not include a Caller ID number. From the control panel, press Fax Mode. Press Press repeatedly until Fax Setup appears. - Page 83 Press repeatedly until On appears. Press to save the setting. If you want to print a list of blocked faxes: Press repeatedly until Print appears. Press to print the list.
-
Page 84: Networking The Printer
Note: You can also set up a wireless network using a Lexmark print server. If your printer came with a Lexmark N4050e print server, follow the steps on the Setup Sheet that came with your product to set it up. -
Page 85: Tips For Installing A Network Printer
Installing the shared printer on other network computers (on the client computers) Using the peer-to-peer method Go to a network computer that you want to enable to print to the shared printer. Insert the printer CD. Click Install. From the “Connect Your Printer” dialog, select the network option. -
Page 86: Finding A Printer/Print Server Located On Remote Subnets
Finding a printer/print server located on remote subnets The printer software CD can automatically find the printers that are located on the same network as the computer. If the printer and print server are located on another network (called a subnet), you must manually enter an IP address during printer software installation. -
Page 87: Maintaining The Printer
Maintaining the printer Changing print cartridges Removing a used print cartridge Make sure the printer is on. Lift the scanner unit. The print cartridge carrier moves and stops at the loading position, unless the printer is busy. Press down on the cartridge carrier lever to raise the cartridge carrier lid. Remove the used print cartridge. - Page 88 Press down on the cartridge carrier levers to raise the cartridge carrier lids. Insert the black cartridge or the photo cartridge in the left carrier. Insert the color cartridge in the right carrier. Close the lids. Close the scanner unit, making sure to keep your hands out from underneath the scanner unit. The control panel display will prompt you to load paper and press Note: The scanner unit must be closed to start a new scan, print, copy, or fax job.
-
Page 89: Achieving Better Print Quality
• Use the appropriate paper for the document. If you are printing photos or other high quality images, for best results use Lexmark Premium Photo Paper or Lexmark Photo Paper. • Use a paper that is a heavier weight or bright white. -
Page 90: Wiping The Print Cartridge Nozzles And Contacts
Press repeatedly until Tools appears. Press Press repeatedly until Maintenance appears. Press Press repeatedly until Clean Cartridges appears. Press A page prints, forcing ink through the print cartridge nozzles to clean them. Print the document again to verify that the print quality has improved. If print quality has not improved, try cleaning the nozzles up to two more times. -
Page 91: Preserving The Print Cartridges
• For best results, use only Lexmark print cartridges. • For best results when printing photos or other high-quality images, use Lexmark Premium Photo Paper or Lexmark Photo Paper. • To prevent smudging, avoid touching the surface of a printed photo. For best results, remove each printed sheet individually from the paper exit tray, and allow the prints to dry at least 24 hours before stacking, displaying, or storing. -
Page 92: Using Genuine Lexmark Print Cartridges
Using genuine Lexmark print cartridges Lexmark printers, print cartridges, and photo paper are designed to perform together for superior print quality. If you receive an Out of Original Lexmark Ink message, the original Lexmark ink in the indicated cartridge(s) has been depleted. -
Page 93: Troubleshooting
Troubleshooting • “Setup troubleshooting” on page 93 • “Print troubleshooting” on page 96 • “Copy troubleshooting” on page 98 • “Scan troubleshooting” on page 100 • “Fax troubleshooting” on page 102 • “Network troubleshooting” on page 106 • “Jams and misfeeds troubleshooting” on page 107 •... -
Page 94: Power Button Is Not Lit
Power button is not lit Check power connection Disconnect the power cord from the wall outlet, and then from the printer. Plug the cord all the way into the power supply on the printer. Plug the cord into an electrical outlet that other electrical devices have been using. If the Software does not install Check your operating... -
Page 95: Page Does Not Print
Make sure no check mark appears next to Pause Printing. • Make sure a check mark does appear next to Set As Default. to turn the printer off. to turn the printer on. www.lexmark.com Printers and Faxes. Printers and Faxes. Printers. Printers. -
Page 96: Cannot Print From Digital Camera Using Pictbridge
• Use the appropriate paper for the document. If you are printing photos or other high quality images, for best results use Lexmark Premium Photo Paper or Lexmark Photo Paper. • Use a paper that is a heavier weight or bright white. -
Page 97: Poor Text And Graphic Quality
Use a different brand of Each paper brand accepts ink differently and prints with color variations. If you are printing paper photos or other high-quality images, for best results use Lexmark Premium Photo Paper or Lexmark Photo Paper. Check paper condition Use only new, unwrinkled paper. -
Page 98: Poor Quality At The Edges Of The Page
Poor quality at the edges of the page Check minimum print Unless you are using the borderless feature, use these minimum print margin settings: settings • Left and right margins: – – • Top margin: 1.7 mm (0.067 in.) • Bottom margin: 12.7 mm (0.5 in.) Select the Borderless From the software application, click File... -
Page 99: Copier Does Not Respond
• “Poor copy quality” on page 99 • “Partial document or photo copies” on page 100 Copier does not respond Check messages If an error message is displayed, see “Error messages” on page 110. Check power If the Software may not be For more information, see “Software may not be installed correctly”... -
Page 100: Partial Document Or Photo Copies
Partial document or photo copies Check document Make sure the document or photo is loaded facedown on the scanner glass in the upper placement left-hand corner. Check paper size Make sure the paper size being used matches the size you selected. Check Original Size Make sure that the Original Size setting is Automatic or the size of the original document setting... -
Page 101: Scanning Takes Too Long Or Freezes The Computer
From the Selected Application Does Not Support Multiple Pages dialog, click Cancel. application From the All-In-One Center Scanning & Copying tab, choose a different application from the “Send scanned image to” menu. Scan the document. Programs or All Programs Lexmark 5400 Series. -
Page 102: Cannot Scan To A Computer Over A Network
Cannot scan to a computer over a network Review scanning steps See “Scanning to a computer over a network” on page 68. Fax troubleshooting • “Cannot send or receive a fax” on page 102 • “Can send but not receive faxes” on page 103 •... -
Page 103: Can Send But Not Receive Faxes
Disable Call Waiting Call Waiting can disrupt fax transmissions. Disable this feature before sending or receiving a temporarily fax. Call your telephone company to obtain the keypad sequence for temporarily disabling Call Waiting. Do you have Voice Mail Voice Mail offered through your local telephone company may disrupt fax transmissions. To service? enable both Voice Mail and the printer to answer calls: •... -
Page 104: Can Receive But Not Send Faxes
Check whether Fax From the control panel, press Fax Mode. Forwarding is selected Press Press Press Press Press Press Press Press To turn off Fax Forwarding, press Press Can receive but not send faxes Check mode selection To make sure the printer is set for faxing, press Fax Mode. Check document Load the original document facedown in the ADF or in the upper left corner of the scanner glass. -
Page 105: Printer Receives A Blank Fax
Be sure that printer is • See “Sending a fax while listening to a call (On Hook Dial)” on page 72. detecting a dial tone • Check the Dial Method setting. Listen for a dial tone. If you hear a dial tone but the printer hangs up without dialing, this means it did not recognize the dial tone. -
Page 106: Caller Id Information Is Not Displayed
Decrease the From the control panel, press Fax Mode. transmission speed Press Press Press Press Press Press Press Press Press Resend the fax. If the problem persists, repeat step 1 through step 11 to resend the fax at successively lower transmission speeds. -
Page 107: Cannot Print To The Network Printer
Check USB connection If you are using a USB cable: Check the USB cable for any obvious damage. Firmly plug the rectangular end of the USB cable into the USB port of the computer. The USB port is marked with the USB symbol Firmly plug the square end of the USB cable into the USB port on the back of the printer. -
Page 108: Paper Jams
Paper jams Is the jam in the paper Press support? Firmly grasp the paper, and gently pull it out. Press Is the jam in the Automatic Flip open the ADF by grasping the notch in the left side of the ADF and pulling up. Document Feeder (ADF)? Firmly grasp the paper, and gently pull it out. -
Page 109: Printer Does Not Feed Paper, Envelopes, Or Specialty Media
Printer does not feed paper, envelopes, or specialty media Check for paper jams Check for and clear any paper jams. For more information, see “Paper jams” on page 108. Check media loading • Verify that the specialty media is loaded correctly. For more information, see “Loading various paper types”... -
Page 110: Nothing Happens When Memory Card Is Inserted
Nothing happens when memory card is inserted Check memory card See “Inserting a memory card” on page 53 to determine which slot accommodates your placement memory card and to see instructions on how to insert it. Check memory card type Make sure that the type of memory card you are using can be used in the printer. - Page 111 Cartridge Error Procedure 1 • 1102 • 1203 • 1204 • 120F (Procedure 1) Cartridge Error Procedure 2 • 1102 Follow this procedure to determine which cartridge is not working properly. • 1203 • 1204 • 120F (Procedure 2) Clear Carrier Jam (remove obstructions) Remove the print cartridges, and close the cartridge carrier lids.
- Page 112 Clear Carrier Jam (remove cartridges) Computer not connected Make sure your computer is connected and turned on. If you are using an ENA, make sure it is connected. For more information, see the print server documentation. Could not detect a The document placed on the scanner glass is not a valid proof sheet.
- Page 113 Make sure the printer is detecting a dial tone. Failed to Connect • (check that printer detects dial tone) • The fax machines have stopped communicating. Fax Error Resend the fax. There may have been a problem with the quality of the telephone line connection.
- Page 114 Left Cartridge One or both cartridges are missing or not installed properly. For more information, see Missing / Right “Installing print cartridges” on page 87. Cartridge Missing Notes: Memory Full If applicable: (reduce memory use) Memory Full (lower the fax resolution) Memory Full Try Setting to Scan After Dial.
- Page 115 The printer automatically redials three times at 3-minute intervals. You can change the Phone Line Busy default settings to redial up to five times at intervals up to 8 minutes. (change redial settings) To change the redial settings: Phone Line Busy See “Sending a broadcast fax at a scheduled time”...
- Page 116 There are one or more photos larger than the paper size you selected. Photo Size Error Photo must fit on page. PictBridge Remove and then reinsert the cable into the PictBridge port on the front of the printer. Communications Error For more information, see “Using a PictBridge-enabled digital camera to control printing photos”...
-
Page 117: Settings Are Not Saved
D:\setup, where D is the letter of your CD-ROM drive. to select a setting, an * appears next to the selected setting. The printer reverts to select a setting, an * appears next to the selected setting. For information on Lexmark 5400 Series. Run, and then type... -
Page 118: Notices
Lexington, Kentucky 40550, U.S.A. In the United Kingdom and Eire, send to Lexmark International Ltd., Marketing and Services Department, Westhorpe House, Westhorpe, Marlow Bucks SL7 3RQ. Lexmark may use or distribute any of the information you supply in any way it believes appropriate without incurring any obligation to you. -
Page 119: Noise Emission Levels
Note: To assure compliance with FCC regulations on electromagnetic interference for a Class B computing device, use a properly shielded and grounded cable such as Lexmark part number 1021294 for USB attach. Use of a substitute cable not properly shielded and grounded may result in a violation of FCC regulations. - Page 120 If you experience trouble with this equipment, for repair or warranty information, contact Lexmark International, Inc. at www.lexmark.com your Lexmark representative. If the equipment is causing harm to the telephone network, the telephone company may request that you disconnect the equipment until the problem is resolved.
-
Page 121: Notice To Users Of The Canadian Telephone Network
Using this product in Switzerland This product requires a Swiss billing tone filter (Lexmark part number 14B5109) to be installed on any line which receives metering pulses in Switzerland. The Lexmark filter must be used, as metering pulses are present on all analog telephone lines in Switzerland. -
Page 122: Power Consumption
Uso del prodotto in Svizzera Questo prodotto richiede un filtro toni Billing svizzero, (codice Lexmark 14B5109), da installare su tutte le linee che ricevono impulsi remoti in Svizzera. È necessario utilizzare il filtro Lexmark poiché gli impulsi remoti sono presenti su tutte le linee analogiche in Svizzera. -
Page 123: Index
Index adding text captions 60 ADF (Automatic Document Feeder) loading documents 46 paper capacity 47 Advanced tab 38 album page, creating 60 aligning print cartridges 89 alignment problem 110 All-In-One Center Maintain/Troubleshoot link 37 opening 35 Saved Images tab 36 Scanning &... - Page 124 envelopes loading 44 printing 51 error 1104 110 error messages alignment problem 110 carrier jam 110 cartridge error 110 cartridge missing 110 change paper or photo size setting 110 change paper size setting 110 color ink low 110 computer not connected 110 could not detect a proof sheet 110 error 1104 110 failed to connect 110...
- Page 125 greeting cards 45 heavyweight matte paper 43 index cards 45 iron-on transfers 45 labels 44 paper 43 photo cards 45 photo paper 43 photos on the scanner glass 48 postcards 45 transparencies 44 MAC address, finding 85 magazine articles, loading on the scanner glass 48 Maintain/Troubleshoot button 35...
- Page 126 72 fax forwarding 73 manually 73 using an answering machine 72 recycling Lexmark products 92 WEEE statement 120 reducing an image 64 red-eye reducing 40 remote fax error 110 removing print cartridges 87 repeating an image 63...
- Page 127 computer not connected 110 could not detect a proof sheet 110 error 1104 110 failed to connect 110 fax error 110 fax mode unsupported 110 insert camera/memory card 110 invalid photo/paper size selection 110 left cartridge error 110 load paper 110 memory full 110 no images have been selected 110 no photo files found 110...