Table of Contents
Advertisement
Quick Links
Download this manual
See also:
Operator's Manual
Advertisement
Table of Contents

Related Manuals for Ryobi 510r


Summary of Contents for Ryobi 510r
- Page 1 510r 4-Cycle Garden Cultivator OPERATOR’S MANUAL FOR QUESTIONS, CALL 1-800-345-8746 in U.S. or 1-800-265-6778 in CANADA www.ryobi.com IMPORTANT MANUAL DO NOT THROW AWAY...
-
Page 2: Table Of Contents
J. Accessories/Replacement parts ... . . 18 • 1-800-345-8746 or www.ryobi.com on the world wide VIII. Cleaning and Storage ......19 web for authorized service dealers in the United States A. -
Page 3: California Emission Regulations
CALIFORNIA EMISSION REGULATIONS This engine meets U.S. EPA PH1 and 2000 model year and later California emissions regulations for small off-road engines. These units are identified by the label on the engine of your product. A typical identification label is shown. To ensure that your unit continues to meet these regulations, refer to the following information and instructions in this operator’s manual. -
Page 4: Rules For Safe Operation
RULES FOR SAFE OPERATION The purpose of safety symbols is to attract your DANGER: Failure to obey a safety warning attention to possible dangers. The safety symbols, and will result in serious injury to yourself or to their explanations, deserve your careful attention and others. -
Page 5: Safety And International Symbols
RULES FOR SAFE OPERATION • Avoid accidental starting. Be in the starting position • Use only genuine Ryobi replacement parts and acces- whenever pulling the starter rope. The operator and sories for this unit. These are available from unit must be in a stable position while starting. See your authorized service dealer. - Page 6 RULES FOR SAFE OPERATION SYMBOL MEANING • KEEP BYSTANDERS AWAY WARNING: Keep all bystanders, especially children and pets, at least 50 feet (15 m) from the operating area. • PRIMER Push primer bulb, fully and slowly, 5 to 7 times. •...
-
Page 7: Know Your Unit
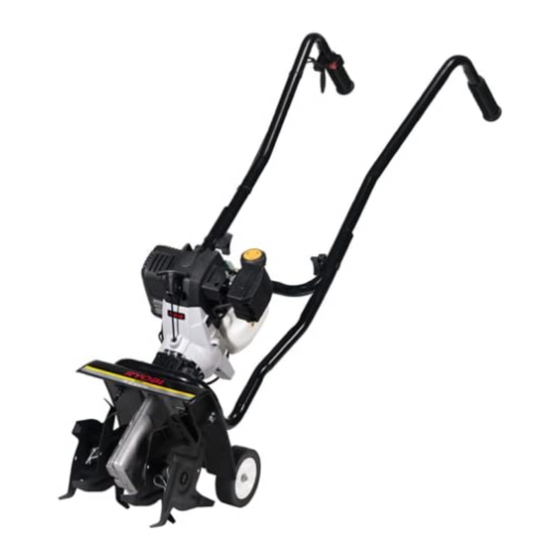
RULES FOR SAFE OPERATION KNOW YOUR UNIT APPLICATION Use this unit for cultivating sod and light to medium soil. Also for cultivating in garden areas, around trees, etc. Handgrip Handgrip Handlebar Primer Bulb Throttle Control Handlebar Knobs Fuel Cap Throttle Cable and Switch Wires STOP/OFF (O) -
Page 8: Assembly Instructions
ASSEMBLY INSTRUCTIONS ASSEMBLING THE UNIT INSTALLING THE WHEEL BRACKET ASSEMBLY Your yard and garden cultivator has been completely WARNING: To avoid injury from the tines, assembled, except for the wheel bracket assembly. wear heavy gloves and a long sleeve shirt NOTE: This unit is shipped without being filled with oil. -
Page 9: Oil And Fuel Information
OIL AND FUEL INFORMATION RECOMMENDED OIL TYPE Fuel Cap Using the proper type and weight of oil in the crankcase is extremely important. Check the oil before each use and change the oil regularly. Failure to use the correct oil, or using dirty oil, can cause premature engine wear and failure. -
Page 10: Starting/Stopping Instructions
OIL AND FUEL INFORMATION Using Fuel Additives Fuel Cap ® The use of fuel additives, such as STA-BIL Stabilizer or an equivalent, will inhibit corrosion and minimize the formation of gum deposits. Using a fuel additive can keep fuel from forming harmful deposits in the carburetor for up to six (6) months. - Page 11 STARTING/STOPPING INSTRUCTIONS 5. Fully press and release the primer bulb slowly 7 times. Gasoline should be felt and visible in the bulb (Fig. 11). If gasoline has not entered the bulb, press three more times, or until it does. Choke Lever Starter Rope Primer Bulb Fig.
-
Page 12: Operating Instructions
OPERATING INSTRUCTIONS OPERATING TIPS ADJUSTING TINE DEPTH Tine adjustment will vary depending on the type of soil WARNING: Dress properly t o reduce the risk being cultivated and how it will be used. Generally, of injury when operating this unit . Do not adjusting the tines to break the soil 4 to 6 inches is wear loose clothing or jewelry. -
Page 13: Maintenance And Repair Instructions
MAINTENANCE AND REPAIR INSTRUCTIONS NOTE: Some maintenance procedures may require WARNING: To prevent serious injury, never special tools or skills. If you are unsure about do maintenance or repairs with unit running. these procedures take your unit to an authorized Always do maintenance and repairs on a service dealer. -
Page 14: Checking The Oil Level
MAINTENANCE AND REPAIR INSTRUCTIONS CHECKING THE OIL LEVEL O-Ring CAUTION: To prevent extensive engine wear and damage to the unit, always maintain the proper oil level in the crankcase. Never Oil Fill Plug/Dipstick operate the unit with the oil level below the bottom of the dipstick. -
Page 15: Air Filter Maintenance
MAINTENANCE AND REPAIR INSTRUCTIONS Fill Level Fig. 21 Fig. 23 AIR FILTER MAINTENANCE 4. Apply enough clean SAE 30 motor oil to lightly coat Cleaning the Air Filter the filter (Fig. 24). WARNING: To avoid serious personal injury, always turn your unit off and allow it to cool before you clean or do any maintenance on it. -
Page 16: Carburetor Adjustment
MAINTENANCE AND REPAIR INSTRUCTIONS CARBURETOR ADJUSTMENT Checking the fuel, cleaning the air filter, and adjusting the idle speed screw should solve most engine prob- The idle speed of the engine is adjustable. An idle lems. adjustment screw is reached though a hole in the top of If not and: the engine cover (Fig 26). - Page 17 MAINTENANCE AND REPAIR INSTRUCTIONS Rocker Arms Adjusting Nuts Screw Feeler Gauge Fig. 29 Gasket 4. Disconnect the spark plug wire. 5. Clean dirt from around the spark plug. Remove the spark plug from the cylinder head by turning a 5/8 in. Fig.
-
Page 18: Replacing The Spark Plug
MAINTENANCE AND REPAIR INSTRUCTIONS REPLACING THE SPARK PLUG SPARK ARRESTOR MAINTENANCE Use only genuine Ryobi spark plugs. The correct air 1. Remove the muffler cover. See Rocker Arm gap is 0.025 in. (0.655 mm). Remove the plug after Clearance, Pg. 16. -
Page 19: Cleaning And Storage
CLEANING AND STORAGE CLEANING THE UNIT MOVING THE UNIT 1. Allow the unit to cool before moving. WARNING: To avoid serious personal injury, always turn the unit off and allow it 2. Loosen the knobs on the handlebar. to cool before you clean or perform any 3. -
Page 20: Troubleshooting Chart
TROUBLESHOOTING ENGINE WILL NOT START C A U S E A C T I O N Ignition switch is OFF Turn switch to ON Empty fuel tank Fill fuel tank Primer bulb wasn't pressed enough Press primer bulb fully and slowly 5-7 times Engine flooded Use starting procedure with choke lever in the RUN position, Pg. -
Page 21: Specifications
SPECIFICATIONS ENGINE Engine Type ..............Air-Cooled, 4-Cycle Displacement . - Page 22 NOTES...
- Page 23 • In order to file a claim, go to your nearest or unapproved modifications. Authorized Ryobi Service Center. Warranty services or repairs will be provided at all Authorized Ryobi • You are responsible for presenting your small Service Centers. off-road engine to a Ryobi Authorized Service Center as soon as a problem exists.
-
Page 24: Warranty
This warranty gives you specific legal rights, and you the RYOBI Operator’s Manual. This warranty does not may also have other rights which vary from state to apply to any damage to the RYOBI Product that is the state. result of improper maintenance or to any RYOBI...