Table of Contents
Advertisement
Quick Links
Advertisement
Table of Contents

Related Manuals for Minolta DiMAGE DiMAGE Scan Multi PRO


Summary of Contents for Minolta DiMAGE DiMAGE Scan Multi PRO
- Page 1 INSTRUCTION MANUAL 9224-2887-11 H-A108...
- Page 2 5000 is a Multiple format film scanner capable of scanning 35mm, 120/220 (6x4.5, 6x6, 6x7, 6x8, 6x9). This manual has been designed to help you understand the operation of your scanner. Please read this manual thoroughly to realize all the benefits of your scanner.
-
Page 3: For Proper And Safe Use
FOR PROPER AND SAFE USE Please read and understand each caution before using this product. WARNING • Use only within the voltage range specified on the unit. Inappropriate current may cause damage or injury through fire or electric shock. • Do not disassemble this product. Electric shock may cause injury if a high voltage circuit inside the product is touched. -
Page 4: Package Contents
PACKAGE CONTENTS THE FOLLOWING CONTENTS SHOULD BE INCLUDED IN THIS PACKAGE Minolta DiMAGE Scan Multi PRO 35mm film holder (FH-P1), Slide mount holder (SH-P1) and Universal holder (UH- 120/220 (6x4.5, 6x6, 6x7, 6x8, 6x9) film attachments with glass and glassless Film Masks Ultra SCSI D-sub half-pitch 50-pin connector cable... - Page 5 Overview This section describes the required system and the names of the parts. Scanner Setup This section describes how to set up the scanner. Index Scan This section describes how to perform the index scan. Preview Scan This section describes how to perform the preview scan.
-
Page 6: Table Of Contents
SCANNER — NAMES OF PARTS ........ - Page 7 INDEX SCAN INDEX SCAN WINDOW ..........42 The Index Tab Part —...
- Page 8 TABLE OF CONTENTS IMAGE CORRECTION IMAGE CORRECTION WINDOW .........64 The Image Correction Tab Part —...
- Page 9 FINAL SCAN SCAN SETTINGS ........... .92 The Scan Settings Part Window —...
-
Page 10: System Requirements - Pc / At
SYSTEM REQUIREMENTS — PC / AT Interface: Pentium 166MHz or later processor (or better). CPU: Support cannot be provided for custom or home built machines.(*1*2) Pentium III processor is recommended when scanning with 16 bit output or using the Digital ICE/ROC/GEM functions. Windows ®... -
Page 11: System Requirements - Macintosh
SYSTEM REQUIREMENTS — MACINTOSH Interface: Power PC 604 or later Excludes notebook PCs. CPU: Power Macintosh G4 processor is recommended when scanning with 16 bit output or using the Digital ICE/ROC/GEM function. Operating System: A minimum of 64 MB application RAM in addition to the requirements for the Mac OS and Adobe Photoshop™. -
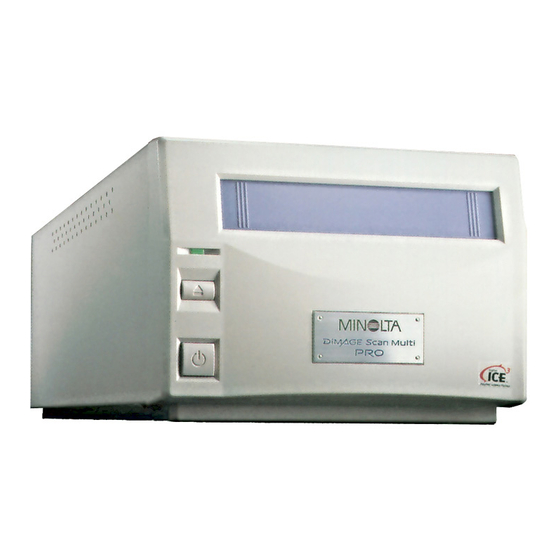
Page 12: Scanner - Names Of Parts
SCANNER — NAMES OF PARTS Film-slot door Indicator lamp Film Holder Eject button Power switch SCSI ID switch IEEE 1394 interface connector Dip switches AC power socket SCSI Interface connector... -
Page 13: Scanner Setup
S C A N N E R S E T U P S C A N N E R S E T U P F L O W REMOVING THE OPTICS LOCKING SCREW CONNECTING THE HARDWARE USING THE SCSI INTERFACE USING THE IEEE1394 INTERFACE INSTALLING THE SOFTWARE LAUNCHING THE SOFTWARE... -
Page 14: Removing The Optics Locking Screw
REMOVING THE OPTICS LOCKING SCREW Before using the scanner for the first time, remove the optics locking screw on the bottom panel of the scanner with a flat- head screwdriver. As the removed locking screw is necessary when transporting the scanner, insert it into the storage posistion, for future use. -
Page 15: Connecting The Hardware
Before connecting the scanner to a computer turn off the power of the scanner, then, decide which interface you will be using, and use the Dip switch No. 4 to set the scanner to the selected interface. Set additional Dip switches for termination and auto power save if necessary. -
Page 16: Using The Scsi Interface
USING THE SCSI INTERFACE A SCSI ID is a unique address you assign to each SCSI device connected to your computer. The SCSI ID range of your computer is from 0 to 7, however some ID's are already occupied. IBM PC/AT Macintosh * IDE Macintosh systems do not use SCSI ID 0 for the hard drive. - Page 17 Connecting the SCSI Cable This scanner has been packaged with the SCSI cable SC-P1. See your dealer if you require a different SCSI cable. • To meet FCC regulations, the SCSI cables used with this scanner must be equipped with ferrite cores.
- Page 18 USING THE SCSI INTERFACE 6. Plug the power cord into the scanner’s AC socket, then plug it into a grounded outlet. NOTE: This device is to be used with a power source within the voltage as specified on the back of unit.
-
Page 19: Using The Ieee 1394 Interface
The driver software only supports IEEE1394 connection with Windows®2000, Windows®Me and Macintosh OS. This scanner has been packaged with the IEEE 1394 cable. For details, refer to the page 106. With Macintosh made by Apple Computer, Inc., an IEEE1394 Interface is named “FireWire”. Therefore, interface names of other related peripheral equipment may also be called “FireWire”. -
Page 20: Installing The Software - Windows
• In the procedure below, the hard disk drive for system startup is drive C, and the CD-ROM drive is drive D. • Make sure the scanner isn’t connected to the computer when you install the software. 1. Turn on the computer to start Windows ®... - Page 21 If the InstallShield Wizard program does not start up automatically Operate the following procedure. 1. “Start” “Run…”. 2. Click [Browse (B)] in the Run dialog box. 3. Select CD-ROM drive (DS MultiPRO (D:)) from the “Look in:” list box in the Browse dialog box. 4.
- Page 22 INSTALLING THE SOFTWARE — WINDOWS 6. To install the software in the default folder (C:\Program Files\DS_MultiPRO), press Next. To install the software in another folder, click [Browse...] to display the window for selecting a folder. Specify the directory to install the software in, then click [OK].
-
Page 23: Installing The Software - Macintosh
INSTALLING THE SOFTWARE — MACINTOSH Please remove or disable any antivirus system extensions before launching this installer. These extensions may conflict with the operation of this installer. Replace or re-enable them when installation is complete. Hold the shift key down during startup to disable the extensions. - Page 24 INSTALLING THE SOFTWARE — MACINTOSH 8. Click on Accept. • If you do not agree to the conditions stated in the End-User License Agreement, click on [Decline] and the software will not be installed. 9. Check the folder in which the software will be installed.
- Page 25 11. Click on Install. The following message appears when the installer is finished. 12. Click on Quit. • The software will be installed in a new folder titled DiMAGE Scan Multi PRO. • If Easy Install was chosen, the DiMAGE Scan Multi PRO folder will contain the following items: DS_MultiPRO Utility, DS_MultiPRO Plug-in, and Read Me file.
-
Page 26: Launching The Software - Windows
LAUNCHING THE SOFTWARE — WINDOWS The TWAIN driver allows you to control the software through another application, such as your image editing software. LAUNCHING THE TWAIN DRIVER This manual uses Adobe Photoshop Ver.6.0 as the host application. Commands may vary among applications. 1. -
Page 27: Launching The Software - Macintosh
LAUNCHING THE SOFTWARE — MACINTOSH The plug-in software lets you access the software through Adobe Photoshop. LAUNCHING THE PLUG-IN This manual uses Adobe Photoshop Ver.6.0 as the host application. Commands may vary among applications. 1. Launch Adobe Photoshop. 2. Select File Import DS_MultiPRO Plug-in…... -
Page 28: Main Window
MAIN WINDOW — NAMES OF PARTS MAIN WINDOW THE MAIN WINDOW PART — NAMES OF PARTS Holder Type list box Film format list box Index Scan button Prescan button Scan button Main Window part (see below) Scan Setting part (see page 92) Film Type list box Preferences button Close button... -
Page 29: Setting The Preferences
SETTING THE PREFERENCES 1. Click on in the Main window. The Preferences Dialog Box — Name of parts 2. Set the preferences as desired. “Auto Expose for Slides” checkbox This option allows you to select whether to perform auto exposure during the prescan or the final scan when using colour slides. - Page 30 SETTING THE PREFERENCES “Colour depth” setting list box This option allows you to specify the format when outputting the scanned data to a file or an application software. Select one from the following items of the list box. The default setting is 8 bit. •...
-
Page 31: Loading The Film Holder
LOADING THE FILM HOLDER Three types of holder are supplied with this scanner. Select the appropriate one according to the film type to be scanned. • 35 mm film holder FH-P1 • Slide mount holder SH-P1 • Universal holder UH-P1... -
Page 32: Slide Mount Holder Sh-P1
• With the fourth frame of the slide mount holder, you can change slides without removing the slide mount holder from the scanner. A prescan should be made with each new slide when using the AF and AE function (page 29). -
Page 33: Loading The Universal Holder Uh-P1
LOADING THE UNIVERSAL HOLDER UH-P1 The universal holder UH-P1 is used with the following attachments. Use the attachment suited to the film. • 120/220 film attachment with glass (HA-P1), glassless (HA-P2) When scanning 120/220 (6x4.5, 6x6, 6x7, 6x8, 6x9) film Select a film attachment with glass or a glassless film attachment according to your purpose. - Page 34 While sliding the lever on the middle part of the holder to the right, lift the attachment. NOTE: • Be sure to fit the appropriate mask before inserting the film in the scanner. Otherwise, interference fringes with the concentric circles-patterns may appear on the image after the scanning is...
-
Page 35: 120/220 (6X4.5, 6X6, 6X7, 6X8, 6X9) Glassless Film Attachment (Ha-P2)
120/220 (6x4.5, 6x6, 6x7, 6x8, 6x9) glassless film attachment (HA-P2) 1. Install the selected attachment on the holder. Place the attachment with the button side up at the position on the holder that is suited for the attachment you selected and fix it aligning with the two grooves on the left side until it clicks. -
Page 36: Multi-Format Attachment (Sold Separately, Hs-P1)
LOADING THE FILM HOLDER Multi-format attachment (sold separately, HA-P3) Purchasing the Multi-format attachment, sold separately, will enable you to deal with a wider range of films such as a 16mm film. Multi-format attachment (HS-P1) The following contents should be included in this package. - Page 37 5. Place a film on the mask with the emulsion side down while aligning it carefully with the cutout in the mask. 6. Close the film cover of the holder until it clicks. Removing a Film While sliding the button on the cover of the attachment, lift the film cover.
-
Page 38: Inserting The Film Holder
During the start-up time, the indicator lamp will blink. DO NOT insert the film holder into the film slot until the indicator lamp is steady. 1. Press the power switch to turn the scanner on. Turn on your computer, then launch the DiMAGE Scan Multi PRO software. -
Page 39: Setting The Film Format/Film Type
SETTING THE FILM FORMAT/FILM TYPE SELECTING THE FILM FORMAT 1. Select the film format from the drop-down list. • The Index window (see page 42) will appear if 35mm, 6x4.5, 6x6, 6x7, 6x8, 6x9, Multi Format 35mm or Multi Format 6x9 is selected. •... -
Page 40: Selecting The Film Type
SETTING THE FILM FORMAT/FILM TYPE SELECTING THE FILM TYPE 1. In the Main window, select the type of film from the drop-down list. • The film type options differ according to the film format currently selected. Film format File type 35mm, 6x4.5, 6x6, 6x7, 6x8, Colour Negative, Slide Film, B&W Negative, B&W Positive... -
Page 41: Index Scan
INDEX SCAN S C A N N I N G Launch the Software (see page 26) Set the Preferences (see page 29) Load the Film Holder Index Scan (see page 31) Changing the Inserting the Film window size Holder Selecting (see page 38) frames Setting the Film... -
Page 42: Index Scan Window
INDEX SCAN WINDOW When 35mm is selected in the film format, index scan displays a scan of each image on the film holder in the Index tab. The time required for an index scan depends on the performance of your computer. If you don’t want to index scan the entire strip, click on the appropriate image box in the index tab to select an image for prescanning or scanning. -
Page 43: Making An Index Scan
MAKING AN INDEX SCAN 1. Click on in the Main window. • All frames on the film folder will be scanned and appear in the Index tab. CHANGING THE WINDOW SIZE Change the size of the Index tab window as desired. The position of the frames will change accordingly. -
Page 44: Scanning The Image
2. Click on to scan the selected image (s). • The image will be opened in your photo application software when the scanner’s driver software is closed. • Some photo applications can only acquire one image at a time. 3. Refer to page 98 to save the scanned image (s). -
Page 45: Rotating Or Flipping The Index Frames
ROTATING OR FLIPPING THE INDEX FRAMES Rotate or Flip index frames so they appear in the Index scan tab window with the proper orientation. 1. Select the desired frames, then click on • Each time the selected frames will rotate in 90° increments either clockwise or counter-clockwise, and flip vertically or horizontally. -
Page 46: Saving The Index Scan Image
SAVING THE INDEX SCAN IMAGE When performing the index scan, all the thumbnail images displayed in the index window can be saved as an image file. 1. Click on in the Main window. • The standard file save dialog box for each operating system will appear. -
Page 47: Saving The Index Image File
[Save]. • When the index images are displayed, these images are saved regardless of the film set in the scanner. • When the index images are not displayed, the index images are saved after performing the index scan. -
Page 48: Loading The Index Image File
LOADING THE INDEX IMAGE FILE The index file can be displayed in the index tab after loading the saved index file. The previously displayed preview images are erased. 1. Click on in the Main window. • The standard file open dialog box for each operating system will appear. -
Page 49: Preview Scan
PREVIEW SCAN S C A N N I N G Launch the Software (see page 26) Set the Preferences (see page 29) Load the Film Holder INDEX SCAN (see page 31) (see page 41) Inserting the Film Holder (see page 38) Setting the Film Format / Film Type (see page 39) -
Page 50: Prescan Window
PRESCAN WINDOW Prescanning creates a scan of the image to which you can apply and view colour, contrast, orientation, and brightness corrections before clicking on the Scan button. This ensures that final scan will be the best it can be. Click on the Prescan tab in the Main window. -
Page 51: Making A Prescan
MAKING A PRESCAN 1. Click on in the Main window. The prescanned image will appear in the Prescan tab. NOTE: Press Ctrl when prescanning ( on the Macintosh) to see CMY values in the RGB/CMY display. DiMAGE Scan Multi PRO... -
Page 52: Rotating The Image
ROTATING THE IMAGE Click on the buttons to correct the orientation of your image before scanning. Changes will be reflected in the prescan image. Click on to rotate the image 90° clockwise. Click on to rotate the image 90° counter- clockwise. -
Page 53: Flipping The Image
FLIPPING THE IMAGE buttons let you flip the image left to right or top to bottom before scanning. Changes will be reflected in the prescan image. Click on to flip the image top to bottom. • The image is upside down compared to the original prescan. -
Page 54: Full Screen Viewing, Magnifying Or Reducing The View
FULL SCREEN VIEWING, MAGNIFYING OR REDUCING THE VIEW FULL SCREEN VIEW This function allows you to display the entire prescanned image in the Prescan tab. 1. Click on • The prescan image is magnified so that it fits in the Main window. -
Page 55: Scrolling The Image
SCROLLING THE IMAGE Use the grab button to scroll an enlarged image. • The grab button can only be selected when the image has been magnified beyond the limits of the Prescan tab. 1. Click on in the Prescan image display area. •... -
Page 56: Auto-Exposure Lock
29) is not checkmarked, the AE lock function is not available with positive film. Images will be scanned using the AE lock settings until AE lock is cancelled or the scanner is reinitialized. CANCELLING THE AE-LOCK 1. Click on 2. -
Page 57: Ae Area Lock
AE AREA LOCK Auto exposure can be based on a specified area in the prescanned image. Perform the procedure below after prescanning the image. 1. Click on 2. Press the Shift key. • The AE area is indicated by an unbroken line, whereas the cropping area is indicated by a dashed line. -
Page 58: Cropping The Image
CROPPING THE IMAGE AUTO CROPPING The cropping area is determined automatically so that the holder or slide mount frame in the prescan image is removed. 1. Click on CROPPING The cropping frame defines how much of the prescan image will be scanned. The dimensions of the cropping frame are displayed in the lower left corner of the Prescan tab. -
Page 59: Cropping The Prescan Image
To define a new cropping frame… Click and drag outside the current cropping frame. * You can resize the cropping frame to cover the full prescan image again by pressing the following keys. When the Prescan tab is displayed: Windows: Press the Ctrl key and A key simultaneously. -
Page 60: Focus
FOCUS The DiMAGE Scan Multi PRO uses the CCD sensor for autofocus. Autofocus uses the centre of the image to determine focus. Normally, this results in an excellent scan because the film plane is flat. However, if the film is warped or curled, or if Autofocus is turned off in the preferences, focus may not be accurate. -
Page 61: Manual Focus
MANUAL FOCUS Manual focus can be use with specific area of the image. 1. Click on • The pointer will change to the Manual Focus icon. • Click on [Manual Focus] button again to escape the function. 2. Click on the area of the image you wish to be in sharp focus. -
Page 62: Displaying Frame Number
DISPLAYING FRAME NUMBER When 35mm is selected the film format, this function allows you to display the current frame number and total frame number. 1. To display the next frame, click on 2. To display the previous frame, click on RGB/CMY INFORMATION The RGB information from the pointer position is always displayed in the Prescan tab. -
Page 63: Image Correction
IMAGE CORRECTION I M A G E C O R R E C T I O N LAUNCH THE SOFTWARE (see page 26) Set the Preferences (see page 29) Load the Film Holder INDEX SCAN (see page 31) (see page 41) Inserting the Film Holder (see page 38) -
Page 64: Image Correction Window
IMAGE CORRECTION WINDOW This scanner gives you three options for correcting the brightness, contrast, and colour balance of the final scan. Click on the Image Correction tab in the Main window. THE IMAGE CORRECTION TAB PART — NAMES OF PARTS... -
Page 65: Tone Curves And Histogram
TONE CURVES AND HISTOGRAM When the Tone curves/Histogram Correction button is clicked, the Tone Curves and Histogram dialog box is displayed. The Tone Curves part allows you to change the tone curves and directly correct the output value. The Histogram part allows you to specify the input and output area from the information included in a film and correct images. -
Page 66: Correcting The Tone Curves
TONE CURVES AND HISTOGRAM CORRECTING THE TONE CURVES Changing the shape of a correction curve changes the output level for each corresponding input level. Changing the shape of the red, green, or blue curves affects colour balance of the image. Changes to the RGB curve affect the image contrast and brightness. -
Page 67: Setting The White, Black Or Grey Points
SETTING THE WHITE, BLACK OR GREY POINTS White point (highlight point) indicates the section you want to lighten, Black point (shadow point) the section you want to darken, and Grey the section you want to have as neutral tone. An image with no highlight or shadow will not be clear and appear dull. -
Page 68: Viewing The Histogram Of Images After Making Corrections
TONE CURVES AND HISTOGRAM 3. Click on • The cursor changes to the black dropper shape. 4. Click the desired shadow point of the image. • The image is corrected so that the point you clicked is shadow point. The colour of the shadow point is the black point value you input in step 2. -
Page 69: Correcting The Histogram
CORRECTING THE HISTOGRAM The input slide bar has the Input shadow slider, Input gamma slider and Input Highlight slider. The output slide bar has the Output Highlight slider and Output shadow slider. The image can be corrected by dragging the slider or inputting the value in the text box. -
Page 70: Brightness / Contrast / Colour Balance
BRIGHTNESS / CONTRAST / COLOUR BALANCE Brightness, Contrast adjusts the brightness and contrast of the whole image. By adjusting the ratio of each RGB colour, you can correct the greenness or redness of the whole image, as well as overlapping of certain colors (colour overlap). Click on in the Image Correction tab. -
Page 71: Auto Setting
1. Drag each Brightness, Contrast or Colour balance (R, G, B) slider, or input the desired value in the text box. • The change will be reflected in the prescan image. • Moving the Brightness, Contrast or Colour balance (R, G, B) slider changes “Post-Correction Greyscale”... -
Page 72: Hue / Saturation / Lightness
HUE / SATURATION / LIGHTNESS You can adjust the 3 colour elements Hue (tone of colour), Saturation (vividness), and Lightness (brightness) separately. This is suitable for when the colour seems dull and you wish to add vividness. It is necessary to choose a good combination of Hue, Saturation, and Lightness. -
Page 73: Auto Setting
Hue correction: Dragging the Hue slider, changes the colour of the image displayed in Pre-Correction Colour Sample, as shown in Post- Correction Colour Sample. When the Hue slider is dragged to the rightmost or leftmost side, the hue of the image is reversed. -
Page 74: Variation Correction
VARIATION CORRECTION A number of images showing different variations are displayed , around the currently corrected prescan image. You can correct the image while comparing with the variation images. Click on in the Image Correction tab. THE VARIATION DIALOG BOX — NAMES OF PARTS Variation Amount Control slider Correction list box... -
Page 75: Colour Balance Correction
COLOUR BALANCE CORRECTION Six images that have been corrected by one-step in each RGBCMY direction the centre current image are displayed. 1. Select colour balance. • The corrected 6 frames of variation images are displayed. 2. Click the image in the direction you want to correct from the 6 frames of the variation images except for the centre image. -
Page 76: Saturation Correction
VARIATION CORRECTION SATURATION CORRECTION Two imageswith saturation correction are displayed on the right and left sides of the centre image. The variation image on the left side shows reduced saturation, and on the right side shows increased saturation. 1. Click the image in the direction you want to correct, except for the image in the centre. -
Page 77: Selective Colour Correction
SELECTIVE COLOUR CORRECTION This feature separates the colour region into 7 groups, Red, Green, Blue, Cyan, Magenta, Yellow and Black. You can adjust the colour range of each processed colour Cyan, Magenta, Yellow, and Black against the separate colour groups. You can use this if you wish to correct a certain colour only and not the whole picture, or if you wish to remove an unwanted colour from a particular colour. -
Page 78: Unsharp Mask
UNSHARP MASK Unsharp Mask can increase definition of the image to make it clearer. It is useful if the image is slightly unfocused. Click on in the Image Correction tab. THE UNSHARP MASK DIALOG BOX — NAMES OF PARTS Amount Level slider and text box Radius Level slider and text box Threshold Level slider and text 1. -
Page 79: Reset
UNSHARP MASK Amount: If you adjust the slider to increase (to the right), Pixels increasing the level of contrast will become larger. If you increase the value too much, Pixelation (the Pixels image becoming noticeably rough) will occur. Normally, we recommend 150 to 200% for highly processed print images. -
Page 80: Snapshot
SNAPSHOT When the Snapshot button is clicked, the current prescan image is stored in the Snapshot Display Area temporarily and displayed as a thumbnail. When the thumbnail in the Snapshot Display Area is double-clicked, that image is displayed in the Prescan tab. This is convenient when storing the image correction temporarily while processing, or when correcting the image again after going back to a certain step. -
Page 81: Cancelling The Image Correction
CANCELLING THE IMAGE CORRECTION CANCELLING THE IMAGE CORRECTION When is clicked, the current image correction is cancelled and the image returns to the previous one. REDO THE CORRECTION When is clicked, the cancelled image correction can be resumed. DELETE THE IMAGE CORRECTION When in the Image Correction tab is clicked, all the image corrections are deleted and the image returns to the initial... -
Page 82: Full-Screen View
FULL-SCREEN VIEW This function allows you to display a full screen view of the corrected image in the Image Correction tab. 1. Click on .in the Image Correction tab. • When is clicked, the size of the pre and post correction image is automatically changed according to the size of the Main window. -
Page 83: Job Save / Job Load
JOB SAVE / JOB LOAD The image correction setting in the correction window can be saved as an image correction job. You can easily correct the image by loading the most appropriate previously saved correction job. SAVING AN IMAGE CORRECTION JOB 1. -
Page 84: Loading Image Correction Job
JOB SAVE / JOB LOAD LOADING IMAGE CORRECTION JOB This function allows you to load the saved correction job and apply an image correction to the displayed image. 1. Click on in the Image Correction tab. • The Selected Image Correction Job dialog box is displayed. -
Page 85: Digital Ice / Digital Roc / Digital Gem
DIGITAL ICE / DIGITAL ROC / DIGITAL GEM BEFORE USING THE DIGITAL ICE/ROC/GEM FUNCTION WINDOWS When connecting with the SCSI interface With Digital ICE/Digital ROC/Digital GEM function turned on. Minimum system requirements 35mm Pentium 166MHz later Multi Format 35mm Pentium 166MHz later Multi Format 6x9 Pentium 166MHz later With Digital ICE/Digital ROC/Digital GEM function, and loading with a 16-bit resolution... - Page 86 DIGITAL ICE / DIGITAL ROC / DIGITAL GEM MACINTOSH When connecting with the SCSI interface With Digital ICE/Digital ROC/Digital GEM function turned on. Minimum system requirements 35mm Power PC604 later Multi Format 35mm Power PC604 later Multi Format 6x9 Power PC604 later With Digital ICE/Digital ROC/Digital GEM function, and loading with a 16-bit resolution turned on.
-
Page 87: Digital Ice
DIGITAL ICE The Digital ICE (Image Correction Enhancement) function removes visible dust, scratches, fingerprints, mould, etc. from the surface of the image. 1. Click on in the main window. • The Digital ICE function is turned on. When the preview scan and final scan are performed, the image is displayed with the visable dust, scratches, figerprints mold etc removed. -
Page 88: Digital Roc
DIGITAL ROC The Digital ROC (Reconstruction Of Colour) function is an image correction function that can restore the colour quality of a faded image. If the colour of the film has faded with the passage of time, the changed colour can be corrected automatically by reconstructing colour when scanning so that a digital image with appropriate colour can be restored. -
Page 89: Digital Gem
DIGITAL GEM The images of developed film are composed of high-density grains. These grains sometimes clump together so that the images look rough. This function detects the grains when scanning and equalizes them. So, a sharp and smooth image can be obtained even when a 35mm image is magnified 1. - Page 90 DIGITAL GEM 6. Change the Confirm Digital GEM effect area size or move that area if necessary and specify the image area to be checked. • The Digital GEM check area is specified in the centre of the image and the size is set to 64 pixels x 64 pixels. •...
-
Page 91: Final Scan
FINAL SCAN F L O W SCAN SETTING CUSTOM WIZARD Creating a job Deleting a job Job type FINAL SCAN DiMAGE Scan Multi PRO... -
Page 92: Scan Settings
SCAN SETTINGS The scan settings determine your final image’s resolution, dimensions, and file size, as well as helping determine the image quality. You can select a Job (see pages 96, 110 to 123) to have the scan settings selected for you or you can directly enter them into the Main window (Index tab or Prescan tab). - Page 93 Image resolution is the number of pixels per inch (ppi or dpi) that represent your scanned image. The size of an image file is determined by its size (dimensions) and resolution. The rule to follow when scanning is "bigger is better". To obtain the best results, set the output resolution to the highest value your final output device (printer, monitor, etc.) can handle.
- Page 94 Size is locked. 6. Enter the desired output size (maximum 3 digits). • The output size is limited by the maximum resolution of the scanner. • The values will change if a different unit of measurement is selected. • The output size cannot be changed when the unit list box is set to pixels.
-
Page 95: Creating / Deleting Job Files
CREATING / DELETING JOB FILES CREATING A JOB In addition to the Job settings included with the software, it is possible to create and save your own Job settings. 1. Set the desired settings in the Main window (Index tab or Prescan tab). 2. -
Page 96: What Is A Job
Properly used, this function can simplify the complicated process of setting the resolution, image size, magnifications, etc. scanner settings, so that even a beginner can easily execute the ideal settings required for the job. -
Page 97: Scan Job Type
SCAN JOB TYPE Before making the final scan, the scanner needs to know how big the final image will be and the quality of output that will be used (printer, monitor, etc.) so it knows what resolution to scan the film. Using the Job function is a quick and easy way to enter the scan settings. -
Page 98: Final Scan
FINAL SCAN Scan the film according to the Prescan settings. With the DiMAGE Scan Multi PRO utility software, you can save the final scan in one of the following file formats. • JPEG • TIFF (No compression) • BMP (Windows only) •... -
Page 99: Utility Software
UTILITY SOFTWARE With the Prescan image displayed in the Prescan tab... 1. Click on in the Main window. • Your system’s standard save dialog box will appear. 2. Enter the desired file name and select the file destination. 3. Select the file type from the drop-down list. -
Page 100: Custom Wizard
• When selecting 6x4.5, 6x6, 6x7, 6x8 or 6x9 in the film format, select the type of the holder set in the scanner. • Click on the film type to be scanned. • Confirm the frame number to be scanned. - Page 101 3. Select the format of the film to be scanned and click on • The Preferences dialog box is displayed. • For details of “Auto Expose for Slides”, “Auto Focus at Scan”, “Colour depth” or “Multi Sample Scan”, see “SETTING THE PREFERENCES” on page 29.
- Page 102 CUSTOM WIZARD 5. Select whether or not to use you use the Digital ICE/ROC/GEM function and click on • The Scan Setting window is displayed. • For details of the settings, see “SCAN SETTINGS” window on page 92. 6. Set the resolution and size of the image to be scanned and click on •...
- Page 103 7. Set the desired image correction and click on • The End of Setting window is displayed. • The scanning starts and the End of Scanning window is displayed. When [Save] is clicked, the setting can be saved and named. The saved setting can be selected by specifying its name in the Custom Wizard Setting window.
-
Page 104: When Starting A Registered Setting
WHEN STARTING A REGISTERED SETTING Scanning can be operated easily by calling up the registered setting by the Custom Wizard. 1. Place the film holder that you are going to scan on the scanner. 2. Click on on the main window of Custom Wizard. - Page 105 A P P E N D I X IEEE 1394 INTERFACE COLOUR MATCHING SCAN JOB FILE LIST GLOSSARY TROUBLE SHOOTING USER TECHNICAL SUPPORT SPECIFICATIONS DiMAGE Scan Multi PRO...
-
Page 106: Ieee 1394 Interface
PRO” and click “Stop.” 5. A confirmation screen will appear. Clicking “OK” will stop the device. 6. The safe-to-remove-hardware screen will appear. Click “OK.” The scanner can now be safely disconnected from the computer. When you re/discommect the IEEE1394Interface unit. make sure to leave a 5-second interval before connection. -
Page 107: Colour Matching
COLOUR MATCHING Reproducing the colour and gradation of the image data you have captured with the scanner will differ, depending on the characteristics of the output unit (monitor or printer). In order to lessen the difference in colour reproduction, it is necessary to match the colour preference that deals with colour (called output colour space), and also to correct the characteristics of the unit in order to output in that preference. -
Page 108: Output Colour Space Setting
COLOUR MATCHING OUTPUT COLOUR SPACE SETTING 1. Insert a check mark in the “Colour Matching ON” checkbox. 2. Click the pull-down menu button in the Output Colour Space list box. The available output colour space settings are displayed. 3. Click the desired output colour space setting. - Page 109 Regarding the “Output Colour Space” and the “Monitor ICC Profile” setting, the combination with respect to the application, the recommended preference setting is as follows. When an application with Monitor Correction Display function Photoshop Ver. 5 to 6) is being used with the Monitor Correction Display function ON Output Colour Space: Optional output colour space can be selected (select the same colour space as set in the application)
-
Page 110: Scan Job File List - 35 Mm
SCAN JOB FILE LIST — 35 mm... - Page 111 SCAN JOB FILE LIST — 35 mm DiMAGE Scan Multi PRO...
-
Page 112: Scan Job File List - 120/220 (6X4.5)
SCAN JOB FILE LIST — 120/220 (6x4.5) - Page 113 SCAN JOB FILE LIST — 120/220 (6x4.5) DiMAGE Scan Multi PRO...
-
Page 114: Scan Job File List - 120/220 (6X6)
SCAN JOB FILE LIST — 120/220 (6x6) - Page 115 SCAN JOB FILE LIST — 120/220 (6x6) DiMAGE Scan Multi PRO...
-
Page 116: Scan Job File List - 120/220 (6X7)
SCAN JOB FILE LIST — 120/220 (6x7) - Page 117 SCAN JOB FILE LIST — 120/220 (6x7) DiMAGE Scan Multi PRO...
-
Page 118: Scan Job File List - 120/220 (6X8)
SCAN JOB FILE LIST — 120/220 (6x8) - Page 119 SCAN JOB FILE LIST — 120/220 (6x8) DiMAGE Scan Multi PRO...
-
Page 120: Scan Job File List - 120/220 (6X9)
SCAN JOB FILE LIST — 120/220 (6x9) - Page 121 SCAN JOB FILE LIST — 120/220 (6x9) DiMAGE Scan Multi PRO...
-
Page 122: Scan Job File List - Multi Format 35 Mm
SCAN JOB FILE LIST — MULTI FORMAT 35 mm... - Page 123 SCAN JOB FILE LIST — MULTI FORMAT 35 mm DiMAGE Scan Multi PRO...
-
Page 124: Glossary
GLOSSARY BRIGHTNESS The lightness or darkness of the image. CHANNEL The component of an image. Your scanned image has three channels: red, green, and blue (RGB). CONTRAST The gradation of shades in an image. A high contrast image has very dark areas and bright areas without many middle shades. - Page 125 Red, Green, and Blue. These are the colors of the three channels that make up the scanned image. Monitors use red, green, and blue phosphors to create the image you see on the screen. SCSI (Ultra SCSI) Ultra SCSI (Fast-20) is one variation of the SCSI-3 standards now being promoted by ANSI (American National Standards Institute).
-
Page 126: Trouble Shooting
• Indicator lamp is off - Turn the DiMAGE Scan Multi PRO on, then restart your system. • Remove the film holder and click on [OK]. • Scanner door opened during setup. Close scanner door. • Remove the optics locking screw on the bottom panel of the scanner. -
Page 127: User Technical Support
USER TECHNICAL SUPPORT Please contact your dealer for information regarding installation, SCSI or IEEE1394 interface recommendations, or application compatibility. If your dealer is unable to help you, contact an authorized Minolta service center. Please have the following information ready when calling Minolta Technical Support. Make and Model of your computer: Available application RAM: Operating System version:... -
Page 128: Specifications
SPECIFICATIONS Type: Multi-format film scanner up to mid-format Usable Film: 35mm, 120/220 (6x4.5, 6x6, 6x7, 6x8, 6x9) - negative/ positive, color/ B&W TEM Film, Transparent Media, 16mm, Glass plate Scanning Dimensions: 35mm 120/220 (6x4.5, 6x6, 6x7, 6x8, 6x9) Input Resolution (Max.):... - Page 129 Scan Times (approx.): Windows: 35mm Color Positive Index-Scan 6 frames/30 s. Vorscan 9 s. Scan 45 s. Windows: 120/220 (6x9) Color Positive Prescan 13 sec. Scan 3 min 50 sec. • Testing Conditions IBM PC/AT CPU: Pentium IV 1.5GHz, RAM: 1GB OS: Windows 2000 Professional Interface: IEEE1394:Adaptec AFW4300, Host Application: Adobe Photoshop 6.0...