Minolta Dimage Scan Elite II Hardware Manual
Konica minolta dimage scan elite ii: hardware guide
Hide thumbs
Also See for Dimage Scan Elite II:
- Instruction manual (100 pages) ,
- Instruction manual (100 pages) ,
- Instruction manual (102 pages)
Table of Contents
Advertisement
Quick Links
Advertisement
Table of Contents

Related Manuals for Minolta Dimage Scan Elite II


Summary of Contents for Minolta Dimage Scan Elite II
- Page 1 HARDWARE MANUAL 9222-2888-11 AV-A207...
- Page 2 OR PROPER AND SAFE USE Read and understand all warnings and cautions before using this product. WARNING • Use only within the voltage range specified on the unit. Inappropriate current may cause damage or injury through fire or electric shock. •...
- Page 3 • Do not use if the cord is damaged. • Do not connect the ground to a gas pipe, telephone ground, or water pipe. Improper grounding can result in injury from electric shock. • Do not cover the AC adapter. A fire may result. •...
- Page 4 Thank you for purchasing this Minolta product. Please take the time to read through this instruc- tion manual so you can enjoy all the features of your new scanner. This manual contains information regarding products introduced before September, 2002. To obtain compatibility information for products released after this date, contact a Minolta service facility listed on the back cover of this manual.
-
Page 5: Table Of Contents
This manual contains information specific to this model scanner. This includes hardware setup and use as well as notes about software operation for this model scanner. See the supplied DiMAGE Scan Utility software manual for information on the installation and operation of the scanner software. -
Page 6: System Requirements
YSTEM REQUIREMENTS The computer and the operating system must be guarantied by the manufacturer to support IEEE 1394 (FireWire), or USB interface. To use the scanner, your computer system must meet the fol- lowing requirements: Pentium 166 Mhz or later processor. -
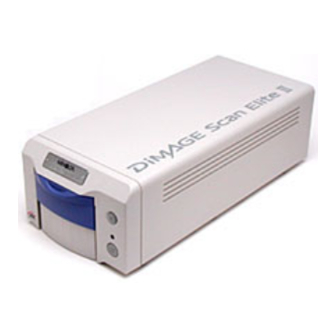
Page 7: Names Of Parts
Indicator lamp APS adapter mark Power switch DC terminal USB port IEEE 1394 port The unused port should be covered with its protective cap. When the scanner is stored, the cables should be removed and the caps replaced in the ports. -
Page 8: Scanner Setup
Before connecting the scanner to a computer, the DiMAGE Scan Utility must first be installed. Read the software instruction manual for the installation procedure. The scanner should be placed on a level surface free from vibrations. It should be located away from direct sunlight and in a clean, dry, well-ventilated area. -
Page 9: Connecting The Ieee 1394 (Firewire) Cable
DC terminal (2). Plug the power cable into a standard household outlet (3). Turning on the scanner With the front door closed, turn on the scanner with the power switch (1). Start up the computer. When launching the DiMAGE Scan Utility, the front door must be closed during initialization;... -
Page 10: Loading The Film Holders
OADING THE FILM HOLDERS Handling film To achieve the best possible reproduction from the scanner, the film and film holder should be free from dust and dirt. Always work with processed film in a clean, dust-free environment. Handle film by the edges or mount to prevent fingerprints and dirt marring the image area. Special lint free gloves are available from photographic equipment retailers for film handling as well as anti- static cloths, brushes, and blowers for removing dust. -
Page 11: Loading Mounted Slides
With the front door closed, turn on the scanner and then start the computer. Launch the DiMAGE Scan Utility before inserting the film holder. Do not insert the film holder into the scanner while the utility software is launching or the scanner is initializing; the indicator lamp blinks during this peri-... -
Page 12: Using The Aps Adapter Ad-10 (Sold Separately)
13. When using the APS adapter, if the scanner makes a strange sound or the film-advance warning appears, eject the APS adapter immediately (p. 13) and do not reinsert it. Contact a Minolta serv-... -
Page 13: Film Format And Type Settings
See scanner setup in the basic-scanning section of the software manual. Two film formats can be selected with this scanner: 35 mm and APS. The APS option is for use with cassette film with the optional APS adapter AD-10. If scanning APS film in slide mounts, use the 35 mm film-format option. -
Page 14: Scanner Notes
DTP experience, see the DiMAGE Scan Utility manual. About the DiMAGE Scan Utility Prescan size cannot be selected in the preference dialog box with this scanner model. See set- ting scanner preferences in the advanced scanning section of the DiMAGE Scan Utility manual. Macintosh computers PowerPC processor Mac OS 8.6, 9.0, 9.0.4, or 9.1. -
Page 15: Digital Ice3 System Requirements
Digital ICE system requirements Digital ICE is a collection of powerful image-processing tools. To make use of the Digital ROC and Gem functions, the following system requirements must be met. These requirements are based on 35mm film scans. Color depth Hard disk space 8 bit 300MB... -
Page 16: Scanner Color Profiles
MLTAF2920p.icc - used with positive film with 16-bit linear color depth. Scanner resolution The maximum resolution for the DiMAGE Scan Elite II is 2820 dpi. The input resolution that can be entered in the DiMAGE Scan Utility is from 176 dpi to the maximum resolution of 2820 dpi for both 35mm and APS film. - Page 17 Disconnecting the IEEE cable with Windows ME To disconnect the scanner, quit the DiMAGE Scan Utility. Left click on the unplug-or- eject-hardware icon located on the task bar. A small window will open indicating the device to be stopped. Click on the small window to stop the device.
-
Page 18: Job File Lists
OB FILE LISTS Jobs can be used to make scan settings based on the final use of the image. See making-the- final-scan section in the DiMAGE Scan Utility manual. The following charts list the parameters of the scanner’s Job files: 35mm... -
Page 20: Troubleshooting
ROUBLESHOOTING This section covers minor problems with scanner operation. For major problems or damage, or if a problem continues to reoccur frequently, contact your dealer or a Minolta service facility. SYMPTOM or MESSAGE When starting up the utility software, Error=4 – could-not-confirm-scanner-connec- tion message appears. -
Page 21: Checking Software Installation - Windows
Checking software installation – Windows If the scanner was connected to the computer before the DiMAGE Scan Utility was installed, the computer may not recognize the scanner unit. Windows 2000 Professional, and XP users should log on with the administrator privilege. With Windows 2000 Professional and XP, the “Digital sig- natures not found”... -
Page 22: Technical Support
ROUBLESHOOTING Technical support Please contact your dealer for information regarding installation, USB or IEEE 1394 interface rec- ommendations, or application compatibility. If your dealer is unable to help you, contact an author- ized Minolta service facility. Please have the following information ready when calling Minolta technical support: 1. -
Page 23: Technical Specifications
ECHNICAL SPECIFICATIONS Scan type: Moving film, fixed sensor, single-pass scan Film type: Negative and positive, color and monochrome Film formats: Mounted and unmounted 35mm film. Mounted APS film. APS cassette with optional AD-10 adapter. Scanning dimensions: 35mm - 24.21 x 36.32mm (2688 x 4032 pixels) APS - 17.29 x 29.98mm (1920 x 3328 pixels) Optical input resolution: 2820 dpi... - Page 24 © 2002 Minolta Co., Ltd. under the Berne Convention and the Universal Copyright Convention. 0-43325-53112-5 9222-2888-11 AV-A207 Printed in Germany...