Table of Contents
Advertisement
Quick Links
IMPORTANT SAFETY INFORMATION: Always read this manual first
before attempting to install or use this fireplace. For your safety, always
comply with all warnings and safety instructions contained in this manual
to prevent personal injury or property damage.
To view the full line of Dimplex products, please visit
www.dimplex.com
Owner's Manual
Model
DWF120330B
7213550100R04
Advertisement
Table of Contents

Related Manuals for Dimplex DWF120330B


Summary of Contents for Dimplex DWF120330B
- Page 1 For your safety, always comply with all warnings and safety instructions contained in this manual to prevent personal injury or property damage. To view the full line of Dimplex products, please visit www.dimplex.com 7213550100R04...
-
Page 2: Table Of Contents
CAUTION: Procedures and techniques which, if not carefully followed, will result in damage to the equipment. WARNING: Procedures and techniques which, if not carefully followed, will expose the user to the risk of fire, serious injury, or death. www.dimplex.com... -
Page 3: Welcome & Congratulations
Welcome & Congratulations Thank you and congratulations for choosing to purchase an electric fireplace from Dimplex, the world leader in electric fireplaces. Please carefully read and save these instructions. CAUTION: Read all instructions and warnings carefully before starting installation. Failure to follow these instructions may result in a possible electric shock, fire hazard and will void the warranty. -
Page 4: Important Instructions
When using electrical appliances, the electric fireplace has been basic precautions should always dropped or damaged in any man- be followed to reduce the risk of ner, contact Dimplex Technical fire, electric shock, and injury to Service at persons, including the following: 1-888-346-7539. -
Page 5: Save These Instructions
IMPORTANT INSTRUCTIONS exhaust in any manner. Do not cian should new circuits or outlets use on soft surfaces, like a bed, be required. where openings may become Always use properly grounded, blocked. fused and polarized outlets. ⑰ All electrical heaters have Disconnect all power supply hot and arcing or sparking parts before performing any cleaning,... -
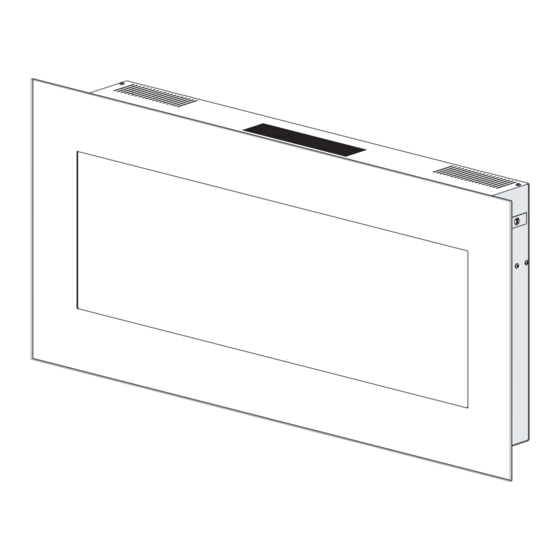
Page 6: Quick Reference Guide
4. For dimensions of your require service, contact fireplace, refer to Figure 1. customer service. Figure 1 914mm (36") 459mm 500mm [18.0"] [19.7"] 144mm 1092mm [5.7"] [43"] 50mm [5.9"] www.dimplex.com... -
Page 7: Fireplace Installation
WARNING: The supplied Volt circuit is required. A mounting bracket is designed dedicated circuit is preferred for use with Dimplex wall but not essential in all cases. mounted fireplaces only. A dedicated circuit will be Improper use, or use for... - Page 8 (2) wall studs. anchors centered on holes B and Studs should be accessed through two (2) wall-bracket 3. Hold the wall-mounting holes in one of the following bracket on the wall and mark combinations: A&F, B&D, or www.dimplex.com...
- Page 9 Fireplace Installation the location of ONE (1) of the Figure 5 mounting holes. 4. Place the bubble level onto the top of the wall-mounting bracket. 5. Adjust the wall-mounting bracket so the bubble on the level is centered between the two black lines.
- Page 10 (Figure 7) 14. Excess electrical cord can be inserted back into the bottom of the unit, into the cord storage area. Glass Retaining Figure 6 Screw Front Glass Assembly Media Tray www.dimplex.com...
-
Page 11: Operation
Operation Figure 9 Figure 8 A B C F On Screen Display The unit can be controlled by the intake temperature will be either the manual controls which indicated on the On Screen are located on the right side of the Display. - Page 12 → Adjusted by pressing the unit, repeatedly, until the desired to decrease the setpoint and the time is displayed. to increase the setpoint on the • The On Screen Display will remote. www.dimplex.com...
- Page 13 Operation Remote Control Battery display the different times as it is adjusted. Once the timer has Replacement begun, pressing the button To replace the battery: will display the time remaining 1. On the back of the remote before the unit turns Off. control, turn the battery cover ! NOTE: The Sleep Timer can counter-clockwise to remove...
-
Page 14: Maintenance
To remove fingerprints or other marks, the Partially Reflective Glass can be cleaned with a damp cloth. The Partially Reflective Glass should be completely dried with a lint free cloth to prevent water spots. To prevent scratching, do not use abrasive cleaners. www.dimplex.com... -
Page 15: Warranty
Limited warranty service requires a the entire cost of all necessary servicing proof of purchase of the product. or repair. What Dimplex will do in the event of a What this limited warranty covers and for defect? how long... - Page 16 DAMAGES ARE FORESEEABLE. IN product or part without charge. If NO EVENT WILL DIMPLEX, OR ITS Dimplex is unable to repair or replace OFFICERS, DIRECTORS, OR AGENTS such product or part, or if repair or BE LIABLE FOR ANY DIRECT LOSSES,...
-
Page 17: Replacement Parts
Thermistor .........3001380100RP Dimplex North America Limited 1367 Industrial Road Cambridge ON Canada N1R 7G8 © 2014 Dimplex North America Limited...