KitchenAid KBMS1454R Technical Education
Kitchenaid built-in microwave oven technical education
Hide thumbs
Also See for KBMS1454R:
- Use and care manual (16 pages) ,
- Installation instructions manual (8 pages) ,
- Use & care manual (18 pages)

Related Manuals for KitchenAid KBMS1454R


Summary of Contents for KitchenAid KBMS1454R
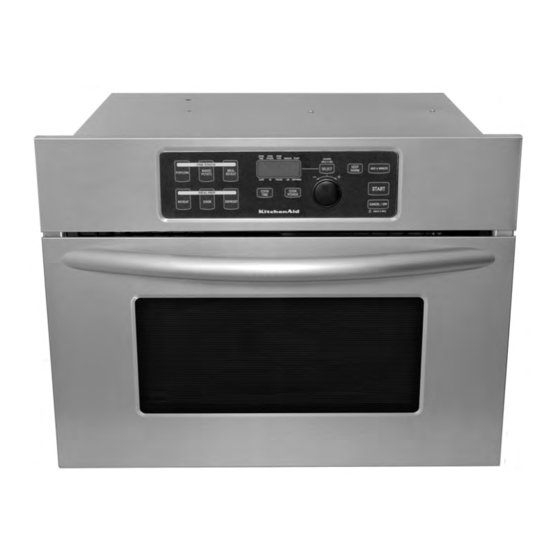
- Page 1 KAC-45 TECHNICAL EDUCATION Built-In Microwave Oven Model: KBMS1454R JOB AID 4317377...
- Page 2 FORWARD This KitchenAid Job Aid, “Built-In Microwave Oven,” (Part No. 4317377), provides the technician with information on the installation, operation, and service of the Built-In Microwave Oven. For specific information on the model being serviced, refer to the “Use and Care Guide,” or “Wiring Diagram”...
-
Page 3: Table Of Contents
Precautions To Be Observed When Troubleshooting ............1-5 Model & Serial Number Designations ................1-6 Model & Serial Number Label And Tech Sheet Locations..........1-7 Specifications ........................1-8 KitchenAid Microwave Oven Warranty ................1-10 INSTALLATION INFORMATION ................... 2-1 Installation Requirements ....................2-1 Installation Instructions ...................... 2-5 PRODUCT OPERATION ...................... - Page 4 COMPONENT TESTING ......................5-1 Humidity Sensor ........................ 5-1 Cavity Thermostat ......................5-2 No Load Cavity Thermostat ....................5-2 Door Interlock Switches ..................... 5-3 Lamp Transformer ......................5-3 20A Line Fuse ........................5-4 Line Filter Capacitor ......................5-4 Cooling Fan Motor ......................5-5 Magnetron Thermostat ......................
-
Page 5: General
GENERAL SAFETY FIRST Your safety and the safety of others is very important. We have provided many important safety messages in this Job Aid and on the appliance. Always read and obey all safety messages. This is the safety alert symbol. This symbol alerts you to hazards that can kill or hurt you and others. -
Page 6: Warning To Service Technicians
WARNING TO SERVICE TECHNICIANS To avoid possible exposure to microwave ra- KitchenAid microwave ovens have a monitor- diation or energy, visually check the oven for ing system designed to assure proper opera- damage to the door and door seal before tion of the safety interlock systems. -
Page 7: Precautions To Be Observed Before And During Servicing To Avoid Possible Exposure To Excessive Microwave Energy
PRECAUTIONS TO BE OBSERVED BEFORE AND DURING SERVICING TO AVOID POSSIBLE EXPOSURE TO EXCESSIVE MICROWAVE ENERGY Do not operate or allow the oven to be the magnetron, wave guide or transmis- operated with the door open. sion line, and cavity for proper alignment, integrity, and connections. -
Page 8: R.f. Leakage Test
R.F. LEAKAGE TEST EQUIPMENT NOTE: Enter leakage readings in space BE- FORE and AFTER on the service document. • Electromagnetic energy leakage monitor (NARDA 8100B, HOLADAY H 1501). All microwave ovens exceeding the emission level of 4 mw/cm must be reported to Dept. of •... -
Page 9: Precautions To Be Observed When Troubleshooting
PRECAUTIONS TO BE OBSERVED WHEN TROUBLESHOOTING The microwave oven is a high voltage, high WARNING current appliance. It is free from danger during There is high voltage present, with high ordinary use, but extreme care should be taken current capabilities in the circuits of the pri- during repair. -
Page 10: Model & Serial Number Designations
MODEL & SERIAL NUMBER DESIGNATIONS MODEL NUMBER MODEL NUMBER PRODUCT GROUP K = KITCHENAID BRAND PRODUCT IDENTIFICATION BH = BUILT-IN HIGH SPEED OVEN BM = BUILT-IN MICROWAVE CM = COUNTERTOP MICROWAVE HM = MICROWAVE HOOD HS = HIGH SPEED MERCHANDISING SCHEME... -
Page 11: Model & Serial Number Label And Tech Sheet Locations
MODEL & SERIAL NUMBER LABEL AND TECH SHEET LOCATIONS The Model/Serial Number label and Tech Sheet locations are shown below. Tech Sheet Location (Below Top Cover) Model & Serial Number Label Location... -
Page 12: Specifications
SPECIFICATIONS MODEL KBMS1454RBL/WH/BT/SS Brand KitchenAid Country Sold In Size-Configuration 1.4 cu ft Feature Level/Series Sensor, Built-in kit DIMENSIONS / SPECIFICATIONS Outside Dimensions (inches) 24" = 23-3/4" W X 21-1/4"D X 17-15/16" H (front) 17-1/2" H (case) Height 17-5/8", Depth 21-3/4" (flush receptacle), 26-1/4" (non-flush Cutout Dimensions (inches) receptacle), Width 24"... - Page 13 MODEL KBMS1454RBL/WH/BT/SS EXTERIOR Stamped Steel Yes - with tempered cover Window Tempered Glass Window Size (inches) 23-3/4" x 12-7/8" Drop Down Door Two Stage Seals (Capacitive & Reflective) Matte textured white, Matte textured black, Color Matte textured biscuit, Brushed stainless EXTERIOR FEATURES Cabinet Finish Galvanized...
-
Page 14: Kitchenaid Microwave Oven Warranty
For one year from the date of purchase, when this appliance is operated and maintained according to instructions attached to or furnished with the product, KitchenAid will pay for factory specified parts and repair labor costs to correct defects in materials or workmanship. Service must be provided by a KitchenAid designated service company. -
Page 15: Installation Information
INSTALLATION INFORMATION INSTALLATION REQUIREMENTS LOCATION REQUIREMENTS TOOLS AND PARTS The microwave oven may be located in a Tools Needed cabinet, above a built-in oven, below the counter Gather the required tools and parts before and/or below a cooktop. Check the opening starting installation. -
Page 16: Minimum Dimensions
MINIMUM DIMENSIONS Minimum Cutout Dimensions The width of the microwave oven cutout can 21-3/4" (55.2 cm)* vary, depending on location, cabinetry and/or 26-1/4" (66.7 cm)** size of the lower built-in oven (if installing mi- crowave oven over existing built-in oven). Minimum Installation Clearances t h W 22-1/4"... -
Page 17: Product Dimensions
PRODUCT DIMENSIONS 21-7/8" (55.6 cm) 17-1/2" 18" (44.5 cm) (45.7 cm)* 18-1/4" (46.4 cm) 21-1/4" (54.0 cm)* 23-3/4" (60.3 cm)* *Measurements include front facing of microwave oven. Depth measurement also includes door handle. - Page 18 ELECTRICAL REQUIREMENTS GROUNDING INSTRUCTIONS • For all cord connected appliances WARNING The microwave oven must be grounded. In the event of an electrical short circuit, grounding reduces the risk of electric shock by providing an escape wire for the electric current. The microwave oven is equipped with a cord having a grounding wire with a grounding plug.
-
Page 19: Installation Instructions
INSTALLATION INSTRUCTIONS PREPARE THE MICROWAVE OVEN INSTALL THE MICROWAVE OVEN Empty the microwave oven of any loose WARNING contents. For 27″ (68.6 cm) and 30″ (76.2 cm) Excessive Weight Hazard Installation Only: Use two or more people to move and Loosen 2 existing screws on each side of install microwave oven. - Page 20 27″ (68.6 cm) or 30″ (76.2 cm) Installation With the microwave oven near the open- ing, plug the microwave oven into the Hold Z-brackets against the outside edges grounded 3-prong outlet. of cutout opening, and mark holes. Make sure bottom ends of brackets rest on the Slide microwave oven all the way into the cutout floor, as shown.
- Page 21 Fasten side brackets to Z-brackets using Position the tabular portion of the side trim two 3/8″ T-10 screws. panel behind the door facing frame, then push the outside edge of the trim behind Open microwave oven door. the Z-bracket, as shown. Attach the side trim panel to the door facing frame using two 3/4″...
- Page 22 COMPLETE THE INSTALLATION Reconnect the power supply to the outlet. Check the operation of microwave oven Install the turntable in the microwave oven. by placing 1 cup (250 mL) of water on the WARNING turntable and programming cook time of 1 minute at 100% power.
-
Page 23: Product Operation
PRODUCT OPERATION THEORY OF OPERATION AIRFLOW Airflow begins at the cooling fan. The air is The airflow enters the oven cavity through the forced around the high voltage transformer, top rear vents, and travels down the back and and through the vanes of the magnetron. From along the floor towards the front door. -
Page 24: Microwave Oven Control
MICROWAVE OVEN CONTROL PARTS AND FEATURES COMPONENT LOCATIONS TURNTABLE The turntable rotates in both directions to help cook food more evenly. Do not operate the microwave oven without having the turntable in place. See “Assistance or Service” in the Use and Care Guide to reorder any of the parts. -
Page 25: Troubleshooting
Instructions provided with the mi- • Is the display showing an “Oven Status” crowave oven. screen, with a letter/number code and instruction to inform KitchenAid? The Oven will not operate oven has detected an internal problem. It has run a self-checking program and dis- •... - Page 26 • Is the radio or TV receiver near the micro- wave oven? Move the receiver away from Radio or TV interference the microwave oven, or adjust the radio or • Is the microwave oven plugged into the TV antenna. same outlet? Try a different outlet. •...
-
Page 27: Component Access
COMPONENT ACCESS This section instructs you on how to service each component inside the Built-In Microwave Oven. The components and their locations are shown below. COMPONENT LOCATIONS Line Filter Capacitor High Voltage High Voltage Diode Power Supply Cord Transformer Cooling Fan Motor &... -
Page 28: Removing The User Interface Board
REMOVING THE USER INTERFACE BOARD Disconnect the six ribbon cables from the WARNING user interface board connectors. User Interface Board Electrical Shock Hazard Disconnect power before servicing. Replace all parts and panels before operating. Failure to do so can result in death or To Display To Touch Panel electrical shock. -
Page 29: Removing The Display, Touch Panel Board, & Selector Board
REMOVING THE DISPLAY, TOUCH PANEL BOARD, & SELECTOR BOARD Remove the four T20 Torx screws (two on WARNING each side) from the control panel assem- bly and remove the assembly from the unit. Electrical Shock Hazard Disconnect power before servicing. Replace all parts and panels before Control Panel operating. - Page 30 To remove the touch panel board: To remove the selector board: a) Lift the ribbon cable retaining bar and a) Pull the knob off the selector board pull the cable from its holder. control shaft. b) Remove the T10 Torx screw from the selector board and remove the board and its mounting bracket.
-
Page 31: Removing The Humidity Sensor & The Cavity Thermostat
REMOVING THE HUMIDITY SENSOR & THE CAVITY THERMOSTAT b) Remove the two screws from the hu- WARNING midity sensor. Rotate the subpanel out at the bottom just far enough to access the back screw. Humidity Sensor & 2 Screws Electrical Shock Hazard Disconnect power before servicing. -
Page 32: Removing The Interlock Switches
REMOVING THE INTERLOCK SWITCHES To remove the secondary interlock WARNING switch: a) Push the locking tabs and unlock them from the interlock switch, then push up on the switch, and remove it from the holder. b) Disconnect the wires from the interlock switch terminals. - Page 33 Lower & Remove b) Remove the two T10 Torx screws from Top Of Actuating the door latch assembly (bottom inset). Actuating Rod Door Latch Assembly Reflected Image Door Latch Assembly Screws d) Push the locking tabs and unlock them from the interlock switch you are servic- ing, then push up on the switch, and c) Carefully move the door latch assem- remove it from the holder.
-
Page 34: Removing The Halogen Lamp & The Lamp Transformer
REMOVING THE HALOGEN LAMP & THE LAMP TRANSFORMER IMPORTANT NOTE: When you remove and WARNING replace the halogen lamp, be very careful not to allow the reflector and lens (shown below), to slide under the top floor of the microwave oven (these two items are loose once the halogen bulb is removed). - Page 35 b) Cut the wire tie around the lamp wires. To remove the lamp transformer: c) Disconnect the halogen lamp wire con- a) Disconnect the four wire terminals from nectors from the lamp transformer the transformer terminals. LOAD terminals. b) Remove the T10 Torx screw from the transformer and remove it from the mounting bracket.
-
Page 36: Removing The 20A Line Fuseholder, Power Supply Cord, And Line Filter Capacitor
REMOVING THE 20A LINE FUSEHOLDER, POWER SUPPLY CORD, AND LINE FILTER CAPACITOR To remove the 20A line fuseholder: WARNING a) Remove the fuse from the fuseholder. b) Disconnect the two wire connectors from the terminals. c) Remove the T10 Torx screw from the fuseholder and remove the fuseholder. - Page 37 c) Lift the power supply cord and remove Black (Ground Lug) it from the chassis slot. White Black (PS Cord) (PS Cord) Lift To Unhook & Pull Out White Brown (Cavity Therm (20A Line Fuse) Fuse) b) Remove the 5/8″ hex nut from the rear of the chassis and remove the line filter capacitor.
-
Page 38: Removing The Cooling Fan Motor
REMOVING THE COOLING FAN MOTOR Disconnect the motor connector (2 black WARNING wires) from connector P2 on the electronic control board. Cut the wire tie with the two cooling fan motor wires. Cooling Fan Motor Connector Electrical Shock Hazard Disconnect power before servicing. Replace all parts and panels before operating. - Page 39 Remove the three lower housing T20 Torx 10. Remove the two cooling fan motor shoulder screws and remove the lower housing. T20 Torx screws from the upper housing and remove the motor from the housing. Cooling Fan Motor Cooling Fan Motor Lower Housing Upper Housing Screws...
-
Page 40: Removing The Electronic Control Board
REMOVING THE ELECTRONIC CONTROL BOARD Disconnect the wire connectors from the WARNING electronic control board. To User Interface Bd P10 Electrical Shock Hazard Disconnect power before servicing. Replace all parts and panels before operating. Failure to do so can result in death or electrical shock. -
Page 41: Removing The Magnetron Thermostat & The Magnetron
REMOVING THE MAGNETRON THERMOSTAT & THE MAGNETRON To remove the magnetron thermostat: WARNING a) Disconnect the wire connectors from the thermostat terminals. b) Remove the two T10 Torx screws and remove the thermostat from the mag- netron. Electrical Shock Hazard Disconnect power before servicing. - Page 42 d) Pull the filament connector off the mag- netron terminals. Filament Connector e) Remove the four T20 Torx screws from the magnetron and remove the magne- tron from the unit. 4 Screws Magnetron 4-16...
-
Page 43: Removing The High Voltage Transformer, Diode, And Capacitor
REMOVING THE HIGH VOLTAGE TRANSFORMER, DIODE, AND CAPACITOR To remove the high voltage transformer: WARNING a) Disconnect the white and blue wires from the primary terminals. b) Disconnect the filament connector from the magnetron terminals. c) Disconnect the orange and white wires from the high voltage capacitor. - Page 44 e) Remove the four high voltage trans- To remove the high voltage capacitor: former screws from the rear panel of a) Remove the diode from the capacitor the microwave oven, and remove the (see step 6). transformer from the oven. b) Disconnect the white and orange wires from the capacitor terminals.
-
Page 45: Removing The Turntable Motor
REMOVING THE TURNTABLE MOTOR Lay the microwave oven on its rear panel WARNING so you can access the bottom of the unit. Remove the two T20 Torx screws from the turntable motor. Screws Electrical Shock Hazard Disconnect power before servicing. Replace all parts and panels before operating. -
Page 46: Removing The Oven Door
REMOVING THE OVEN DOOR Open the microwave oven door. Use a 1/4″ drill bit, and drill the head off the rivet on the right side of the oven door. NOTE: A new rivet is supplied with the replacement oven door (a rivet must be used in this application to deter disassem- bly by customers). -
Page 47: Component Testing
COMPONENT TESTING Before testing any of the components, perform • Check all connections before replacing com- the following checks: ponents, looking for broken or loose wires, failed terminals, or wires not pressed into • The most common cause for control failure is connectors far enough. -
Page 48: Cavity Thermostat
WARNING Electrical Shock Hazard Disconnect power before servicing. Replace all parts and panels before operating. Failure to do so can result in death or electrical shock. CAVITY THERMOSTAT NO LOAD CAVITY THERMOSTAT NOTE: The no load cavity thermostat assem- Refer to pages 4-5 for the procedure for ac- bly is a non-serviceable component. -
Page 49: Door Interlock Switches
WARNING Electrical Shock Hazard Disconnect power before servicing. Replace all parts and panels before operating. Failure to do so can result in death or electrical shock. DOOR INTERLOCK SWITCHES LAMP TRANSFORMER Refer to page 4-6 for the procedure for access- ing the door interlock switches. -
Page 50: 20A Line Fuse
WARNING Electrical Shock Hazard Disconnect power before servicing. Replace all parts and panels before operating. Failure to do so can result in death or electrical shock. 20A LINE FUSE LINE FILTER CAPACITOR Refer to page 4-10 for the procedure for ac- cessing the line fuse. -
Page 51: Cooling Fan Motor
WARNING Electrical Shock Hazard Disconnect power before servicing. Replace all parts and panels before operating. Failure to do so can result in death or electrical shock. COOLING FAN MOTOR MAGNETRON THERMOSTAT (N.C.) Refer to page 4-15 for the procedure for ac- cessing the magnetron thermostat. -
Page 52: Magnetron
WARNING Electrical Shock Hazard Disconnect power before servicing. Replace all parts and panels before operating. Failure to do so can result in death or electrical shock. MAGNETRON HIGH VOLTAGE TRANSFORMER Primary Terminals White Filament Refer to page 4-17 for the procedure for ac- cessing the high voltage transformer. -
Page 53: High Voltage Capacitor & Diode
WARNING Electrical Shock Hazard Disconnect power before servicing. Replace all parts and panels before operating. Failure to do so can result in death or electrical shock. HIGH VOLTAGE CAPACITOR To test the high voltage capacitor: & DIODE a) Set the ohmmeter to the R x 1K scale. b) Touch the ohmmeter test leads to the HV Capacitor capacitor terminals. -
Page 54: Turntable Motor
WARNING Electrical Shock Hazard Disconnect power before servicing. Replace all parts and panels before operating. Failure to do so can result in death or electrical shock. TURNTABLE MOTOR Refer to page 4-19 for the procedure for ac- cessing the turntable motor. Unplug microwave oven or disconnect power. -
Page 55: Diagnostics & Troubleshooting
DIAGNOSTICS & TROUBLESHOOTING FAILURE CODE INDICATIONS Display Likely Failure Condition Recommended Repair Procedure Flashing colon “:” Power failure After a power failure, the colon “:” will be flashing. Press any key to end this indica- tion. The colon will then be steady when in standby. -
Page 56: Microwave Oven Power Output Test
MICROWAVE OVEN POWER OUTPUT TEST 3. When the microwave oven is finished, stir The power output of the magnetron can be the thermometer through the water and measured by the following tap water tempera- record the temperature. ture rise test. 4. -
Page 57: Primary, Secondary, & Monitor Interlock Switch Checkout Procedure
PRIMARY, SECONDARY, & MONITOR INTERLOCK SWITCH CHECKOUT PROCEDURE Switch Check By Door Open Door Closed 1. Unplug microwave oven or disconnect power. Primary 2. Disconnect the wires at the Primary Interlock Interlock Switch. – 3. Check from the common terminal (white/brown wires) to the normally open terminal (white wire). -
Page 58: Touch Panel
TOUCH PANEL TOUCH PANEL CONTINUITY TEST PIN# POPCORN REHEAT SELECT KEEP BAKED WARM POTATO COOK MEAL ADD A REHEAT DEFROST MINUTE COOK COOK CANCEL TIME POWER START 11.12 GROUND PLANE/PATTERN NOTE: The distance between the ground plane and the membrane switch should be at least 7/25″ (7 mm). - Page 59 KEY TABLE FOR TEST MODE...
-
Page 60: Board Interconnection Diagram
BOARD INTERCONNECTION DIAGRAM DISPLAY USER INTERFACE T OUCH 7001 BOARD PANEL (MEMBRANE SWITCH) SELECTOR BOARD HUMIDITY SENSOR 7001 Secondary TT Relay Interlock Switch 4906 Fan Relay Turntable 4901 Motor H.V. Transformer MW Relay Cooling Fan 4903 Motor Light Relay 4902 Cavity Light Transformer Secondary... -
Page 61: Microwave Oven Wiring
MICROWAVE OVEN WIRING YELLOW/GREEN... - Page 62 — NOTES —...
-
Page 63: Wiring Diagrams & Strip Circuits
WIRING DIAGRAMS & STRIP CIRCUITS SCHEMATIC DIAGRAM... -
Page 64: Wiring Diagram
WIRING DIAGRAM... -
Page 65: Strip Circuits
STRIP CIRCUITS MICROWAVE OVEN COOKING Secondary No Load Primary Cavity Interlock Switch MW Relay Thermostat Interlock Switch Thermostat 20A Fuse Filter Filter Magnetron Thermostat High Voltage System Turntable Turntable Motor Relay 250 mA Fuse Control Inverter Lamp Relay Power Supply Cavity Lamp Fan Motor Fan Relay... - Page 66 TIME OF DAY DISPLAYED CONDITION: DOOR CLOSED...
-
Page 67: Product Specifications
WARRANTY INFORMATION SOURCES IN THE UNITED STATES: FOR PRODUCT SPECIFICATIONS AND WARRANTY INFORMATION CALL: FOR WHIRLPOOL PRODUCTS: 1-800-253-1301 FOR KITCHENAID PRODUCTS: 1-800-422-1230 FOR ROPER PRODUCTS: 1-800-447-6737 FOR TECHNICAL ASSISTANCE WHILE AT THE CUSTOMER’S HOME CALL: THE TECHNICAL ASSISTANCE LINE: 1-800-253-2870...