Planet NVR-820 User Manual
8/16-channel network video recorder with hdmi
Hide thumbs
Also See for NVR-820:
- User manual (110 pages) ,
- User manual (104 pages) ,
- Quick installation manual (24 pages)

Related Manuals for Planet NVR-820


Summary of Contents for Planet NVR-820
- Page 1 Network Video Recorder with HDMI NVR-820 / NVR-1620 8/16-Channel Network Video Recorder with HDMI NVR-820 / NVR-1620 ...
- Page 2 Further, PLANET reserves the right to revise this publication and to make changes from time to time in the contents hereof without obligation to notify any person of such revision or changes.
- Page 3 Do not dispose of WEEE as unsorted municipal waste; they should be collected separately. Revision User’s Manual for PLANET Network Video Recorder with HDMI Model: NVR-820 / NVR-1620 Rev: 1.0 (January 2014) Part No. EM- NVR-820 / NVR-1620...
-
Page 4: Table Of Contents
Network Video Recorder with HDMI NVR-820 / NVR-1620 Table of Contents Chapter 1. Product Introduction................7 Package Contents ................. 7 Overview....................7 Features....................8 Product Specifications ................8 Chapter 2. Hardware Interface................11 Physical Descriptions................11 Hardware Installation ................12 2.2.1 Installing Hard Disk ................ - Page 5 Network Video Recorder with HDMI NVR-820 / NVR-1620 Adding a Camera ................55 8.1.1 Automatic Search ................55 8.1.2 Adding a Camera Manually ............... 59 OSD Settings ..................59 PTZ Setting ..................61 8.3.1 PTZ Preset Settings................61 8.3.2 PTZ Preset Sequence ................
- Page 6 Network Video Recorder with HDMI NVR-820 / NVR-1620 Appendix B: Planet DDNS Application..............119 Appendix C: Configuring Port Forwarding Manually......... 120 ...
-
Page 7: Chapter 1. Product Introduction
This NVR is suitable for introducing high-definition IP surveillance solution, and for upgrading your CCTV system to IP system without re-cabling. The NVR-1620 and NVR-820 is the 16 / 8-channel Linux embedded NVR with HDMI local display from PLANET, bringing stable and efficient system operation under a wide range of recording/network management/system settings. -
Page 8: Features
Exports record video file to AVI format to USB device or local storage Instant Event Notification and recording Network Service Easy access with PLANET Dynamic DNS and Built-in NTP Server Supports DHCP Server/client (Auto detection) Convenient Data Access (SMB/CIFS /HTTP /FTP) Easy Installation &... - Page 9 Network Video Recorder with HDMI NVR‐820 / NVR‐1620 IR Receiver Built-in IR receiver Camera Max.
- Page 10 Network Video Recorder with HDMI NVR‐820 / NVR‐1620 Triggers and Event System Events – System Start / Shutdown System Settings modified Camera Settings Modified...
-
Page 11: Chapter 2. Hardware Interface
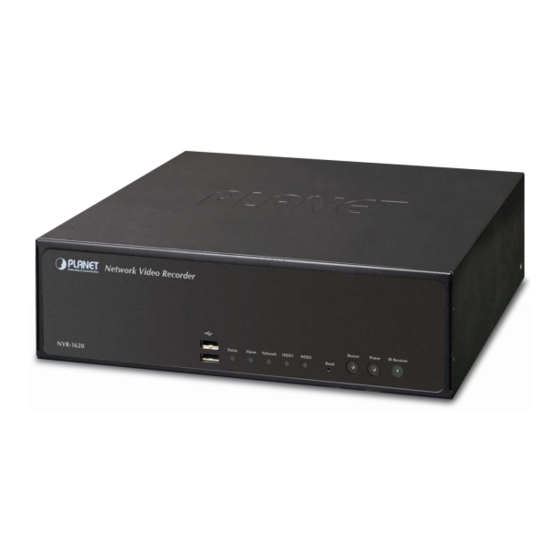
Network Video Recorder with HDMI NVR‐820 / NVR‐1620 Chapter 2. Hardware Interface 2.1 Physical Descriptions Front Panel NVR-1620 NVR-820 Status Definitions LEDs Green Solid green when the HDD is mounted Solid red for disk fail... -
Page 12: Hardware Installation
Network Video Recorder with HDMI NVR‐820 / NVR‐1620 Press and hold for 2 seconds Power Press and hold for 2 seconds Restore... - Page 13 Network Video Recorder with HDMI NVR‐820 / NVR‐1620 2. Place the HDD in the tray on the left. Slide it in until it is securely connected with the SATA connector.
- Page 14 Network Video Recorder with HDMI NVR‐820 / NVR‐1620 4. Place the top case and secure it with the screws on both sides. ...
-
Page 15: Chapter 3. Connecting To The Nvr
Network Video Recorder with HDMI NVR‐820 / NVR‐1620 Chapter 3. Connecting to the NVR There are various ways you can connect to the NVR and below are the suggested methods for different network setups: The NVR is placed in a network with a DHCP server: Connect to the NVR by using “Device... - Page 16 Network Video Recorder with HDMI NVR‐820 / NVR‐1620 Please click “Next” to continue. Please click “Install” to start the installation. ...
- Page 17 Network Video Recorder with HDMI NVR‐820 / NVR‐1620 Once the installation is complete, please check the “Finish”. Please go to Start =>...
-
Page 18: Accessing Nvr With Its Default Ip Address
Network Video Recorder with HDMI NVR‐820 / NVR‐1620 ou may click on the button highlighte elow to perform search again. - Page 19 Network Video Recorder with HDMI NVR‐820 / NVR‐1620 • Please make sure you are using Internet Explorer 7 or above. •...
-
Page 20: Chapter 4. Web-Based Management
Network Video Recorder with HDMI NVR‐820 / NVR‐1620 Chapter 4. Web-based Management This chapter provides setup details of the Internet Camera’s Web-based Interface. 4.1 Main / Live Viewing The main/live view is the first interface displayed once you access to the NVR through the internet browser. -
Page 21: User's Configuration
Network Video Recorder with HDMI NVR‐820 / NVR‐1620 4.1.2 User’s Configuration It displays the name of the current user. If you click on the name of the user, the context menu offers the functions below: - Language settings - User setting... -
Page 22: Digital Zoom
Network Video Recorder with HDMI NVR‐820 / NVR‐1620 If you click on the name of the user, the menu will display as shown below: The camera menu offers the functions below: - Digital Zoom After clicking the digital zoom button, hold the mouse left button and draw a square on the video... - Page 23 Network Video Recorder with HDMI NVR‐820 / NVR‐1620 If the "3 continuous snapshots" option is chosen, the new window will display snapshots and let you view them individually by using the "Prev", "Next"...
-
Page 24: List Viewing
Network Video Recorder with HDMI NVR‐820 / NVR‐1620 - Enhancing Contrast You are able to adjust brightness and contrast of the live video from the camera menu. The default values of two parameters are 50%. -
Page 25: Pattern View
Every time you click on an “n” pattern icon, the live video of the next “n” cameras will be displayed. The channel spilt of NVR-820 is 1, 4, and 8. 4.3.2 Sequence Viewing The sequence mode will automatically switch between a single and group of cameras every a certain period of time. -
Page 26: Saved Viewing
Network Video Recorder with HDMI NVR‐820 / NVR‐1620 4.4 Saved Viewing This section can display the views that you have already saved. You can choose the views from the list you have created. -
Page 27: Camera Installation
Network Video Recorder with HDMI NVR‐820 / NVR‐1620 4.6 Camera Installation 4.6.1 Adding a Camera -- Automatic Search In “Settings”... - Page 28 Network Video Recorder with HDMI NVR‐820 / NVR‐1620 Cameras found should be listed and simply select a camera from the list and press “Configure” Its corresponding information should be displayed in the “Camera Information”...
-
Page 29: Adding A Camera Manually
Network Video Recorder with HDMI NVR‐820 / NVR‐1620 4.6.2 Adding a Camera Manually Simply follow the instruction described above but instead of using the “Search” function, enter the camera’s IP address and credential in the “Camera Information”... - Page 30 Network Video Recorder with HDMI NVR‐820 / NVR‐1620 Type in the IP address of the NVR in the address bar You should be prompted to enter the user name and password to access the NVR Upon successful login, you should see the live view video of the first channel ...
-
Page 31: Live Viewing Through Blackberry Phones
Network Video Recorder with HDMI NVR‐820 / NVR‐1620 Click on the “Channel” drop-down menu to select other cameras If a PTZ camera is selected, the corresponding control buttons will display (control PT only) This function is camera dependent and is not available to all cameras. - Page 32 Network Video Recorder with HDMI NVR‐820 / NVR‐1620 Enable the “Support JavaScript” option, click the menu button and click “Save Options” Go to “General Properties Make sure two options illustrated above are enabled Press the menu button and click the “Save Options”...
- Page 33 Network Video Recorder with HDMI NVR‐820 / NVR‐1620 Press the button highlighted above to go back to the browser Type in the IP address of the NVR in the address bar You should be prompted to enter its username and password for access ...
-
Page 34: Chapter 5. Playback Viewing
Network Video Recorder with HDMI NVR‐820 / NVR‐1620 Chapter 5. Playback Viewing Playback is a function that allows you to play one or more videos that were previously recorded by a chosen recording method or due to an event trigger. -
Page 35: The Main Layout For Playback
Network Video Recorder with HDMI NVR‐820 / NVR‐1620 Once the image is digitally zoomed in, use the mouse scroll button to further zoom on or zoom out the image. -
Page 36: Exporting Playback Videos To Avi Files
Network Video Recorder with HDMI NVR‐820 / NVR‐1620 If you click on the icon you can zoom on range of the time and get more details on the playback bar. - Page 37 Network Video Recorder with HDMI NVR‐820 / NVR‐1620 Click the button to pull down the calendar to help you specify the month, date and the year Specify the starting and ending hours of the video by entering numbers in the text boxes.
-
Page 38: Playing Exported Playback Videos With Nvr Media Player
Network Video Recorder with HDMI NVR‐820 / NVR‐1620 The exported AVI file will be saved under the C partition (or the partition where Windows is installed) ffdshow is required in order to play the exported AVI file with Windows Media Player. - Page 39 Network Video Recorder with HDMI NVR‐820 / NVR‐1620 Locate the exported AVI file, and click “open”. (Normally under “C:\ExportFolder)” ...
-
Page 40: Chapter 6. Event Viewing
Network Video Recorder with HDMI NVR‐820 / NVR‐1620 Chapter 6. Event Viewing This section displays the last events recorded by the NVR. The events can only be detected and displayed if you have configured it on the NVR’s settings. -
Page 41: Opening Event Snapshot Images With Nvr Media Player
Network Video Recorder with HDMI NVR‐820 / NVR‐1620 6.1 Opening Event Snapshot Images with NVR Media Player The NVR sends snapshots that are taken when an event occurs to a destined FTP server or mail recipient. -
Page 42: Chapter 7. Nvr Setup - System Configurations
Network Video Recorder with HDMI NVR‐820 / NVR‐1620 Chapter 7. NVR Setup – System Configurations 7.1 Network Setup The “System Configurations”... -
Page 43: Dhcp Server
Network Video Recorder with HDMI NVR‐820 / NVR‐1620 The NVR supports three connection types that can be configured depending on how the network is set up. -
Page 44: Ddns Service
Network Video Recorder with HDMI NVR‐820 / NVR‐1620 The built-in DHCP Server function is NOT always configurable and is greatly dependant to the connection type that is set to "Device Network Setting": 1. - Page 45 Network Video Recorder with HDMI NVR‐820 / NVR‐1620 *Please make sure a valid DNS server has been configured under the “Network Setting”...
- Page 46 Network Video Recorder with HDMI NVR‐820 / NVR‐1620 Fill in the necessary fields as illustrated above The page will check whether or not another user has used the host name you entered as soon as you click the “Add to Cart”...
- Page 47 Network Video Recorder with HDMI NVR‐820 / NVR‐1620 Once you get to the next page, fill in the necessary fields as illustrated above ...
- Page 48 Network Video Recorder with HDMI NVR‐820 / NVR‐1620 Go back to the NVR’s DDNS service configuration page under “Setup” >> “System Configuration”...
-
Page 49: Time And Date
Network Video Recorder with HDMI NVR‐820 / NVR‐1620 7.2 Time and Date Set the time and date by selecting the time zone according to your location. It is imperative that you set the recorder’s time correctly to avoid the following errors: •... -
Page 50: User Account
Network Video Recorder with HDMI NVR‐820 / NVR‐1620 7.3 User Account Multiple users can access the recorder simultaneously. You can add, remove, and edit users by using options provided on this page to keep user information organized. -
Page 51: Adding A New User
Network Video Recorder with HDMI NVR‐820 / NVR‐1620 7.3.1 Adding a New User • Enter a user name and password in “User Account Information”. All other fields are optional for your own reference. -
Page 52: Changing The Password Of The "Admin" Account
Network Video Recorder with HDMI NVR‐820 / NVR‐1620 Account 7.3.2 Changing the Password of the “Admin” ... - Page 53 Network Video Recorder with HDMI NVR‐820 / NVR‐1620 Group Privilege is where you can create multiple customized access policies for situations if you need the recorder to be accessed by users other than the administrator.
-
Page 54: Disk Setup
Network Video Recorder with HDMI NVR‐820 / NVR‐1620 7.5 Disk Setup Once you install a hard disk to the recorder, you would need to initialize it so that it can be ready for recording. -
Page 55: Chapter 8. Nvr Setup -- Channel Configurations
Network Video Recorder with HDMI NVR‐820 / NVR‐1620 Chapter 8. NVR Setup -- Channel Configurations 8.1 Adding a Camera The NVR provides two options for adding a new camera. - Page 56 Network Video Recorder with HDMI NVR‐820 / NVR‐1620 Once you have the ActiveX component installed, the search status should be displayed after clicking "Search"...
- Page 57 Network Video Recorder with HDMI NVR‐820 / NVR‐1620 Click on “Detect” to establish connection between the recorder and the camera. If connection establishes successfully, camera’s detailed information should be polled and displayed as below.
- Page 58 Network Video Recorder with HDMI NVR‐820 / NVR‐1620 Once the camera's settings are polled and displayed, you can also enable "continuous" recording and adjust its recording quality settings before adding the camera.
-
Page 59: Adding A Camera Manually
Network Video Recorder with HDMI NVR‐820 / NVR‐1620 For single stream camera, only the recording fps can be adjusted. 8.1.2 Adding a Camera Manually Simply follow the instruction described above but instead of using the “Search”... - Page 60 Network Video Recorder with HDMI NVR‐820 / NVR‐1620 Choose one or more display options if you would also like the recorder to automatically embed the system time or the frame rate for you.
-
Page 61: Ptz Setting
Network Video Recorder with HDMI NVR‐820 / NVR‐1620 8.3 PTZ Setting 8.3.1 PTZ Preset Settings The recorder supports PTZ cameras and can set multiple preset points or retrieve and manage preset points that are set in the camera. -
Page 62: Ptz Preset Sequence
Network Video Recorder with HDMI NVR‐820 / NVR‐1620 and fill in a name in the “Position Name” field for easier identification. 3. -
Page 63: E-Map Setting
Network Video Recorder with HDMI NVR‐820 / NVR‐1620 To configure preset sequence for a camera, 1. - Page 64 Network Video Recorder with HDMI NVR‐820 / NVR‐1620 unusual event occurs. To replace the map, click the “Browse” button to locate the new map image file from the local PC and then click “Upload”.
-
Page 65: Google Map Setting
Network Video Recorder with HDMI NVR‐820 / NVR‐1620 When the NVR receives an event triggered from any of the cameras, their videos will be displayed on the E-Map and you can double-click on the video to enlarge it. - Page 66 Network Video Recorder with HDMI NVR‐820 / NVR‐1620 To configure locations of each camera, first determine the location you’d like to place the camera to on the map.
-
Page 67: Chapter 9. Nvr Setup -- Event Configurations
Network Video Recorder with HDMI NVR‐820 / NVR‐1620 Chapter 9. NVR Setup -- Event Configurations 9.1 Event Configuration The “Event Configurations”... -
Page 68: I / O Settings
Network Video Recorder with HDMI NVR‐820 / NVR‐1620 9.2 I / O Settings This function allows users to manage camera’s digital input and output ports right from the recorder. -
Page 69: Event Servers
Network Video Recorder with HDMI NVR‐820 / NVR‐1620 9.3 Event Servers 9.3.1 Configuring an FTP Server Event servers are to be used with event trigger actions. -
Page 70: Configuring An Smtp Server
Network Video Recorder with HDMI NVR‐820 / NVR‐1620 6. Click “Test” to verify if all information is entered correctly and the connection to the FTP server can be established successfully. -
Page 71: Event Triggers
Network Video Recorder with HDMI NVR‐820 / NVR‐1620 9.4 Event Triggers We have finished defining how an event will be triggered and which servers will be receiving notifications in the previous two sections, now we can finish up the event configuration by setting: •Which channels will have event trigger function enabled... - Page 72 Network Video Recorder with HDMI NVR‐820 / NVR‐1620 Define which system events should trigger the recorder to send out notifications. Define how the notifications will be sent and where they will be sent.
-
Page 73: Chapter 10. Nvr Setup -- Recording Configurations
Network Video Recorder with HDMI NVR‐820 / NVR‐1620 Chapter 10. NVR Setup -- Recording Configurations 10.1 General Settings The “recording configurations”... - Page 74 Network Video Recorder with HDMI NVR‐820 / NVR‐1620 The “Pre-alarm” function only works when the “Continuous” recording is also activated.
- Page 75 Network Video Recorder with HDMI NVR‐820 / NVR‐1620 Users can also set to keep a previous number of days of recording data by enabling the option below.
-
Page 76: Schedule Recording
Network Video Recorder with HDMI NVR‐820 / NVR‐1620 10.2 Schedule Recording You can define the time range of the schedule recording for all channels on this page. To configure a schedule recording Use the “Channel”... - Page 77 Network Video Recorder with HDMI NVR‐820 / NVR‐1620 You can also use the “Quick Configuration” to define recording time range instead of clicking cell boxes one by one on the timetable.
-
Page 78: Chapter 11. Nvr Setup -- System Options
Network Video Recorder with HDMI NVR‐820 / NVR‐1620 Chapter 11. NVR Setup -- System Options 11.1 Device Information System Options gives users a glance of the overall system status and allows users to perform maintenance tasks such as upgrading firmware, restore/backup device settings or reboot... -
Page 79: Maintenance
Network Video Recorder with HDMI NVR‐820 / NVR‐1620 11.3 Maintenance “Maintenance” provides functions for users to: •... -
Page 80: Through The Web Interface
Network Video Recorder with HDMI NVR‐820 / NVR‐1620 11.3.2 Through the Web Interface Login into NVR’s web management UI, and go to "NVR Setup" >> "System Options"->"Maintenance"... -
Page 81: Upgrading Through Usb Thumb Drive
Network Video Recorder with HDMI NVR‐820 / NVR‐1620 When done, click “Upgrade”. Follow the on screen instruction and wait for the process to finish (After upgrade, the system will reboot automatically, it’s part of the process) 11.3.3 Upgrading through USB Thumb Drive 1. -
Page 82: Resetting The Nvr To Factory Default
Network Video Recorder with HDMI NVR‐820 / NVR‐1620 11.3.4 Resetting the NVR to Factory Default To reset the recorder back to its factory default, click the “Restore Factory Default”... -
Page 83: Usb Backup
Network Video Recorder with HDMI NVR‐820 / NVR‐1620 11.5 USB Backup It’s a function that allows users to back up the recording data in its database file format (not AVI) to the externally connected USB hard disk. -
Page 84: Things To Pay Attention To The Usb Backup Function
Network Video Recorder with HDMI NVR‐820 / NVR‐1620 The USB hard disk(s) will be listed in the drop-down menu displaying the remaining disk space. Make your selection from the drop-down menu if you have more than one disks connected to the NVR. -
Page 85: Playing The Backup File With The Nvr Media Player
Network Video Recorder with HDMI NVR‐820 / NVR‐1620 Process: • Progress will be displayed on the UI. •... - Page 86 Network Video Recorder with HDMI NVR‐820 / NVR‐1620 A new dialog should be prompted for you to select the file location. When done, click “Check”...
- Page 87 Network Video Recorder with HDMI NVR‐820 / NVR‐1620 Once the file has been successfully verified, you should be prompted with the message shown below.
- Page 88 Network Video Recorder with HDMI NVR‐820 / NVR‐1620 Finally, click “OK” to begin playing. The player should now play the backup file. ...
-
Page 89: Chapter 12. Nvr Local Interface
Network Video Recorder with HDMI NVR‐820 / NVR‐1620 Chapter 12. NVR Local Interface 12.1 System Configuration 12.1.1 Service You will the see the "Service"... -
Page 90: Network
Network Video Recorder with HDMI NVR‐820 / NVR‐1620 The NVR comes with two video outputs (HDMI: Primary as default, VGA: Secondary as default). - Page 91 Network Video Recorder with HDMI NVR‐820 / NVR‐1620 The built-in DHCP Server function is NOT always configurable and is greatly dependent to the connection type that is used: 1.
-
Page 92: User Account -- User Setting
Network Video Recorder with HDMI NVR‐820 / NVR‐1620 12.1.4 User Account -- User setting Multiple users can access the recorder simultaneously. -
Page 93: User Account -- User Group Setting
Network Video Recorder with HDMI NVR‐820 / NVR‐1620 12.1.5 User Account -- User Group Setting Group Privilege is where you can create multiple customized access policies for situations if you need the recorder to be accessed by users other than the administrator. -
Page 94: Disk
Network Video Recorder with HDMI NVR‐820 / NVR‐1620 You can change the group name by typing in a new group name and click the “Change Group Name”... -
Page 95: Channel Configurations -- Adding A Camera (Automatic Search)95
Network Video Recorder with HDMI NVR‐820 / NVR‐1620 Once you install a new hard disk to the recorder, it will be listed on this page and shown status "offline”. - Page 96 Network Video Recorder with HDMI NVR‐820 / NVR‐1620 The progress will be displayed, and you will be switched to the "Channel setting" page for more configurations.
- Page 97 Network Video Recorder with HDMI NVR‐820 / NVR‐1620 The camera's current settings will be displayed on the right and you can adjust settings such as "Format", "Resolution"...
-
Page 98: Channel Configurations -- Adding A Camera (Add Manually)
Network Video Recorder with HDMI NVR‐820 / NVR‐1620 12.1.8 Channel Configurations -- Adding a Camera (Add manually) To add a camera manually, go directly to the "Channel Setting"... - Page 99 Network Video Recorder with HDMI NVR‐820 / NVR‐1620 You can create up to 8 preset points for each channel if it's a PTZ-capable camera. To add a preset point: 1.
-
Page 100: E-Map
Network Video Recorder with HDMI NVR‐820 / NVR‐1620 To configure preset sequence for a camera, 1. - Page 101 Network Video Recorder with HDMI NVR‐820 / NVR‐1620 E-Map monitoring is a function that alerts users whenever there is an event triggered (e.g. motion detected) from a camera with a geographical perspective.
- Page 102 Network Video Recorder with HDMI NVR‐820 / NVR‐1620 Locate the image file (.jpg) and click "Open" to finish. ...
-
Page 103: Recording
Network Video Recorder with HDMI NVR‐820 / NVR‐1620 12.1.10 Recording The “recording configurations” gives users the overall control of how and when a recording is performed and the quality of different types of recordings that will be performed on each channel. - Page 104 Network Video Recorder with HDMI NVR‐820 / NVR‐1620 You can further configure the recording frame rate for different types of recordings, and choose whether to record audio or not.
- Page 105 Network Video Recorder with HDMI NVR‐820 / NVR‐1620 You will be given with options to record i frame only or i+p frames if the recording format is MPEG4 or H.264.
-
Page 106: Event Setting
Network Video Recorder with HDMI NVR‐820 / NVR‐1620 You can also use the options in the "Quick Configuration" section to quickly define the recording time frame without using the schedule table. - Page 107 Network Video Recorder with HDMI NVR‐820 / NVR‐1620 Start the configuration by defining the general settings: Define when an event will be triggered •...
- Page 108 Network Video Recorder with HDMI NVR‐820 / NVR‐1620 • For the “Scheduled” option, use the table to define a range of time if you would like events to trigger corresponding actions only during a certain period of time.
- Page 109 Network Video Recorder with HDMI NVR‐820 / NVR‐1620 How often an event is triggered •...
- Page 110 Network Video Recorder with HDMI NVR‐820 / NVR‐1620 This function allows users to use camera's digital input port from the recorder as source of an event.
- Page 111 Network Video Recorder with HDMI NVR‐820 / NVR‐1620 To add an FTP server, 1. Click "Add" to begin 2.
- Page 112 Network Video Recorder with HDMI NVR‐820 / NVR‐1620 To add an SMTP server, 1. Enter the host name or the IP address of the SMTP server. 2.
-
Page 113: System Log
Network Video Recorder with HDMI NVR‐820 / NVR‐1620 Define which system events should trigger the recorder to send out notifications if you will. Define how the notifications will be sent and where they will be sent. -
Page 114: Maintenance
Network Video Recorder with HDMI NVR‐820 / NVR‐1620 12.1.13 Maintenance “Maintenance” provides functions for users to: •... - Page 115 Network Video Recorder with HDMI NVR‐820 / NVR‐1620 To reset the recorder back to its factory default, click the “Restore Factory Default” button and begin the process.
-
Page 116: Usb Backup
Network Video Recorder with HDMI NVR‐820 / NVR‐1620 It’s a function that allows users to back up the recording data in its database file format as well as in AVI to the externally connected USB hard disk. - Page 117 Network Video Recorder with HDMI NVR‐820 / NVR‐1620 Configure the start and end time of the recording data you would like to back up and click the “Backup”...
-
Page 118: Appendix A: Ping Ip Address
Network Video Recorder with HDMI NVR‐820 / NVR‐1620 Appendix A: Ping IP Address The ping (Packet Internet Groper) command is used to detect whether a specific IP address is accessible by sending a packet to the specific address and waiting for a reply. - Page 119 Network Video Recorder with HDMI NVR‐820 / NVR‐1620 Appendix B: Planet DDNS Application Configuring PLANET DDNS Steps: Step 1 Enable DDNS option through accessing web page of the ICA-3200.
- Page 120 Manually set up the device with a fixed IP address, for example, 192.168.0.100. 2. Accessing the Router with Your Web browser The following steps generally apply to any router that you have on your network. PLANET WNRT-620 is used as an example to clarify the configuration process. Configure the initial settings of the router by following the steps outlined in the router’s Quick Installation Guide.
- Page 121 Your WAN IP Address will be listed here. 3. Opening/Setting Virtual Server Ports to enable remote image viewing The firewall security features built into the router and most routers prevent users from accessing the video from the device over the Internet. The router connects to the Internet over a series of numbered ports.
- Page 122 Enter valid ports in the Virtual Server section of your router. Please make sure to check the box on this line to enable settings. Then the device can be accessed from WAN by the router’s WAN IP Address. By now, you have finished your entire PC configuration for this device. ...