Table of Contents
Advertisement
Quick Links
Advertisement
Table of Contents

Related Manuals for Planet NAS-7450


Summary of Contents for Planet NAS-7450
- Page 1 NAS-7450 / NAS-7850 User’s manual Version 1.0.0...
- Page 2 Copyright Copyright © 2011 by PLANET Technology Corp. All rights reserved. No part of this publication may be reproduced, transmitted, transcribed, stored in a retrieval system, or translated into any language or computer language, in any form or by any means, electronic, mechanical, magnetic, optical, chemical, manual or otherwise, without the prior written permission of PLANET.
- Page 3 Do not dispose of WEEE as unsorted municipal waste and have to collect such WEEE separately. Revision User’s Manual for PLANET 4-Bay/8-Bay SATA NAS RAID Server Model: NAS-7450/7850 Rev: 1.0 (Dec. 2010) Part No. EM-NAS-7450/7850...
-
Page 4: Table Of Contents
1.1 NAS-7450 overview....................... 5 1.2 NAS-7850 overview....................... 8 Chapter 2 Installing and Starting NAS system ..............11 2.1 Installing the NAS-7450/NAS-7850 rack-mount Model ..........11 2.2 Sliding Rails Installation...................... 13 2.3 Accessing the Administration Home Page ..............18 2.4 Detection of Chassis Intrusion ..................18 Chapter 3 Server Configuration ..................19... - Page 5 6.6 Configuring File and Folder Security and ACL..............56 6.7 Managing Quotas ........................ 59 Chapter 7 User Access ......................62 7.1 Workgroup or Domain Mode....................62 7.2 Accessing from Windows ....................62 7.3 Accessing from Web Browsers ..................64 7.4 Accessing from MacOS ...................... 66 7.5 Accessing from FTP Clients....................
-
Page 6: Chapter 1 Introduction
HDD space, but also positions as the central management device managing each user of the device. With the NAS-7450, business-class office or home users will get a simple yet effective way to expand the client side or the network data storage. - Page 7 High Usability: Easier configuration and design with cables that are thinner, have smaller connectors, and are simpler to route and install 1.1.2 Package Content NAS-7450 x 1 Key x 2 Power Cord x 1 Screw Package x 1 User’s Manual CD x 1...
- Page 8 RAID building, rebuilding, expanding Volume un-mounted and HDD is ready for being Red off Amber on hot-up plugged Disk faulty. Amber Blinks (Slowly) Blinking interval is about 2 seconds NAS-7450 Rear View RS-232 e-SATA PCI-E LAN Jack Power Jack Interface Description...
-
Page 9: Nas-7850 Overview
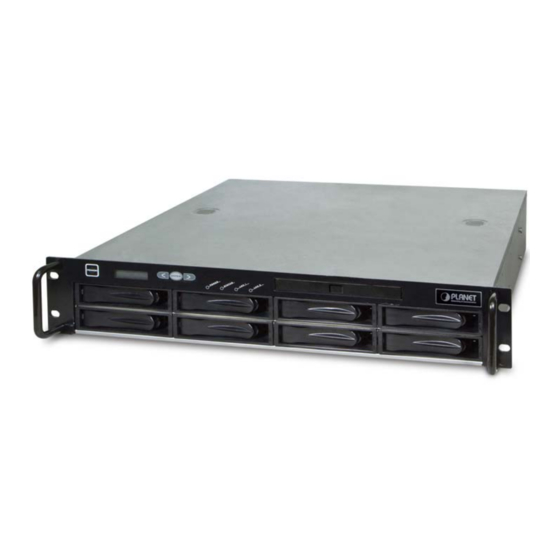
1.2 NAS-7850 overview The reliable and high-performance business-class network storage, PLANET NAS-7850 is a 2U 8-Bay rack-mountable with redundant power supplies network storage system designed for those seeking reliable and affordable server virtualization and file storage. The network storage unified architecture supports both NAS and IP-SAN applications and solves numerous data management problems with a single system. - Page 10 serial bus High System Reliability: A dedicated port for each disk drive, providing greater system reliability through individual drive and cable fault isolation High Usability: Easier configuration and design with cables that are thinner, have smaller connectors, and are simpler to route and install 1.2.2 Package Content ‧...
- Page 11 HDD Access LED HDD ready LED Description Red on Green Blinks Power is being accessed during access Red on Green Blinks (FAST) RAID building, rebuilding, expending Amber on Volume un-mounted and HDD is ready for being hot-unplugged Amber Blink (Slowly) Disk fault Blinking interval is 2 second Hard disk is absent or SATA cable is not connected...
-
Page 12: Chapter 2 Installing And Starting Nas System
This chapter covers the installation procedure of different form factors of NAS server as well as the NAS-7450/NAS-7850 Mobile Rack. Instruction on how to startup the NAS server by setting up the basic configuration through the Admin Home page or provided software tool – NAS Finder is also outlined in this chapter. - Page 13 Figure 3 until the lever retract slowly toward the tray. Then, push the level down as far as it can go to connect the hot swap hard disk tray to the chassis. NAS-7450/NAS-7850 rack-mount server installation 1. Pull out a HDD tray from the server.
-
Page 14: Sliding Rails Installation
10. Press the power button on the left hand corner of your NAS server. 11. Wait for the server to boot up. The boot up process takes approximately 2 minutes. 2.2 Sliding Rails Installation 1. Make sure that you have the following the mounting parts for the sliding rails. •... - Page 15 4. Next, attach the two L-shaped mounting brackets on to a sliding rail. Use the “M4” screws to secure the L-shaped bracket on to the sliding rail. 5. Attach the sliding rail onto a rack-mount cabinet. Secure the sliding rail onto the rack-mount cabinet via the screw holes on the L-shaped brackets...
- Page 16 After properly attaching both sliding rails to the rack-mount cabinet, you may slide the rack-mount chassis (mounting) in to the cabinet. Configuring the NAS using the LCD console...
- Page 17 Configuring the IP addresses using the LCD console 1. After NAS server is boot up, the LCD console shows System Ready. Press the right button. The IP address of LAN1 is shown. Press the middle button to configure LAN1 IP address. Note that the symbol at the right hand upper corner indicates that the IP address can be configured using the LCD console.
- Page 18 5. After you edit the last digit of the IP address, press the right button and configure the Subnet Mask address. 6. Repeat Steps 4 to Steps 5 to configure the Subnet Mask and Gateway address. 7. After you edit the last digit of the Gateway address, press the right button. Move the cursor to Save and save the setting or Edit to repeat the above process or Abort to quit the configuration process without saving.
-
Page 19: Accessing The Administration Home Page
2.4 Detection of Chassis Intrusion Model NAS-7450/7850 NAS server supports the detection of chassis intrusion and door intrusion. When the chassis is opened or chassis door is opened, the system will send email alerts or SNMP traps. To enable the function, please go to the “Event →... -
Page 20: Chapter 3 Server Configuration
Chapter 3 Server Configuration This chapter describes how to name the server, specify the server date and time, upgrade the OS firmware, shut down the system and use UPS with the NAS server. 3.1 Server Information and Settings Click Server from the administration homepage. You will see the “Information” page describing the summary information of the NAS server. -
Page 21: Upgrading The Firmware
Indicates whether users can configure the server from the LCD Configure from LCD console Indicates the banner text which is displayed on the LCD console System LCD Banner when it receives no user input or event messages for a period of time UPS Support Indicates whether the UPS support is enabled or not... -
Page 22: Enabling Ups Support
Shutdown, reboot and startup actions The NAS server can be shut down by pressing the power button twice at the front of the server case. The whole shutdown process might take seconds to minutes until data are all safely saved to the hard disks. To shut down the server from the “Administration Homepage”, select “Shutdown”... - Page 23 occur, the NAS server can shut down itself automatically to prevent potential data loss. To use smart-signaling UPS, connect UPS to the NAS server with an RS-232 or USB cable. Then go to the “Server UPS Settings” menu on the administration page to enable UPS support.
- Page 24 When utility power fails, the NAS server will always shut down. Note:...
-
Page 25: Modifying The Administrator's Password
3.5 Modifying the Administrator’s Password “Admin” is a built-in user account for the administrator. It is like the “root” account in UNIX or the “administrator” account in Windows 2000 or XP. Using this account, users have access to the administration homepage and all the storage resources. By default, the password for this user account is empty. -
Page 26: Chapter 4 Network Configuration
Chapter 4 Network Configuration This chapter details concepts and procedures for configuring the NAS server and establishing the system that can communicate among various OS platforms. Management protocol and email notification setting are also covered in this chapter. 4.1 Network Information The “Network Information”... - Page 27 The “TCP/IP Suite Settings” section shows the various TCP/IP settings of the server. Item Description Port Display Ethernet port #. IP Address An identifier for a network resource on a TCP/IP network. A subnet mask used to determine what subnet an IP address Subnet Mask belongs to.
-
Page 28: Tcp/Ip Settings
4.2 TCP/IP Settings TCP/IP handles network communications between network nodes that are connected to the network. It is important to setting up correct TCP/IP setting that for NAS server to function properly. Network Teaming Mode The NAS server provides two on-board 10/100/1000 or Gigabit Ethernet ports (LAN1 & LAN2). You can configure the Ethernet ports using the following operating modes: Stand Alone: Each LAN1 &... -
Page 29: Windows Settings
9. Input the “NTP Time Server IP Address” if available. 10. Click “Apply” to save the setting. To disable a LAN port, enter 0.0.0.0 in its “IP address” field. If you happen to disable all LAN ports and cannot access the administration page, please use the LCD panel to change the IP address to non-zero values. -
Page 30: Unix/Linux Settings
server will be created as a machine account on the domain controller. And it will use Kerberos as the authentication mechanism, which provides better integration into the Windows network environment. Configuring Windows Network Settings 1. Click the “Enable Windows Network” (SMB/CIFS Protocol) checkbox to enable access for SMB client. - Page 31 numbers corresponds to the type of users- Owner, Members of a group and Everyone Else. Number Read (R) Write (W) Execute (X) Example: If the permission of a file is set to 777, this file has read, write and execute permissions for the owner, the group and for other users.
-
Page 32: Macintosh Settings
Configuring NIS settings The NIS (network information services), formerly known as Yellow Pages, is a UNIX standard for centralizing the management of UNIX resources. The NAS server supports the retrieval of user accounts and their UID/GID from a NIS server. If the NIS support is enabled, the NAS server cans auto-map NIS users with local/domain users. - Page 33 Local account authentication: Authenticate user using NAS server’s internal user database. Local and domain authentication: If Windows Network is enabled, you can enable both local and domain authentication for AFP client. Current Zone: A division between groups of machines when viewed using AppleTalk. AppleTalk Zones can be seen in the Chooser, the AppleTalk Control Panel, and the Network Browser.
-
Page 34: Web Data Access Settings
Configuring Macintosh Network Settings 1. Click the “Enable Macintosh Network” (AFP Protocol) checkbox to enable access for AFP client. 2. Select a protocol and click the radio button beside it. 3. Click the “Local account authentication” radio button to authenticate user using the server’s local user database. -
Page 35: Ftp Data Access Settings
4. Or, click the “Local and domain account authentication” radio button to use both local account and Microsoft domain security authentication. 5. Select the default type of the folder display on the user page. You can choose from “Detail View”, “Large Icons” or “Small Icons”. 6. -
Page 36: Snmp Settings
4. Or, click “Allow individual user login”. Select “Local account authentication” to authenticate user using the local user database or click the “Local and domain account authentication” radio button to use both local account and Microsoft domain security authentication. 5. Select the “User Limit”. Click the “Unlimited” radio button or specify the maximum number of users allowed to access the content in your NAS server via FTP. -
Page 37: Email Settings
Contact: Provide name of the contact person who has the management information of the SNMP agent. Configuring SNMP Settings 1. Click the “Enable SNMP Protocol” checkbox to enable SNMP accessing. 2. Enter a “Community” name. 3. Enter the “IP” address of the management console. 4. -
Page 38: Configuring Email Settings
Configuring Email Settings 1. Click the “Enable SMTP Protocol” checkbox to enable SMTP protocol. 2. Enter the “SMTP Server Address”. 3. Enter an existing user account name of the SMTP server. 4. Enter the password of the account. 5. Enter up to two email addresses you want to send email notification to when event occurred. 6. -
Page 39: Ssl Settings
4.10 SSL Settings The NAS server enables secure web access by supporting SSL 3.0, both for the user homepage and the administration homepage. To use SSL 3.0, the NAS server will generate a server certificate for authentication and data encryption. By default, the server certificate is issued to the NAS server designated by its IP address. -
Page 40: Chapter 5 Storage Management
Chapter 5 Storage Management This chapter describes how to create a single-disk volume or a RAID volume. It also outlines the steps of deleting a volume, expanding a RAID-5 volume and assigning hot-spare disks. After a volume is created, please refer to the next chapter for more information about sharing data and assigning permissions. - Page 41 Not Ready The volume is not mounted successfully. It is not accessible. Degraded One of the volume members is defective. Data are still intact and accessible, but the volume is no longer protected by RAID. Data backup and RAID rebuilding are strongly suggested when a volume is in this state.
-
Page 42: Creating A Volume
To change the name of a volume, click its Volume Name hyperlink in the List of Volumes table. It brings to another page for displaying detailed information of the volume. You can modify the volume name on that page. 10. Device View It is a list of all the storage devices connected with the NAS server, including hard disks, CD/DVD-ROM, CD/DVD writers and tape drives. - Page 43 Item Description Just a Bunch Of Disks. JBOD A JBOD-type volume contains only one hard disk as its member. RAID 0 RAID level 0 is disk striping only, which distribute data evenly over multiple disks for better performance. It does not provide safeguards against failure. RAID level 0 uses two or more hard disks.
-
Page 44: Deleting A Volume
performance on the level of RAID 0. Write-Once Volume: When setting a Write-Once volume, you are not allowed to erase or change what you have written on this volume. This setting CANNOT be reverted in any situation, please think it twice before you enable it. -
Page 45: Assigning Hot-Spare Disks
clusters in Volume/Disk. All readable data will be placed in new clusters and defective cluster will mark as bad in the file system. All the newly added devices will be scanned before usage to ensure the data integrity in the NAS Server. Select the volumes or disks you want to scan, click “Scan Now”... -
Page 46: Migrating Data Volumes
You may have to change hard disks in some situations, such as hard disk failure, degraded RAID, Critical RAID or general maintenance. The NAS server supports HDD hot-swapping if used with NAS-7450 hot-swappable HDD module. Below are the instructions of replacing hard disks when using the HDD module. -
Page 47: Iscsi
For NAS-7450 rack mount model: 1. Identify which hard disk fails. The amber LED2 will blink to indicate hard disk failure. 2. Unplug the HDD tray and replace the HDD with a good one. 3. Plug in the HDD tray. Wait until the Green LED is steady on. - Page 48 1. Click “iSCSI” tab and Click “Add” to create an iSCSI target on the NAS. 2. Enter the iSCSI target information for configuration Item Description The name for the target. Target User Name Select to create an iSCSI target with a mapped LUN and enter the iSCSI Target Lun size of LUN Comment...
-
Page 49: Chapter 6 Security Control
Chapter 6 Security Control This chapter covers how to setting up the security control of the files, folders and shares stored in NAS server. Managing Access Control List (ACL) file level security, file ownership and user quota are also covered in this chapter. You can configure the following types of security control on the NAS server: 1. -
Page 50: Creating The Local User And Local Group Accounts
Number of Shares Total number of share created in NAS server. Number of ACL Nodes Total number of ACL node created. ACL tells NAS server which access right each user has to a folder or an individual file. Number of Accounts The total account number of the Local User/Group, Domain User/Group, Trust Domain User/ Group and Unix/Linux Host Entry. - Page 51 the name. You can also grant administrator privilege to a local group. Groups with administrator privilege are indicated by a # sign at the suffix of the name. To create a local user: 1. Go to “Security → Account → Local Account” menu. 2.
-
Page 52: Caching Windows Domain User Accounts
3. Click the “Property” button. 4. If you want to change the password, enter a new password and confirm. 5. If you want to disable this user account, click the “Disable user account” checkbox. 6. Select a group from the left hand window and click the >> button to add the user as a member of this group in the Member of section. -
Page 53: Creating Unix/Linux Host
8. Click “Apply” to save the setting. Filter Rules: 1. User/Group: You can filter windows domain pool displays domain users or domain groups or all. 2. Domain: You can filter which one domain displays in pool or all. 3. Authorized / Unauthorized: You can filter authorized or unauthorized domain accounts or all 4. - Page 54 To create a list of the UNIX/Linux host: 1. Go to “Security → Account” menu. 2. Click the “UNIX/Linux Host” tab. 3. Enters a single host IP address in the first text box. 4. Or, enter the start IP address in the first text box and the last 3 digits of the end IP address in the second text box to input a range of the host IP addresses of the “Host IP”...
-
Page 55: Creating Share And Assigning Share Permissions
6.5 Creating Share and Assigning Share Permissions You can share a specific folder in any volume created in the NAS server with others on the network. When you create a share, you can assign the permission to the share that other users will be allowed or denied when they access the share over the network. - Page 56 To assign share permission of a share for local account and domain account: 1. Go to “Security → Share” menu. 2. Locate the share and click to assign or modify share permission to this share. 3. Highlight the users or groups from user pool and click user’s checkbox. 4.
-
Page 57: Configuring File And Folder Security And Acl
4. Assign the UID, GID and Permission of this share. It will overwrite the ownership and permission of the mount point once the share is mounted by the NFS client. If the NIS support is enabled, the UID and GID pull-down menus will list all NIS users for you to choose. - Page 58 currently accessing, the permission setting do not take immediate effect because of the local handle being used by the user. The new rights will only take effect when the user reconnects to the file or folder. There are two built-in user accounts: “Admin” and “Guest”. And two built-in group accounts: “Admins”...
- Page 59 Read Write (RW) – Account is allowed to read and write to the file or folder, but not to delete it. Modify (MO) – Account is allowed to read, write and delete the file or folder Full Control (FC) – Account is allowed to read both read and write and change permission to the file or folder.
-
Page 60: Managing Quotas
To change owner of a file or folder 1. Go to “Security → File/Folder” menu. 2. If you want to change the owner’s name of the corresponding file and folder, click the owner’s name hyperlink. Select a new owner from the user list. 3. - Page 61 Configuring user quota: NAS server supports two types of quotas: user quota and folder quota. User quota monitors the disk space usage of each user. It is based on file ownership, and is independent to which volume that the file and folder located. Below are the descriptions of the parameters when setting up user quotas.
- Page 62 1. Click the “Enable folder quota control” checkbox to enable folder quotas. 2. Click the “Add” to add folder quota to a folder. 3. Click the “Select Path” to browse for target folder. 4. Enter the quota limit in MB. 5.
-
Page 63: Chapter 7 User Access
Chapter 7 User Access The NAS server fits into the network environment as soon as it is properly configured. This chapter describes how to get the NAS server ready for user access from various network OS. Before reading on, please make sure that the NAS server is configured with an IP address and a volume is created successfully. - Page 64 1. Please configure the NAS server to operate either in the workgroup mode or the domain mode. Go to the “Network → Windows” menu and select either “Workgroup Mode” or “Domain Mode”. Also specify the workgroup/domain name. 2. Create local accounts if the NAS server is in the workgroup mode. Go to the “Security → Account →...
-
Page 65: Accessing From Web Browsers
7.3 Accessing from Web Browsers In addition to the administration homepage, the NAS server provides the user homepage for normal users to access data in the server. With a web browser, users can download files, create folders, upload files and modify ACL. To enable user access from web, please follow the steps. - Page 66 NAS server. When the user homepage is opened, it prompts for user name and password. Then it will display all shared folder after user login. The user homepage will be like: In the top right corner of the user page are the tool-bar icons, which provide access to various functions like creating folder or uploading files.
-
Page 67: Accessing From Macos
7.4 Accessing from MacOS After setting the NAS server to operate in the workgroup mode or the domain mode, follow the steps below to configure for MacOS user access. 1. Enable the Macintosh Network support (the AFP protocol). Open the administration page and enter the “Network → Macintosh” menu. Check the “Enable Macintosh Network”... -
Page 68: Accessing From Ftp Clients
the server. Once you find the server, click Connect to put it on Desktop. 7.5 Accessing from FTP Clients You can set an FTP home directory in the NAS server for user access. Login authentication is done by checking the ACL of the FTP home directory. During an FTP session, the server always checks ACL when it receives any FTP requests, such as ls, put, get, etc. -
Page 69: Accessing From Nfs Clients
volume01. These will be the accounts which are allowed to login the NAS using ftp software. Note that the Inherited List will be cleared if you uncheck the Inherit from parent folder check-box and click “Apply” button. Now, run an FTP client to connect to 192.168.170.172. Login as the user you assign in step 3 above. - Page 70 Once mounted, the /mnt directory will link to volume01 and inherit the same UID, GID and permission as you specify in the configuration steps. The users on the NFS client with proper access rights will be able to access the /mnt directory and hence the NAS server.
-
Page 71: Chapter 8 Backup And Recovery
Chapter 8 Backup and Recovery 8.1 Snapshot – Fast Point-In-Time Copies Snapshots are read-only copies of file-systems at a specific point in time. Snapshot distinguishes itself in its speed. Creating a snapshot is not involved with copying user data, thus usually taking less than a second. The concept of snapshot is very different from tape backups. - Page 72 2. Viewing Snapshot Information On the page shows the snapshots existing on the volume and their information. “Snapshot Used Space” indicates the disk space used by snapshot data. In the table – List of Snapshots, “Space to Free” indicates the disk space which will be freed if a snapshot is deleted. “Activity” indicates whether the snapshot is being deleted or rolled back.
- Page 73 several snapshots at a time. The NAS server will delete the snapshots one by one. 6. Snapshot Roll-back Snapshot roll-back is to restore the volume to the state when the selected snapshot was taken. Snapshot roll-back is useful if most data are lost or destroyed by virus attacks or human errors. Snapshot roll-back is much faster than restoring from tapes.
-
Page 74: Smartsync - Nas-To-Nas Data Replication
8.2 SmartSync – NAS-to-NAS Data Replication The NAS server is integrated with the SmartSync function for NAS-to-NAS data replication. Two or more NAS server are required, one as the SmartSync server, others as the SmartSync clients. The SmartSync server is like an ftp server. The SmartSync clients can either replicate their data to the SmartSync server, or copying data from the SmartSync server, depending on the task settings. - Page 75 On the NAS server which acts as the SmartSync client, set up a SmartSync task, which defines the schedule settings and the source folder. To set up a SmartSync task, please go to the “Backup → SmartSync” →”Task” menu on the “Administration”...
- Page 76 The GFS media rotation mechanism is the policy of managing backup versions. The policy is described as below. Basically it will check for obsolete versions and delete them when a new backup version is created. X, Y, Z are user-defined numbers. a.
- Page 77 There are four steps to take when adding a SmartSync task. Step 1 is to specify the IP address of the SmartSync server. Step 2 is to choose a sync point of “Backup” mode in the SmartSync server. Specify the action as “Backup to server”.
- Page 78 On the NAS server which acts as the SmartSync client, set up a SmartSync task, which defines the schedule settings and the target folder. To set up a SmartSync task, please go to the “Backup → SmartSync →Task” menu on the “Administration Page”.
-
Page 79: Backup And Restore System Profiles
The SmartSync Options When setting up a SmartSync task, you will see the following SmartSync options. • Compress the data stream during data transmission: when checked, it will compress data before transmitting to the SmartSync server. Sometimes it will make it faster to complete a task. -
Page 80: Backup Usb Device
of the system settings to restore. Then click the “Apply” button. A system profile can also be created by the NAS Finder software. To recover from a system profile saved by NAS Finder, click the “An external file” item and find the system profile. Specify restore options and click the “Restore”... - Page 81 • One drive supports 3 partitions. • Please unmeant the USB device before removing, or the data may be damaged...
-
Page 82: Chapter 9 Event Logs And System Status
Chapter 9 Event Logs and System Status This chapter covers the Event Notification and System Status pages. You can collect information about the system, hardware and security event of you NAS server. NAS server records three kinds of logs: • System Log •... -
Page 83: Thermal Settings
3. Click “Advance” button to configure the way of notification for various events. 4. Click “Apply” to save the setting. The “System Fan Control” functions only on NAS-7450/NAS-7850. The system and CPU fan would start to work over 25℃. 9.2 Checking the Event Logs You can view a summary of all the events occurred on your NAS server: “Web Reminder”, “System Log”, “Device Log &... -
Page 84: Viewing System Status
message and it will directly lead you to the Web Reminder summary menu. Go to “Event → Web Reminder” menu to see a summary of all the critical events occurred on your NAS server. Viewing System Log In the “Event → System Log” menu, you can: 1. -
Page 85: Saving System Settings And Status As Html Files
the latest figure. Viewing the Open Files In “Status → Open Files” menu, it provides the following information about all the open files on NAS server: • R/W – read/write privileges of the opened file. • User – the name of the user who has opened the file. •... -
Page 86: Share Access Counts
performing tape, SMB, permissions, DISC, and system profiles backup. To create the system folder, please open the “Administration Page” and go to the “Server → Maintenance” menu. On the menu page, select a volume to contain the system folder. And click “Apply” to create the system folder. -
Page 87: Chapter 10 Virus Protection
Chapter 10 Virus Protection Most storage systems are vulnerable to virus attacks. An infected file in you NAS server can be exchanged among the clients system in the network and resulting in corrupted data or causing productivity loss. The integrated Trend Micro antivirus software in NAS server is the best-of-breed security product that delivers the reliable antivirus protection to prevent virus from spreading before they get to you. -
Page 88: Real-Time, Manual And Schedule Scanning
Last successful Display the date/time of the last successful virus pattern file update update Scan engine Display the current scan engine version version Display the current virus pattern file version Virus pattern version Quarantine Folder Display the folder name and path where virus infected files are located and quarantine The real-time scan history display the date time that the virus is found, virus name, action taken and the full path name of the infected file. -
Page 89: Configuring Scan Settings
Scan Settings” on Section 11-3. 2. Click the “Manual” tab to go to the manual scanning page. 3. Click the “Select Folders” hyperlink to specify the folders you want to perform the manual scan. 4. Click “Apply” to save the settings. Configuring Schedule Scanning 1. -
Page 90: Updating Virus Pattern File
1. Click the desire scan file type. 2. If “All file types” is selected, all files regardless to its file extension will be scanned. 3. If “Files with specified file extensions Only” is selected, specify using the recommended extensions recommended by Trend Micro or specify the file extension manually. 4. -
Page 91: Appendix A Troubleshooting & Frequently Asked Questions
Appendix A Troubleshooting & Frequently Asked Questions Device What kind of OS is NAS-7450 / 7850 are equipped with the Linux-based OS that is used in NAS-7450 / optimized for networking storage. Planet develops the OS to be 7850? seamlessly integrated with its own SlimServer technology. - Page 92 Blu-ray, Dual-layer and hard disk drives of SATA interface. support? How to operate CD-R/RW devices You can find two functions within Admin Home page of NAS-7450 / and DVD+-R/RW 7850 that are “Writer” and “Loader” for backup or restore data. devices on...
-
Page 93: Appendix B Utility For Nas System
Control List) and applicable to shared folders and files. control? How many user accounts can be Up to 20,480 accounts information can be stored in the NAS-7450 / stored in user 7850, which include local accounts and domain accounts. database of the... - Page 94 • VGA or higher resolution monitor • Microsoft Windows 95/98/98SE/ME, Windows NT/2000/XP Installing TCP/IP Protocol for Microsoft Networks NAS Finder communicates with NAS Servers through the TCP/IP protocol. You must install “Client for Microsoft Networks” and the “TCP/IP” protocol in Windows to use NAS Finder.
- Page 95 automatically”. 6. Or, you can specify the IP settings manually. 7. Click “Next” button to go to the next page. 8. Enter the “Server Name, Server Comment”, and “Workgroup/Domain Name” and select either the “Workgroup mode” or “Domain mode”. Note that this is the server name as it appears on the network which is irrelevant to the network protocol used.
- Page 96 You can disable this option by choosing “Tool->NAS Finder Options” and un-checking the option - “Open Windows Explorer when NAS Finder starts”. The main window consists of a file menu, a tool bar, a tree view pane on the left, a list view pane on the right and a status bar on the bottom.
- Page 97 view its content. Disc Image: represents a mirrored CD/DVD image. The following are some examples of browsing the servers. Example 1. Content of a disc image folder It displays all the disc images, path name, size, status and file system. Tool Bar Functions The tool-bar provides an easy access to the main functions of NAS Finder.
- Page 98 Save Container: saves data in My Container into a container file. Load Container: loads a container file into My Container. Mirror CD: starts the “Mirror CD” wizard for duplicating CD images into the NAS Server. Build Image: starts the “Build Image” wizard to build a CD image from My Container into a NAS Server.
- Page 99 2. Choose one or more servers as the destination. Select a server in the “Target & File Path” list-box, select “Smart” mode for redundancy check of the CD image or select “Force” mode to allow a second copy of the same CD image. Then, click the >>...
- Page 100 3. Change the volume label of the CD/DVD image if necessary. If you want to change the volume label, click the “2. User Define” radio button and enter the volume label in the input-box. Then click the “Update” button. Click the “Next” button afterwards. 4.
- Page 101 5. Set the Mirror CD options if necessary. 6. Click “OK” to start the task. The Task Manager will show the progress. Archiving Files as a CD/DVD Image This chapter describes how to build CD image from “My Container” into a NAS Server. Please follow the steps below.
- Page 102 2. Click the “Build Image” icon on the tool-bar to bring up the “Build Image” wizard. You can click the “Validate” button to check if the file/folder information in My Container is correct. If not, you can choose to update My Contained. 3.
- Page 103 4. Name the CD/DVD image to be created. Enter the name in the “Volume label” input-box and click the “Update” button. Press “Next” afterwards.
- Page 104 5. Specify the date/time to run the task. Then press “OK”. 6. The Task Manager will show the progress. Burning Disc Images If the NAS server is equipped with CD or DVD writer, it can burn any existing disc image in it. Select a NAS server from the “NAS Servers”...
- Page 105 • High Sierra • Hybrid (ISO+HFS) • Multi-session CD • Mixed Mode CD • UDF V1.5, V2.0...
-
Page 106: Appendix C Led Indicators
Appendix C LED Indicators LED indicator Blink Amber* 1000M link no link 1000M activity Green 100M link no link 100 M activity Yellow 10M link no link 10 M activity 1000M link 1000M activity Amber* no link Green 100M link no link 100M activity Yellow... -
Page 107: Appendix D Product Specification
Appendix D Product Specification Hardware Specification for NAS-7450 Specification Intel Celeron 2.0G/1M/533MHz Memory 1GB RAM Flash 1GB RAM 3.5” SATA I/II HDD x4 NOTE: The system is shipped without HDD. HDD Tray 1U / 4 x Hot-swappable and lockable tray... - Page 108 • Advanced RAID bad sector recovery mechanism • Support smart-signaling UPS, USB UPS and network • Local tape backup with SCSI tape drive support Network Security • Built-in Trend Micro antivirus software • Integrate with Microsoft Windows NT/2000/2003/2008/7 Domain and Active Directory environment •...
- Page 109 Power Adapter INPUT: 100-240V AC, 3-6A FUSE: 6.3A, 250V Secure Design Lock security slot for HDD prevention Regulatory FCC, CE, RoHS, WEEE compliance Hardware Specification for NAS-7850 Specification Intel Core 2 Duo 2.2G/4M/800MHz Memory 2GB RAM Flash 1GB RAM 3.5” SATA I/II HDD x8 NOTE: The system is shipped without HDD.
- Page 110 Data Protection • RAID 0,1,5,6,10 and JBOD with global hot-spare and RAID expansion • NAS-to-NAS data synchronization with SmartSync • Advanced RAID bad sector recovery mechanism • Support smart-signaling UPS, USB UPS and network • Local tape backup with SCSI tape drive support Network Security •...
- Page 111 Humidity: 0% ~ 90%, non-condensing Dimension (L x W x H) 669mm x 480mm x 88mm Weight 16.2kg Power Adapter INPUT: 100-240V AC, 5-8A FUSE: 8A, 250V Secure Design Lock security slot for HDD prevention Regulatory FCC, CE, RoHS, WEEE compliance...