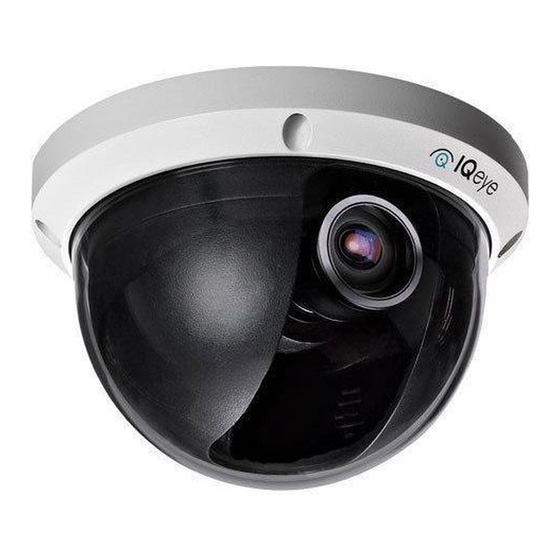
Summary of Contents for Iqinvision IQeye Alliance
- Page 1 IQeye Alliance-pro Series Vandal-resistant IP Camera Installation and Operating Instructions...
-
Page 2: Table Of Contents
Parts List Mounting Options Removal of Dome Cover and Camera Assembly Install Interior Mounting Plate Connect Camera Camera Positioning, Field-of-View Set-up and Focus Reboot and Factory Restore Close Camera PC Configuration of IQeye Alliance-pro Auto Focus Lens Zoom & Focus Adjustment... -
Page 3: Unpacking
> Mounting Hardware > Mounting Template > IQtools CD-ROM 2 Service If the unit needs repair service or parts, the customer should contact IQinVision for authorization to return, as well as shipping instructions. IQinVision 33122 Valle Road San Juan Capistrano, CA 92675-4853 Phone: +1-949-369-8100 or 1-877-850-0805 (toll-free in U.S.) -
Page 4: Description
4 Installation NOTE: This manual describes how to install the IQeye Alliance-pro Series camera system and details interior wall and ceiling mounting options. For exterior mounting options, consult the additional manual included with those units. Installation should be performed by qualified service personnel... -
Page 5: Parts List
5 Parts List Figure 5.1 and Figure 5.2 depict the major camera assembly parts included: IQA3xNI and IQA3xWI Series a. Alliance Mounting Plate b. Alliance Camera, Lens c. Alliance Shroud d. Alliance Dome Cover Assembly Figure 5.1 IQA3xNE, IQA3xWE, IQA3xNX and IQA3xWX Series a. -
Page 6: Mounting Options
6 Mounting Options Alliance-pro cameras can be mounted in one of two configurations, wall or ceiling. Both mounting configurations are shown in Figure 6.1 and Figure 6.2. Figure 6.1 Figure 6.2 WARNING: When installing the Alliance-pro dome camera outdoors, the camera should not be installed directly to a wall surface and should avoid exposure to direct sunlight. -
Page 7: Removal Of Dome Cover And Camera Assembly
7 Removal of Dome Cover and Camera Assembly a. Using the supplied Torx T-20 security tool, loosen the four tamper-proof screws holding the dome cover to the enclosure assembly. Note these screws are captive. These screws should not be removed from the dome cover trim ring. -
Page 8: Install Interior Mounting Plate
In addition, follow local regulations and laws which may have specific requirements governing the installation of security equipment on a ceiling tile surface. IQinVision strongly recommends the use of a ceiling tile brace and other mounting hardware designed to secure the Alliance-pro to the ceiling frame infrastructure. - Page 9 a. Power the camera using either direct power or Power-over-Ethernet. 1. Direct Power: Connect either a 12-24VDC or 24VAC power source to the camera. Wire polarity is not important, therefore + or – connections can be connected to either terminal as shown in Figure 9.2. Figure 9.2 NOTE: Using a power source with specifications other than those defined will damage the camera, and will void the product warranty.
-
Page 10: Camera Positioning, Field-Of-View Set-Up And Focus
c. If audio, I/O, and continuous analog video out connections are being used, attach them to the appropriate terminals on the Audio / Triggers / Video terminal block on the camera as shown in Figure 9.4. d. If using the continuous analog video output use the IQ76x-AVC analog video cable adapter (not supplied). - Page 11 The Alliance-pro is equipped with an analog video port, RCA type, which can be found next to the reset / reboot buttons. This analog port utilizes IQinVision’s exclusive IQfocus utility which allows precise focusing of the camera. Note that IQfocus shuts off 30 minutes after the Alliance-pro is powered up or immediately after sending a digital stream.
-
Page 12: Reboot And Factory Restore
11 Reboot and Factory Restore a. Rebooting - Depress the reboot key for 2-3 seconds then release. b. Restoring to Factory Default - Press the “Factory” button for 2-3 seconds then release. Factory Reboot Figure 11.1 12 Close Camera a. Once the field-of-view and focus have been verified, make sure all adjustment screws and locks are firmly tightened. -
Page 13: Pc Configuration Of Iqeye Alliance-Pro
13 PC Configuration of IQeye Alliance-pro PLEASE NOTE – The default user name for all IQeye devices is “root” and the default password is “system”. IQeye cameras are configured for DHCP and will have an IP addressed assigned if a DHCP server is on the network. If a DHCP server is not available, the camera IP address will need to be configured using either IQfinder or IQmanager depending on the number of cameras being installed. - Page 14 c. The “Assign IP” window allows the IP Address, Subnet, and Gateway of the camera to be changed. It also allows the camera to be configured to DHCP. Click the “Apply” button after making the desired changes (Figure 13.2). NOTE: Changing between a static IP address and DHCP will cause the camera to reboot. Figure 13.2 d.
- Page 15 e. To perform further configuration of the camera click on the “Setup” tab. NOTE: The default username is “root” and the default password is “system”. f. To prepare the camera to serve the H.264 stream, select H.264 from the video drop-down (Figure 13.5).
-
Page 16: Auto Focus Lens Zoom & Focus Adjustment
14 Auto Focus Lens Zoom & Focus Adjustment The auto focus lens greatly reduces installation time allowing for remote zoom and one-touch focus control for sharp images. From a remote computer fine lens adjustments can be made eliminating the need for manual zoom and focus adjustments at the camera. - Page 17 Zoom Position Range: The zoom range of the lens. The lower number indicates telephoto field-of-view, and the higher number indicates a wide field-of-view. Figure 14.2 For product warranty, additional documentation and technical information, please visit www.iqeye.com/support For information on Supported SD Cards please visit https://iqinvision.zendesk.com/entries/46439946-Supported-SD-cards...
- Page 18 NOTES:...
- Page 19 NOTES:...
- Page 20 901-0278 Rev E 33122 Valle Road San Juan Capistrano, CA 92675-4853 USA phone +1 949 369 8100 fax +1 949 369 8105 www.iqeye.com...


