Table of Contents
Advertisement
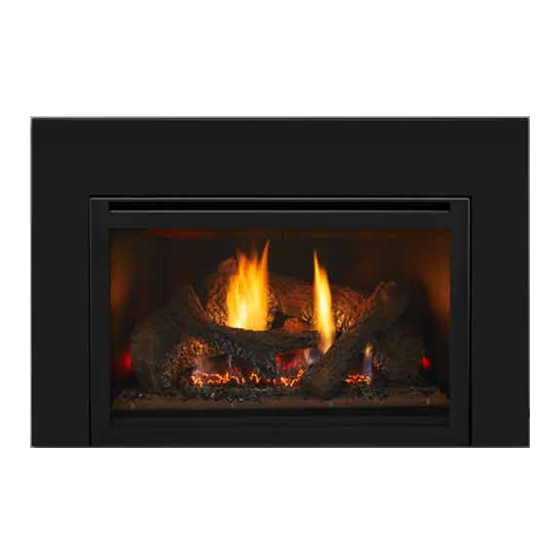
Model(s):
FB-GRAND
FB-IN
• Important operating
a n d m a i n t e n a n c e
instructions included.
WARNING: If the information in these
instructions is not followed exactly, a re
or explosion may result causing property
damage, personal injury, or death.
• Do not store or use gasoline or other am-
mable vapors and liquids in the vicinity of
this or any other appliance.
• What to do if you smell gas
- Do not try to light any appliance
- Do not touch any electrical switch. Do not
use any phone in your building.
- Immediately call your gas supplier from a
neighbor's phone. Follow the gas suppli-
er's instructions.
- If you cannot reach your gas supplier, call
the re department.
• Installation and service must be performed
by a quali ed installer, service agency, or the
gas supplier.
This appliance may be installed as an OEM installation in
manufactured home (USA only) or mobile home and must be
installed in accordance with the manufacturer's instructions and
the manufactured home construction and safety standard, Title
24 CFR, Part 3280 or Standard for Installation in Mobile Homes,
CAN/CSA Z240MH.
This appliance is only for use with the type(s) of gas indicated
on the rating plate.
CAUTION
DO NOT DISCARD THIS MANUAL
• Read, understand and follow
these instructions for safe
installation and operation.
Heat & Glo • FB-IN, FB-GRAND • 783-908 Rev. J • 2/07
Owner's Manual
Installation and Operation
• Leave this manual with
party responsible for use
and operation.
WARNING
HOT! DO NOT TOUCH.
SEVERE BURNS MAY RESULT.
CLOTHING IGNITION MAY RESULT.
Glass and other surfaces are hot during
operation and cool down.
• Keep children away.
• CAREFULLY SUPERVISE children in same room as
appliance.
• Alert children and adults to hazards of high temperatures.
• Do NOT operate with protective barriers open or
removed.
• Keep clothing, furniture, draperies and other
combustibles away.
This appliance has been supplied with an integral barrier
to prevent direct contact with the xed glass panel. Do
NOT operate the appliance with the barrier removed.
Contact your dealer or Hearth & Home Technologies if the
barrier is not present or help is needed to properly install one.
In the Commonwealth of Massachusetts:
• installation must be performed by a licensed plumber
or gas tter;
• a CO detector shall be installed in the room where the
appliance is installed.
Installation and service of this appliance should be
performed by quali ed personnel. Hearth & Home
Technologies suggests NFI certi ed or factory trained
professionals, or technicians supervised by an NFI
certi ed professional.
1
Advertisement
Table of Contents

Related Manuals for Heat & Glo FB-GRAND


Summary of Contents for Heat & Glo FB-GRAND
- Page 1 Technologies suggests NFI certi ed or factory trained professionals, or technicians supervised by an NFI This appliance is only for use with the type(s) of gas indicated certi ed professional. on the rating plate. Heat & Glo • FB-IN, FB-GRAND • 783-908 Rev. J • 2/07...
- Page 2 00,000 00,000 00,000 00,000 MIN. MIN. INPUT INPUT BTUH: BTUH: 00,000 00,000 00,000 00,000 Serial Serial ORIFICE ORIFICE SIZE: SIZE: #XXXXX #XXXXX #XXXXX #XXXXX XXXXXXXX XXXXXXXX (Serie): (Serie): Heat & Glo • FB-IN, FB-GRAND • 783-908 Rev. J • 2/07...
-
Page 3: Table Of Contents
E. Contact Information ......41 = Contains updated information. Heat & Glo • FB-IN, FB-GRAND • 783-908 Rev. J • 2/07... -
Page 4: Listing And Code Approvals
Heat & Glo • FB-IN, FB-GRAND • 783-908 Rev. J • 2/07... -
Page 5: Getting Started
Gloves Variable speed drill 1/4 Hex drive Safety glasses Manometer Phillips screwdriver Tape measure Non-corrosive leak check solution 1/2 - 3/4 inch length, #6 or #8 Self-drilling screws Heat & Glo • FB-IN, FB-GRAND • 783-908 Rev. J • 2/07... -
Page 6: Fireplace Size Requirements
* NOTE: If exhaust collar on insert and replace damper do not line up, add 4 inches (102 mm) to minimum replace height for bends in vent pipe. Figure 3.1 Fireplace Opening Heat & Glo • FB-IN, FB-GRAND • 783-908 Rev. J • 2/07... -
Page 7: Clearances
Fire Risk. TOP EDGE OF UNIT • Locate and install appliance to all clearance speci cations in manual. Figure 3.2 Clearances to Mantels or other Combustibles above Appliance Heat & Glo • FB-IN, FB-GRAND • 783-908 Rev. J • 2/07... -
Page 8: Termination Locations
Over 16/12 to 18/12 ..........7.0 Over 18/12 to 20/12 ..........7.5 Over 20/12 to 21/12 ..........8.0 * 3 foot minimum in snow regions Figure 4.1 Minimum height from roof to lowest discharge opening Heat & Glo • FB-IN, FB-GRAND • 783-908 Rev. J • 2/07... -
Page 9: Vent Information And Diagrams
BLOCK PIPE END WITH INSULATION OR ANY OTHER SEALING MATERIAL STAINLESS STEEL PIPE - 3 FT. MIN. REQUIRED (INCLUDED) INLET AIR VENT PIPE COLLAR ATTACHMENT BRACKET Figure 5.1 Heat & Glo • FB-IN, FB-GRAND • 783-908 Rev. J • 2/07... -
Page 10: Installation Preparation
• The solid fuel burning replace manufacturer’s REMOTE speci cation. RECEIVER UNIT • Local building codes required by authority having jurisdiction. • NFPA 211 EXISTING BOTTOM OF FIREPLACE Heat & Glo • FB-IN, FB-GRAND • 783-908 Rev. J • 2/07... -
Page 11: Installing Vent Pipe And Appliance
BLOCK PIPE END WITH INSULATION OR ANY OTHER SEALING MATERIAL STAINLESS STEEL PIPE - 3 FT. MIN. REQUIRED (INCLUDED) INLET AIR VENT PIPE COLLAR ATTACHMENT BRACKET Figure 7.1 Heat & Glo • FB-IN, FB-GRAND • 783-908 Rev. J • 2/07... -
Page 12: Placing, Securing And Leveling The Appliance
• Install fiberglass insulation pieces to back face of surround. • Attach surround. Follow instructions accompanying surround. • Push insert so that surround becomes tight against face of replace. Heat & Glo • FB-IN, FB-GRAND • 783-908 Rev. J • 2/07... -
Page 13: Installing Adaptor And Termination Cap
VENT PIPE 3 screws. Connect both the LINK-ZC-ADPB to Class VENT PIPE A Pipe and the termination cap to the LINK-ZC-ADPB with the self tapping screws provided. Figure 7.4 Heat & Glo • FB-IN, FB-GRAND • 783-908 Rev. J • 2/07... -
Page 14: Gas Information
5.0 inches 11.0 inches Minimum inlet pressure w.c. w.c. 14.0 inches 14.0 inches Maximum inlet gas pressure w.c. w.c. 3.5 inches 10.0 inches Manifold pressure w.c. w.c. Heat & Glo • FB-IN, FB-GRAND • 783-908 Rev. J • 2/07... - Page 15 Fire hazard. Do NOT change the valve settings. • This valve has been preset at the factory. • Changing valve settings may result in re hazard or bodily injury. Heat & Glo • FB-IN, FB-GRAND • 783-908 Rev. J • 2/07...
-
Page 16: Electrical Information
Figure 9.1). STANDING PILOT REMOTE SWITCH PIGTAIL ON/OFF VALVE SWITCH OPTIONAL WALL SWITCH, THERMOSTAT OR REMOTE Figure 9.1 Standing Pilot Ignition Wiring Diagram Heat & Glo • FB-IN, FB-GRAND • 783-908 Rev. J • 2/07... -
Page 17: Junction Box Installation
Shock hazard. • Replace damaged wire with type 105º C rated wire. • Wire must have high temperature insulation. Heat & Glo • FB-IN, FB-GRAND • 783-908 Rev. J • 2/07... - Page 18 SENSOR SWITCH IT MUST BE REPLACED WITH TYPE C RATED WIRE. SPEED CONTROL (RHEOSTAT) BEND GROUND WIRE UP TABS (ATTACH TO ANY METAL SURFACE) Figure 9.4 Fan Wiring Diagram Heat & Glo • FB-IN, FB-GRAND • 783-908 Rev. J • 2/07...
-
Page 19: Finishing
Reposition the replace if necessary. Refer to surround instruc- tions provided with the decorative surround. Heat & Glo • FB-IN, FB-GRAND • 783-908 Rev. J • 2/07... -
Page 20: Appliance Setup
• Follow ember placement instructions in manual. • Do NOT place embers directly over burner ports. • Replace ember material annually. Improperly placed embers interferes with proper burner operation. Heat & Glo • FB-IN, FB-GRAND • 783-908 Rev. J • 2/07... -
Page 21: Positioning The Logs
Please refer to grate assembly. Grate Assembly LOG NUMBER 1 (SRV768-701): Place log #1 onto the grate. Push log back until it rests against locating tabs B and D. 768-924 3/03 Heat & Glo • FB-IN, FB-GRAND • 783-908 Rev. J • 2/07... - Page 22 Place log #4 across both at spots on log #1 and log #3, with the “Y” in log #4 placed on log #1. The back of log #4 should make contact with the back of the rebox. Heat & Glo • FB-IN, FB-GRAND • 783-908 Rev. J • 2/07...
- Page 23 Position log #1onto the grate such that grooves on bottom of log #1 mate with grate. Push log back until it rests against locating tabs A and B. 773-936 3/03 Heat & Glo • FB-IN, FB-GRAND • 783-908 Rev. J • 2/07...
- Page 24 LOG #4 (SRV573-702): Place log #4 into the at spot on the log #1 and the left side of the log will rest on log #2 as shown. Heat & Glo • FB-IN, FB-GRAND • 783-908 Rev. J • 2/07...
-
Page 25: Glass Assembly
Replacing Glass Assembly Replace the glass door on the appliance. Fasten the latches on the glass frame. FB-GRAND Full open Full open FB-IN 1/2 pulg. Full open Heat & Glo • FB-IN, FB-GRAND • 783-908 Rev. J • 2/07... -
Page 26: Operating Instructions
Immediately call a quali ed service technician to inspect the appliance and to replace any part of the control system and any gas control which has been under water. Heat & Glo • FB-IN, FB-GRAND • 783-908 Rev. J • 2/07... -
Page 27: Lighting Appliance
OFF”. Do not force. For additional information on operating your Close control access panel. 464-903G Hearth & Home Technologies replace, please refer to www. replaces.com. Heat & Glo • FB-IN, FB-GRAND • 783-908 Rev. J • 2/07... -
Page 28: Check Pilot Flame Appearance
• Replace cap screw and seal to prevent gas leaks. • Check for gas leaks after tightening. Heat & Glo • FB-IN, FB-GRAND • 783-908 Rev. J • 2/07... -
Page 29: Frequently Asked Questions
In an Intelli re ignition system it is normal to see the pilot ame, but it should turn off when continually? ON/OFF is turned off. In a standing pilot system the pilot will always stay on. Heat & Glo • FB-IN, FB-GRAND • 783-908 Rev. J • 2/07... -
Page 30: Troubleshooting
Take a reading at the thermopile leads. The read- ing should be 325 millivolts minimum. Replace the thermopile if the reading is below the minimum. Heat & Glo • FB-IN, FB-GRAND • 783-908 Rev. J • 2/07... - Page 31 Ensure that the glass is tightened properly on the unit, particularly on top corners. Heat & Glo • FB-IN, FB-GRAND • 783-908 Rev. J • 2/07...
-
Page 32: Maintaining And Servicing Appliance
• Glass • Air passageways, grilles, control compartment • Burner, burner ports Risk of: • Fire • Delayed ignition or explosion • Exposure to combustion fumes • Odors Heat & Glo • FB-IN, FB-GRAND • 783-908 Rev. J • 2/07... - Page 33 1. Verify operation of remote. 2. Replace batteries in remote transmitters and battery-powered receivers. 3. Verify batteries have been removed from battery back-up IPI systems to prevent premature battery failure or leaking. Heat & Glo • FB-IN, FB-GRAND • 783-908 Rev. J • 2/07...
-
Page 34: Reference Materials
MODEL DIMENSIONS FB-GRAND FB-IN Location Inches Millimeters Inches Millimeters 22-1/2 8-3/4 6-1/2 33-3/4 29-3/8 30-9/16 26-1/16 23-7/8 20-5/8 18-7/16 15-3/16 25-3/8 22-1/8 24-1/2 21-1/4 Figure 15.1 Appliance Dimensions Heat & Glo • FB-IN, FB-GRAND • 783-908 Rev. J • 2/07... -
Page 35: Vent Kits Components
FLEX3-30/2: Two 3 inch exible liners expands to 30 feet FLEX3-CNCT each. FLEX-CNCT: Connector kit - 3 inch liner to 3 inch liner, Figure 15.3 Direct Vent Flex Liner Accessory Kits one connector per kit. Heat & Glo • FB-IN, FB-GRAND • 783-908 Rev. J • 2/07... -
Page 36: Limited Lifetime Warranty
3. HEAT & GLO reserves the right to make changes at any time, without notice, in design, material, speci cations and prices of the Product. HEAT & GLO also reserves the right to discontinue styles and products. 060-981D 3/05 © 2005 Hearth & Home Technologies Inc. Heat & Glo • FB-IN, FB-GRAND • 783-908 Rev. J • 2/07... -
Page 37: Contact Information
6774802, 6796302, 6840261, 6848441, 6863064, 6866205, 6869278, 6875012, 6880275, 6908039, 6919884, D320652, D445174, D462436; (Canada) 1297749, 2195264, 2225408, 2313972; (Australia) 780250, 780403, 1418504 or other U.S. and foreign patents pending. Printed in U.S.A. - Copyright 2006 Heat & Glo • FB-IN, FB-GRAND • 783-908 Rev. J • 2/07...