
Related Manuals for BT Paragon 200


Summary of Contents for BT Paragon 200
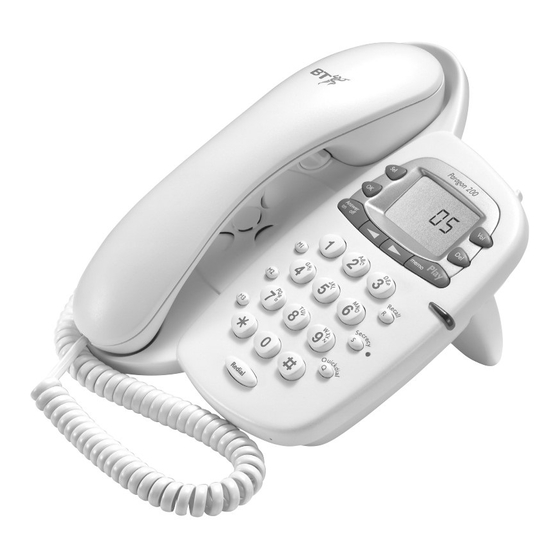
- Page 1 Paragon 200 - Edition 4.3 – 26th Sept ’00 Paragon 200 Digital Telephone Answering Machine User Guide This product is intended to be connected to analogue networks in the United Kingdom...
- Page 2 Paragon 200 - Edition 4.3 – 26th Sept ’00 Please open this page for an ‘at a glance’ guide to your Paragon 200.
- Page 3 Paragon 200 - Edition 4.3 – 26th Sept ’00 Please open this page for a further ‘at a glance’ guide to your Paragon 200.
-
Page 4: At A Glance
Paragon 200 - Edition 4.3 – 26th Sept ’00 At a glance I I n n d d u u c c t t i i v v e e c c o o u u p p l l e e r r Lets you skip forwards or backwards In the handset. - Page 5 Paragon 200 - Edition 4.3 – 26th Sept ’00 M M o o d d e e s s w w i i t t c c h h Default TB H H a a n n d d s s e e t t s s o o c c k k e e t t...
-
Page 6: Table Of Contents
Paragon 200 - Edition 4.3 – 26th Sept ’00 In this guide At a glance Introduction Unpacking your Paragon 200 For your records Setting up Plan the location of your Paragon 200 Using the telephone Using the Inductive Coupler Making and ending calls... -
Page 7: Introduction
Paragon 200 - Edition 4.3 – 26th Sept ’00 Introduction Your Paragon 200 has been designed for ease of use and made to the high standards set by BT. You can expect your Paragon 200 to give you Unpacking your Paragon 200 many years of trouble-free service. -
Page 8: Setting Up
Paragon 200 - Edition 4.3 – 26th Sept ’00 Setting up Follow these steps to set up your Paragon 200 ready for use. Plan the location of your Insert back-up battery Paragon 200 Although optional we recommend fitting an Situate your Paragon 200 close enough to both... - Page 9 Paragon 200 - Edition 4.3 – 26th Sept ’00 Connect handset cord to base Check Dial Mode setting (default TB) Use the dialling mode switch on the underside of your Paragon 200. Your Paragon 200 should be pre-set to TB which gives you Tone dialling.
- Page 10 Fit plinth for desk mounting and socket and switch on track cables If you use your Paragon 200 as a desk phone you will need to fit the stand on to the base. Ensure all the cables on the underside of the base are in their respective channels.
- Page 11 Paragon 200 - Edition 4.3 – 26th Sept ’00 Wall-mounting your Paragon 200 To set the day and time Press buttons in the order shown 1 Turn around the handset clip to prevent the handset from falling when the product is Press and release until TIME is shown wall-mounted.
-
Page 12: Using The Telephone
Paragon 200 - Edition 4.3 – 26th Sept ’00 Using the telephone Using the Inductive Coupler To use the secrecy function Your Paragon 200 has an inductive coupler in This allows you to talk to someone its handset, to improve sound quality for people close by without the person on the other using hearing aids. -
Page 13: Using The One-Touch Buttons
Paragon 200 - Edition 4.3 – 26th Sept ’00 Note To adjust the earpiece volume during a call If you make a mistake when entering a number, press the button to delete the last digit. To increase the volume in the earpiece. -
Page 14: Using The Quickdial Memory
Paragon 200 - Edition 4.3 – 26th Sept ’00 Using the quickdial memory To make a quickdial call Lift handset HANDSET To store a quickdial number Press QUICKDIAL You can store numbers of up to 32 Press the button under which the digits long. -
Page 15: Using The Answering Machine
Paragon 200 - Edition 4.3 – 26th Sept ’00 Using the answering machine Selecting the answering To use the pre-recorded machine mode outgoing message When your answering machine is switched on, To switch the answering machine on, off the pre-recorded message will automatically... - Page 16 Paragon 200 - Edition 4.3 – 26th Sept ’00 Note To record your own outgoing message If you delete your own recorded outgoing message, it will automatically be replaced by the Press buttons in the order shown pre-recorded message. Press and release until the display shows OGM.
-
Page 17: Message And Ring Indicator
Paragon 200 - Edition 4.3 – 26th Sept ’00 To privately playback your messages Message and Ring Indicator through the handset The indicator blinks when you have new messages or memos. When you have played Press the button. Play PLAY/MEMO memo them back, the indicator goes off. -
Page 18: To Use Caller Return (Auto 1471)
Paragon 200 - Edition 4.3 – 26th Sept ’00 To adjust the playback volume To use Call Screening You can let your Paragon 200 answer a During playback: call and have the loudspeaker switched on so you can hear the caller. This gives you the option of picking up the Adjust the loudspeaker volume. - Page 19 Paragon 200 - Edition 4.3 – 26th Sept ’00 To set your PIN To play back messages Ring your answering machine as Press buttons in the order shown normal. Press and release until the display Press and release during the outgoing shows SECURITY CODE.
-
Page 20: Optional Settings
Paragon 200 - Edition 4.3 – 26th Sept ’00 Optional Settings To adjust the number of rings before To adjust the ring tone your answering machine takes a call This is called the Answer Delay. You You can choose between three different... - Page 21 Paragon 200 - Edition 4.3 – 26th Sept ’00 To adjust the ringer volume Press buttons in the order shown You can select between three different volume levels, off, medium and loud. Press and release until the display shows RINGER.
-
Page 22: General Information
• Do not use your Paragon 200 in damp, humid equipment, or any attempt at adjustment or conditions such as bathrooms. repair other than through approved agents. -
Page 23: Help And Advice
Paragon 200 - Edition 4.3 – 26th Sept ’00 Outside guarantee Incoming message does not record If your Paragon 200 needs repair after the Check that your machine is set to ANSWER ON guarantee period has ended, call the Paragon and that the recording capacity is not full. - Page 24 You will still be able to make and receive telephone Paragon 200 is only approved for use with a calls on your Paragon 200 even if the mains power compatible switchboard including those which fails and there is no back-up battery installed.
-
Page 25: Wall-Mounting Template
Paragon 200 - Edition 4.3 – 26th Sept ’00 Wall-mounting template If wall-mounting your Paragon 200, drill two holes for the screws using this template and insert the wall plugs provided (if required). -
Page 26: Index
Paragon 200 - Edition 4.3 – 26th Sept ’00 Index Call screening daptor cord Caller return (Auto 1471) Answer delay Answering machine answer mode Delete answer only default outgoing message all messages delete all messages one-touch number delete personal OGM... - Page 27 Paragon 200 - Edition 4.3 – 26th Sept ’00 Secrecy ne-touch button delete/change number make a call store a number time Store one-touch number Playback messages quickdial number Plinth Switchboard connection Pre-recorded OGM echnical information listen to switch between male and female...
- Page 28 Paragon 200 - Edition 4.3 – 26th Sept ’00 Offices worldwide The telecommunications services described in this publication are subject to availability and may be modified from time to time. Services and equipment are provided subject to British Telecommunications plc’s respective standard conditions of contract.