Table of Contents
Advertisement
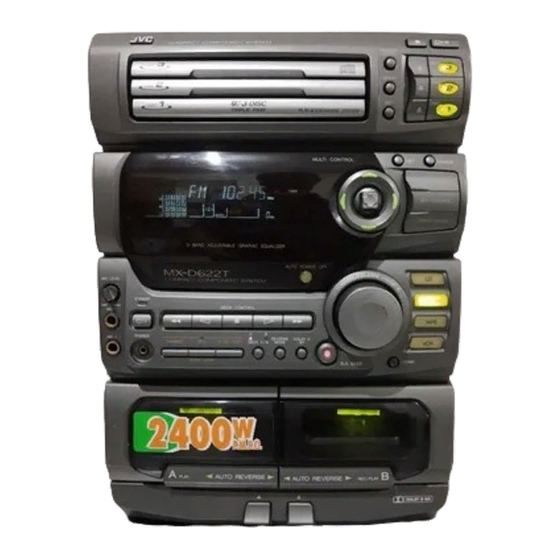
COMPACT COMPONENT SYSTEM
SYSTEME DE COMPOSANTS COMPACT
CA-D622T
COMPACT COMPONENT SYSTEM
DISC
DISC
DISC
MX-D622T
STANDBY
COMPU
POWER
PLAY
1
2
3
POWER
CONTROL
PHONES
4
5
6
DUBBING
REC
7
8
9
TUNER
START/STOP
L BALANCE R
10
10
VCR
FM MODE
DISC
SHIFT
SOUND MODE
DISC
C D
DISC
A
B
REC PAUSE
DECK
VOLUME
FADE
SLEEP
MUTING
RM-SED60TU
REMOTE CONTROL
A
PLAY
INSTRUCTIONS
MANUEL D'INSTRUTIONS
PROGRAM
/ RANDOM
DISC
COMPACT
DIGITAL AUDIO
REPEAT
DISC
3
DISC
EDIT
DISC
TRIPLE TRAY
PLAY & EXCHANGE SYSTEM
SET
CANCEL
MULTI CONTROL
SOUND MODE
SEA CONTROL
TIMER/CLOCK
AUTO POWER OFF
CD
FM/AM
DECK CONTROL
TAPE
A
B
REVERSE
DOLBY B
NR
CD REC START
DECK A/B
MODE
VCR
S.A. BASS
DEMO
B
AUTO REVERSE
AUTO REVERSE
REC/PLAY
DOLBY B NR
For Customer Use:
COMPACT
DIGITAL AUDIO
Enter below the Model No. and Serial
No. which are located either on the rear,
bottom or side of the cabinet. Retain this
information for future reference.
Model No.
Serial No.
GVT0001-002A
[ C ]
Advertisement
Table of Contents

Related Manuals for JVC GVT0001-002A


Summary of Contents for JVC GVT0001-002A
- Page 1 DOLBY B NR For Customer Use: Enter below the Model No. and Serial No. which are located either on the rear, bottom or side of the cabinet. Retain this information for future reference. Model No. Serial No. GVT0001-002A [ C ]...
- Page 2 Warnings, Cautions, and Others/ Mises en garde, précautions et indications diverses For Canada/pour le Canada CAUTION: TO PREVENT ELECTRIC SHOCK, MATCH WIDE BLADE OF PLUG TO WIDE SLOT, FULLY INSERT ATTENTION: POUR EVITER LES CHOCS ELECTRIQUES, INTRODUIRE LA LAME LA PLUS LARGE DE LA FICHE DANS LA BORNE CORRESPONDANTE DE LA PRISE ET POUSSER JUSQUAU FOND REPRODUCTION OF LABELS/REPRODUCTION DES ETIQUETTES...
-
Page 3: Features
The controls and operations have been redesigned to make them very easy to use so you can spend your time listening to music. With the One Touch Operation feature of JVC’s COMPU PLAY you can turn on the CA- •... -
Page 4: Table Of Contents
Table of Contents Features ... 1 How This Manual Is Organized ... 1 IMPORTANT CAUTIONS ... 1 Getting Started ... 3 Accessories ... 3 How To Put Batteries In the Remote Control ... 3 Using the Remote Control ... 3 Connecting the FM Antenna ... -
Page 5: Getting Started
Getting Started Accessories Check that you have all of the following items, which are supplied with the CA-D622T. AM Loop Antenna (1) Remote Control (1) Batteries (2) FM Wire Antenna (1) If any of these items is missing, contact your dealer immediately. How To Put Batteries In the Remote Control Match the polarity (+ and –) on the batteries with the + and –... -
Page 6: Connecting The Fm Antenna
CAUTION: Make all connections before plugging the Unit into an AC power outlet. Connecting the FM Antenna Using the Supplied Feeder Antenna ANTENNA LOOP Using an FM 75-Ohm Antenna Cable (Not Supplied) If reception is poor, connect the outside antenna. ANTENNA LOOP Before attaching a 75 ohm coaxial lead (the kind with a round wire going to an outside antenna),... -
Page 7: Connecting The Speakers
CAUTION: Make all connections before plugging the Unit into an AC power outlet. Connecting the Speakers For each speaker, connect one end of the speaker wire to the speaker terminals on the back of the CA-D622T and the other end to the speaker. 1. -
Page 8: Demo Mode
The DEMO display will not start if VCR is selected as a music source. COMPU PLAY COMPU PLAY is JVC’s feature that lets you control the most frequently used functions of the CA- D622T with a single touch. One Touch Operation starts playing a CD, turns on the radio, plays a tape, etc. with a single press of the play button for that function. -
Page 9: Using The Amplifier
Using the Amplifier COMPU PLAY CONTROL L BALANCE R SOUND MODE PHONES POWER POWER TUNER L BALANCE R FM MODE SHIFT DISC SOUND MODE DISC SHIFT DISC REC PAUSE DECK VOLUME FADE SLEEP MUTING RM-SED60TU REMOTE CONTROL VOLUME –, + FADE MUTING Turning the Power On and Off Turning the CA-D622T On ——————————————————————... -
Page 10: Adjusting The Volume
Adjusting the Volume Turn the VOLUME control clockwise to increase the volume or anticlockwise to decrease it. Turning the VOLUME control quickly also adjusts the volume level quickly. When using the Remote Control, press the VOLUME + button to increase the volume or press the VOLUME –... -
Page 11: Sound Modes
Sound Modes The CA-D622T has some preset sound effects that give you control of the way your music sounds, so you can tailor it for your room and for the quality of the source. We can give you some idea of how each one affects the music, but the only way to really tell is to try them yourself. -
Page 12: Customizing A Sound Mode
Using the Remote Control Press the SOUND MODE button. SOUND MODE The display changes with each press of the button as shown below. =D, CLUB=HALL=STADIUM=ROCK=POP=CLASSIC=MANUAL 1=MANUAL 2= MANUAL 3=OFF=(back to the beginning) Customizing a sound mode ————————————————————— You can change an existing sound mode to suit your own preferences. These changed setting can be stored in the CA-D622T’s sound mode memory. -
Page 13: Auto Power Off
Auto Power Off When playing either a tape or a CD, Auto Power Off will shut the Unit off when the tape or CD comes to an end. Although Auto Power Off is very useful for shutting off the CA-D622T at night, you can also use it if you think you might forget to turn the Unit off when leaving the house or your room at other times of the day. -
Page 14: Using The Tuner
Using the Tuner COMPU PLAY CONTROL Number keys POWER TUNER TUNER L BALANCE R FM MODE FM MODE SHIFT DISC SOUND MODE DISC DISC DECK REC PAUSE VOLUME FADE SLEEP MUTING RM-SED60TU REMOTE CONTROL You can listen to both FM and AM stations. Stations can be tuned in manually, automatically, or from preset memory storage. -
Page 15: Selecting A Radio Station
Selecting a radio station —————————————————————— Select a frequency by adjusting the MULTI CONTROL stick up or down. The frequency changes in one step increments. “TUNED” appears on the display when a signal is found. This is called Manual Tuning. The frequency increases when MULTI CONTROL stick is pressed upwards, and decreases when the MULTI CONTROL stick is pressed downwards. -
Page 16: Using The Cd Player
Using the CD Player DISC DISC DISC STANDBY COMPU POWER PLAY CONTROL PHONES Number keys POWER TUNER L BALANCE R FM MODE SHIFT DISC SOUND MODE DISC CD Player DISC control buttons DECK REC PAUSE VOLUME FADE SLEEP MUTING RM-SED60TU REMOTE CONTROL DISC indicator DISC... -
Page 17: The Quickest Way To Start A Cd Is With The One Touch Operation
The CA-D622T’s CD Player has an Automatic Changer with 3 disc trays. You can use Continuous, Random, Program or Repeat Play for the discs in DISC-1, DISC-2 and DISC-3. Repeat Play can repeat all the tracks on all the CD’s, the tracks on one of the CD’s or one track on one CD. There is also the Tray Lock function, which safely keeps discs in the trays. -
Page 18: To Play A Disc
To Play a Disc —————————————————————————— This function plays the disc in the Unit continuously. Prepare the discs. DISC DISC Press the DISC button (1-3) of the disc you want to play. DISC DISC The first track of the selected disc will begin playing. When the selected disc finishes playing, the next disc will begin playing automatically. -
Page 19: To Select A Disc, Track Or Passage Within A Track
To Select a Disc, Track Or Passage Within a Track ——————————— Press the DISC button (1-3) for the disc tray containing the track you want to listen to. Playback starts from the first track of the disc you selected. Example: for the third disc, press 3. To Select a Track —————————————————————————... - Page 20 Select a disc with the DISC buttons (1 to 3). The display changes to the Program Entry display and the disc number and track number DISC sections blink for a few seconds. DISC DISC While the display is blinking, perform the operations in steps 3 to 4. When the blinking display changes to the “PROGRAM”...
-
Page 21: To Check The Program
Press the number keys (1 to 10 and +10) to select the track to program. Example: For track 5, press 5. For track 15, press +10 then 5. For track 20, press +10 then 10. For track 32, press +10 three times, then 2. The blinking disc number and track number changes to a steady light, and the step number is displayed. -
Page 22: Repeating A Selection Or The Discs
Note: Press the DISC buttons (1-3), or the number keys, to cancel Random play and begin playback in Continuous Play mode. Press the REPEAT button before or during random play to instruct the CA-D622T to continue with a different random track selection after the last selection is played. To cancel random play, press the 7 button, then press the PROGRAM/RANDOM button to select another mode. -
Page 23: Using The Cassette Deck (Listening To A Tape)
Using the Cassette Deck (Listening to a Tape) COMPU PLAY CONTROL POWER TUNER L BALANCE R FM MODE SHIFT DISC SOUND MODE DISC DISC DECK REC PAUSE VOLUME FADE SLEEP MUTING RM-SED60TU REMOTE CONTROL Cassette Deck control buttons The Cassette Deck allows you to play, record and dub audio tapes. Most tapes are now recorded with the Dolby NR system, so first check which type of the Dolby NR system has been used on the tape. -
Page 24: One Touch Play
One Touch Play ————————————————————————— Press the TAPE button. The power comes on and “TAPE” lights up on the display . If there is a tape in the deck corresponding to the Deck Indicator DECK A/B, that tape starts to playback. If there is no tape in the deck corresponding to the Deck Indicator, the CA-D622T automatically turns on the power and displays “TAPE”... -
Page 25: Music Scan
Music Scan To find the beginning of a music track during play, use the Music Scan function. Music Scan searches for blank portions that usually separate selections, then plays the next selection. To Find the Beginning of the Current Selection ————————————— Press the 1 or ¡... -
Page 26: Using The Cassette Deck (Recording)
Using the Cassette Deck (Recording) DUBBING Recording onto a cassette from any of the sound sources is simple. Just place a tape in Deck B, have the source ready, make one or two settings, and you’re ready to record. For each source the proce- dure is a little different and now we’ll explain just what to do for each one. -
Page 27: Standard Recording
Standard Recording This is the basic method for recording any source. The CA-D622T also has special ways for recording CD to tape, and tape to tape, which save you time and effort, as well as give you some special effects. However, when you need to add a selection to a tape you have made, or are combin- ing selections from several sources on one tape, use the method described below;... -
Page 28: Cd Direct Recording
Notes for using Reverse Mode for recording When recording in Reverse Mode, the CA-D622T automatically stops when it reaches the end of the reverse 2 direction. To record on both sides of a tape, make sure that the recording direction for the tape inserted into Deck B is forwards 3, and that the Tape Direction indicator is also forwards 3, before you start recording. -
Page 29: Auto Edit Recording
Auto Edit Recording Using Auto Edit, you can record the CD tracks to fit the tape, so a selection isn’t cut off. Auto Edit is one of the best ways to copy all of a CD onto a tape. Auto Edit programs the CD tracks in numerical order. To prevent the end of the last track on the front side from being cut off, the last track on the front side is selected to fit on the remaining tape length. -
Page 30: Tape To Tape Recording (Dubbing)
To stop at any time while recording, press the 7 button (CD control or Cassette Deck control) or the REC START/STOP button. If you press the CD control 7 button, the Cassette Deck creates a four second blank space after the CD Player stops. If you press any other button to stop the recording, the CD Player and Cassette Deck stop at the same time. -
Page 31: Using The Timers
Using the Timers POWER TUNER L BALANCE R FM MODE SHIFT DISC SOUND MODE DISC DISC DECK REC PAUSE VOLUME FADE SLEEP MUTING RM-SED60TU REMOTE CONTROL SLEEP The timers lets you control recording and listening functions automatically. Three types of timers are available: DAILY Timer —... -
Page 32: Setting The Daily Timer
CAUTION: If there is a power failure, the clock loses its setting. The display shows “AM 12:00”, and the clock must be reset. Setting the DAILY Timer With this timer you can wake up to music from a CD, tape, your favorite radio program, or other source. - Page 33 Select the source you want to listen to. To use the Tuner as the source: 1. Adjust the MULTI CONTROL stick left or right until “TUNER” blinks in the display. 2. Adjust the MULTI CONTROL stick up or down to select the preset channel you want to listen to.
-
Page 34: Turning The Daily Timer On And Off
Setting the Volume Level. Adjust the MULTI CONTROL stick left or right to set the volume level. VOLUME - A: Sets the volume level to 10. VOLUME - B: Sets the volume level to 15. VOLUME - C: Sets the volume level to 20. VOLUME - - : Sets the volume to the last volume setting used. -
Page 35: Setting The Rec (Recording) Timer
Setting the REC (Recording) Timer With the Recording Timer you can make a tape of a radio broadcast automatically whether or not you are home. For the timer to work correctly, you need to make sure of the following in addition to setting the time for the Tuner and Cassette Deck to come on: You can set the REC Timer whether the Unit is on or off. -
Page 36: Turning The Rec Timer On And Off
It is very easy, and can be very disappointing, to forget to put in a tape, or to accidentally leave a tape in Deck B you don’t want recorded over. Although this happens to almost everyone at one time or another, we hope it won’t happen to you! To Change the Recording Timer Setting To change the settings for the REC Timer, repeat the setting procedure from the beginning. -
Page 37: Timer Priority
Timer Priority Since each timer can be set independently, you may wonder what happens if the settings overlap. Here are the priorities for each timer: The REC Timer always has priority. This means that: • If another timer is set to come on during a time when the REC Timer is operating, the other timer just won’t come on at all, so you will always get the entire program on tape. -
Page 38: Care And Maintenance
Care And Maintenance Compact Discs Handle your compact discs, cassette tapes, and Cassette Deck carefully, and they will last a long time. • Remove the CD from the case by holding it at the edges while pressing the center hole lightly. •... -
Page 39: Troubleshooting
Troubleshooting • If you are having a problem with your CA-D622T, check this list for a possible solution before calling for service. • If you cannot solve the problem from the hints given here, or the Unit has been physically damaged, call a qualified person, such as your dealer, for service. -
Page 40: Specifications
Specifications Input Sensitivity/Impedance (1 kHz) CD Automatic Changer Section Design and specifications are subject to change without notice. Amplifier Section Output Power 120 watts per channel, Min. RMS into 6 ohms at 1 kHz, with no more than 3% Total Harmonic Distortion. VCR 300 mV/45 kohms Speaker terminals Main speakers 6 - 16 ohms... - Page 41 VICTOR COMPANY OF JAPAN, LIMITED 0298HHMFLEJEM EN, FR...