Table of Contents
Advertisement
Advertisement
Table of Contents

Related Manuals for JVC CA-MXDK11


Summary of Contents for JVC CA-MXDK11
- Page 1 COMPACT COMPONENT SYSTEM CA-MXDK11 INSTRUCTIONS GVT0205-001A [UN,UG,UX,A,UW]...
-
Page 2: Important For Laser Products
Caution–– (standby/on) button! Disconnect the mains plug to shut the power off completely (the STANDBY lamp goes off). When installing the apparatus, ensure that the plug is easily accessible. The • When the System is on standby, the STANDBY lamp lights red. •... - Page 3 Caution: Proper Ventilation To avoid risk of electric shock and fire, and to prevent damage, locate the apparatus as follows: 1. Front: No obstructions and open spacing. 2. Sides/ Top/ Back: No obstructions should be placed in the areas shown by the dimensions below. 3.
-
Page 4: Playable Disc Types
Precautions Installation • Install the System in a location with adequate ventilation to prevent internal heat buildup in the System. DO NOT install the System in a location near heat sources, or in a place subject to direct sunlight, excessive dust or vibration. •... -
Page 5: Table Of Contents
The System can play back the following digital audio formats. • LPCM (Linear PCM), DIGITAL (Dolby Digital), DTS (Digital Theater Systems) Caution for DualDisc playback The Non-DVD side of a “DualDisc” does not comply with the “Compact Disc Digital Audio” standard. Therefore, the use of Non-DVD side of a DualDisc on this product may not be recommended. -
Page 6: Connections
Do not connect the AC power cord until all other connections have been made. • Connect VIDEO OUT directly to the video input of your TV. Connecting VIDEO OUT to a TV via a VCR may cause a monitor problem when playing back a copy-protected disc. You may also have a monitor problem when connecting the player to an integrated TV/Video system. - Page 7 AM/FM antenna To assemble the AM loop antenna To connect AM/FM antenna FM antenna (supplied) Extend it so that you can obtain the best reception. AM loop antenna (supplied) Turn it until the best reception is obtained. For better FM reception FM outdoor antenna (not supplied) AM loop antenna (supplied)
- Page 8 Auxiliary equipment Stereo audio cord (not supplied) For the Australian model Stereo mini plug (not supplied) Speakers • When connecting the speaker cords, match the polarity of the speaker terminals: (+) to (+) and (–) to (–). White From right speaker •...
-
Page 9: Preparing The Remote Control
¤ Voltage Selector Use a screwdriver to rotate the voltage selector so that the voltage mark is pointing to the same voltage as where you are plugging in the unit. (See also the back cover page.) When your mains lead (AC) When your mains lead (AC) line voltage is 230-240 V line voltage is 220 V... -
Page 10: Display Indication
The indications on the display tell you a lot of things while you are operating the System. Before operating the System, be familiar with when and how the indicator illuminates on the display. 1 DVD LEV. 1/2/3 indicators • Lights to indicate the DVD increase level (see page 12). 2 MIC indicator •... -
Page 11: Daily Operations-Playback
Daily Operations In this manual, the operations using the remote control are mainly explained; however, you can use the buttons and controls on the main unit if they have the same (or similar) name and marks. Number buttons —Playback ¥ Turn on the power. The STANDBY lamp on the main unit goes off. - Page 12 To drop the volume in a moment To restore the volume, press again, or adjust the volume level. Listening to the Radio To select the AM tuner interval spacing Some countries space AM stations 9 kHz apart, and other countries use 10 kHz spacing. Select “AM,”...
- Page 13 Playing Back a Disc Before operating a disc, be familiar how a disc is recorded. • DVD Video/DVD-VR consist of “Titles” which include “Chapters,” MP3/WMA/MPEG-1/MPEG-2 consist of “Groups” which include “Tracks,” JPEG consist of “Groups” which include “Files,” and CD/SVCD/VCD consist of only “Tracks.”...
- Page 14 To select an item directly You can select a title/chapter/track directly and start playback. For DVD Video, you can select a title before starting playback, while you can select a chapter after starting playback. Examples: To select number 5, press 5. To select number 10, press 10.
-
Page 15: Daily Operations-Sound & Other Adjustments
Daily Operations —Sound & Other Adjustments Reinforcing the Bass Sound Remote Control To change the bass level • You can also use ACTIVE BASS EXTENSION on the main unit. To reinforce the heavy sound—SOUND TURBO II You can boost the low and high frequency sound. Presetting Automatic DVD Video Sound Increase Level The DVD Video sound is sometimes recorded at a lower... -
Page 16: Creating 3-Dimensional Sound Field-3D Phonic
Creating 3-dimensional Sound Field —3D Phonic While playing a disc... On the TV screen Suitable for action movies and sports 3D ACTION programs. Creates natural and warm sound. Enjoy 3D DRAMA movies in a relaxed mood. 3D THEATER Enjoy sound effects like in a major movie theater. -
Page 17: Changing The Picture Tone
Changing the Picture Tone While showing a playback picture on the TV, you can select the preset picture tone, or adjust it and store your own settings. To select a preset picture tone While playing, display VFP setting screen. (While holding...) On the TV screen Select a preset picture tone. -
Page 18: Unique Dvd/Vcd Operations
Unique DVD/VCD Operations Remote Control Selecting the Sound Track For DVD Video: While playing back a chapter containing audio languages, you can select the language to listen to. For DVD-VR or SVCD/VCD: When playing back a track, you can select the audio channel to play. •... -
Page 19: Selecting The Subtitle Language
Selecting the Subtitle Language For DVD Video: While playing back a chapter containing subtitles in different languages, you can select the subtitle language to display on the TV screen. For SVCD: While playing, you can select the subtitles even if no subtitles are recorded on the disc. For DVD-VR: While playing, you can turn the subtitle on or off. -
Page 20: Special Picture Playback
Special Picture Playback Still picture playback To start still picture To resume normal playback: playback: While playing... Frame-by-frame playback While playing... Still picture playback starts. Advance the still picture frame by frame. To resume normal playback, press DVD/CD 3. Slow-motion playback •... -
Page 21: Advanced Disc Operations
Advanced Disc Operations Remote Control Number buttons Main unit Programming the Playing Order —Program Play You can arrange the playing order of the chapters or tracks (up to 99) before you start playback. • Program play cannot be used for DVD-VR/JPEG/ MPEG-1/MPEG-2 discs. -
Page 22: Playing At Random-Random Play
To check the programmed contents Before playback... in the reverse order in the programmed order To modify the program Before or after playback... To erase the last chapter/ To erase the entire track: program: (While holding...) (While holding...) To add chapters/tracks to the program: Repeat step 2 on page 18. -
Page 23: Playing Repeatedly
Playing Repeatedly • You can also select the repeat mode using the on-screen bar (see page 22). • For DVD-VR/JPEG, see page 25. • For DVD Video: While playing... On the TV: • For MP3/WMA/MPEG-1/MPEG-2: While playing or before playback... On the TV: (REPEAT)TRACK (Canceled) -
Page 24: On-Screen Bar Operations
On-Screen Bar Operations Remote control Number buttons On-screen bars DVD Video DVD-VR SVCD MPEG-1/MPEG-2 On-screen Bar Information You can check the information on a disc (except for MP3/ WMA/JPEG disc) and use some functions through the on-screen bar. 1 Disc type 2 Playback information Indication Meanings... - Page 25 Operations Using the On-screen Bar Basic operation procedures through the on-screen bar are as follows: Ex.: Selecting a subtitle (French) for DVD Video: While a disc is selected as the source... Display the on-screen bar with the pull-down menu. Disappears * This does not appear for MPEG-1/MPEG-2 discs.
- Page 26 A-B Repeat Select “A-B” in step of “Repeat Play” on page 22. Select the start point (A). • Before pressing ENTER/SET, you can search for the end point using y. Select the end point (B). A-B Repeat starts. The selected portion plays repeatedly.
- Page 27 Operations on the Control Screen For DVD-VR/MP3/WMA/JPEG/MPEG-1/MPEG-2: You can search for and play the desired items through the control screen. Control screen for DVD-VR The control screen is superimposed on the TV screen when you call up Program List (PG) or Play List (PL). To select playback type To select the Program To select the Play List:...
- Page 28 To start playback For JPEG: The selected track (still picture) is displayed until you change it. Slide-show playback starts. Each track (still picture) is shown on the screen for a few seconds, then changes one after another. For the other discs: Playback starts with the selected track.
-
Page 29: Recording Operations
Recording Operations Main unit IMPORTANT It may be unlawful to record or play back copyrighted material without the consent of the copyright owner. Recording on a Tape You can use type I tapes for recording. • To play a tape, see page 11. Insert a recordable cassette in deck B. -
Page 30: Dubbing Tapes
Dubbing Tapes Change the source to TAPE-B. Insert the source cassette in deck A, and a recordable cassette in deck B. Start dubbing. • When either tape playback or recording ends, both cassette decks stop at the same time. To stop dubbing Synchronized Disc Recording You can start and stop both disc play and tape recording at the same time. -
Page 31: Enjoying Karaoke
Remote control Number buttons Source Selecting buttons Main unit Karaoke function is not available in the Australian model. Enjoying Karaoke NOTE • This function is not available in the Australian model. IMPORTANT • Always set MIC LEVEL to MIN when connecting or disconnecting the microphone. -
Page 32: Adjusting The Key (Disc Playback Only)
Select the desired audio channel (see page 15). (While holding...) Sing into the microphone. Adjust the MIC LEVEL and VOLUME. To cancel the Karaoke Mode, select “MIC OFF” in step 3. Adjusting the key (disc playback only) To raise the key. To lower the key. -
Page 33: Microphone Mixing
Microphone Mixing You can enjoy microphone mixing by using the microphone. • By pressing REC START/STOP, you can record your singing-along. Turn MIC LEVEL to MIN. Connect the microphone (not supplied) to the MIC jack. Start playing the source—FM, AM, disc player, tape, or auxiliary equipment connected to the AUX jack. -
Page 34: Reserving Karaoke Songs-Karaoke Program Play
Reserving Karaoke Songs —Karaoke Program Play You can determine the playback order of up to 12 chapters or tracks on the disc player. Karaoke Program Play cannot be used for DVD-VR. Turn MIC LEVEL to MIN. Connect the microphone (not supplied) to the MIC jack. -
Page 35: Timer Operations
Remote Control Timer Operations You need to set the built-in clock before using timer functions (see page 14) except Sleep Timer. Setting the Timer Using Daily Timer, you can wake up with your favorite music. On the other hand, with Recording Timer, you can make a tape of a radio broadcast. -
Page 36: Sleep Timer
Turn off the System (on standby) if you have set the timer with the System turned on. How Daily Timer works Once the Daily Timer has been set, the timer indicator ) and DAILY indicator are lit on the display. Daily Timer is activated at the same time everyday until the timer is turned off manually (see below). -
Page 37: Setup Menu Operations
Setup Menu Operations Initial Settings The Setup Menu cannot be activated during playback. LANGUAGE menu Item You can select the initial menu language of DVD Video. See page 41. MENU LANGUAGE You can select the initial audio language of DVD Video. See page 41. AUDIO LANGUAGE You can select the initial subtitle language of DVD Video. - Page 38 Item You can set the screen saver function to ON or OFF. SCREEN SAVER ON: The on-screen display on the TV becomes dark when no operation is done for about OFF: To cancel the screen saver. You can select the file type to play. FILE TYPE AUDIO: To play MP3/WMA files.
-
Page 39: Operating The Tv
Remote control Operating the TV Operating TV You can operate JVC’s TV using this remote control. To turn on or off the To adjust TV volume: (While holding...) To select the TV channel: (While holding...) To select the input mode (either TV or VIDEO): (While holding...) -
Page 40: Additional Information
Additional Information Learning More about This System Introduction (see pages 1 and 2) Playable Disc Types: • If you play back an NTSC disc with the color system set to “PAL,” you can watch the playback picture (the disc will be reproduced using “PAL 60”... - Page 41 Daily Operations—Sound & Other Adjustments (see pages 12 to 14) Creating 3-dimensional Sound Field—3D Phonic: • While you use the headphones, 3D Phonic mode is canceled temporary. • When you activate the Karaoke Mode, 3D Phonic mode is canceled temporary. •...
- Page 42 Enjoying Karaoke (see pages 28 to 31) Singing Along Using Stereo Discs—Vocal Masking: • Vocal Masking Mode setting is also applied to the optical digital output signals through the OPTICAL DIGITAL OUTPUT terminal. • On some music, Vocal Masking does not provide the correct effect.
-
Page 43: Troubleshooting
Troubleshooting If you are having a problem with your System, check this list for a possible solution before calling for service. General: Adjustments or settings are suddenly canceled before you finish. There is a time limit. Repeat procedure again. Operations are disabled. The built-in microprocessor may malfunction due to external electrical interference. -
Page 44: Maintenance
Maintenance To get the best performance of the System, keep your discs, tapes, and mechanism clean. Handling discs • Remove the disc from its case by holding it at the edge while pressing the center hole lightly. • Do not touch the shiny surface of the disc, or bend the disc. •... -
Page 45: Specifications
Specifications Amplifier section Output Power: 90 W per channel, min. RMS, driven into 6 Ω at 1 kHz with no more than 10% total harmonic distortion. Digital output: OPTICAL DIGITAL OUTPUT: –21 dBm to –15 dBm (660 nm ±30 nm) Audio input sensitivity/Impedance (Measured at 1 kHz, with tape recording signal 400 mV) AUX:... -
Page 46: Optical Digital Output Signals
OPTICAL DIGITAL OUTPUT Signals DIGITAL AUDIO OUTPUT Playback disc DVD Video with 48 kHz, 16/20/24 bit Linear PCM with 96 kHz, Linear PCM with Dolby Digital with DTS DVD-VR format discs with 48 kHz, 16/20/24 bit Linear PCM with Dolby Digital SVCD, VCD, CD CD with DTS MP3/WMA/MPEG-1/MPEG-2 disc... -
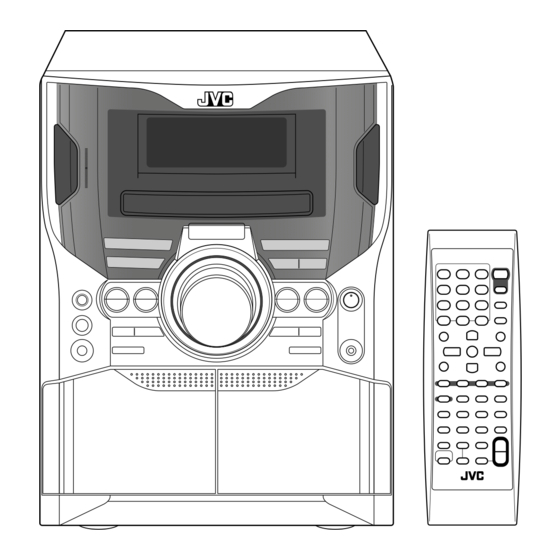
Page 47: Parts Index
Remote control Button Page AUDIO 8, 33 DVD/CD 6, 11, 13, 14, ECHO 16, 17, 19, ENTER/SET 22-25, 31, 32, 9-11, 19 FADEMUTING 9, 10, 17 FM MODE 10, 11, 19, 25, FM/AM 30, 31 KARAOKE* 10, 17, 19, 25 KEY / * Number buttons 9, 10, 11, 18, MENU... - Page 48 Mains (AC) Line Instruction (not applicable for Europe, U.S.A., Canada and U.K.) CAUTION for mains (AC) line BEFORE PLUGGING IN, do check that your mains (AC) line voltage corresponds with the position of the voltage selector switch provided on the outside of this equipment and, if different, reset the voltage selector switch, to prevent from a damage or risk of fire/electric shock.