Table of Contents
Advertisement
Advertisement
Table of Contents

Related Manuals for Emotiva Airmotiv 4s


Summary of Contents for Emotiva Airmotiv 4s
- Page 1 ®...
-
Page 3: Important Safety Precautions And Explanation Of Symbols
Do not install the Airmotiv 4s on any stand, shelf, or other piece of furniture that is unable to support its weight. If a cart is used to move the unit, use caution to avoid injury from tip-over. - Page 4 Only replace the fuse(s) in the Airmotiv 4s with a fuse(s) of proper value and voltage rating. The Airmotiv 4s should only be cleaned as directed in the manual. Avoid spraying liquids directly onto the unit and NEVER spray liquids into the port, drivers, or controls.
-
Page 5: Table Of Contents
Important Safety Precautions and Explanation of Symbols Introduction ........................3 About This Manual ......................4 Features ..........................5 Unpacking ...........................6 The Emotiva Pro airmotiv™ 4s Powered Monitor ..........7 Quick Start ..........................8 About Near-Field Monitors ...................9 Speaker Placement ....................... 10 Connections ........................17 Operation ......................... 20 Adjustments ........................ - Page 6 Page 2...
-
Page 7: Introduction
The 4.5 inch airmotiv™ low-frequency transducer delivers a fast, natural, extended low end and a beautifully integrated and cohesive midrange. The airmotiv 4s is flat within +/- 3 dB from 52 Hz to 27 kHz; amazing for a speaker that occupies less than 1/3 of a cubic foot of volume. -
Page 8: About This Manual
Many of you are experienced studio professionals and are very familiar with powered near-field monitors. Since the airmotiv 4s is intended for several different applications, you may find that some of the sections of the manual don’t apply to you. -
Page 9: Features
Stealth™ monitors, minimizes the acoustic signature and reduces room interactions, and a soft rubber bottom pad protects the airmotiv 4s and whatever it is resting on, and ensures secure slip-free positioning on any surface or stand. -
Page 10: Unpacking
It is important to save the box and all packing materials in case your airmotiv 4s monitors ever need to be moved or shipped back to the factory for service. -
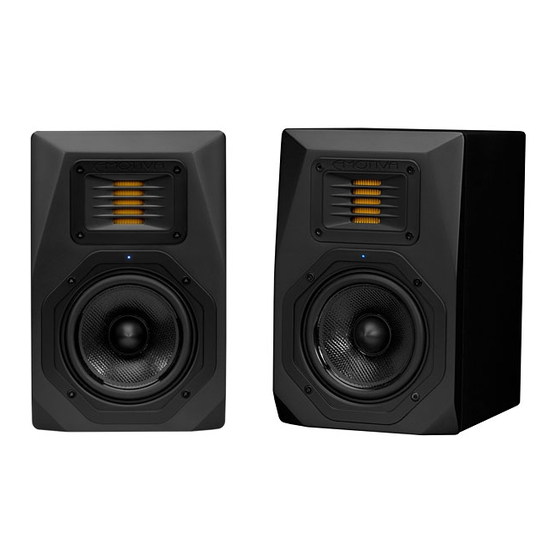
Page 11: The Emotiva Pro Airmotiv™ 4S Powered Monitor
The Emotiva Pro airmotiv™ 4s Powered Monitor 1. Emotiva’s exclusive airmotiv™ high-frequency transducer. 2. Emotiva’s exclusive airmotiv™ low-frequency transducer. 3. Power indicator. 4. Linear taper tuned port. 5. Balanced input (XLR). 6. Unbalanced input (RCA). 7. Level trim. 8. Low-frequency Equalization adjustment. -
Page 12: Quick Start
• • Turn up the volume on your source and enjoy the music. While you’re enjoying your airmotiv 4s monitors, it would be a great time to read the rest of the manual to learn more about them. Page 8... -
Page 13: About Near-Field Monitors
In short, because the near-field monitor is almost a direct pipeline between the music and the engineer’s ears, it must do a superb job of delivering the music with virtually no coloration or distortion. Emotiva’s airmotiv™ monitors are your direct link to the music. Page 9... -
Page 14: Speaker Placement
Mount your airmotiv 4s powered monitors on separate stands, or mounts, if possible. If you • place them directly on the meter bridge or the same table as your console, vibrations may be coupled to the console. - Page 15 Locate your airmotiv 4s monitors so that the distance between them is approximately the •...
- Page 16 Positioning your airmotiv™ 4s monitors as stereo speakers The Emotiva airmotiv 4s works beautifully as a full-range speaker in a small audiophile two-channel system, or as a satellite speaker in a larger two-channel system with the addition of a sub-woofer. When choosing optimum locations for speakers in an audiophile home stereo system, the goal is usually to optimize the frequency response and imaging.
- Page 17 Typical placement of stereo speakers to cover a wide listening area Avoid locating your airmotiv 4s speakers close to side walls if possible. If you have large • reflective or sound-absorbing surfaces on the side walls, try to make them as symmetrical as possible.
- Page 18 Emotiva’s airmotiv 6s powered monitors for front speakers and airmotiv 4s (or airmotiv 5s) powered monitors for surrounds. Since all airmotiv monitors share the same basic technology, and are voiced similarly, they will work exceptionally well together in any combination in a surround or multi-channel playback system.
- Page 19 Sub-woofer Display Center Left Front Right Front Left Side Right Side Surround Surround Listener Listener Left Rear Right Rear Surround Surround One example of placement for surround-sound speakers • Place your front-center speaker either directly above or directly below the display. If you have a large display and the front-center speaker must be placed above head height, better results may be achieved if it is mounted upside down (high-frequency transducer towards the floor) and slanted slightly downwards toward the listener.
- Page 20 Positioning your airmotiv 4s monitors as computer speakers The Emotiva airmotiv 4s also makes an incredible computer speaker, either using the computer’s internal sound card or, better yet, a good quality external DAC (like our DC-1). When choosing optimum locations for computer speakers, most people prefer to position them as they would near-field monitors.
-
Page 21: Connections
NOTE: DO NOT connect your airmotiv 4s monitors to any digital outputs on your music client or damage to your airmotiv 4s speakers and your music client may result. - Page 22 4s speakers. A single “long Y-cable” is preferable to multiple separate adapters and extension cables. If you have an iPod® dock or other similar device, connect your airmotiv 4s speakers to the same output you would connect to the input of an amplifier or receiver; if the line output on the dock doesn’t offer level control, then connect the cable to the headphone output...
- Page 23 Hum may also arise due to how equipment is arranged and connected. If, after following these guidelines, you still have hum or noise problems, please call Emotiva Technical Support. Equipment •...
-
Page 24: Operation
With a powered monitor, listening level is usually controlled by the source equipment. While the airmotiv 4s includes a Level Trim (on the rear panel; see page 7), this is normally only used if necessary to adjust the gain of your monitors to match the requirements of certain source equipment. -
Page 25: Adjustments
The High-frequency Equalization control is intended to compensate for room acoustics (“bright” or “dull” rooms). On the airmotiv 4s, this control affects mainly frequencies above 4 kHz and offers a gain or reduction in high-frequency output of +2 dB or -2 dB at 4 kHz If you notice excessive brightness or harshness, especially if your room contains a lot of reflective surfaces, try setting this control to the -2 dB position. -
Page 26: Care And Maintenance
If necessary, use a mild detergent, wipe the surface with a rag dampened with plain water afterwards to rinse it, and then gently dry the surface with a clean soft rag. If something nasty does get on the sides or top of your airmotiv 4s, use a rag dampened with •... -
Page 27: Specifications
Specifications Frequency Response: 52 Hz to 27 kHz +/- 3 dB. Input Connectors: One unbalanced (RCA). One professional balanced (XLR). Driver complement: airmotiv™ One 26 x 32 mm high-frequency transducer. airmotiv™ One 115 mm (4.5 inch) low-frequency transducer. Bass Alignment: Single rear-oriented port with linear taper . Amplification: High-frequency amplifier: 25 watts RMS;... -
Page 28: Troubleshooting
It’s a good idea to verify that your signal source is working, that all cabling is correct and intact, and that signal is present on the input of your airmotiv 4s monitors. First, check the source itself by trying different media (like a different CD), or a different source component. Next, make sure that your source is properly configured, that its output level is set correctly, and that your interconnect cables are properly connected and in good condition. - Page 29 If not, uneven frequency response and poor imaging may result. Problem: No sound from only one transducer • Check your signal source. • Try swapping monitors. If the problem is definitely associated with one unit, then contact Emotiva Technical Support. Page 25...
-
Page 30: Accessories
The Emotiva Pro Control Freak™ is a high-quality passive volume control which connects between your source component and powered monitors, and provides a large, easy to adjust, volume control knob which can be located wherever it is most convenient. -
Page 31: Emotiva Audio Corporation Limited Warranty
Emotiva Audio Corporation Limited Warranty What does this warranty cover? Emotiva Audio Corporation (“Warrantor”) warrants its products against defects in materials and workmanship. How long does this coverage last? This warranty commences on the date of retail purchase by the original retail purchaser and... - Page 32 In order to make a claim under the warranty, you must: 1. Call or email a customer service representative at 1-877-EMO-TECH (1-877-366-8324) or support@emotiva.com. Provide a description of your problem and the serial number of the product for which the warranty claim is being made.
-
Page 33: Notes
Notes All information contained in this manual is accurate to the best of our knowledge at the time of publication. In keeping with our policy of ongoing product improvement, we reserve the right to make changes to the design and features of our products without prior notice. Owners Manual Revision 1.0 March 2014 Page 29...