Table of Contents
Advertisement
Advertisement
Table of Contents

Related Manuals for Omron SEM-2


Summary of Contents for Omron SEM-2
- Page 1 INSTRUCTION MANUAL Automatic Blood Pressure Monitor !" Model SEM-2...
-
Page 2: Table Of Contents
CONTENTS Before Using the Monitor Introduction ........3 Important Safety Notes . -
Page 3: Before Using The Monitor
An oscillometric monitor does not need a stethoscope so the monitor is simple to use. The SEM-2 Automatic Blood Pressure Monitor is intended for home use. SAVE THESE INSTRUCTIONS... -
Page 4: Important Safety Notes
IMPORTANT SAFETY NOTES To assure the correct use of the product basic safety measures should always be followed including the precautions listed below: Self-diagnosis of measured results and treatment are dangerous. Please follow the instructions of your doctor. Do not use the unit on infants or persons who cannot express their consent. - Page 5 IMPORTANT SAFETY NOTES When using batteries, the battery liquid may leak and damage the main unit. Please observe the following points. • Do not insert the batteries with their polarities incorrectly aligned. • Replace old batteries with new ones immediately. •...
-
Page 6: Operating Instructions
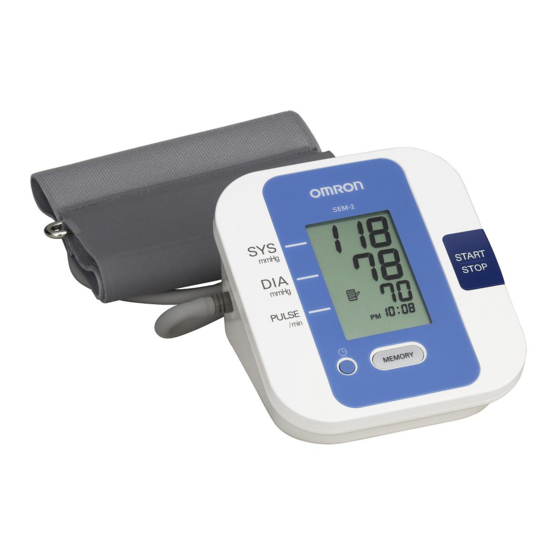
Operating Instructions KNOW YOUR UNIT Main Unit: Display Battery Compartment Settings Button START/STOP Button MEMORY Button Air Jack AC Adapter Jack Arm Cuff: The arm cuff should last for 18 months, when used four times a day. To ensure accurate measurement results, you should change to a new arm cuff after this period. -
Page 7: Unit Display
KNOW YOUR UNIT Components: Storage Case Four “AA” Alkaline (LR6) Batteries UNIT DISPLAY Systolic Blood Pressure Diastolic Blood Pressure Memory Symbol Heartbeat Symbol Pulse Display Average Value Symbol Deflation Symbol Date/Time Display Battery Low Symbol... -
Page 8: How To Use Your Blood Pressure Monitor
HOW TO USE YOUR BLOOD PRESSURE MONITOR Preparation Insert the batteries page 9 page 11 Set the date and time Measurement page 13 Sit correctly page 15 Apply the arm cuff page 17 Start measurement View Results Check the page 19 measurement result View previous page 21... -
Page 9: How To Install/Replace The Batteries
HOW TO INSTALL/REPLACE THE BATTERIES 1. Turn the main unit over. 2. Slide the battery cover in the direction of the arrow while pressing the ribbed part of the cover. 3. Install or replace four “AA” size batteries so that the + (positive) and - (negative) polarities match the polarities indicated on the battery compartment. - Page 10 HOW TO INSTALL/REPLACE THE BATTERIES Battery Life & Replacement If the battery low symbol ( ) appears on the display, replace all four batteries at the same time. Even if the battery low symbol ( ) starts to blink, you will still be able to use the unit for a short while.
-
Page 11: Setting The Date And Time
SETTING THE DATE AND TIME Your blood pressure monitor automatically stores up to 60 measurements, and also calculates average values based on the three most recent measurements taken within 10 minutes of the last reading. (If there are only two readings in memory for that period, the average will be based on two readings. - Page 12 SETTING THE DATE AND TIME 4. Repeat steps 2 and 3 to set the month. The month is set and the day digits flash on the display. 5. Repeat steps 2 and 3 to set the day (date). The date is set and the hour digits flash on the display.
-
Page 13: How To Sit Correctly When Taking A Measurement
HOW TO SIT CORRECTLY WHEN TAKING A MEASUREMENT You can take a measurement on either your left or right arm. NOTE: Measurements should be taken in a quiet place and you should be in a relaxed, seated position. Make sure that the room is not too hot or cold. - Page 14 HOW TO SIT CORRECTLY WHEN TAKING A MEASUREMENT NOTES: • Correct posture during measurement is necessary to get accurate results. • You should also try to measure your blood pressure at the same time each day. (Within 1 hour of waking is recommended.) Incorrect Posture •...
-
Page 15: How To Apply The Arm Cuff
HOW TO APPLY THE ARM CUFF Be sure to wrap the arm cuff correctly so that you get accurate results. Measurements can be taken in light clothing. However, please remove thick clothes, such as sweaters, before taking a reading. 1. Insert the air plug into the air jack on the left side of the main unit. - Page 16 HOW TO APPLY THE ARM CUFF 3. Position the arm correctly. 1) The air tube should run down the inside of your forearm and be in line with your middle finger. 2) The bottom of the cuff should be approximately 1 to 2 cm above your elbow.
-
Page 17: How To Take A Measurement
HOW TO TAKE A MEASUREMENT 1. Press the START/STOP button to turn on the monitor. Sit in a chair with your feet flat on the floor and place your arm on a table so that the cuff will be at the same level as your heart. Keep still and do not talk during measurement. - Page 18 HOW TO TAKE A MEASUREMENT Common Causes of Inaccurate Results Leaning forwards. Arm cuff is too loose. Movement or talking during measurement. NOTE: If the arm cuff is at a lower position than your heart use cushions etc., to adjust the height of your arm. 2.
- Page 19 HOW TO TAKE A MEASUREMENT 3. Check the measurement results. Systolic Blood The monitor automatically stores blood Pressure pressure and pulse rate into its memory. Diastolic Blood Pressure Refer to “How to Use the Memory Pulse Display Function” on page 21. NOTES: •...
- Page 20 HOW TO TAKE A MEASUREMENT INSTRUCTIONS FOR SPECIAL CONDITIONS Instructions for special conditions If your systolic pressure is known to be more than 220 mmHg, press and hold the START/STOP button until the arm cuff inflates 30 to 40 mmHg higher than your suspected systolic pressure.
-
Page 21: How To Use The Memory Function
HOW TO USE THE MEMORY FUNCTION This monitor has a memory capable of storing 60 sets of readings. Every time you complete the measurement, the monitor automatically stores the blood pressure and pulse rate. If there are three readings within 10 minutes of the last reading, the average of the three readings is displayed. - Page 22 HOW TO USE THE MEMORY FUNCTION 2. Press the MEMORY button again, while the average reading screen is displayed. The result from the most recent measurement is displayed. The date and time of each measurement is displayed alternately with the measurement reading.
- Page 23 HOW TO USE THE MEMORY FUNCTION TO DELETE ALL THE READING You cannot delete individual stored readings, all the readings will be deleted. 1. To delete stored measurement results, while the memory values are displayed, first press the MEMORY button. Then while holding it down, press the START/STOP button simultaneously for about 2-3 seconds.
-
Page 24: Care And Maintenance
Care and Maintenance MAINTENANCE AND STORAGE MAINTENANCE To keep your digital blood pressure monitor in the best condition and protect the unit from damage follow the directions listed below: • Do not subject your monitor and cuff to extreme temperatures, humidity, moisture or direct sunlight. - Page 25 MAINTENANCE AND STORAGE STORAGE Keep the unit in its storage case when not in use. 1. Unplug the air tube from the air jack. 2. Gently fold the air tube into the arm cuff. NOTE: Do not bend the air tube excessively.
-
Page 26: Using The Optional Ac Adapter
NOTES: • Never unplug the power cord with wet hands. • Use only exclusive AC adaptor specified by Omron dealers. Use of unsupported adapters may damage the unit. • When storing the optional AC adapter in the storage case with the main unit, be careful not to damage the main unit or cuff. -
Page 27: Error Indicator
ERROR INDICATOR SYMBOL CAUSE CORRECTION Repeat measurement. Remain Movement during still and do not talk during measurement. measurement. Refer to page 17. Air plug Insert the air plug securely. disconnected. Refer to page 15. Apply the arm cuff correctly. Arm cuff not applied Refer to page 15. - Page 28 ERROR INDICATOR SYMBOL CAUSE CORRECTION Replace all four “AA” batteries Batteries are worn. with new ones. Refer to page 9. Blinks or appears continuously Contact your OMRON service Device error. representative.
-
Page 29: Troubleshooting Tips
TROUBLESHOOTING TIPS PROBLEM CAUSES REMEDY Apply the arm cuff Arm cuff not applied correctly. correctly. Refer to page 15. Remain still and do not The reading is Movement or talking talk during extremely low (or during measurement. measurement. high). Refer to page 17. Clothing is Remove any clothing interfering with the... - Page 30 Press the START/STOP button and repeat measurement. If the problem continues, try replacing the Other problems. batteries with new ones. If this still does not solve the problem, contact your OMRON service representative.
-
Page 31: Specifications
SPECIFICATIONS Name: OMRON Automatic Blood Pressure Monitor Model: SEM-2 Display: LCD Digital Display Measurement Range: Pressure: 0 to 299 mmHg, Pulse: 40-180/min. Accuracy/Calibration: Pressure: ±3mmHg or 2% of reading Pulse: ±5% of reading Inflation: Automatic by electric pump Deflation: Automatic pressure release valve...