Table of Contents
Advertisement
Quick Links
Advertisement
Table of Contents

Related Manuals for Dual XDM6810


Summary of Contents for Dual XDM6810
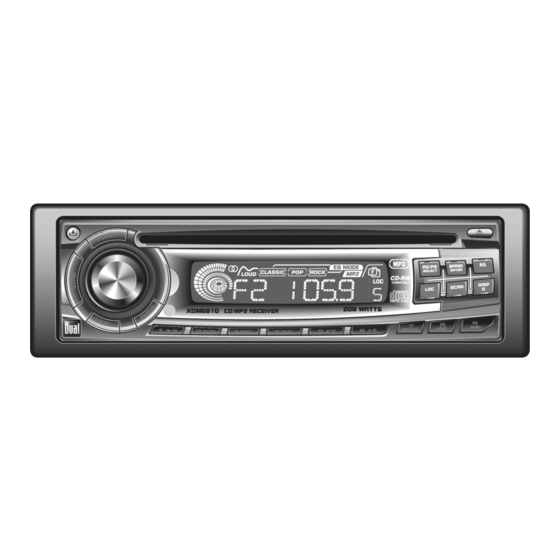
- Page 1 XDM6810 INSTALLATION/OWNERS MANUAL AM/FM/CD/MP3 Receiver with Detach Face...
-
Page 2: Installation
XDM6810 INSTALLATION Preparation Please read entire manual before installation. Before You Start • Disconnect negative battery terminal. (consult a qualified technician for instructions) • Avoid installing the unit where it would be subject to high temperatures, such as from direct sunlight, or where it would be subject to dust, dirt or excessive vibration. -
Page 3: Wiring Diagram
XDM6810 INSTALLATION Wiring Diagram FUSE When replacing a fuse, make sure new fuse is the correct type and amperage. Using an incorrect fuse could damage the radio. The XDM6810 uses one 10 amp ATM fuse located beside the wiring connector. -
Page 4: Operation
Tune/Track Up/9 Mute The XDM6810 allows playback of your favorite MP3 files recorded on CD-R and CD-RW discs. Its powerful on-board DSP processor decodes the compressed audio while main- taining near-CD sound quality. An internal buffer provides up to 100 seconds of ESP (Electronic Skip Protection) (@128kbps/44.1kHz) and allows alphanumeric or direct track... -
Page 5: General Operation
XDM6810 OPERATION General Operation Faceplate Removal Press RELEASE and pull away from the left side to remove. To re-install, insert right side of faceplate first then push left side to secure. *For semi-permanent faceplate installation, remove trim ring and install supplied Phillips head #1 screw through left side of mounting frame into face- plate. - Page 6 XDM6810 OPERATION General Operation Reset Press and hold for more than 2 seconds to RESET the unit upon initial installation, when selecting between US/European frequency spacing or if abnormal operation occurs. The rest button is located behind the faceplate. Audio Press AUDIO to select between Volume (default), Bass, Treble, Balance &...
-
Page 7: Tuner Operation
XDM6810 OPERATION Tuner Operation Press TUNE or TUNE momentarily to seek the Seek Tuning next strong station. Press TUNE or TUNE for more than 2 seconds, Manual Tuning then release. "MANUAL" will momentarily appear in the display. Press TUNE or TUNE momentarily to move radio frequency up or down one step at a time. -
Page 8: Cd/Mp3 Player Operation
XDM6810 OPERATION CD/MP3 Player Operation With the label facing up, insert a standard size CD into the Insert CD CD slot. The CD will automatically begin playback. Press the EJECT button to stop and eject the CD. The unit will... - Page 9 XDM6810 OPERATION CD/MP3 Player Operation When an MP3 encoded disc is first inserted, READING CD Playing an MP3 Disc ROM will appear in the display. Depending on the number of files and folders, this may take several seconds. MP3 Icon icon will illuminate anytime a valid MP3 encoded disc is inserted.
- Page 10 XDM6810 OPERATION CD/MP3 Player Operation Refer to the following button function table when selecting, searching or navigating MP3 files and folders: MP3 Button Function Table Button Function SELECT MP3 Direct Select, Search and Navigate Modes ENTER Enter/Confirm Preset 1 A, B, C, 1...
- Page 11 XDM6810 OPERATION CD/MP3 Player Operation Press SELECT two times, an "*" will flash in the display. Use Alphanumeric Track or Folder Search the buttons in the table on page 10 (16 keystroke maximum input) or the rotary encoder to enter the desired alphanu- meric search characters.
- Page 12 XDM6810 OPERATION CD/MP3 Player Operation Current Folder Navigate Press SELECT four times to navigate the current folder.The current folder name is briefly displayed. After the current folder name is displayed, the currently playing track name is displayed. Step 2 If a subfolder is selected, the icon will illuminate.
- Page 13 XDM6810 OPERATION CD/MP3 Player Operation Disc Shuffle Press SHF momentarily to play all tracks on entire disc in random order. S-SHF will appear in the display along with the current track number. Folder Shuffle Press SHF for more than 2 seconds to play all tracks in cur- rent folder only in random order.
-
Page 14: Limited One-Year Warranty
4. DUAL will pay the return shipping charges if (whichever is deemed necessary) if it becomes defec- the product is returned to an address within the tive or inoperative. -
Page 15: Specifications
XDM6810 OPERATION Specifications CD Player Signal-to-noise: >92dB Frequency response: 10Hz-20kHz Channel separation @ 1kHz: >65dB D/A converter: 1 Bit FM Tuner Tuning range: 87.5MHz-107.9MHz Usable sensitivity: 8.5dBf 50dB quieting sensitivity: 10dBf Stereo separation @ 1kHz: 40dB Frequency response: 30Hz-13kHz AM Tuner... -
Page 16: Troubleshooting
XDM6810 OPERATION Troubleshooting Problem Cause Action Yellow wire not connected or incorrect voltage Check connections for proper voltage Unit will not turn on Red wire not connected or incorrect voltage (11~16VDC) (no power) Black wire not connected Check connection to ground...