Husqvarna Automower 305 Operator's Manual
Husqvarna 305 automower operator's manual
Hide thumbs
Also See for Automower 305:
- Technical manual (94 pages) ,
- Operator's manual (80 pages) ,
- Workshop manual (52 pages)
Table of Contents
Advertisement
Advertisement
Table of Contents

Related Manuals for Husqvarna Automower 305


Summary of Contents for Husqvarna Automower 305
- Page 1 H U SQVARNA AUTOMOWE R ® OPE R ATOR’S MAN UAL...
-
Page 3: Table Of Contents
3.5 Connecting the boundary wire ..........3.6 Installation of the guide wire ..........3.7 Checking the installation ............3.8 Linking Automower 305 to the charging station ® ..... 4. Use ....................4.1 Charging a discharged battery ..........4.2 Using the timer ................ - Page 4 If the mower is unexpectedly stolen, it is important to notify your dealer of this. Provide the serial number of the mower so that is can be registered as stolen in the central systems at Husqvarna AB. It is an important step in theft protection procedure which reduces interest in the buying and selling of stolen mowers.
-
Page 5: Introduction And Safety
This Operator's Manual contains important information about the mower, how it must be installed and how to use it. Husqvarna AB has a policy of continuous product development and therefore reserves the right to modify the design and appearance and function of products without prior notice. -
Page 6: Symbols On Automower
Operator’s Manual must be carefully followed if the mower is to be used safely and efficiently. • Automower 305 can only start when the main ® switch is moved to the 1 position and the correct PIN code has been entered. Inspection and/or maintenance must be carried out with the main switch set to 0 . -
Page 7: Symbols In The Operator's Manual
Always wear protective gloves when working with the mower’s underframe. • Never use a high-pressure washer or even running water to clean Automower 305. ® • A warning box indicates a risk of personal injury exist, especially when the stated instructions are WARNING not followed. -
Page 8: Safety Instructions
1 and the correct PIN code has been entered. • Automower ® 305 must never be used at the same time as a sprinkler. In this case use the timer function, see 6.3 Timer (1) , so the mower and sprinkler never run simultaneously. •... - Page 9 The PIN code has four digits and is chosen when the mower is started for the first time, see 3.8 Linking Automower® 305 to the charging station . Set the main switch to 0 if the mower must be carried.
-
Page 10: Presentation
® 305 includes four main components: • Automower ® 305, an robotic lawn mower that mows the lawn by moving in essentially an irregular pattern. The mower is powered by a maintenance-free battery. • Charging station, where your Automower ®... -
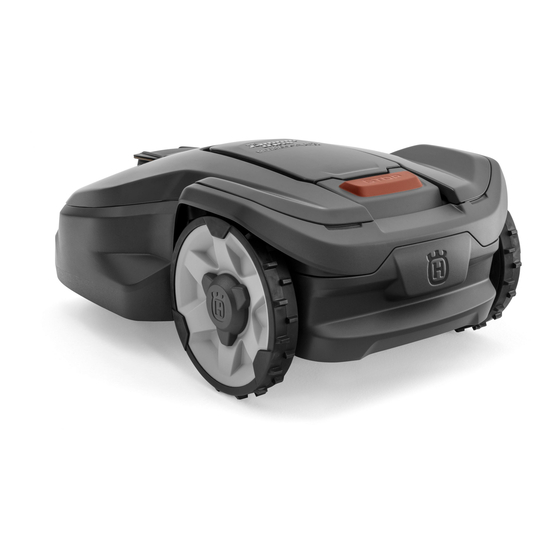
Page 11: What's What
2. PRESENTATION 2.1 What’s what? The numbers in the picture correspond to: Body 14. Keypad Cover to display, keypad and cutting height 15. Display adjustment 16. Loop wire for boundary wire and guide wire Stop button/Lock button for opening the cover 17. -
Page 12: Function
2. PRESENTATION 2.2 Function Capacity Automower 305 is recommended for lawns up to 500 ® in size. How big an area Automower 305 can keep cut ® depends primarily on the condition of the blades and the type, growth and moisture of the grass. The shape of the garden is also significant. - Page 13 It continuously combines mowing and charging. The mower starts to search for the charging station when the battery charge becomes too low. Automower 305 does not mow when it is searching ® for the charging station. When Automower 305 searches for the charging ®...
-
Page 14: Search Method
PIN code and setting the time and date, see 3.8 Linking Automower® 305 to the charging station After this, the selected PIN code must be entered every time the main switch is set to 1 . See 6.5 Security for more information on theft protection. -
Page 15: Installation
3.5 Connecting the boundary wire. 3.6 Installation of the guide wire. 3.7 Checking the installation. 3.8 Linking Automower® 305 to the charging station. The charging station and boundary and guide wires must be connected to be able to carry out a complete start-up of Automower 305. -
Page 16: Installation Of The Charging Station
Automower ® 305 finds it easier to reach all areas in the working area. It is a good idea to place the charging station in the shadow. The battery is spared if it is charged in the lowest possible ambient temperature. - Page 17 3. INSTALLATION The charging station must not be positioned so that its plate bends. Consider the distance to a wall socket when selecting a location for the charging station. The charging station must be connected to a 230 V wall socket via the transformer.
-
Page 18: Charging The Battery
Set the main switch to the 1 position. Place Automower ® 305 in the charging station to charge the battery while the boundary and guide wires are being laid. If the battery is empty, it takes around 3 hours to fully charge it. -
Page 19: Installation Of The Boundary Wire
The boundary wire should be laid so it: • Forms a loop around the working area for Automower 305. Only an original boundary wire must be ® used. This is tinned and has a high quality insulation to withstand the dampness in the ground. - Page 20 When the working area is divided by a flat slab path that is level with the lawn, it is possible to allow Automower 305 to run over the path. It can be an ® advantage to lay the boundary wire under the slabs.
- Page 21 Long narrow passages and areas, narrower than 1.5 - 2 metres, should be avoided. When Automower ® 305 mows there is a risk that it runs around in the passage or area for a too long. The lawn will then look flattened.
- Page 22 The boundary wire should not be laid across a slope that is steeper than 10 %. There is a risk of Automower 305 finding it difficult to turn there. The ® mower will then stop and show the fault message Outside working area.
- Page 23 IMPORTANT INFORMATION Extra wire must not be placed in coils outside the boundary wire. This can disrupt Automower 305. ® Tip! Use the supplied measurement gauge as a guide when you lay out the boundary wire. This helps you to easily set the correct distance between the boundary wire and the boundary/obstacle.
- Page 24 (see figure below). If the boundary wire is laid in any other way, Automower ® 305 may find it hard to enter the charging station. When connecting to the charging station, make sure that the boundary wire's right end is connected to the right hand pin and the left wire end to the left hand pin.
-
Page 25: Connecting The Boundary Wire
3. INSTALLATION 3.5 Connecting the boundary wire Connect the boundary wire to the charging station: IMPORTANT INFORMATION The boundary wire must not be crossed when connecting to the charging station. Therefore the right hand wire end must be connected to the right hand connector on the charging station and vice versa. -
Page 26: Installation Of The Guide Wire
The guide wire, as the boundary wire, can be stapled to or buried in the ground. The guide wire is used by Automower 305 to find its ® way back to the charging station but it also guides the mower to find its way from the charging station to remote areas of the working area. - Page 27 3. INSTALLATION Draw the wire through the slot in the bottom of the charger plate. Fix a connector to the guide wire. Connect it to the contact pin on the charging station that is labelled “guide”. Route the guide wire at least 2 metres straight out from the front edge of the charging plate.
- Page 28 If the guide wire must be laid in a passage: Automower ® 305 follows the guide wire on the same side of the wire both to and from the charging station. This means that in towards the charging station the...
-
Page 29: Checking The Installation
3.8 Linking Automower ® 305 to the charging station Set the main switch to the 1 position. Place Automower 305 in the charging station. ® Open the control panel cover by pressing the STOP button. A start-up sequence begins when Automower ®... -
Page 30: Use
4. USE 4. Use 4.1 Charging a discharged battery When Husqvarna Automower 305 is new or has been ® stored for a long period the battery will not be charged and needs to be charged before starting. Charging takes 2 hours. -
Page 31: Using The Timer
When the blade disc starts, 5 beeps are heard for 2 seconds. 4.4 Stopping Press the STOP button. Automower 305 stops, the blade motor stops ® and the control panel cover opens. Restart Push the Start button. Shut the cover within 10 seconds. Automower ®... -
Page 32: Adjusting The Cutting Height
MAX (5 cm). If the grass is long it is appropriate to let Automower ® 305 start mowing at the MAX cutting height. Once the grass is shorter, you can gradually lower the cutting height. To adjust the cutting height: Press the STOP button to stop the mower and open the cover. -
Page 33: Control Panel
5. CONTROL PANEL 5. Control panel All forms of commands and settings for Husqvarna Automower 305 are made via the control panel. All ® functions are accessed via a number of menus. The control panel consists of a display and a keypad. -
Page 34: Operation Selection
20 cm and then stop. Use the MAN mode when mowing secondary lawn areas, as Automower ® 305 never searches for the charging station and mows until the battery runs out. 5.2 Multi-choice buttons... -
Page 35: Numbers
5.4 Main switch Set the main switch in the 1 position to start Automower ® 305. Set the main switch in the 0 position when the mower is not in use or work is being carried out on the blade disc. -
Page 36: Menu Functions
There are a number of submenus under each option. You can access all the functions to set Automower ® 305 settings via these. Browse between menus Browse the main menu and submenus using the multi-choice buttons. Enter values and times using the number keys and confirm each selection with the multi-choice button marked OK. -
Page 37: Menu Structure
6. MENU FUNCTIONS 6.2 Menu structure English - 37... -
Page 38: Timer (1)
When Automower 305 is allowed to mow too much, the lawn ® may appear flattened. Besides, the mower is subjected to unnecessary wear. - Page 39 Medium the Corridor. Remote start Automower 305 has a default setting for medium ® Wide wide corridors. To further reduce the risk of tracks Test settings forming, it is recommended to select a wide corridor in working areas where it is possible to do so.
- Page 40 Test IN (2-3-1) The Test IN (2-3-1) function is used to test how Corridor width Automower ® 305 finds its way into the charging station. Remote start Test in Test settings Test out...
-
Page 41: Security (3)
Remote start To test the settings for Remote start (2-2): Test in Park Automower 305 in the charging station and ® Test settings select Test OUT (2-3-2). The mower will then leave Test out the charging station straight away along the guide wire and begin mowing after the designated distance. - Page 42 30 days without first entering the correct PIN code. When the 30 days has passed Automower 305 will continue to mow as normal, ® but the Enter PIN code message appears when the cover is opened. Enter your code again and press OK.
-
Page 43: Settings (4)
OK. Factory reset Factory reset (4-3) This function allows you to reset Automower ® 305 to Time & Date the default settings it had when it left the factory. Select Factory reset in the menu and press OK. Enter Language the correct PIN code and press OK. -
Page 44: Garden Example
The mower's behaviour is controlled to a certain extent by what settings are made. Adapting the mower's garden settings according to the shape of the garden makes it easier for Husqvarna Automower ® 305 to frequently reach all parts of the garden and in doing so achieve a perfect mowing result. - Page 45 7. GARDEN EXAMPLE Proposals for installation and settings Area: 500m Open area. Timer: Operating time of 24 hours per day. Corridor width: Wide. Area: 500m . A number of islands and a 25% slope along the boundary loop. Timer: Operating time of 24 hours per day. Corridor width: Wide.
- Page 46 7. GARDEN EXAMPLE Proposals for installation and settings Area: 250m . U-shaped garden with the charging station placed on one of the large open areas. A guide wire should be laid in the passage. Timer: Operating time of 12 hours per day. Corridor width: Narrow.
-
Page 47: Maintenance
See 8.5 Cleaning for more details on cleaning. When Automower 305 is first used, the blade disc and ® blades should be inspected once a week. If the amount of wear during this period has been low, the inspection interval can be increased. -
Page 48: Winter Storage
• If necessary the dealer can also load Automower ® 305 with new software, possibly including newly added features. 8.4 After winter storage During a service the dealer can clean the mower thoroughly, test its function and components as well as replace wear parts if necessary. -
Page 49: Transport And Removal
8.6 Transport and removal Secure the machine during transport. It is important that Automower ® 305 does not move when it is being transported, for instance, between lawns. 8.7 In the case of thunderstorms To reduce the risk of damage to components in... -
Page 50: Replacing The Blades
There are several different types of mower blades to choose from as accessories, with different features. Use Husqvarna AB approved blades only. Please contact your dealer for more information. To replace the blades: Set the main switch to the 0 position. -
Page 51: Trouble Shooting
9. TROUBLE SHOOTING 9. Trouble shooting 9.1 Messages Below we have listed a number of messages which may be shown in the display of the Husqvarna Automower 305. If the same message appears often: contact your dealer. ® Message Cause... - Page 52 No drive Automower ® 305 has got caught in Free the mower and rectify the something. reason for the lack of drive. If it is due to wet grass, wait until the lawn has dried before using the mower.
-
Page 53: Symptom
9. TROUBLE SHOOTING 9.2 Symptom If your Automower 305 does not work as expected, follow the troubleshooting guide below. It you still ® cannot find the reason for the fault, contact your dealer. Symptom Cause Action Uneven mowing Automower 305 works too few hours Increase the mowing time, see 6.3... -
Page 54: Technical Data
17 cm Working capacity 500 m +/- 20% Husqvarna AB does not guarantee full compatibility between the Automower 305 and other types of ® wireless systems such as remote controls, radio transmitters, buried electric animal fencing or similar. 11. Environmental information... -
Page 55: Eu Declaration Of Conformity
Husqvarna AB, SE-561 82 Huskvarna, Sweden, hereby declares that robotic lawnmower Husqvarna Automower ® 305 from 2011's serial numbers and onwards (the year is clearly stated in plain text on the rating plate with subsequent serial number), complies with the requirements of the COUNCIL'S DIRECTIVE: •... - Page 56 ORIGINAL INSTRUCTIONS AUTOMOWER® is a trademark owned by Husqvarna AB. Copyright © 2011 HUSQVARNA. All rights reserved. 115 39 67-26...