Table of Contents
Advertisement
Quick Links
Advertisement
Chapters
Table of Contents

Related Manuals for Fujitsu F-02F


Summary of Contents for Fujitsu F-02F
- Page 1 F-02F ’13.11 INSTRUCTION MANUAL...
- Page 2 Introduction Viewing this manual Thank you for purchasing "F-02F" mobile terminal. In this manual, "F-02F" mobile terminal is usually referred to Before using your terminal, or when necessary, read this as "the terminal". manual to ensure safe use and handling.
-
Page 3: Basic Package
AC Adapter F07 (with warranty) Basic package F-02F (including warranty) Desktop Holder F43 USB coaxial conversion cable F01 Quick start guide (Japanese) Other options P159 Contents/Precautions... -
Page 4: Table Of Contents
..............57 Before using the terminal ... 27 SMS ................... 57 Part names and functions ..........27 Email ................. 59 docomo mini UIM card ............28 Gmail ................. 62 Charging ................29 Early warning "Area Mail" ..........62 Turning power on/off ............33 Browser ................ - Page 5 Data communication ....144 Electronic dictionary ............97 ® Search ................98 Bluetooth communication .......... 144 docomo backup ..............99 NFC communication ............147 Settings ........102 External device connection ..148 Setting menu ..............102 Connecting with a PC ............. 148 WIRELESS & NETWORKS ..........106 Connecting with a Wi-Fi printer ........
- Page 6 Federal Communications Commission (FCC) Notice ..177 FCC RF Exposure Information ........177 Important Safety Information ........179 Export Administration Regulations ......180 Intellectual Property Right ..........180 SIM unlock ..............184 Index ................185 Contents/Precautions...
-
Page 7: Before Using The Terminal
You can use the terminal only with docomo mini UIM card. not function in locations where it is difficult for radio waves If you have a UIM or FOMA card, bring it to a docomo Shop to penetrate, such as tunnels, underground passages and to replace. - Page 8 For details on usage fee, refer to http:// displays and not defects in the terminals. www.nttdocomo.co.jp/english/. For commercially available option devices, DOCOMO is not liable to any failures or the malfunctions. When the memory space of the microSD card or the terminal is low, running applications may not operate normally.
-
Page 9: Precautions (Always Follow These Directions)
The symbols below show specific directions. Precautions (Always follow This symbol denotes that the action is these directions) prohibited. Don’t Before using your terminal, or when necessary, read the This symbol denotes that disassembling the precautions below to ensure safe use and handling. After phone or its components is not allowed. -
Page 10: Handling The Terminal, Adapter, Desktop Holder, Docomo Mini Uim Card And Usb Coaxial Conversion Cable (Common)
Precautions contain the description below. Do not let the terminal get wet with water, Handling the terminal, adapter, desktop holder, docomo mini drinking water, urine of pet animals, UIM card and USB coaxial conversion cable (common)..8 perspiration, etc. No liquids Handling the terminal ..............9... -
Page 11: Handling The Terminal
Turn the terminal OFF and stop charging before Be careful especially when using the terminal entering a place such as a gas station where connected to the adapter continuously for a long flammable gases are generated. time. The gas may catch fire. If you use applications or watch TV while charging the battery for a long time, the terminal and adapter may be If the equipment starts giving off a strange smell,... - Page 12 Do not put foreign objects such as liquid like determine how the device is affected by radio water, metal pieces or burnable things into waves before using. docomo mini UIM card slot or microSD card slot. Don’t May cause harmful effect on electronic medical equipment etc.
-
Page 13: Handling Adapter And Desktop Holder
WARNING May cause ignition or environmental destruction. Bring Don’t the old terminal into a sales outlet such as docomo Shop. If your local municipality has a recycling program, dispose Do not use the adapter cord if it gets damaged. of them as provided for. - Page 14 Always use the DC adapter with a negative- Only use with the specified power source and ground vehicle. Do not plug it into a positive- voltage. When charging the terminal overseas, ground vehicle. use AC adapter for global use. Don’t May cause fire, burns, electric shock.
-
Page 15: Handling Docomo Mini Uim Card
Unplug coaxial conversion cable. May cause fire, burns, electric shock. May cause electric shock by thunder. Don’t Handling docomo mini UIM card Do not place heavy objects on the USB coaxial conversion cable. CAUTION May cause fire, burns, electric shock. -
Page 16: Handling Mobile Phones Near Electronic Medical Equipment
Handling mobile phones near electronic Material list medical equipment Part Material/Surface treatment WARNING Display panel Hardened glass/AF coating Exterior case Side Wearers of medical equipment such as decorative implanted pacemakers or defibrillators must parts (2 parts carry and use the terminal at least 15 cm away on side from the implanted device. - Page 17 Desktop Holder F43 Part Material/Surface treatment Part Material/Surface treatment Earphone jack PA resin Exterior case Top case, ABS resin Fingerprint Sensor Epoxy resin back side sensor Outer Stainless steel/Chrome coating case, bottom periphery case Charging terminals Stainless steel/Gold plating Charging Terminal POM resin terminals...
-
Page 18: Handling Precautions
- If the terminal is crammed into a brimming bag, display or F-02F is waterproof/dustproof, however, do not allow internal PCBs may be damaged or malfunction. And, if water or dust to seep into the terminal or do not adhere external devices are plugged into the external connection water or dust to accessories or optional devices. - Page 19 Do not bring magnetic cards etc. close to the terminal. terminal. - Magnetic data in cash cards, credit cards, telephone cards, - If the data is deleted, DOCOMO assumes no responsibility floppy disks, etc. may be erased. for the loss of any data.
-
Page 20: Docomo Mini Uim Card
Take care not to scratch, touch accidentally or short IC. - May cause data loss or malfunction. Charge the battery in an area within the proper ambient Do not drop docomo mini UIM card or subject it to shocks. temperature range (5-35 ). - May cause malfunction. - Page 21 Bluetooth. production lines of a factory that require a license, DOCOMO assumes no responsibility for any information specified low power radio stations, or amateur radio which may be leaked during communication via Bluetooth.
- Page 22 Do not use wireless LAN in a place where magnetized by advance. electric products, AV, OA equipment, etc. or where When docomo mini UIM card is not inserted or when you electromagnetic wave is generated. are out of service area, channels 12, 13 of 2.4 GHz band and...
- Page 23 Cautions on using 5 GHz devices CAUTION Using wireless LAN built-into the terminal in 5.2/5.3 GHz Do not use a remodeled terminal. Using a remodeled outside is prohibited by the Radio Law. terminal violates the Radio Law/Telecommunications Channel numbers and frequency bands available in Japan Business Act.
-
Page 24: Waterproofness/Dustproofness
For F-02F, IPX8 means that a communication device keeps - Do not apply water flow stronger than allowed ( P22). functioning after F-02F is slowly submerged to depth of 1.5 m in - Do not use brush, sponge, soap, detergent, etc. - Page 25 Do not put on or soak the terminal in liquid other than tap water in room-temperature. For attaching/removing docomo mini UIM card or microSD card, put your fingertip into the groove on the slot cap to raise the cap (a), then open in the direction of the arrow (b).
- Page 26 Even if the F-02F is by the warranty. waterproof in IPX5 waterproof, water may enter inside from a damaged section and cause troubles such as electric shocks or corrosion of the battery.
- Page 27 Draining water When the terminal is wet, water may flow out after wiping it off. Drain the water in the following steps. a Place the terminal on the stable table etc. and wipe off moisture on the terminal surface and back side with a dry, clean cloth etc.
- Page 28 d Swing the terminal about 10 times against a dry, clean Charging cloth etc. to wipe off water remaining in the stereo Check the following during and after charging. earphone jack, microphone, speaker, keys, charging When charging, confirm that the terminal is not wet. Never terminals, etc.
-
Page 29: Before Using The Terminal
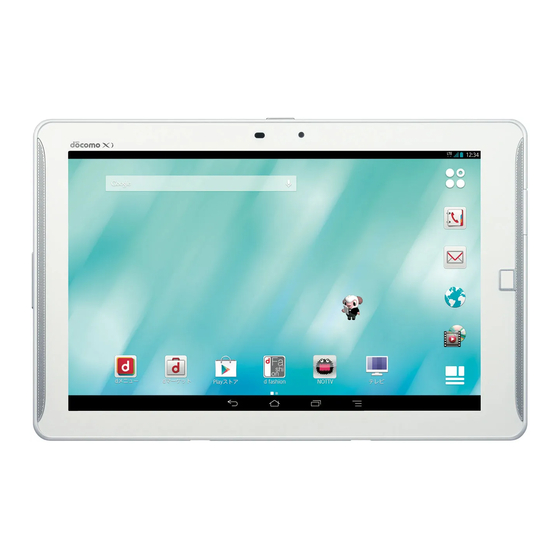
Before using the terminal Part names and functions a RGB sensor It senses ambient light and brightness and automatically adjusts the display backlight. b In-camera c Display (Touch panel) d Speaker e Indicator LED f Microphone g Fingerprint sensor Authenticate with fingerprint, cancel the screen lock, or set/ cancel sleep mode. -
Page 30: Docomo Mini Uim Card
You can use the terminal only with docomo mini UIM card. Tray is designed to be removed from the docomo mini If you have a UIM or FOMA card, bring it to a docomo Shop UIM card slot. to replace. -
Page 31: Charging
Security code for docomo mini UIM card Security code called PIN code can be set for the docomo mini UIM card. The code is set to "0000" at subscription, you can change PIN code yourself. P126 Tray... - Page 32 (in Japanese only) or When power voltage of the internal battery is abnormal, DOCOMO-specified repair office. charging error occurs and the indicator LED flashes. Remove ❖ the terminal from the charger and retry in the correct Available charging adapter method.
- Page 33 Charging with desktop holder Charge the battery using included Desktop Holder F43 and AC Adapter F07 as follows. a Insert AC power cable into AC adapter main unit To AC 100V b Insert the connector of AC adapter main unit into the outlet charging jack of the desktop holder Indicator LED...
- Page 34 Charging with AC adapter Jack cap Indicator LED To charge with an optional AC Adapter 04, operate as follows. a Open the jack cap on the terminal P23 External connection jack b Insert the microUSB plug of the AC adapter into the external connection jack of the terminal horizontally with B-engraved side facing up c Insert the AC adapter's power plug into an outlet...
-
Page 35: Turning Power On/Off
Turning power on/off Basic operation Turning power on Using touch panel Touch the touch panel directly to operate the terminal. Press and hold P (2 sec. or more) until the Set whether to vibrate when tapping is recognized (Distinct indicator LED lights in green touch P115). -
Page 36: Touch And Hold
❖ Tap/Double-tap Tap : Touch the screen lightly and release the finger quickly. Double-tap : Tap twice quickly. Example : Drag ❖ Pinch Example : Tap Touch the screen with two fingers and widen (pinch-out) or ❖ Touch and hold narrow (pinch-in) the fingers distance. -
Page 37: Character Entry
Switching the portrait/landscape view Character entry The terminal supports a motion sensor that senses orientation or motion of the terminal. You can switch display view by Enter characters using software keyboard displayed on the tilting the terminal vertical or horizontal (Auto-rotate screen screen. -
Page 38: Handwritten Input
QWERTY keypad : Switch input mode to Kana/Alphabet/Number : Set/cancel capitals lock Enter characters using Romaji input. : Touch and hold to switch to capitals lock for alphabet entry with QWERTY keypad : Switch to upper case/capitals lock/lower case for alphabet entry with Japanese syllabary keypad : Switch to symbol input mode : Switch to Hiragana/Katakana... - Page 39 ❖ Numeric keypad input : Display menu When the menu is displayed, the following operations You can use the following 4 input methods in the numeric are available. keypad. (Common phrase) : Display common phrases Select input method in "Numeric keypad settings" to use. ATOK (ATOK direct) : Quote ATOK...
- Page 40 Switching to other input method Gesture input If you tap and keep your finger on the key assigned the You can switch to another input method such as the Google character you want to enter, characters (gesture guide) will be keyboard to enter characters.
-
Page 41: Editing Text
Set each item Utility : Register or edit Personal dictionary in Dictionary utility, register or edit common phrases in Common Operation sound/Vibrate : Set Keypad sound, Keypad phrase utility, share words registered in Windows/Mac vibration. version of ATOK Sync. Numeric keypad settings : Set Input mode (Flick input/ Initialize : Initializing settings or Initializing learning data Numeric keypad input/Gesture input/2-touch input), can be performed. -
Page 42: Initial Settings
P120 ❖ Connecting external keyboard (Complete then go next)] Connecting with Bluetooth keyboard P145 On the docomo services initial settings screen, Connecting USB keyboard (Next)] Connect USB keyboard to the external connection jack of the terminal Before using the terminal... -
Page 43: Indicator Led
Access point (APN) settings P106 (Set docomo apps password) Switching to English display P137 : Set the password for using docomo applications or set use/not use of remote initializing service. docomo apps password is set "0000" by default. Follow Indicator LED the onscreen instructions to set. -
Page 44: Screen Display/Icon
Main notification icons bottom of the screen. Names and actions of icons are as : New Gmail follows. : New Email : New docomo mail : New SMS : New Area Mail Navigation bar : Sending SMS is failed Back icon... -
Page 45: Notification Panel
: Alphabet input mode : Error/alert message : Number input mode : Touch screen lock is set : Handwritten input mode : Error in docomo ID setting : Pictogram/smiley/symbol entry : Improved sound for IP calls Main status icons : Signal strength... - Page 46 Change setting switch allocations. ® On the Notification panel, touch and hold the " (Butler Sheep)" NTT DOCOMO © setting switch Depending on the security unlock setting ( P127), authentication is required on the lock screen. On the panel selection screen, select a function on the lock screen to activate the camera.
- Page 47 Slide-in launcher/Capture & Draw ✔INFORMATION Alternatively, slide your finger on the fingerprint sensor to By default, you can call out Slide-in launcher and Capture & cancel the screen lock. When you operate after sleep mode is Draw by sliding your finger from the slide spot (start point for deactivated by pressing the fingerprint sensor, release your sliding) at the corner of the screen.
-
Page 48: Task Manager
❖ Capture & Draw Task manager Capture displayed screen to edit as an image or share with other application. If you stop operation of an application by tapping etc., the Some screens may not be captured. application may remain active in the background. Also, 2 or at the lower left of the screen more applications may be running depending on the Alternatively, slide from the slide spot to the center of... -
Page 49: Touch Screen Lock
Touch screen lock Set the screen not to react by touch operation. You can use it as child-lock which prevents from erroneous operation by children. Press and hold P until Tablet options menu appears [Touch screen lock] [OK] To cancel the settings, press P. ✔INFORMATION When sleep mode is canceled, touch screen lock is also canceled. -
Page 50: Docomo Live Ux
LIVE UX Apps button : Call up application list. P50 My Magazine : My Magazine is a search service for displaying articles for categories you selected. P53 e Capture & Draw button P46 Use Capture & Draw. Set to show/hide Capture & Draw button. -
Page 51: Home Screens
Tap a thumbnail of home screen Touch and hold blank area in the customize ✔INFORMATION area Alternatively, pinch-in at any position on the Home screen to [Change Kisekae]/[Change wallpaper] display the home screens. Select items or make settings. docomo LIVE UX... -
Page 52: Application List
For use, Wi-Fi environment is required. P150 docomo Wi-Fi Easy Connection : An application which helps you use public wireless LAN provided by DOCOMO, "docomo Wi-Fi". You can connect to Wi-Fi automatically in the Wi-Fi area. Also you can search Wi-Fi area. - Page 53 Disaster kit : Check received early warning "Area Mail", NOTTV : Watch Mobacas. Enjoy broadcast programs/ make settings and record/check messages on the docomo contents such as "NOTTV". P72 Disaster Message Board. Play Games : Discover new games, manage record or (Shabette concier) : Speak "what you...
- Page 54 : An application for backing up to/restoring Email : Set email accounts provided by general providers from "Data Storage Box (docomo cloud)" or "micro SD card". to send/receive emails. P59 Back up/restore bookmarks etc. to/from Data Storage BOX Messaging : Send/Receive SMS.
-
Page 55: My Magazine
The article list by category appears. Tap [Recommends] button to display applications For the first time you set, a screen for the explanation of recommended by NTT DOCOMO. My Magazine appears. You can select categories there. From the Home screen, [Recommends] After confirmation, tap [OK]. -
Page 56: Phonebook
Favorite To use cloud, docomo phonebook application is needed and Tap to register to contacts group "Favorite". start use of cloud. For the first time activation of docomo l Profile screen phonebook application (including after the application is Display a selected party's profile. Tap an item to send initialized), "Use of Cloud"... - Page 57 ✔INFORMATION Creating a new group Registering group can be set only in docomo account and In the contacts screen, [Groups] Google account. At the bottom of the group list, [Add] Set...
- Page 58 If you try to send all phonebook entries via Bluetooth communication to an i-mode terminal, data cannot be moved normally. Use docomo backup application to back up and restore phonebook data and other data all at once. For details, see "docomo backup (Backup/restore to microSD)". P99...
-
Page 59: Mail/Browser
Pictograms and Deco-mail can be used, and automatic phone number without a leading "0", if any. reception also is supported. For details on docomo mail, refer to NTT DOCOMO website. When SMS is received From the Home screen, When SMS is received, the notification icon appears on the From here on, follow the onscreen instructions. - Page 60 [Forward] each time. [To] Enter a mobile phone number [Send] Manage SIM card messages : Manage messages saved on the docomo mini UIM card. Deleting SMS Message center number : Set the message center number. From the Home screen, [Messaging] Making the setting is not necessary normally.
-
Page 61: Email
Creating and sending an email Email From the Home screen, [Email] If you have several mail accounts, tap account at the Set an email account provided by general provider to use upper left of the screen to switch. Email. [COMPOSE] Setting Email account [To] Enter an address Obtain the information required for setting up the mail... - Page 62 Receiving/Displaying emails Forwarding an email From the Home screen, [Email] Display an email If you have several mail accounts, tap account at the upper left of the screen to switch. Tapping [Combined view] shows emails for all mail [To] Enter an address [SEND] accounts.
- Page 63 ❖ Setting Email account Choose ringtone : Set ringtone when receiving an email. Vibrate : Set vibration when receiving an email. Available items vary depending on account type. Incoming settings : Set incoming mail server. Outgoing settings : Set outgoing mail server. From the Home screen, [Email] Remove account : Delete an account.
-
Page 64: Gmail
Gmail Early warning "Area Mail" Gmail is a Google online email service. You can send and This is a service with which you can receive emergency receive emails using Gmail on the terminal. earthquake flash report delivered by the Meteorological To use Gmail, you need to set up a Google account on the Agency etc. - Page 65 Displaying received Area Mail Setting Early warning "Area Mail" From the Home screen, [Disaster kit] From the Home screen, [Disaster kit] [Early Warning "Area Mail"] For the first activation, read the " (Using this application)" and tap [Agree]. [Settings] [Early Warning "Area Mail"] Select an Area Set required items Mail Receive setting : Set whether to receive Area Mail.
-
Page 66: Browser
Activating Browser to display a Browser website From the Home screen, You can view web pages like on a PC using Browser. On the terminal, Browser can be used over a packet The preset home page is displayed. communication or Wi-Fi connection. Slide the screen downward to display the address bar at In the terminal, you can use two types browsers: Android the top part of web page. - Page 67 Displaying website in incognito tab Saving and displaying web pages You can browse web pages without leaving browsing/ Save currently displayed web page to view offline. searching history. ❖ Saving web page When a web page is displayed, [New incognito tab] When a web page is displayed, [Save for offline reading]...
- Page 68 ❖ Displaying web pages from bookmarks Saving images displayed on a web page When a web page is displayed, slide the screen When a web page is displayed, select an image down to display the top of the screen (touch and hold) [Save image] Select a bookmark You can check saved images in Gallery ( P90) etc.
-
Page 69: Simplified Browser
Setting Browser Simplified Browser When a web page is displayed, [Settings] You can view web pages with easily comprehensive and Set required items simple operations. General : Set home page displayed when Browser is activated, downloaded file saving location, filling forms Screen operations on web page with automatically, entering texts automatically, or Simplified Browser... - Page 70 Activating Simplified Browser to Registering bookmark in Simplified display web page Browser to display web pages ❖ From the Home screen, [Simplified Registering a bookmark Browser] When a web page is displayed, [Favorite] [Search] [Register in bookmarks] [OK] In the search keyword entry area, enter URL/ ❖...
- Page 71 Displaying a web page from history of Simplified Browser When a web page is displayed, [Favorite] [View browser history] Select a history [Connect] Registering in bookmarks : [Menu] [Register in bookmarks] Select a history [OK] Deleting : [Menu] [Delete] Mark a history [Delete] [Delete] [OK] Displaying URL : [Menu] [Display URL] Select a...
-
Page 72: Applications
From the Home screen, [dmenu] (Terms of service for dmarket software) and tap [Start use]. Browser activates and "dmenu" appears. For details on dmarket, refer to NTT DOCOMO website. ✔INFORMATION To use dmenu, Internet connection by packet communication Play Store (LTE/3G/GPRS) or Wi-Fi is required. - Page 73 When terms of service screen etc. appears, confirm the NTT DOCOMO is not liable for malfunctions, if any, caused by content, then follow the onscreen instructions. the application you installed. In such case, the repair is charged even during the warranty period.
-
Page 74: Toruca
[ToruCa] application. Mobacas is a broadcasting service for smartphones. You can For details of ToruCa, refer to NTT DOCOMO website. use 2 watching styles : "Real Time" (broadcasting in real time style) that allows you to watch programs in real time and ✔INFORMATION... - Page 75 Broadcast wave and service area To change direction of the TV antenna, hold the root part of the TV antenna. Do not use excessive force. The radio wave received via Mobacas differs from that of received via Xi/FOMA service and 1Seg/terrestrial digital broadcasting (Full Seg).
- Page 76 Watching Mobacas Video can be played back using the video correction engine by marking [Video correction]. P120 ❖ Since Mobacas content is prohibited from copying, capturing Watching programs/contents watching content or screen is not available. From the Home screen, [NOTTV] Searching programs/contents The NOTTV Home screen appears.
-
Page 77: Reserving Programs/Contents
Reserving programs/contents When contents are not completely received because of the reception status of broadcast wave etc., data is automatically ❖ complemented using packet communication ( (Auto Reserving Shift Time reception contents complement)). You can disable auto contents complement. On the NOTTV home screen, [ (Program ❖... - Page 78 Mobacas settings (Parental control) (Age restriction for watching) : Set not to watch age restricted programs. On the NOTTV home screen, (Set age) : Set age to be restricted. (Settings)] (Change password) : Change password for Set required items setting age restriction or age. (Social) (Audio/subtitle) Twitter...
-
Page 79: Tv (Full Seg/1Seg)
Before using Full Seg/1Seg (Reload) : Reload content when playing content including data information except for video (program Full Seg/1Seg is a service provided by TV broadcasters information etc.) for Shift Time. (broadcast stations), etc. Transmission charges are not (Character code conversion) : Convert to incurred for receiving images, voice and sound. - Page 80 Airwaves <Connecting USB coaxial conversion cable F01> a Open the jack cap on the terminal P23 Full Seg/1Seg is one of the broadcasting services, and the b Insert the microUSB plug straight and horizontally into the receiving signal (broadcast) differs from that of the Xi/FOMA external connection jack of the terminal service.
- Page 81 Activating TV When " (Background play)" is set to ON, if the terminal returns to the Home screen or goes into the From the Home screen, [TV] sleep mode while receiving TV program, only sound of TV comes out with Background play function. To end TV watching screen appears.
- Page 82 e Switching channels Ending TV Touch and hold to start channel search. When unregistered broadcasting station is found, On the TV watching screen, (Channel setting)] [ (End TV)] (Individual channel registration)] Tap an empty channel to add it to the channel list. TV link f Control bar Tap the icon (blue) to switch the display in the operation...
-
Page 83: Using Browser
❖ Using Browser Checking reservation Activate Browser while watching TV. On the TV watching screen, On the TV watching screen, (Reservation list)] Browser screen appears in the operation panel area. A reservation list appears. Tap a reserved item Reserving watching/recording ✔INFORMATION You can reserve recording or watching TV programs. - Page 84 Recording a program When playing programs saved in the microSDHC card, image or audio may be interrupted. For recording, you are You can record image, sound, subtitle and data broadcasting recommended to use microSDXC card. (http:// you are watching and save on a microSD card. www.fmworld.net/product/phone/microsdxc/).
- Page 85 ❖ Playing recorded program TV settings On the TV watching screen, On the TV watching screen, (Recording list)] (Settings)] Select data Set required items On the recording list, appears for the data recorded (Subtitle setting) : Set to show/hide in Full Seg. subtitle in Full Seg.
- Page 86 (Display information when playing) : Display (Select area and information when playing recorded program. scan)]/[ (Scan (Web browser setting) : Delete all received channels)]/[CATV cache contents of web browser in application. (Scan all received (Initialize CAS information) : Initialize channels in all band areas including CATV)] information recorded when receiving Full Seg programs.
- Page 87 ❖ Switching channel lists Playing digital terrestrial broadcasting program On the TV watching screen, You can play digital terrestrial broadcasting programs written (Channel setting)] [ in microSD card with another device such as HDD recorder etc. (Switch channel list)] Select channel list at home in VGA class image quality (Digital terrestrial ❖...
-
Page 88: Camera
Camera Copyrights and portrait rights Avoid reproducing, altering, or editing taken or recorded pictures or sounds using the terminal without the Notes on shooting copyright holders authorization, because, except for personal use etc., they are prohibited by the Copyright Although the camera is manufactured using extremely high- law. - Page 89 Viewing shooting screen Shooting still images From the Home screen, [Camera] Display an object on the shooting screen Shutter sound is heard and a photo is taken. Main operations on the still image shooting screen Zooming : Pinch-in/Pinch-out the screen Pinch-in/pinch-out to show a slide bar.
-
Page 90: Shooting Videos
Panorama shooting Shooting videos Move the camera left and right, or up and down by little to From the Home screen, [Camera] shoot panorama image. Panorama shooting is not available for in-camera. [MENU] [Video] From the Home screen, [Camera] Display an object on the shooting screen (Start)/ U [MENU] [Panorama] Shooting start sound is heard and a shooting is started. -
Page 91: Qr Code Reader
Changing the settings for shooting Display grid Set to display 3 x 3 auxiliary lines (grid) on the shooting screen Tap [MENU] on the shooting screen to change the settings for vertically and horizontally as an assistant for photo shooting. composition. -
Page 92: Gallery
❖ ❖ Reading with QR code reader Use of QR code Read with the camera 10 cm or more away from an object Use the scanned QR code data. (QR code) . Displayed menu options may vary depending on the If the code is not scanned well, try to change the distance scanned data. - Page 93 Viewing/Playing image Main icons and functions : Saving destination is internal memory of the terminal. From the Home screen, [Gallery] : Saving destination is microSD card : Images shot by Camera Select an album : Send/upload/print etc. image ( P149) For videos, appears.
-
Page 94: Media Player
❖ Selecting album/image Media Player Touch and hold an album/image on the album list/image list to display check mark at the upper left of the screen. Frame You can use the Media Player to play music/video and music/ in light blue appears on the image and the image is in video contents downloaded from dmarket. -
Page 95: Gps/Navigation
Help for Media Player Using the GPS function You can check operations of the Media player. Note that DOCOMO is not liable for any damages that may occur as a result of irregularities in the GPS system. From the Home screen,... - Page 96 Location access setting The displayed map based on the acquired location information (latitude and longitude information) may be Allow location access to applications. inaccurate because of the legal system in each country and area. From the Home screen, [Settings] [Location access] Where radio waves are difficult to receive Note that since GPS is using radio waves for satellites, under [Access to my location] [Agree] [Agree]...
-
Page 97: Clock
Google Maps Clock The Google Maps application lets you measure your current location, find locations and calculate routes. Display desk clock or set alarms. To use Google Maps, a network connection via LTE/3G/ GPRS network or Wi-Fi is required. From the Home screen, [Clock] To measure your current location, turn on [Access to my The desk clock appears. -
Page 98: Calendar
❖ When alarm time arrives Registering event Alarm operates according to the settings. On the calendar screen, [NEW EVENT] Stopping alarm : On the notification screen, slide When an adding account screen appears, add an Setting snooze : On the notification screen, slide account if required. -
Page 99: Calculator
Checking event Enter a keyword [Search] When entering characters, search suggestions appear Display information of registered event. linking with the keyword (Incremental search). On the calendar screen, tap an event Voice search : Speak a keyword Displaying Help : On the month display screen, tap the day then tap the You can check operations of the e-dictionary. -
Page 100: Search
Search settings Search Make search settings. From the Home screen, [Google] Enter a keyword to search in the terminal or websites, call up applications in the terminal to activate. Searching web sites [Settings] Set required items using Voice search is also available. Voice : Set language or voice input. -
Page 101: Docomo Backup
Select data to restore [Select] Select Backup restore method [Start restore] [Restore] Back up data such as phonebook, docomo mail, media files, Enter a docomo apps password [OK] etc. to a microSD card. If a microSD card is not inserted, image/video data is saved to the phone memory according to the terminal memory structure. -
Page 102: Backing Up To/Restoring From Data Storage Box
❖ Phonebook account copy Backing up to/Restoring from Data Storage Box Copy phonebook data stored on a Google account to docomo account. ❖ Backup From the Home screen, [docomo backup] Back up data such as music, user dictionary, bookmarks to [Backup/restore to microSD] Data Storage Box (docomo cloud). - Page 103 ❖ Restoring Restore data of music, user dictionary, bookmarks backed up in Data Storage Box (docomo cloud) to the terminal or a microSD card. From the Home screen, [docomo backup] [Backup/restore to docomo cloud] [Restore] [Select] for data type to restore...
-
Page 104: Settings
Settings DEVICE Menu Page Sound & Vibration Volumes settings Manner mode Setting menu MIC input Improved sound for IP calls You can make various settings in the menu displayed from the Notification sound Home screen, Tap [Settings]. Touch sounds Screen lock sound WIRELESS &... - Page 105 Menu Page Menu Page Display Brightness Storage Unmount SD card/Mount SD card Sleep/Lit when held Erase SD card Wallpaper Display menu at SD card Daydream insert Theater mode Unmount USB storage/ Slide-in function Mount USB storage Homescreen selector Download file save-to Customize screen destination Display Capture &...
- Page 106 ID cloud Security unlock preference docomo cloud Fingerprint settings Application manager Application lock docomo Wi-Fi Easy Connection Set up SIM/RUIM card lock docomo apps password Make passwords visible AUTO-GPS Password manager docomo location Hide recently used app...
- Page 107 If an application is disabled, it may not appear in the list of Auto-rotate screen docomo service/cloud. If an application is newly downloaded from docomo, an item may be added to the list of docomo service/cloud. Speak passwords Accessibility shortcut...
-
Page 108: Wireless & Networks
❖ sp-mode Do not change the MCC/MNC to other than 440/10. The sp-mode is an ISP for NTT DOCOMO smartphone. In addition setting disappears from the screen. to accessing Internet, you can use the mail service using the From the Home screen, [Settings] In same address as i-mode mail (@docomo.ne.jp), etc. - Page 109 (security code), correct IP address may not have been obtained. Check signal condition and reconnect. To use docomo services via Wi-Fi, set "docomo ID" beforehand. To make settings, from the Home screen, [Settings] [docomo service/cloud] Tap [docomo ID (docomo ID setting)].
- Page 110 ❖ ❖ Scanning Wi-Fi network Disconnecting Wi-Fi network Set Wi-Fi to ON in advance. From the Home screen, [Settings] [Wi-Fi] From the Home screen, [Settings] [Wi-Fi] Select the connected Wi-Fi network [Forget] [Scan] ❖ Connecting other devices with Wi-Fi ❖ Adding Wi-Fi network Direct Enter network SSID or security information to add Wi-Fi...
-
Page 111: Advanced Wi-Fi Settings
❖ Advanced Wi-Fi settings Wi-Fi Easy Connection You can connect through simple operations when connecting From the Home screen, [Settings] [Wi-Fi] via a Wireless access point supporting AOSS™ or WPS. [Advanced] From the Home screen, [Settings] [Wi-Fi Easy Settings] Set required items Network notification : Set to notify you when Wi-Fi open Select a registration method network is available. -
Page 112: Data Usage
Data usage Airplane mode You can enable Internet access via mobile network, set limit of When Airplane mode is set, wireless functions of the terminal mobile data communications on graph or set alert when usage (packet communication, Wi-Fi, Miracast, tethering, Bluetooth exceeds the limit. - Page 113 ❖ Adding VPN Tethering Tethering is a function for using mobile devices such as From the Home screen, [Settings] In smartphones as modems to allow external devices connected WIRELESS & NETWORKS, [More...] [VPN via USB or Wi-Fi to access the Internet. settings] While tethering is enabled, sp-mode function can be used only for Internet connection and mail service.
-
Page 114: Usb Tethering
❖ ❖ USB tethering Wi-Fi tethering Connect the terminal to a PC using PC connection USB cable You can allow Wi-Fi devices to access the Internet by using the T01 (optional) or Micro USB Cable 01 (optional) to use the terminal as Wi-Fi hotspot. -
Page 115: Easy Wi-Fi Registration
❖ Easy Wi-Fi registration Stopping packet connection Register Wi-Fi device supporting AOSS™ or WPS. Some applications automatically perform packet Set Wi-Fi tethering to ON in advance. communications. Packet communication is kept active unless you cut off the connection or the time-out occurs. Activate or From the Home screen, [Settings] In deactivate packet communication as required. -
Page 116: Manner Mode
❖ Manner mode Changing Manner mode type Set/cancel Manner mode. From the Home screen, [Settings] You can change the Manner mode type. P114 [Sound & Vibration settings] [Manner mode] From the Home screen, [Settings] [Select manner mode] [Sound & Vibration settings] [Manner mode] Selecting an item Mark/unmark [Enable manner mode] Manner mode : All sounds do not sound from the terminal... -
Page 117: Improved Sound For Ip Calls
Improved sound for IP calls Setting notification sound/operation sound/vibration Set whether to use sound improvement of IP calls. Sound quality of calls via application using Voice over IP From the Home screen, [Settings] technology may be inferior to ordinary phone calls due to [Sound &... -
Page 118: Display
❖ Keep lit when held Display Set whether to keep the screen backlight on while the terminal is in motion, held in hand. Brightness From the Home screen, [Settings] [Display] [Sleep/Lit when held] Set brightness of screen backlight. From the Home screen, [Settings] Mark/unmark [Keep lit when held] [Display] [Brightness]... -
Page 119: Slide-In Function
Slide-in function ✔INFORMATION Even when you change the orientation of the terminal, the Enable to activate an application or capture screen by sliding screen may not change depending on the application. your finger from the edge of the screen. From the Home screen, [Settings] Intelligent color adjust [Display] [Slide-in function]... -
Page 120: Font Size
Blue light cut mode ✔INFORMATION Depending on screen, turning the power OFF and ON reflects Set whether to cut down blue light emitted from the screen. font settings. From the Home screen, [Settings] The font settings may not be reflected or set font may not be [Display] displayed correctly on some applications or Web sites. -
Page 121: Set Style
❖ Kids style setting Set style Create/set Kids style for restricting applications and time for use. Switch style Set a security unlock preference which requires authentication on the lock screen in advance. P127 Create/set style. From the Home screen, [Settings] [Set From the Home screen, [Settings] [Set style] [Switch style] [New]... -
Page 122: Multimedia
✔INFORMATION Multimedia If children use the terminal, setting in Kids style setting is recommended. Also, to prevent children from using the terminal in the restricted time by entering the password or Video correction/Picture correction security code, setting "Fingerprint" in Security unlock Set whether to correct image quality of videos (TV, YouTube, preference is recommended. -
Page 123: Storage
Launcher setting Storage Set to show launcher to launch applications when earphone is connected. Checking available space From the Home screen, [Settings] [Multimedia] Check available memory in the terminal and microSD card. From the Home screen, [Settings] Mark/unmark [Enable launcher function] in [Storage] EARPHONE PLUG-IN LAUNCHER SETTING Applications displayed in the launcher can be set in... -
Page 124: Battery
Displaying menu when SD card is NX! eco inserted Set whether to display menu for playing or copying still Enabling/Disabling eco-mode pictures/videos when microSD card is inserted or mounted. From the Home screen, [Settings] Enable/disable eco-mode. When eco-mode is enabled, the notification icon appears on [Storage] the status bar. -
Page 125: Apps
Uninstalling applications ✔INFORMATION [Select app to limit when screen is off] Tap [OK] to set For deleting the applications you obtained from Play Store, applications which you can control not to run when the operating from the Google Play screen is recommended. screen is off in order to save the battery. -
Page 126: Docomo Service/Cloud
Notes on the security codes Application manager : Set periodical update check etc. To set a security code, avoid imaginable numbers such docomo Wi-Fi Easy Connection : Set docomo Wi-Fi Easy as "birth date", "a part of phone number", "street Connection. -
Page 127: Pin Code
The PUK code is written on a subscription form (copy for user) handed at subscription in a docomo Shop. For Security code called PIN code can be set for the docomo mini users subscribed in other than docomo Shop, bring a UIM card. - Page 128 To change PIN code, set the PIN code (mark [Lock SIM card]) in Shop. advance. When docomo mini UIM card is locked by PIN or PUK, From the Home screen, [Settings] remove the docomo mini UIM card. The Home screen will...
-
Page 129: Screen Lock
Screen lock ✔INFORMATION To hide the pattern when unlocking, from the Home screen, Display lock screen to prevent unintended operations, set to [Settings] [Security] Unmark [Make pattern visible]. request authentication on the lock screen to prevent others To hide the characters when entering the password, from the from misusing the terminal, etc. - Page 130 ❖ ❖ Locking/Unlocking screen Setting wallpaper on the lock screen Set wallpaper for lock screen. Lock From the Home screen, [Settings] P /Press the fingerprint sensor [Security] The terminal goes into sleep mode and the screen is locked. [Lock screen wallpaper] Select an item ❖...
- Page 131 ❖ When you forget unlocking method Scanning 3 times or more with the same finger is needed to register your fingerprint. Do not use different fingers to When you forget unlocking method of lock screen, set a register. security unlock preference according to the followings and Authentication performance (the probability of successful then unlock.
- Page 132 Fingerprint authentication technology does not guarantee complete identity authentication or verification. Note that DOCOMO assumes no responsibility for any damage caused by use of this product or unavailability of this product. ❖ Usage precautions for fingerprint sensor...
-
Page 133: Fingerprint Sensor
Select an item Following the message, slide The following conditions may make fingerprint scanning difficult or reduce the authentication performance. Clean the your finger pressing the fingerprint sensor surface of the fingerprint sensor from time to time. Register second fingerprint in the same operation. - Dirt of dust, sebum, etc. - Page 134 Deleting all : [Delete all] [OK] Privacy mode can be set only for phonebook in FUJITSU account. If you change docomo account to FUJITSU Displaying recently used applications account, data added by name card data and SNS account information are not saved.
- Page 135 ❖ Privacy Mode Settings Set required items Phonebook : Set whether to hide specified phonebook You need to set the security unlock preference in advance. entry/group when in privacy mode. P127 Phonebook setting : Specify a phonebook/group entry to From the Home screen, [Settings] be hidden.
- Page 136 ❖ ❖ Privacy mode operation settings (Others Setting privacy mode deactivation privacy) preference You can specify to hide icons, folders or bookmarks of Android Set activating and deactivating option of privacy mode. browser, albums or images in Gallery on the application list From the Home screen, [Settings] (when Home application is set to NX!Home).
- Page 137 Permitting to install unknown sources Managing authentication information applications You can install authentication information for accessing VPNs etc. or other certificates from a microSD card. Permit to install applications obtained from sites other than ❖ Play Store, mails, etc. Displaying trusted credentials To protect the terminal and personal data, download applications only from trusted sources such as Play Store From the Home screen,...
-
Page 138: Clear Credentials
❖ Clear credentials Change password : Change SD card password. Delete password : Delete SD card password. Clear all authentication information, certificates and VPN Forcibly delete password : Delete all data including micro settings from the authentication storage. SD card password. From the Home screen, [Settings] When a password is set to microSD card... -
Page 139: Encrypt Sd Card
✔INFORMATION Language & input After encrypted, security code or password entry screen appears each time the terminal is powered on. Note that you cannot return to the password entry screen if you tap For ATOK, see "Setting NX!input & ATOK". P38 then select [ (Input language)]/[Google Switching to English display... -
Page 140: Adding An Account
Setting the Google keyboard Text-to-speech Set key operation tone of the Google keyboard, auto- Set the read out speed for text-to-speech plug-in. correction of text, etc. Text-to-speech plug-in in Japanese is not supported by default. From the Home screen, [Settings] From the Home screen, [Settings] [Language &... -
Page 141: Accessibility
[Remove account] [Remove account] Set required items ✔INFORMATION When you unmark [Automatic date & time]/[Automatic docomo account and FUJITSU account cannot be removed. time zone], you can set date, time zone, and time Starting synchronization manually manually. From the Home screen,... -
Page 142: About Tablet
About tablet Display various information of the terminal. From the Home screen, [Settings] [About tablet] Check items Software Update : Update software to latest one. P168 Upgrade Android software : Upgrade the OS of the terminal. P171 My profile : Set/check profile information. Status : Check battery status, phone number, network name and address, IMEI (individual serial number), etc. -
Page 143: File Management
Folders in the internal storage and data saved in each folder (as of November, 2013). by default are as follows. Note that DOCOMO does not guarantee actual operations of Alarms Alarm sound all microSD cards. For information on compatible microSD cards, contact manufacturers of microSD cards. - Page 144 Open the slot cap with the back side of the terminal facing up P23 Opening the slot cap reveals microSD card slot on the back side and docomo mini UIM card slot on the display side of the terminal. c Close the slot cap of the terminal P23 ✔INFORMATION...
-
Page 145: File Operations
Removing File operations a Open the slot cap with back side of the terminal up, then push the microSD card lightly and then release it, then pull the microSD card straight out You can manage data saved in the internal storage and microSD card (rename/delete/copy/move folders and files). -
Page 146: Data Communication
❖ Data communication Handling precautions when using Bluetooth function Connect with another Bluetooth device keeping the line-of- sight distance to 10 m or shorter. Distance available for ® connection may be shorter if obstacles exist between the Bluetooth communication terminal and the Bluetooth device or depending on surrounding (wall, furniture, etc.). - Page 147 Turning Bluetooth ON/OFF When connection is requested from another Bluetooth device Set Bluetooth to ON to use Bluetooth function. When you do If a Bluetooth pair setting request screen appears, enter a pass not use Bluetooth, set it to OFF in order to cut the battery code (PIN) if necessary and tap [OK], or tap [Pair].
- Page 148 Bluetooth Low Energy Settings <Example> Receiving files from a Bluetooth device Send files from a Bluetooth device Set notification for Bluetooth Low Energy device. After file arrival is notified, open the From the Home screen, [Settings] In Notification panel [Bluetooth share: WIRELESS &...
-
Page 149: Nfc Communication
❖ Transferring content displayed on the NFC communication screen Activate each other's Android Beam function NFC is an abbreviation for Near Field Communication and a short range wireless communication method of international Show website, contents, etc. to transfer on the standard defined by ISO (International Organization for senders terminal Standardization). -
Page 150: External Device Connection
External device Open the Notification panel [Connected as a media device] [Media device (MTP)]/[Camera connection (PTP)] For Windows XP, select [Media device (MTP)]. If you select [Camera (PTP)], data on the microSD card in the terminal may not be displayed correctly. Connecting with a PC Select a program Follow the onscreen instructions... -
Page 151: Connecting With A Wi-Fi Printer
Set required items Connecting with a Wi-Fi printer Set printer, paper, etc. [Print] You can connect the terminal with a Wi-Fi compatible printer (ink-jet printer manufactured by Seiko Epson or Canon) via For Seiko Epson printers Wi-Fi to print images displayed on a browser screen, Gallery, Available formats are JPEG, BMP and PNG. -
Page 152: Linking With Dlna Device
(Yes)]. Videos recorded with the terminal's camera may not be Set required items played with DLNA devices other than F-02F. DiXiM Server : Mark to enable the server function. (Server name) : Rename the device name shown on a DLNA device. - Page 153 Distributing contents in the terminal Playing back DLNA device's contents on the terminal Distribute contents on the terminal to DLNA devices. Playback can be operated via the terminal. Disclose contents on the DLNA device to allow access from Activate DiXiM Server to allow access from a DLNA device the terminal in advance.
-
Page 154: Connecting With Other Devices
Peripheral device connection USB cable T01 (optional) and exchange data. You can save digital recorded programs on DLNA devices such DOCOMO does not guarantee actual operations for all USB as a recorder to the terminal to play. devices. The DLNA device is required to support uploading a content. - Page 155 HDMI conversion cable display setting. manual. While the HDMI cable is connected, do not hold the HDMI DOCOMO does not guarantee actual operations for all HDMI cable to lift the terminal. devices. Remove the HDMI cable when not displaying on the TV.
- Page 156 Displaying on Wi-Fi Miracast device via Wi-Fi connection Show videos, images, etc on TV screen or displays by connecting the terminal to a Wi-Fi Miracast device through Wi- Fi connection. From the Home screen, [Settings] [Miracast] At the right top of the screen, [ON] When a Miracast device does not appear, tap [SEARCH FOR DISPLAYS].
-
Page 157: International Roaming
* To use data communication during roaming, set Data roaming setting in the service area of the overseas network operator affiliated to on. P157 with DOCOMO. You can use SMS without changing settings. ✔INFORMATION The terminal is Class 4. The terminal works in a 3G network Some services may not be available depending on the and GSM/GPRS network service area. - Page 158 About inquiries Connectivity When you have set [Network operators] in [Mobile networks] For loss or theft of the terminal or docomo mini UIM card, to [Choose automatically], optimum network is automatically immediately contact DOCOMO from the spot to take the selected.
-
Page 159: Settings For Overseas Use
If you release SIM lock and use SIM by a carrier other than If an error occurs in network search, unmark [Data NTT DOCOMO to perform data communication, set an enabled] and retry. P113 access point (APN) before use. P106... -
Page 160: After Returning To Japan
After returning to Japan When you return to Japan, the terminal is connected to DOCOMO network automatically. If connection is failed, perform the following operations. Set [Network Mode] in [Mobile networks] to [LTE/3G/GSM (Auto)]. P157 Set [Network operators] in [Mobile networks] to [Choose automatically]. -
Page 161: Appendix/Index
Some (in Japanese only) or DOCOMO-specified repair office. products are unavailable depending on the area. For details, contact a sales outlet such as docomo Shop. For Power supply and charging details about the optional devices, refer to the instruction The terminal cannot be turned ON. - Page 162 No operations are performed even by pressing keys. The docomo mini UIM card is not recognized. Is the terminal in sleep mode? Press P or the fingerprint Is the docomo mini UIM card installed in the right sensor to unlock. P44 direction? P28 The screen reacts slowly when a touch panel is tapped/ key is pressed.
- Page 163 Have you changed any of the following settings? - With the power turned off, press and hold P for 2 - Brightness P116 seconds or more. After the docomo logo disappears - NX! eco P122 and Xi logo appears, keep pressing D Display flickers.
- Page 164 Operations are not possible when tapping the screen. Mail • Do you operate with a gloved hand? Mail is not received automatically. • Do you operate with a fingernail or foreign object on the • Check if you set Inbox check frequency in Email account screen? settings to "Never".
- Page 165 Make Bluetooth device (commercially available) refer to "Mobile Phone User's Guide [International registering stand-by state and then register the device on Services]" or DOCOMO International Services website. the terminal. If you delete already registered device and • Change network mode type to [LTE/3G/GSM (Auto)].
-
Page 166: Error Messages
SIM card error connect them to the terminal. SIM card removed. Phone will restart. It may appear when IC of docomo mini UIM card is dirty Error messages or when docomo mini UIM card is removed with the power ON, but it is not malfunction. Clean the IC of Memory space is full docomo mini UIM card regularly. -
Page 167: Smartphone Anshin Remote Support
Support Resetting the terminal By sharing screens of your terminal with DOCOMO, you can receive technical support to make settings. (In Japanese only) Reset the terminal to the default state. All installed This service is not available when your docomo mini UIM... -
Page 168: Warranty And After-Sales Service
If it does not contain Take the terminal to DOCOMO-specified repair office. Be sure the necessary information, immediately contact the shop to check the opening hours of the office before you go. The where you bought it. - Page 169 - May cause fire, injuries or malfunction. repairs done to the terminal. DOCOMO shall have no - The modified terminal may be repaired only if the owner liability for any change or loss of any kind. Under some...
-
Page 170: Software Update
It is recommended to perform while charging. This function allows you to connect the network and check if Software cannot be updated in the following cases. software in the F-02F needs to be updated, if software update - When (out of service area) is displayed is necessary, it downloads software to update. - Page 171 (software update available) disappears. managed by DOCOMO. DOCOMO does not use the sent Open the Notification panel and tap the information for purposes except software update. notification When software update has failed, the terminal may not Software update notice screen appears.
- Page 172 Updating software immediately Rewriting starts automatically approximately 10 seconds after [Ready for update. Please Software update starts immediately. refrain from starting other application.] is There are 2 ways to activate software update: activating displayed from Software update notice screen and activating from the menu.
-
Page 173: Upgrade Android Software
If F-02F is turned OFF at the reserved time, the software update starts at the same time as the reserved time after the terminal is turned ON. - Page 174 When PIN code is set, the PIN code entry screen appears in For Upgrade Android software, docomo mini UIM card is the reboot step after rewriting and you need to enter PIN needed. For using packet communication, subscription to code.
- Page 175 Downloading update file Installing update file When downloading the update file is complete, installing to From the Home screen, [Settings] [About the terminal is available. tablet] [Upgrade Android software] Install now : Immediately install the update file. Install later : Install the update file at reserved time. [Start upgrading] When installing is complete, the terminal restarts.
-
Page 176: Main Specifications
Size Approx. 10.1 inches Number of 16,777,216 colors colors Tablet × Resolution 2560 (H) 1600 (V) dots Product name F-02F × (WQXGA) Size Approx. 169 mm (H) 261 mm × Image Type Out-camera : Back-illuminated 8.9 mm (T) (Thickest part :... - Page 177 Charging time indicates the estimated time for charging an empty Bluetooth Version internal battery with the terminal turned OFF. Charging with the Output Power class 1 terminal turned ON or charging in lower temperature requires Supported HSP, DUN, OPP, SPP, HID, A2DP, longer time.
-
Page 178: Certificate And Compliance
Image size Terminal (1GB) Mobile email Approx. 2,198 Approx. 43 min. × The product "F-02F" is declared to conform with the (640 480) min. (Approx. 87 (Approx. 43 min. essential requirements of European Union Directive 1999/ min. per one) per one) 5/EC Radio and Telecommunications Terminal Equipment ❖... -
Page 179: Federal Communications Commission (Fcc) Notice
Federal Communications FCC RF Exposure Information Commission (FCC) Notice This model device meets the U.S. Government's requirements for exposure to radio waves. This device complies with part 15 of the FCC rules. This model device contains a radio transmitter and receiver. Operation is subject to the following two conditions : This model device is designed and manufactured not to a this device may not cause harmful interference, and... - Page 180 Before a tablet PC model is available for sale to the public, it * In the United States, the SAR limit for wireless tablet PC used by the must be tested and certified to prove to the FCC that it does not general public is 1.6 Watts/kg (W/kg), averaged over one gram of exceed the limit established by the U.S.
-
Page 181: Important Safety Information
Pacemakers Important Safety Information Pacemaker manufacturers recommend that a minimum separation of 15 cm be maintained between a tablet PC and a pace maker to avoid potential interference with the AIRCRAFT pacemaker. Switch off your wireless device when boarding an aircraft or Hearing Aids whenever you are instructed to do so by airline staff. -
Page 182: Export Administration Regulations
Regulations "ToruCa", "mopera U", "WORLD WING", "sp-mode", and logo of "Xi" are trademarks or registered trademarks of NTT DOCOMO. This product and its accessories may be under coverage of the Rovi, G-GUIDE, G-GUIDE MOBILE and G-Guide Export Administration Regulations of Japan ("Foreign related logos are trademarks or registered Exchange and Foreign Trade Control Laws"... - Page 183 DigiOn and DiXiM are registered trademarks of owned by the Bluetooth SIG, INC. and any use of such marks DigiOn, Inc. ® by NTT DOCOMO, INC. is under license. Other trademarks StationTV is trademark of and names are those of their respective owners.
- Page 184 ® Others TouchSense Technology and MOTIV™ Integrator Licensed from Part of this product includes module developed by Immersion Corporation and protected Independent JPEG Group. under one or more of the following This product is licensed based on MPEG-4 Visual Patent United States Patents: Portfolio License.
- Page 185 This product is licensed under the VC-1 Patent Portfolio THE POSSIBILITY OF DAMAGE, AND ON ANY THEORY OF License for the personal and noncommercial use of a LIABILITY, ARISING OUT OF OR IN CONNECTION WITH THE consumer to (i) encode video in compliance with the VC-1 USE OR PERFORMANCE OF THIS SOFTWARE.
-
Page 186: Sim Unlock
SIM unlock This terminal supports SIM unlock. If you release SIM lock, you can use SIM by a carrier other than NTT DOCOMO. The SIM unlock service is provided at a docomo Shop. A SIM unlock charge is separately required. -
Page 187: Index
Displaying ..............Index Receiving ............... Settings ................Authentication information ........... Auto-rotate screen............Available space ............... About tablet..............Access point ..............Battery Adding ................. Battery life..............Initializing ..............Charging ................ Accessibility..............Checking ..............Accounts ................. Best view adjust.............. Adding ................. Best-fit rotation............... Manual synchronization.......... - Page 188 Accessibility ..............Channel setting ..............Advanced ............... Character entry ..............Bandwidth management ..........Cutting/Copying ............Bookmark ............... Editing common phrase ..........Displaying ..............Keyboard................ General ................Pasting ................History ................Registering to Personal dictionary....... Incognito tab ..............Setting................Labs ................Voice input..............
- Page 189 Original ................ Backing up to/Restoring from microSD card ....Remaining battery............docomo LIVE UX ............... Timer ................docomo mail..............Editing text ................ docomo mini UIM card ............. Electronic dictionary............Installing................. Email .................. Removing ............... Account settings............29, 125 Security code ............
- Page 190 Restore ................Gmail.................. Sending ................Displaying ..............Settings ................Google Keyboard ............Encrypt SD card.............. Google Maps ..............Encrypt tablet ..............Google Play ............... Encryption settings............GPS antenna section ............English................GPS satellites ..............Export Administration Regulations......GPS/Navigation ..............External connection jack ..........External device connection Connecting with a Wi-Fi printer ........
- Page 191 Image Viewing/Playing ............. 57, 59, 62 Mail................ Improved sound for IP calls........... Manner mode ..............In-camera ................Media Player..............27, 41 Indicator LED .............. Help ................Initial settings..............Playing music/video............Intellectual Property Right ..........Purchasing from dmarket..........Intelligent color adjust........... MHL ..................
- Page 192 Clear Cookie ..............2-touch input ..............Cookie................NX! eco ................Delete broadcast saving area ........Eco level............... Display data broadcasting ..........NX!input & ATOK Settings ..........Display on-air programs ..........Lock screen notification ..........Notification of arrival information ....... Optional and related devices ......... Notification of notice information........
- Page 193 Setting Voice Search ............SIM card lock..............QR code reader..............SIM unlock............... QWERTY keypad ............... Simplified Browser ............Advanced settings............Bookmarks ..............Character size ..............Recommended applications..........Display ................Registering words............History................Reset................Screen operations ............RGB sensor ................ Set homepage ............... Setting................
- Page 194 Status bar ................Ending ................Status icon................. Playing recorded programs.......... Stereo earphone jack............Recording............... Still image shooting............Reserving recording............121, 141 Storage..............Reserving watching ............Strap hole ................Setting image/audio/subtitle ........Swipe ................. Settings ................Switching input method ..........TV link ................Using Browser...............
- Page 195 Video correction............. Video shooting ..............Viewing still image ............Voice input................. Voice Search..............Volume key................ Volumes ................VPN.................. Adding ................. Connection ..............Disconnecting ............. Warranty ................. Wi-Fi ................Adding ................. Advanced settings ............Disconnecting ............. Easy connection............Scan ................Wi-Fi antenna section ............Wi-Fi Direct ..............
- Page 196 * Some services may be charged when accessing from sp-mode art museum * You need "docomo ID/Password" to access the site from your PC. * If you do not have or forget " Network security code" or Using the terminal in quiet public places will likely bother "docomo ID/Password", contact to the numbers for "General...
- Page 197 *However, shutter sound cannot be muted. We collect old phones, etc. regardless of brands and manufactures. Bring them to your nearest docomo Shop. *Items to be collected: mobile phones, PHS, battery packs, chargers, desktop holders (regardless of brands and manufactures)
- Page 198 If you lose your terminal or have it stolen, immediately take the steps necessary for suspending the use of the terminal. If the terminal you purchased is damaged, bring your terminal to a repair counter specified by DOCOMO after returning to Japan.
- Page 199 (Business hours : 9:00 a.m. to 8:00 p.m. (open all year round)) Please confirm the phone number before you dial. For Applications or Repairs and After-Sales Service, please contact the above-mentioned information center or the docomo Shop etc. near you on the NTT DOCOMO website.